On Kiosk Hardened Image, Windows Update is enabled by default to ensure the latest security updates are automatically downloaded and applied. However, if you prefer to disable automatic Windows update on the Kiosk, please follow the instruction below.
It is best practice to keep automatic Windows updates enabled to ensure the latest security updates are applied promptly, keeping the system secure. Disabling automatic updates could lead to the system vulnerable to security risks.
Disable Windows Update and Update Orchestrator Services
Step 1. Open Microsoft Management Console (MMC)
- Go to the Start menu, type mmc, and open it with Administrator permissions
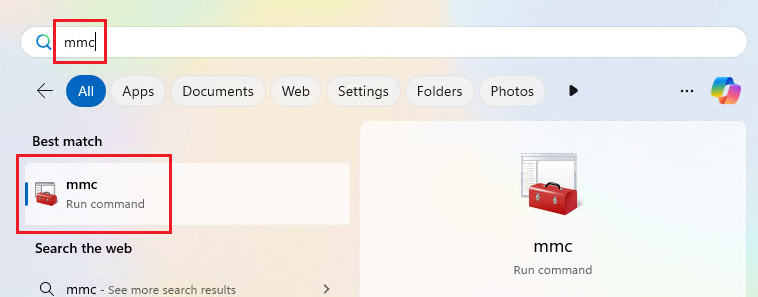
Open Microsoft Management Console (MMC)
Step 2. Add the Services Snap-in
- In the MMC window, select File, select Add/Remove Snap-in.
- From the list, select Services and click Add. A popup Window will appear, select Local computer, click Finish. Then, click OK.
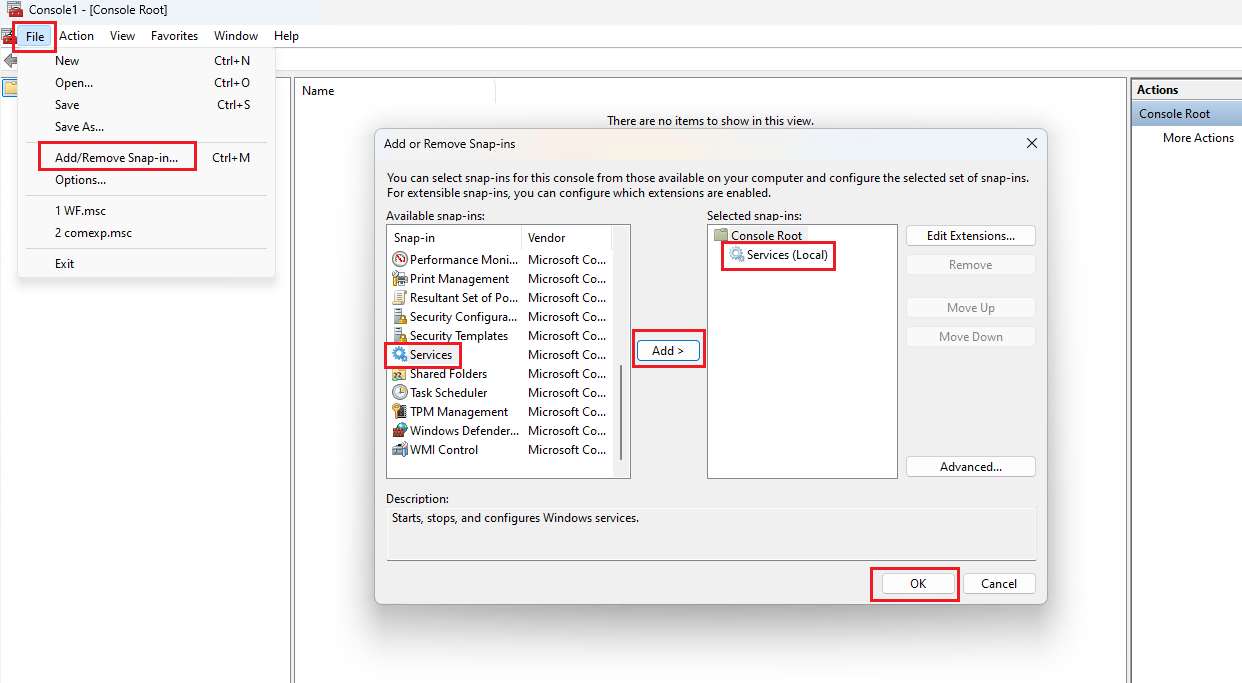
Add Services Snap-in in MMC
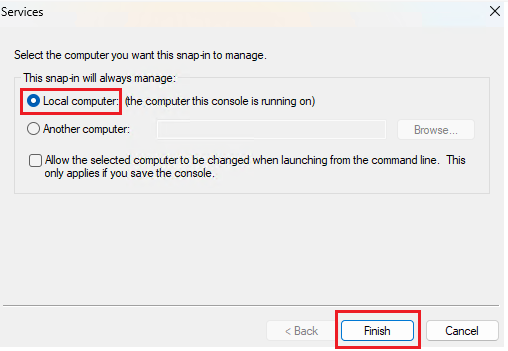
Select Local Computer to add Service Snap-in
Step 3. Disable the Windows Update service
- In the Services list, find Windows Update service. Right-click on it and select Properties.
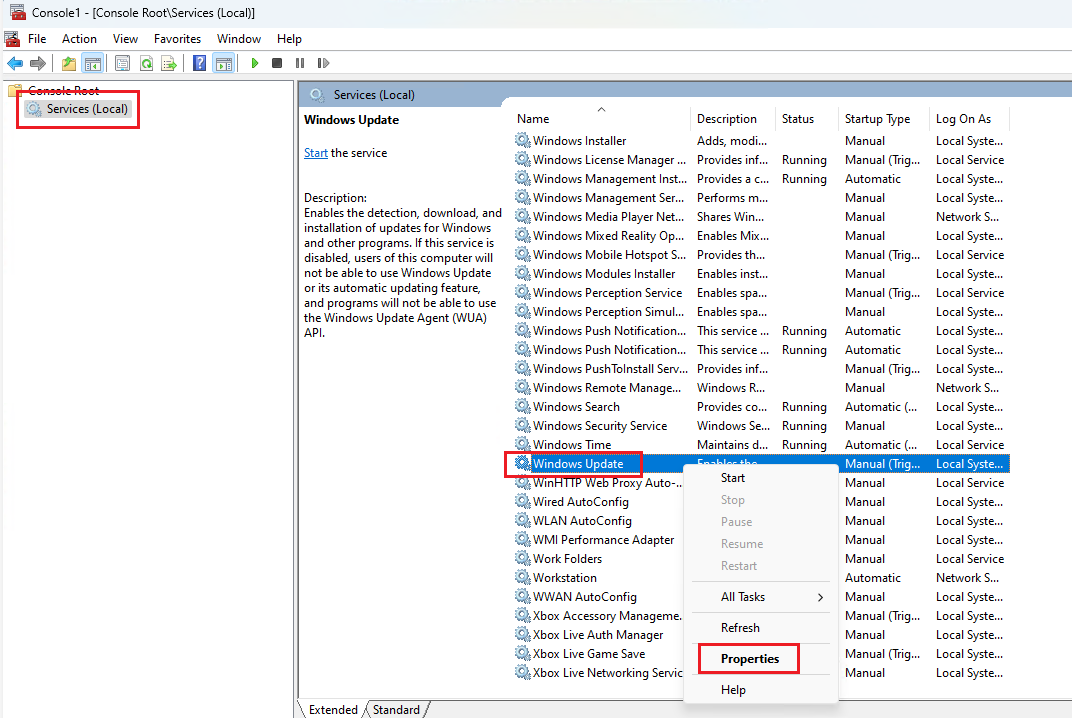
Open Properties of Windows Update service
- Under the General tab, set Startup type to Disabled.
- Click Stop to halt the service, then click Apply and OK.
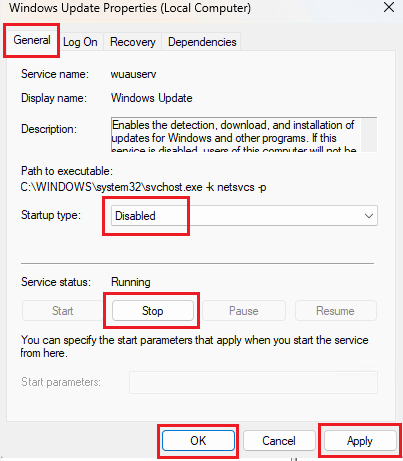
Disable Windows Update service
Step 4. Disable Update Orchestrator service
- Still in Services list, find Update Orchestrator Service. Right-click on it and select Properties.
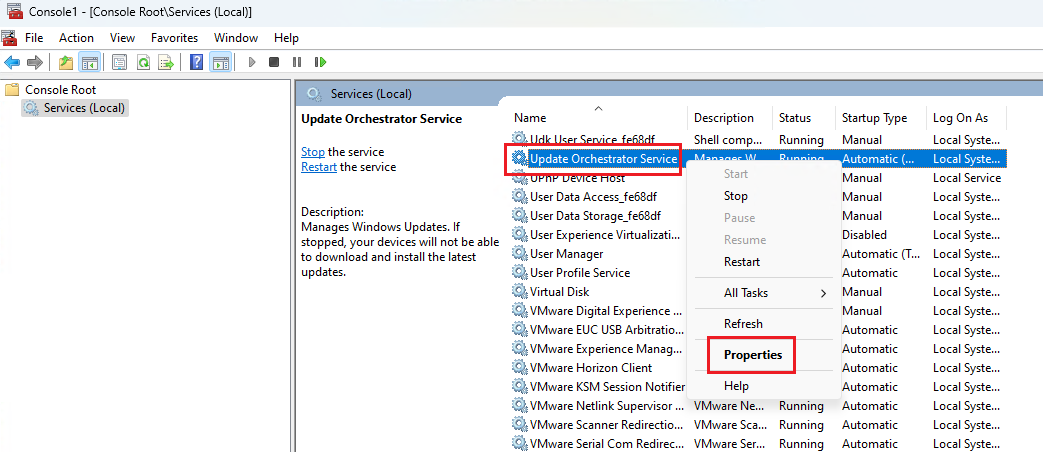
Open Properties of Update Orchestrator Service
- Under the General tab, set Startup type to Disabled.
- Click Stop to halt the service, then click Apply and OK.
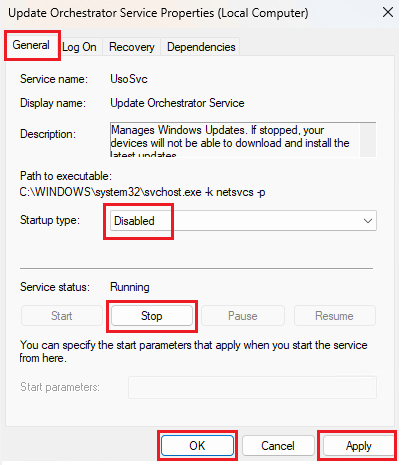
Disable Update Orchestrator Service
Prevent Windows Update from being automatically re-enabled
Step 1. Rename Registry Keys
- Go to Start menu, type regedit, and open it with Administrator permissions
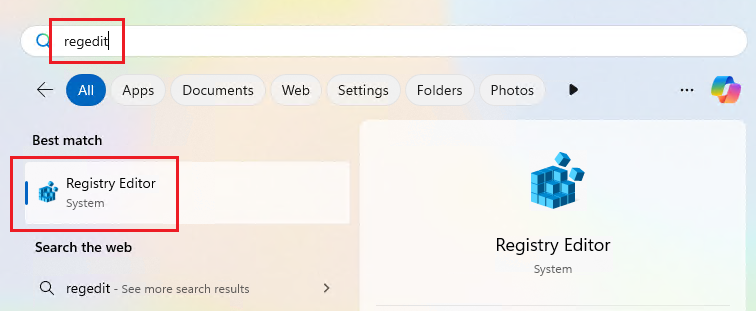
Open Registry Editor
- Navigate to
HKEY_LOCAL_MACHINE\SYSTEM\CurrentControlSet\Services. - Rename the following registry keys:
usoSvctousoSvc-backupwuauservtowuauserv-backup
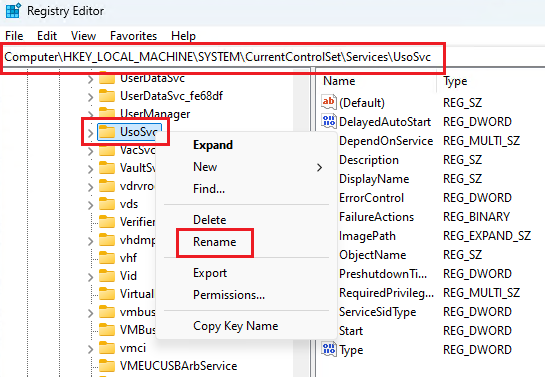
Rename Registry Keys

UsoSvc Registry Key after renamed

wuauserv Registry Key after renamed
Step 2. Reboot the Kiosk system
- Restart the system to apply the changes.
Step 3. Verify Windows Update status
- After reboot, go to Start menu, type Windows Update settings , and open it. Verify to ensure the Windows Update was disabled
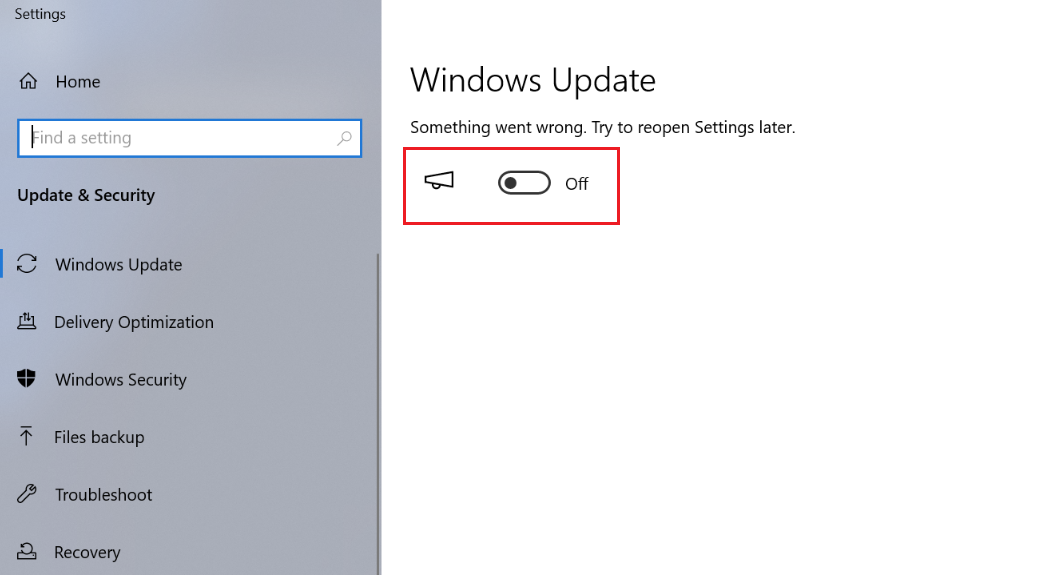
Verify Windows Update status
Prevent removed services from being registered by DCOM
Step 1. Run registry with Administrators permissions, and navigate to HKEY_LOCAL _MACHINE\SOFTWARE\Classes\CLSID{B91D5831-B1BD-4608-8198-D72E155020F7}
Step 2. Right click on the key, select permissions
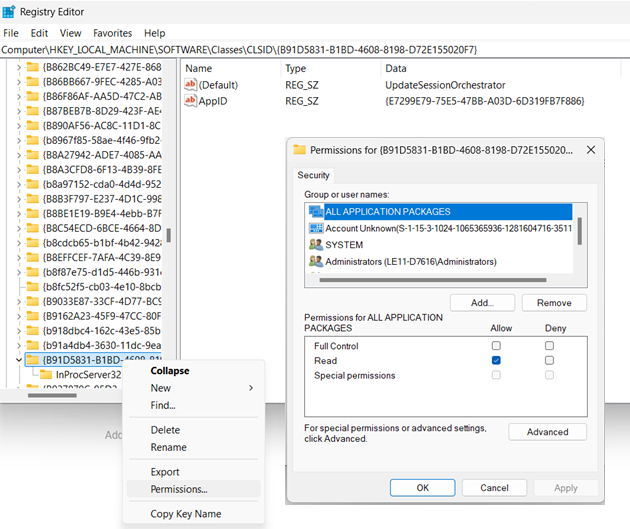
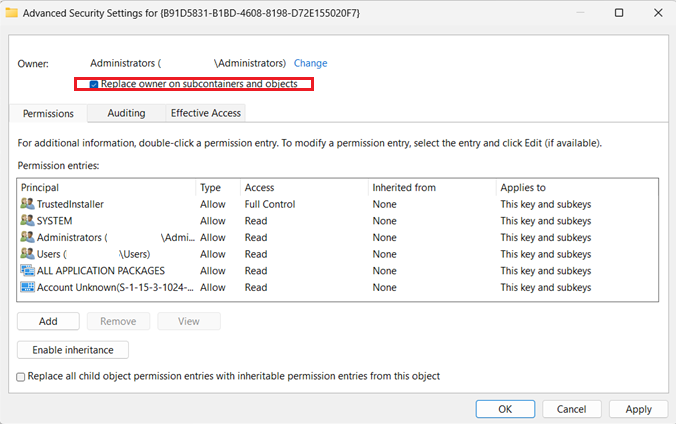
Step 3. Click on Advanced. Under Advanced Security Settings, Click on Change the owner
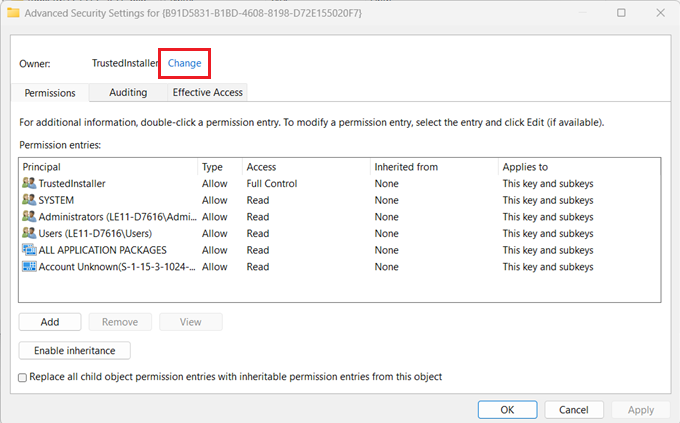
Step 4. Input BUILTIN\Administrators under object name, click Check names to verify the username, click OK to save the setting. Make sure you select Replace owner on subcontainers and objects, click Apply
Step 5. Rename the key to HKEY_LOCAL_ MACHINE\SOFTWARE\Classes\CLSID{B91D5831-B1BD-4608-8198-D72E155020F7}_backup
Step 6. Repeat step 2-4 to change the permissions of the key back to NT Service\TrustedInstaller
Step 7. Repeat the step 2-5 to change the key name HKEY_LOCAL_ MACHINE\SOFTWARE\Classes\CLSID{e60687f7-01a1-40aa-86ac-db1cbf673334} to HKEYLOCAL MACHINE\SOFTWARE\Classes\CLSID{e60687f7-01a1-40aa-86ac-db1cbf673334}_backup

