
Create OIDC directory in MetaDefender Core
Sign in to MetaDefender Core.
In the dashboard, click on
User Managementin the left sidebar.In
User Managementpage, selectDirectoriestab and clickAdd Directoryin the top right corner.
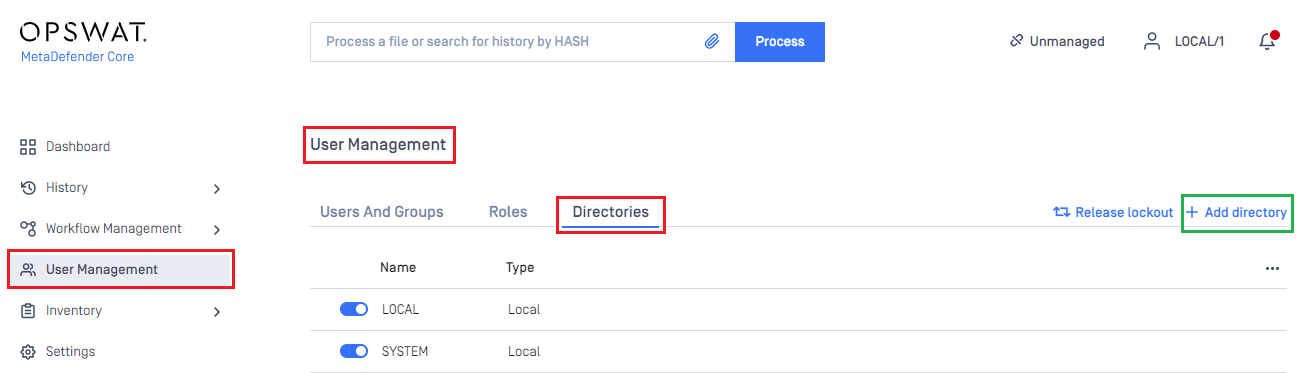
In
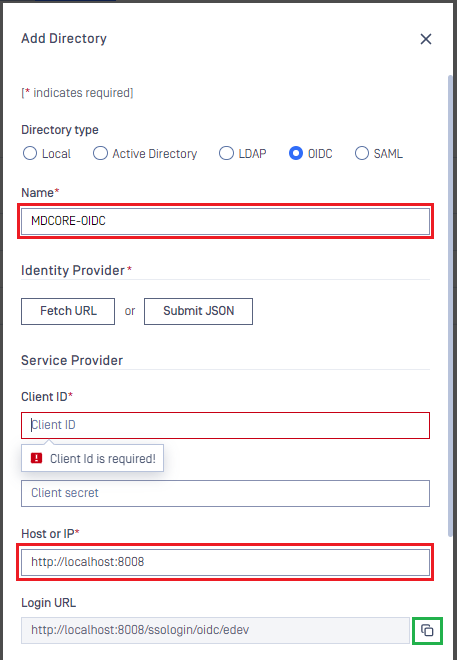
Add Directorypage, select OIDC asDirectory type, and enter a name for the new directory, such as MDCore-OIDC.Enter
Host or IPwhere MetaDefender Core is hosted, for this example use https://127.0.0.1:8008.Copy the string generated under
Login URLand store it as reply_uri.
Create Amazon Cognito user pool
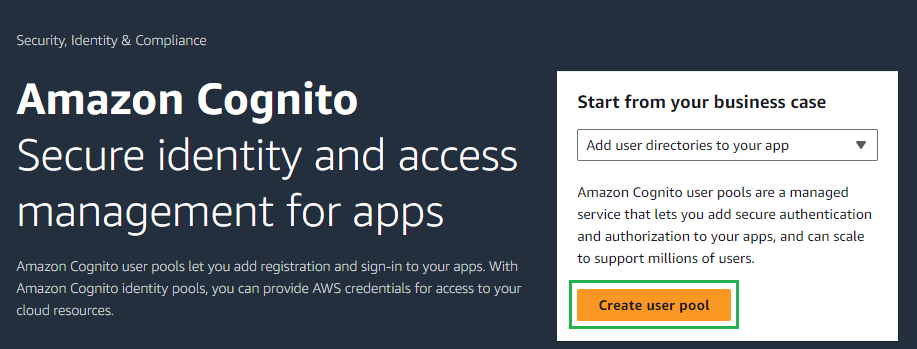
Access https://aws.amazon.com/cognito/v2/home and sign in with your account.
On the main page, click
Create user pool.
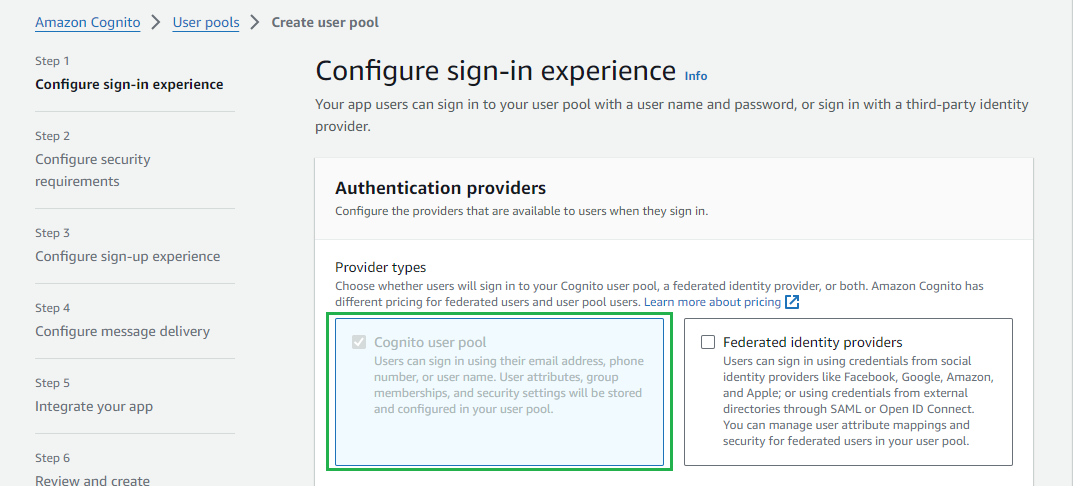
In
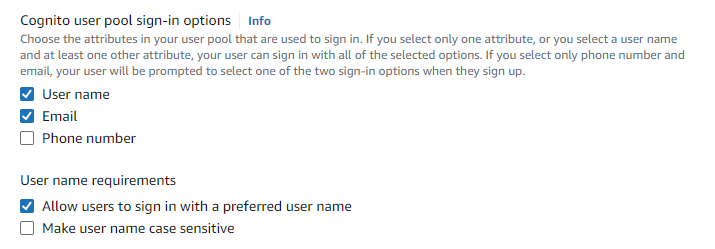
Step 1 - Configure sign-in experience, selectCognito user poolforProvider types.
Tick
User name,Email, andAllow users to sign in with a preferred user name, then clickNext.
In
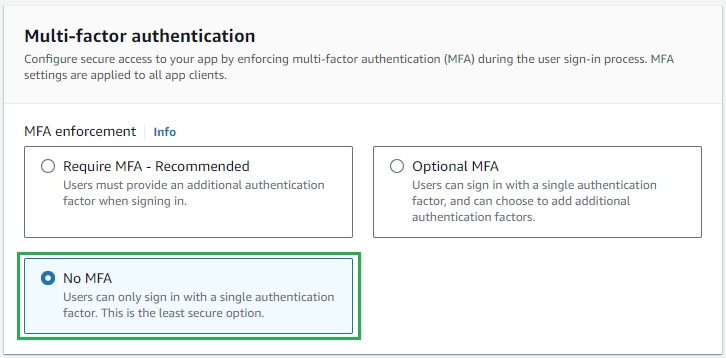
Step 2 - Configure security requirements, selectNo MFAforMFA enforcement, leave all others as default , and clickNext.
In
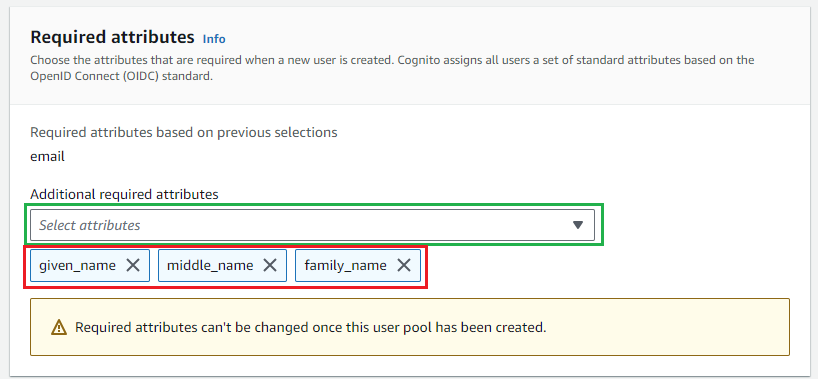
Step 3 - Configure sign-up experience, navigate toRequired attributesand add additional attributes: given_name, middle_name , and family_name. ClickNext.
In
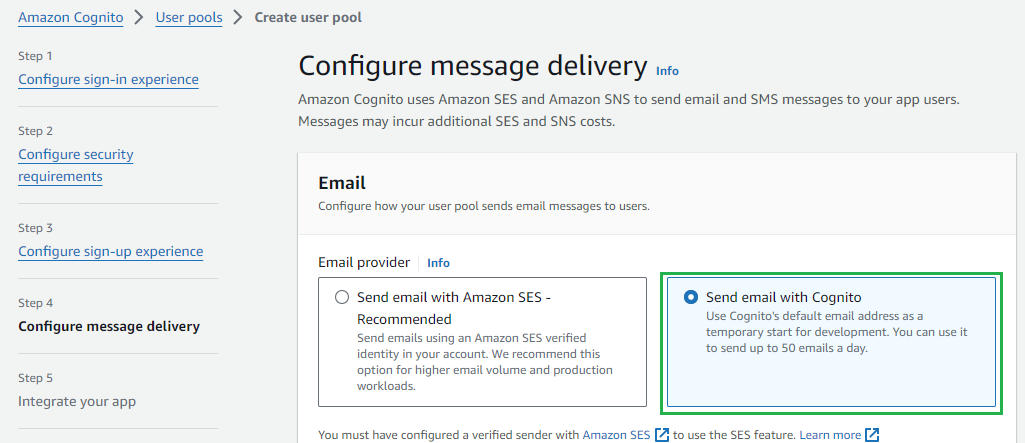
Step 4 - Configure message delivery, chooseSend email with Cognitoand clickNext.
In
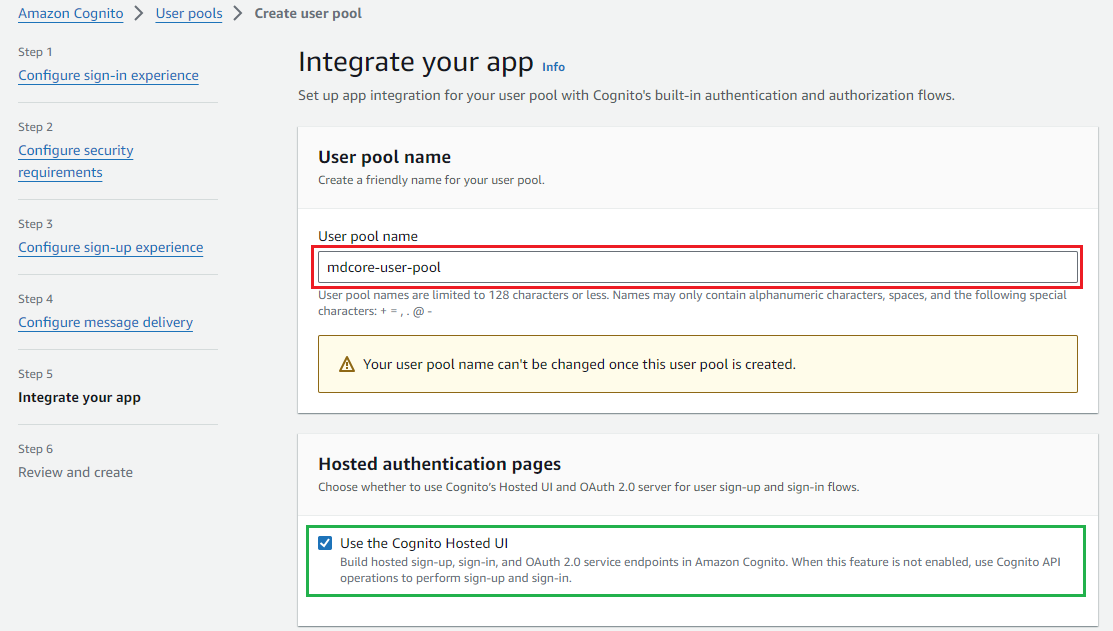
Step 5 - Integrate your app, enter the user pool name and tickUse the Cognito Hosted UI.
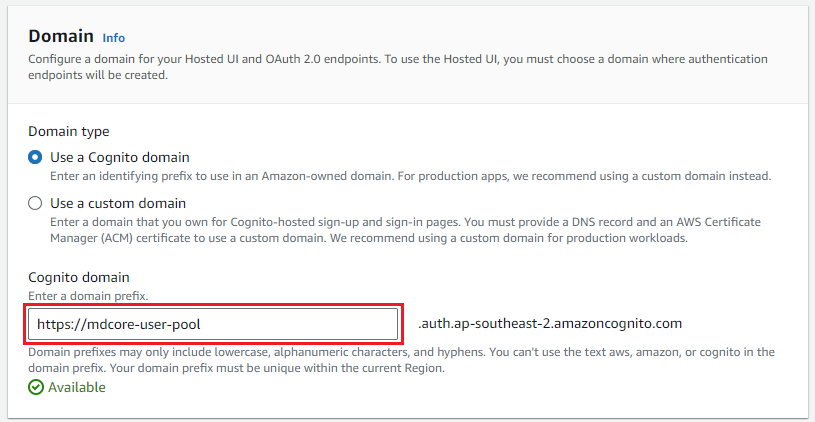
Enter your domain to
Cognito domain.
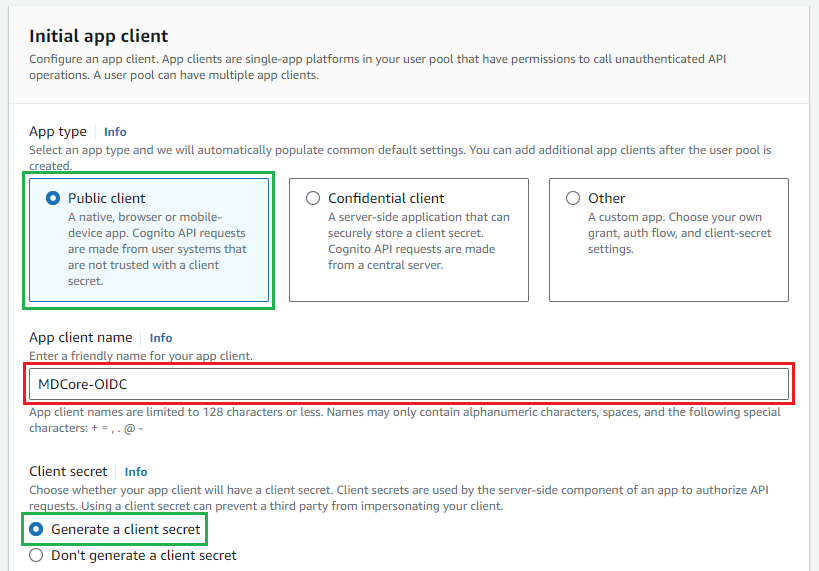
Under
Initial app clientsection, selectPublic clientforApp type, enterApp client name, and selectGenerate a client secretforClient secret.
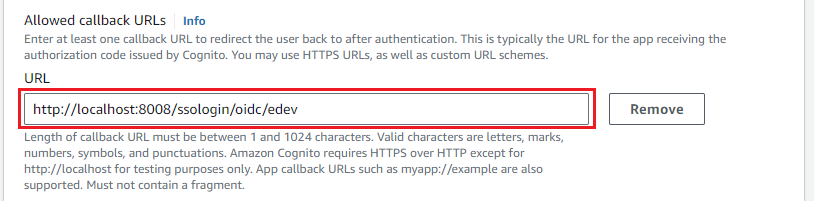
Under
Allowed callback URLssection, fill inURLbox with the value of reply_uri.
Expand
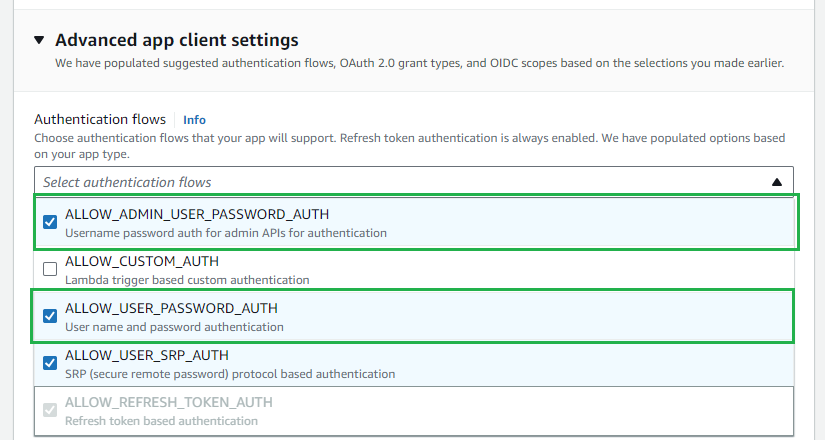
Advanced app client settings, then stick to ALLOW_ADMIN_USER_PASSWORD_AUTH and ALLOW_USER_PASSWORD_AUTH forAuthentication flows.
Navigate to
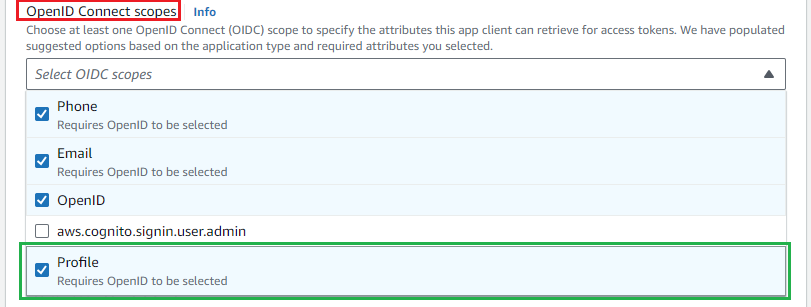
OpenID Connect scopesand addProfilescope.
Click
Nextin the final review page and clickCreate user pool.
Create Amazon Cognito user
In Amazon Cognito, click
User Poolsin the left sidebar and select the user pool that has been created.In
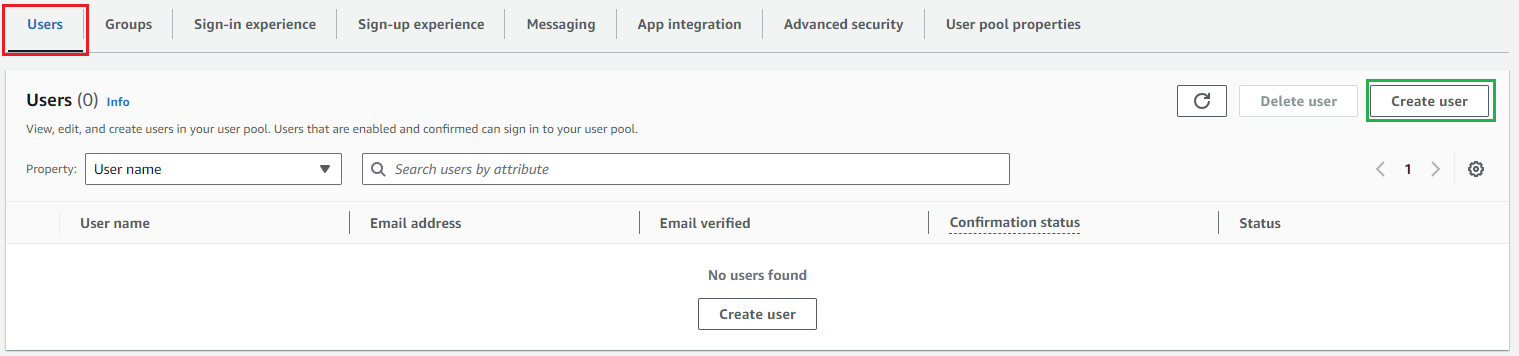
Userstab, clickCreate User.
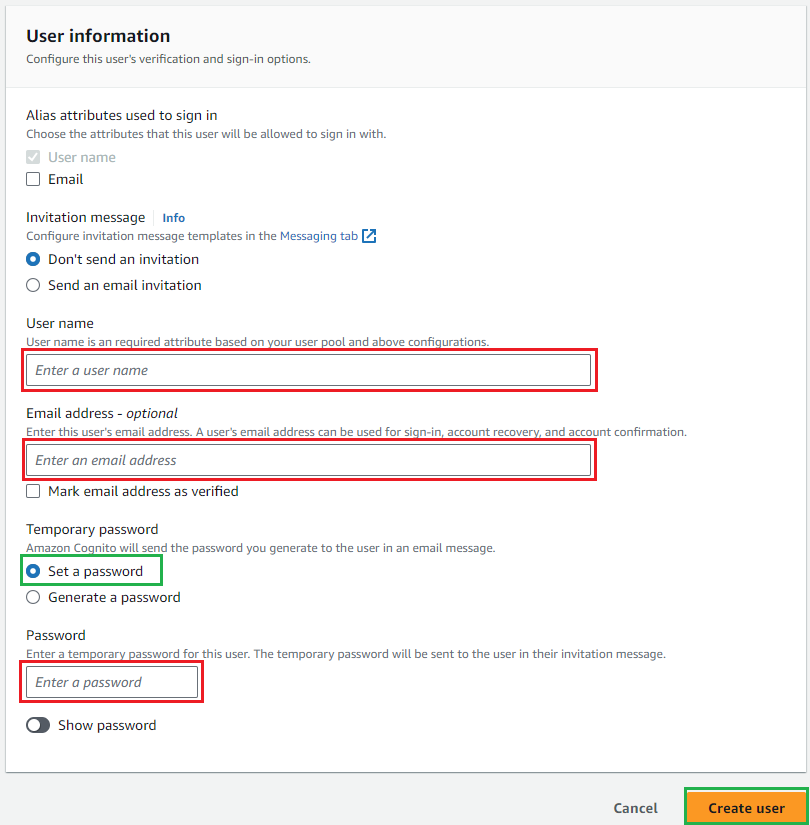
Enter the user name, and optional email address; stick to
Set a password, and enter your temporary password. ClickCreate Userto complete.
Download and modify ODIC metadata
Start your favorite web browser and enter a URL in the following format:
https://cognito-idp.{region_where user_pool_is_created}.amazonaws.com/{user_pool_id}/.well-known/openid-configuration, whereuser_pool_idcan be found inUser pool overview.
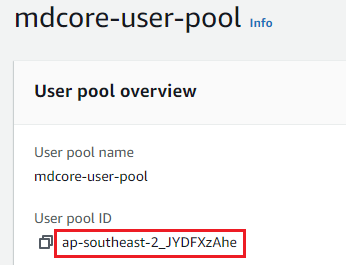
Save the responded content to a file on disk.
Open the file in your favorite editor.
Add the following content to the beginning of the file, right after the first open brace.
Save the file.
claims_supported includes items that are selected for Required Attributes at step 6 of Create Amazon Cognito user pool stage.
Complete the configurations
In Amazon Cognito, click on
User Poolsin the left sidebar and select the user pool that has been created.In
App Integrationtab, navigate toApp Client listand select the app client that has been created.

Copy
Client IDandClient Secret.
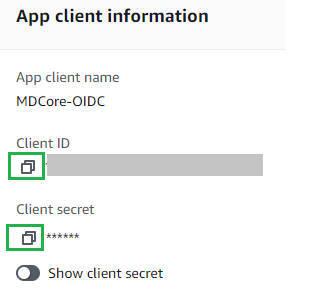
Switch to MetaDefender Core, under
Service Provider, pasteClient IDandClient Secretfrom the previous step into their respective fields.
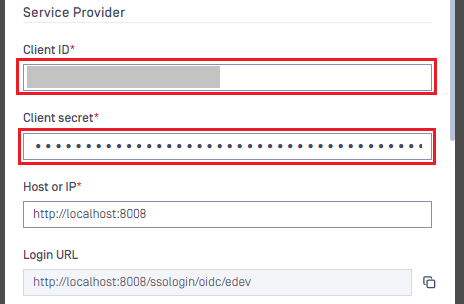
In
Identity Provider, clickSubmit JSONbutton and upload the file that was modified in the previous stage. Wait a moment for MetaDefender Core to set Amazon Cognito as its IdP.
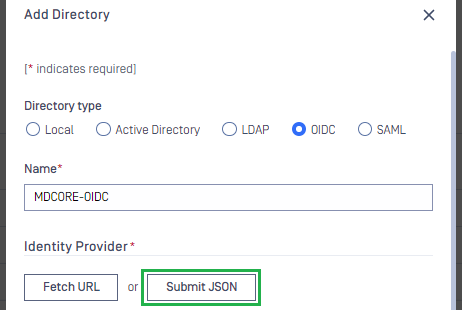
Enter
User identified bywith ${given_name} and select the appropriate role.
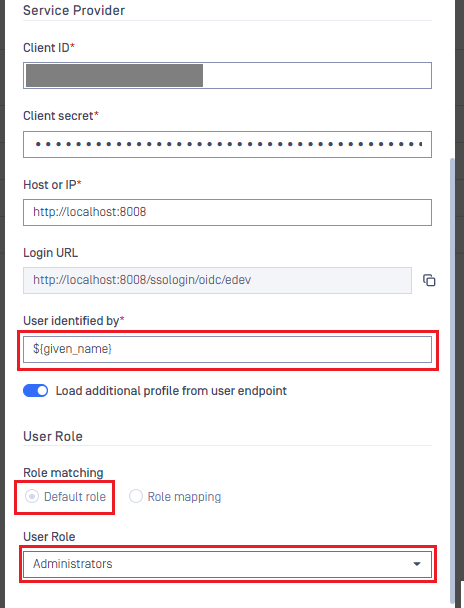
Click
Addto complete.In
User Management, toggle the new directory. A dialog box will appear to confirm the action. OnceEnableis clicked, all sessions will be expired immediately.
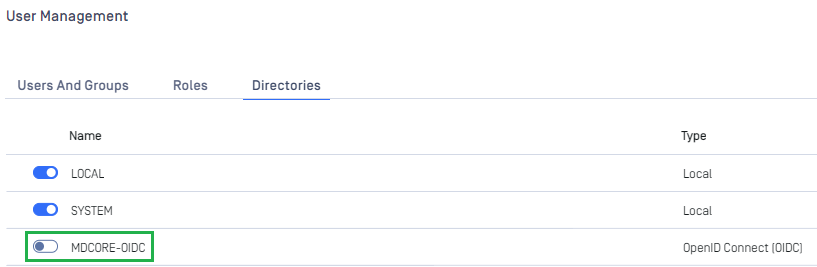
Test the integration
On the home screen of MetaDefender Core, click
Login; the user is redirected to Amazon Cognito page.
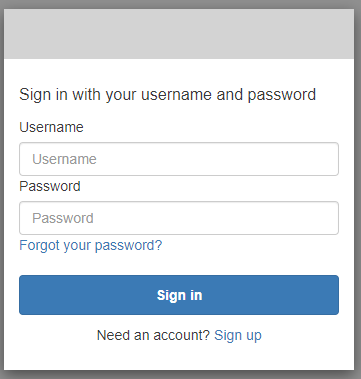
Change the password, enter other required fields, and click
Send.
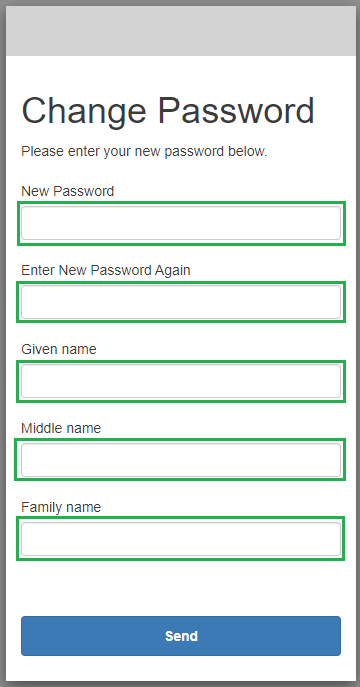
If everything goes well, MetaDefender Core dashboard is displayed with the user identity in the top right corner.

Otherwise, access backup login page at
<mdcore-host>#/public/backuploginfor trouble shooting.