Using SAML
Create Okta application
Access https://www.okta.com/login/ to log in.
In sidebar of dashboard, hit "Applications" to drop sub items down, then select "Applications".
Hit "Create App Integration".

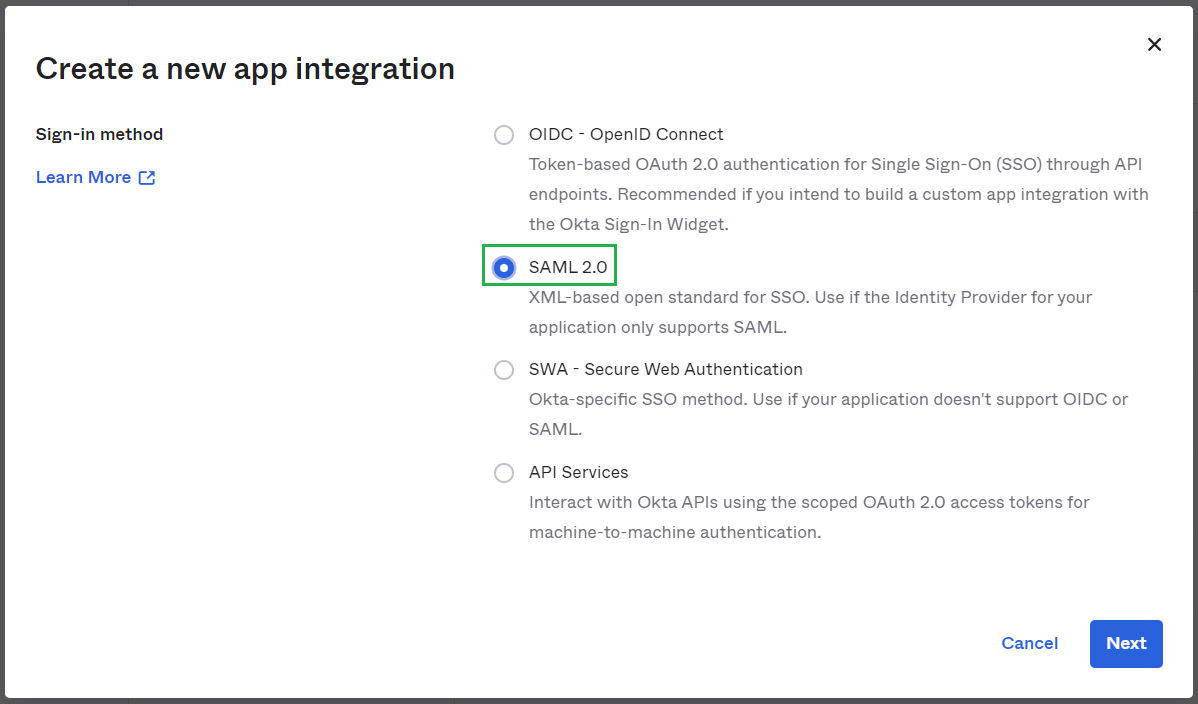
In "Sign-in method", choose "SAML 2.0" and hit "Next".
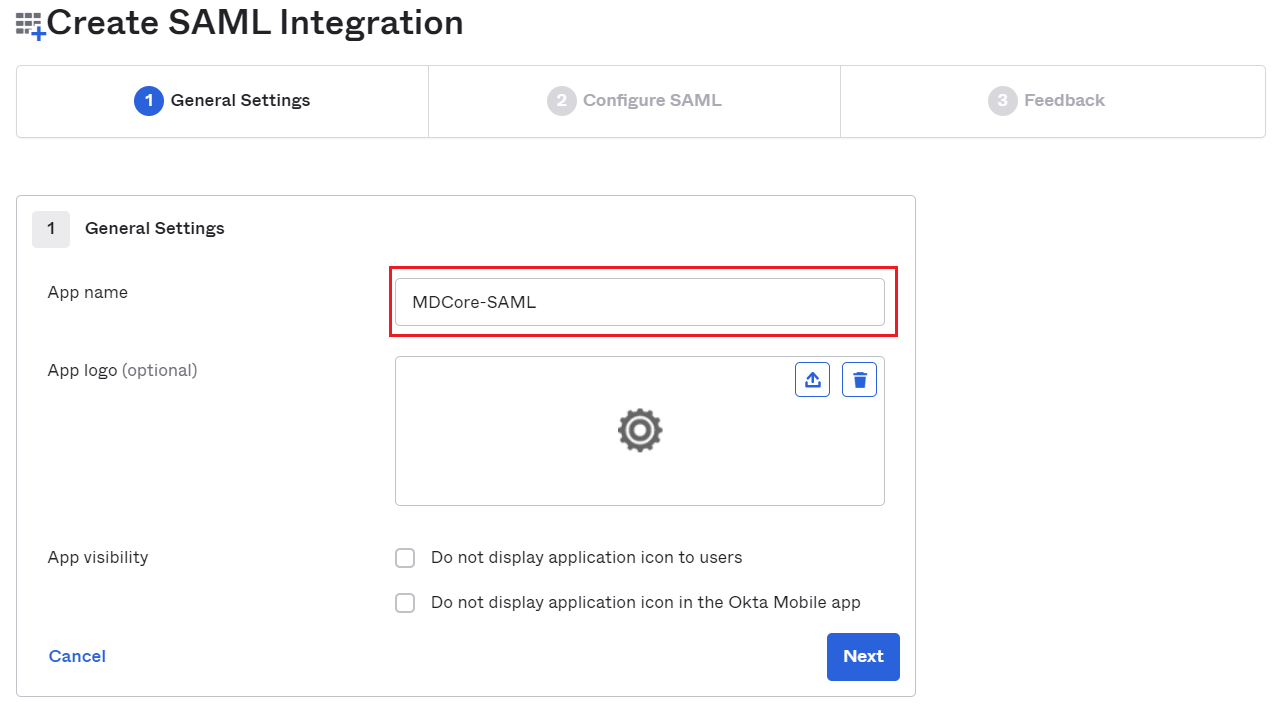
Fill "App name", MDCore-SAML for example and hit "Next".
Create SAML directory on MetaDefender Core
Login to MetaDefender Core management console.
Under "Dashboard", hit "User Management" in sidebar.
Under "User Management", choose "Directories" tab and hit "Add directory" on the top right

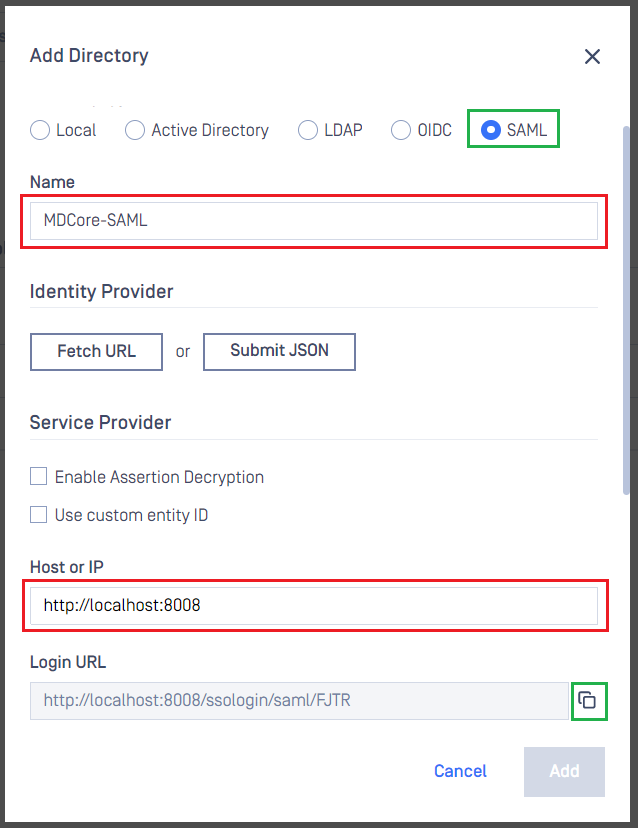
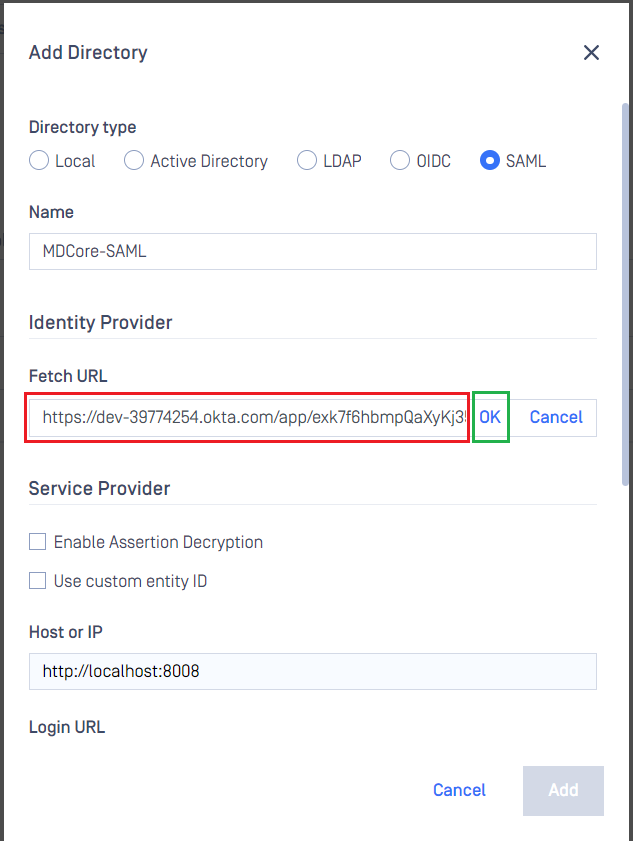
In "Add Directory" page, choose "SAML" in Directory Type.
Fill "Name" of the new directory, MDCore-SAML for example.
Under "Service Provider", fill in "Host or IP" where MetaDefender Core is being hosted, https://localhost:8008 for this example.
Configure Okta
Switch to "Applications" screen on Okta home page.
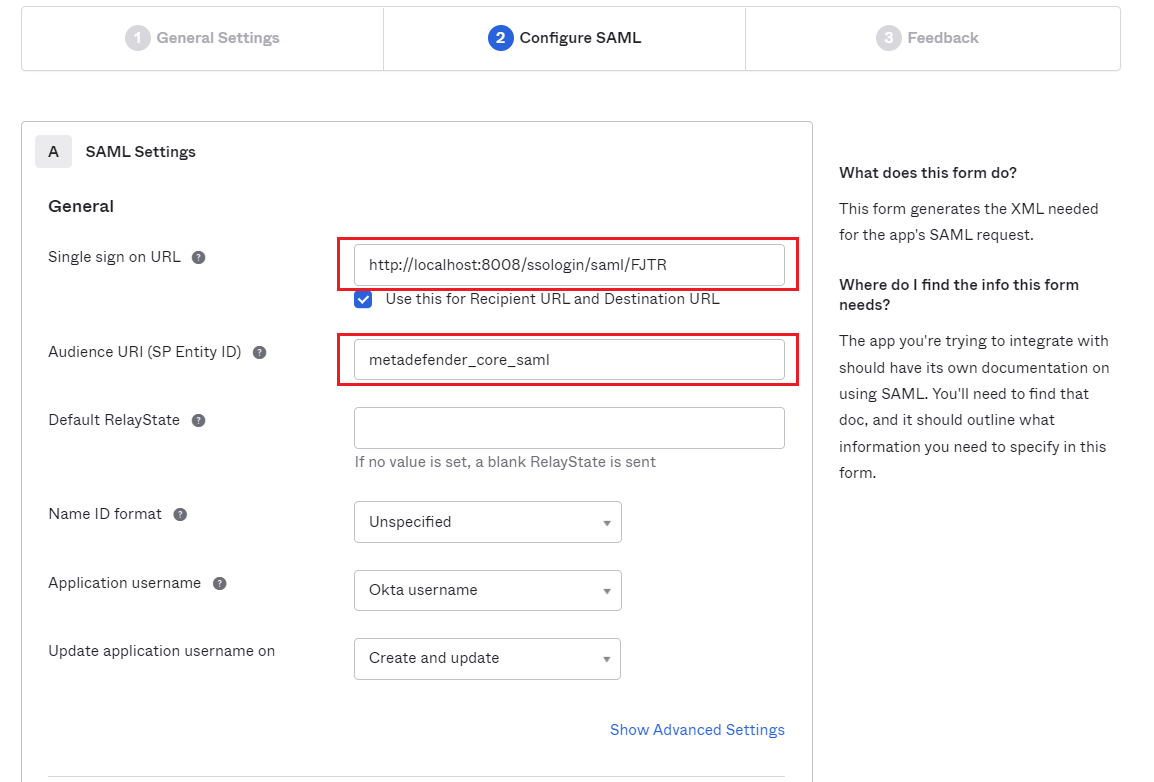
Paste the "Login URL" from MetaDefender Core into "Single sign on URL" and set id for "Audience URI," metadefender_core_saml for example.
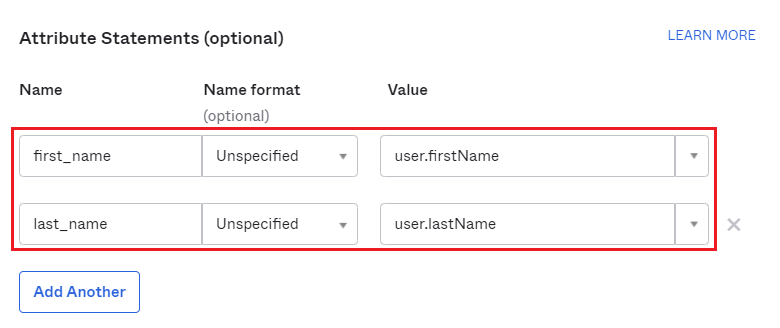
Scroll down, navigate to "Attribute Statements" and set mapping from Okta key name to the one set at "User identified by" on MetaDefender Core, then hit "Next".
Choose your answer at "Feedback" screen and hit "Finish".
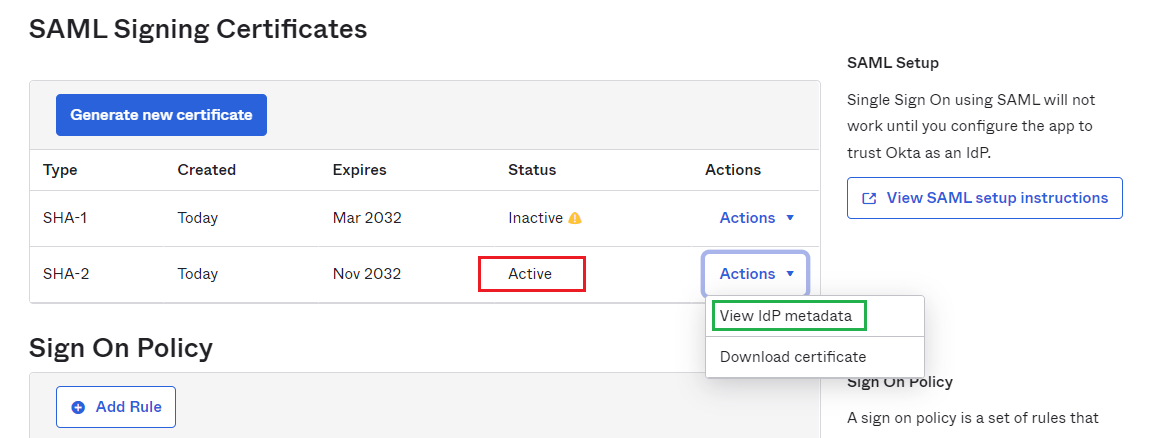
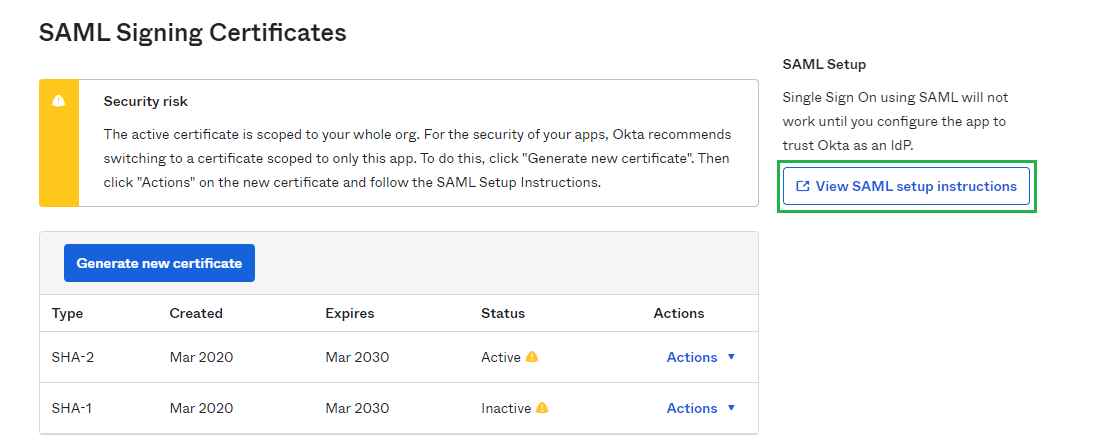
On next screen, navigate to "SAML Signing Certificates", choose row that has value of column "Status" is "Active" then hit "Actions" and hit "View IdP metadata".
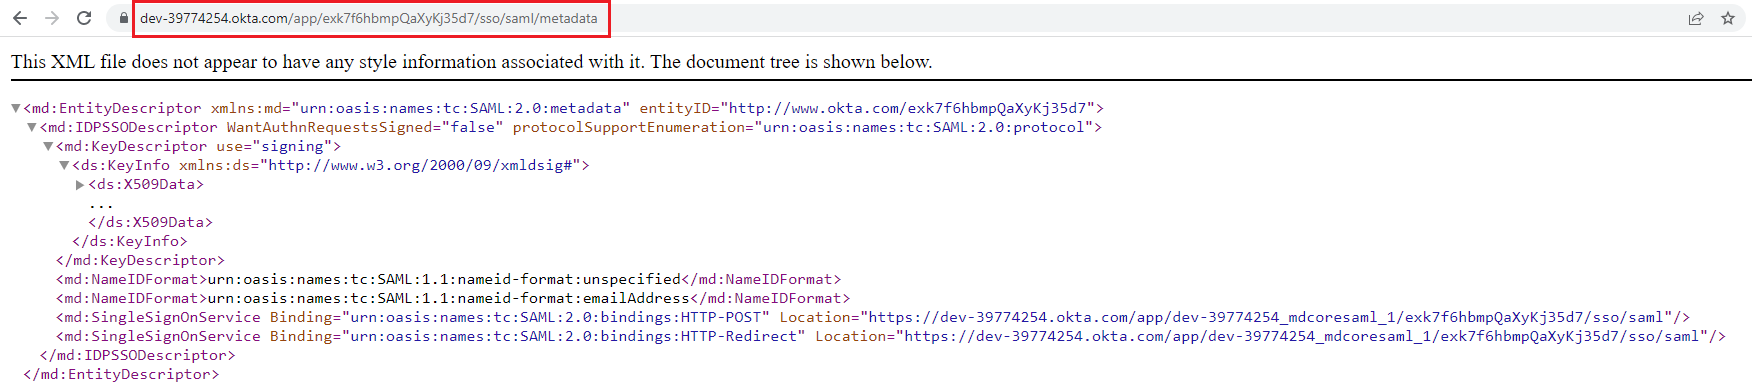
Copy SAML Metadata link
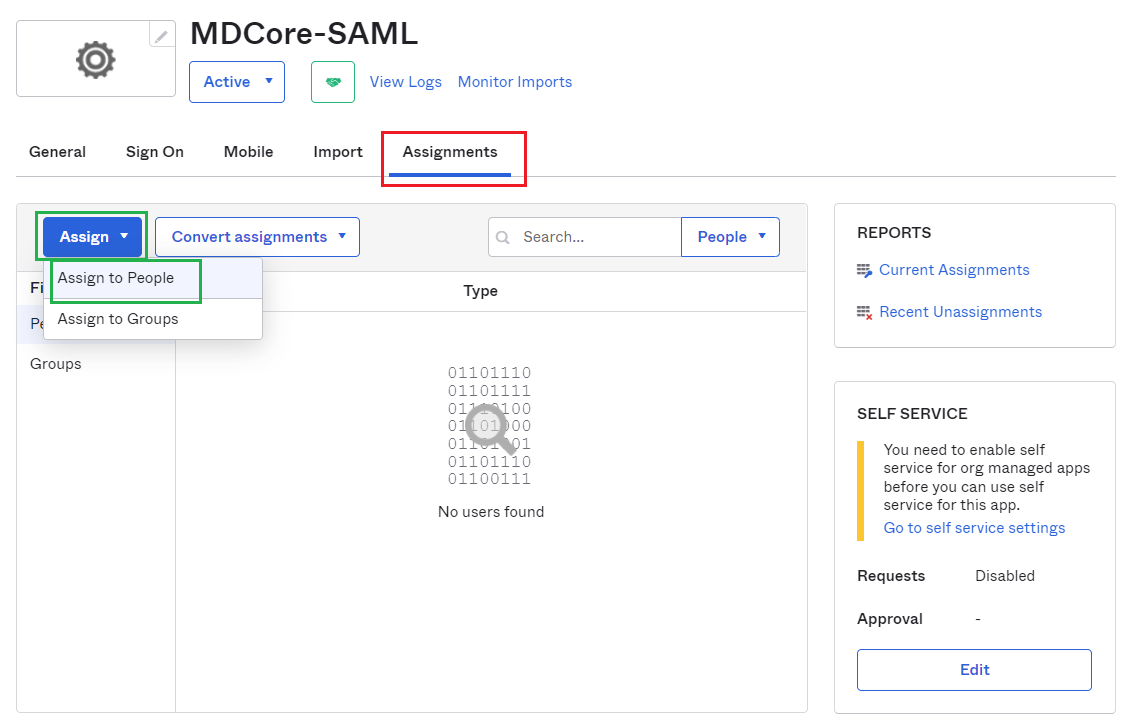
Switch to "Applications" screen on Okta, navigate to "Assignments" tab, and assign users for the application.
Complete configuration on MetaDefender Core
Switch to MetaDefender Core screen, under "Identity Provider", hit on "Fetch URL".
Paste "SAML Metadata link" from Okta to the box under "Fetch URL" and hit "OK" to ensure MetaDefender Core can set Okta as its IdP.
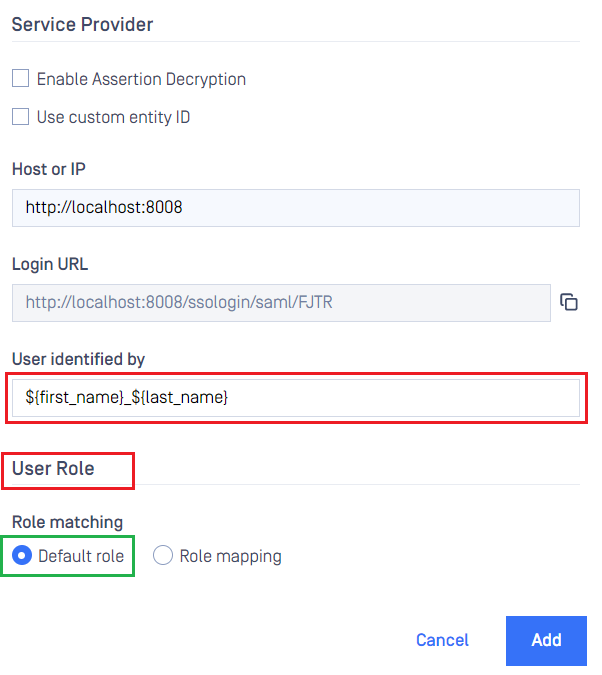
Under "Service Provider", fill in user identity under "User identified" by with ${first_name}${last_name}_ for example.
Select correct role for the user under "User Role".
Hit "Add" to complete the settings.
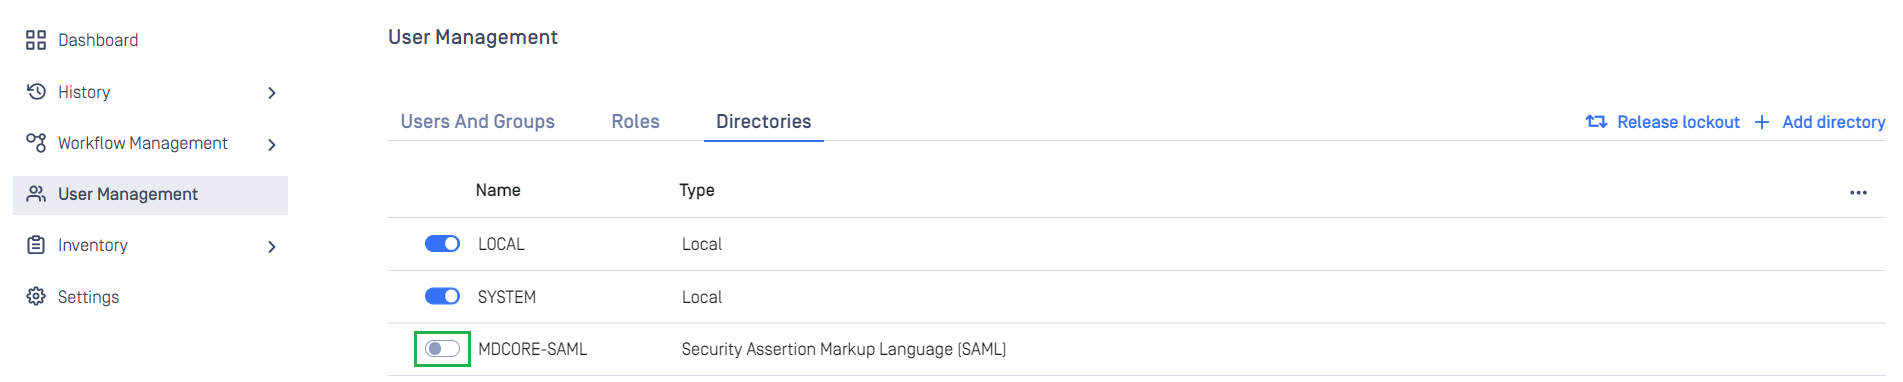
On screen "User Management", toggle the new directory, MDCORE-SAML in this example. A dialog box is shown to confirm the action. Once "Enable" is hit, all existing sessions will be expired immediately and Okta will be used to authenticate users going forward.
Test the integration
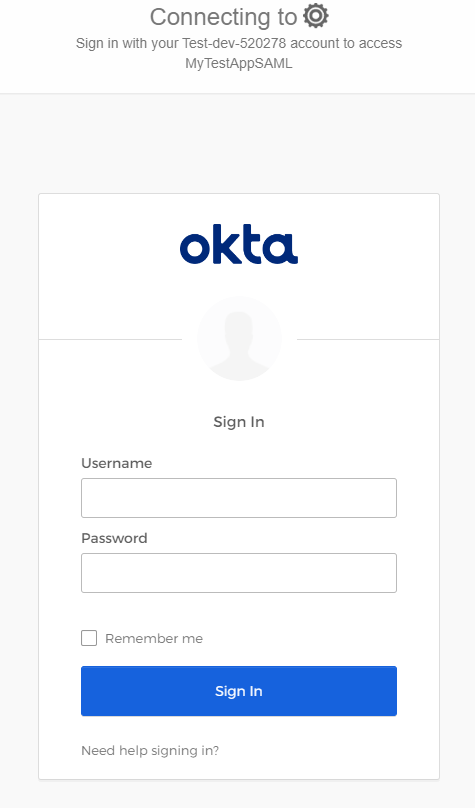
Browse MetaDefender Core, hit "Login", user is redirected to Okta's login page.
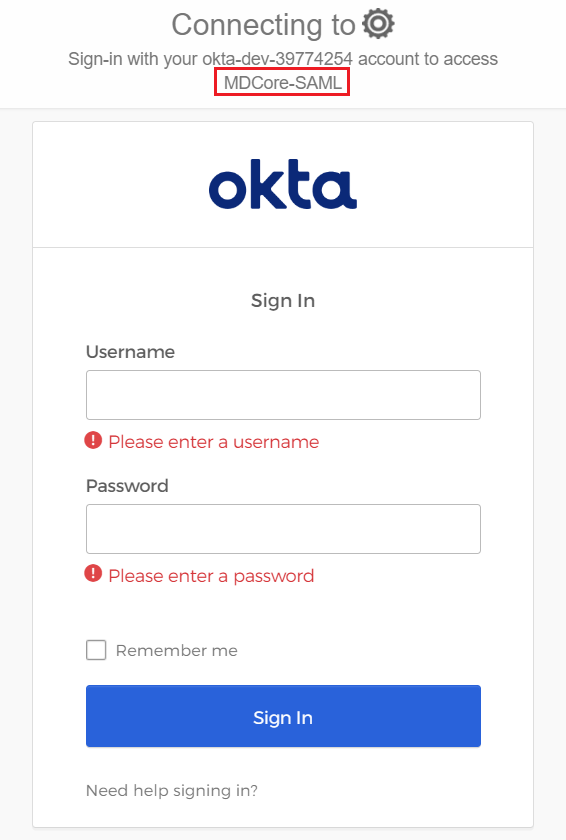
Login by the account registered in Okta.
If everything goes right, MetaDefender Core dashboard is shown with user identity set at the top right corner.

For troubleshooting, browse <mdcore-host>#/public/backuplogin.
Test IdP-initiated login
Login to Okta management page.
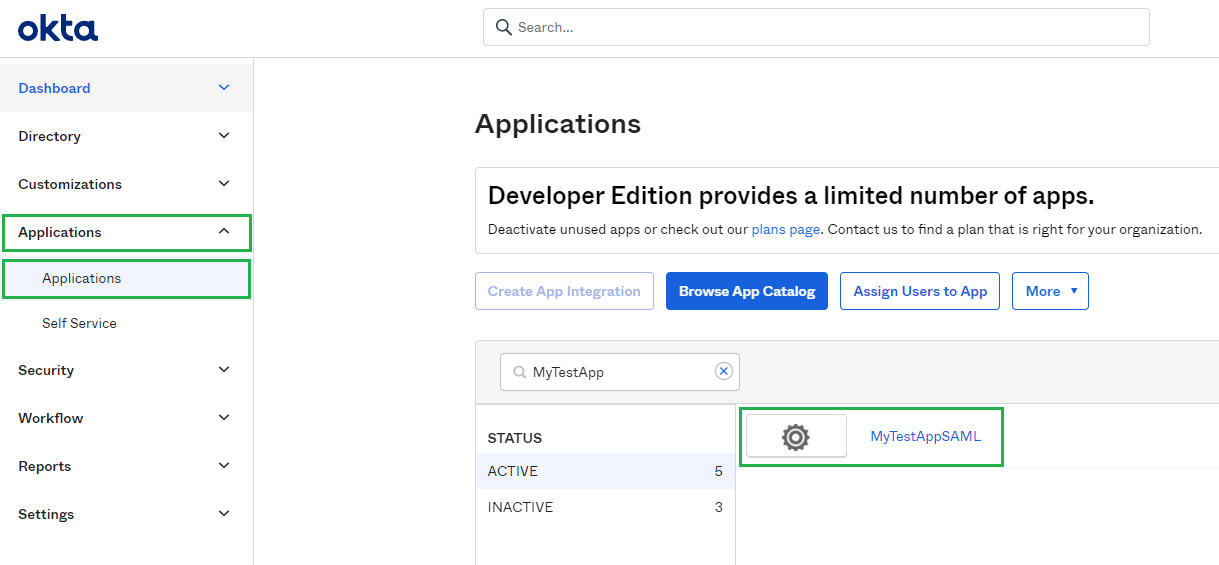
Navigate to "Applications" / "Applications" on sidebar.
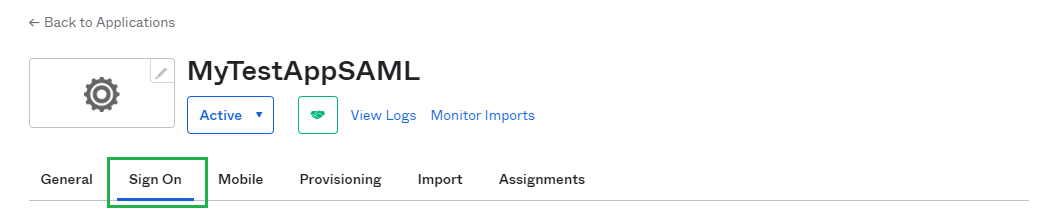
Select the active SAML application.
In tab Sign On, find and hit "View SAML setup instructions" button.
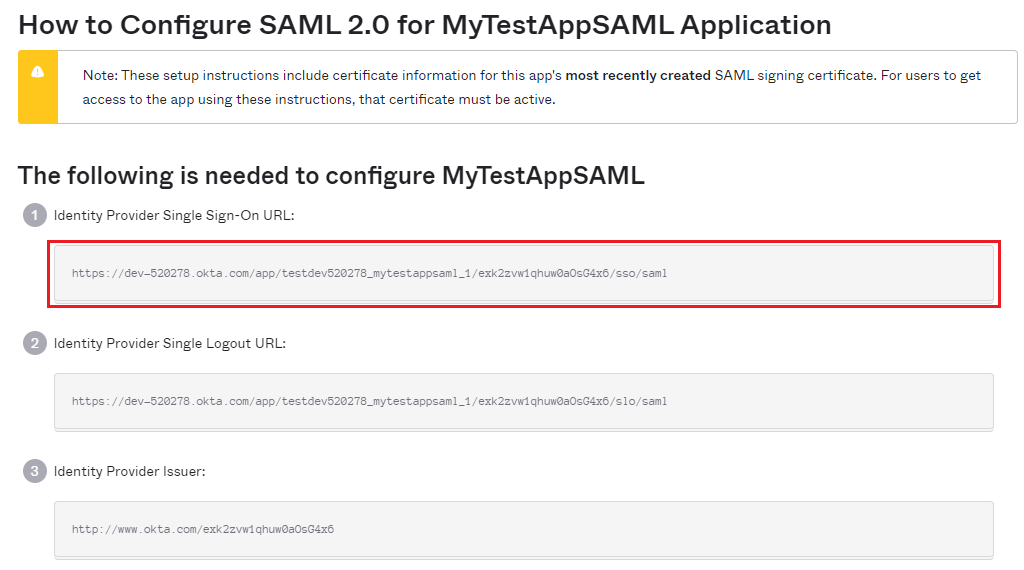
In new page, copy the URL under "Identity Provider Single Sign-On URL" section.
Paste the copied URL to browser and login.
If everything goes right, MetaDefender Core dashboard is shown with user identity set at the top right corner.
For troubleshooting, browse <mdcore-host>#/public/backuplogin.
Using OpenID Connect
Create Okta application
Access https://www.okta.com/login/ to log in.
In sidebar of dashboard, hit "Applications" to drop sub items down, then select "Applications".
Hit "Create App Integration".

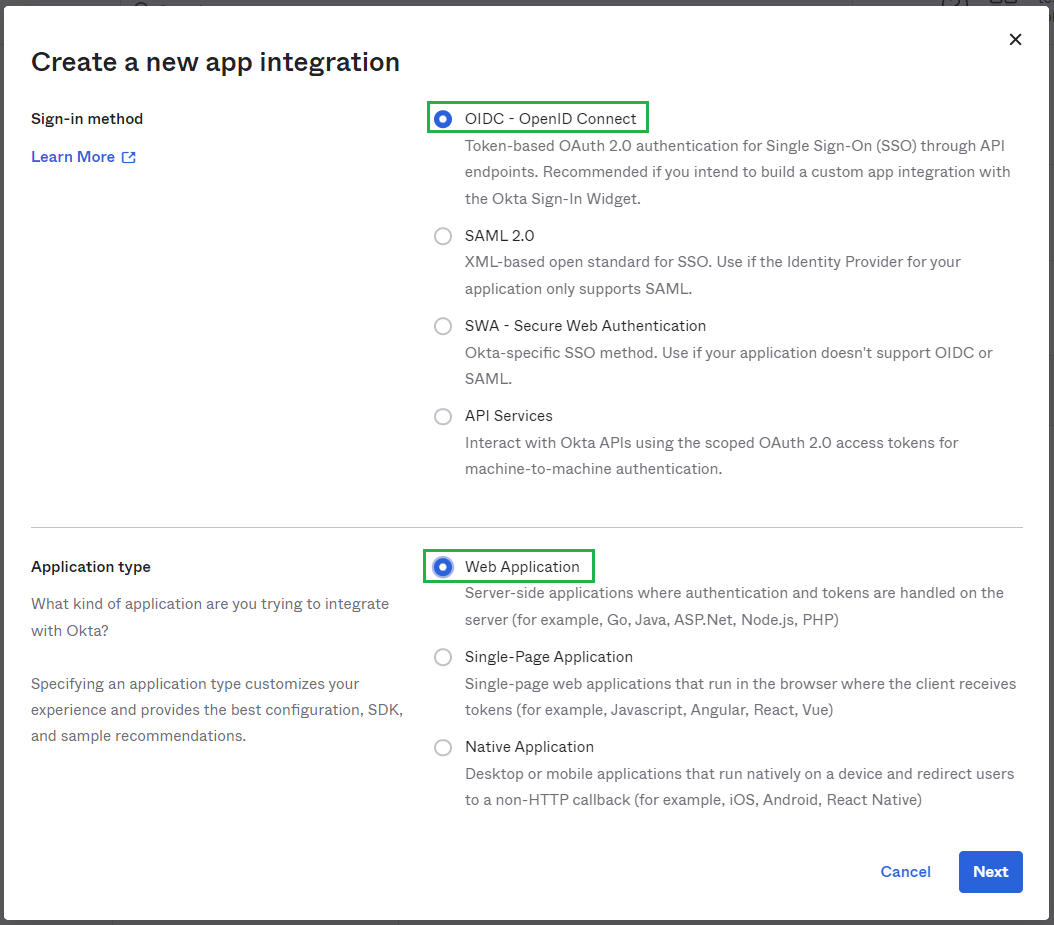
In "Sign-in method", choose "OIDC - OpenID Connect", and in "Application type" choose "Web Application" and hit "Next".
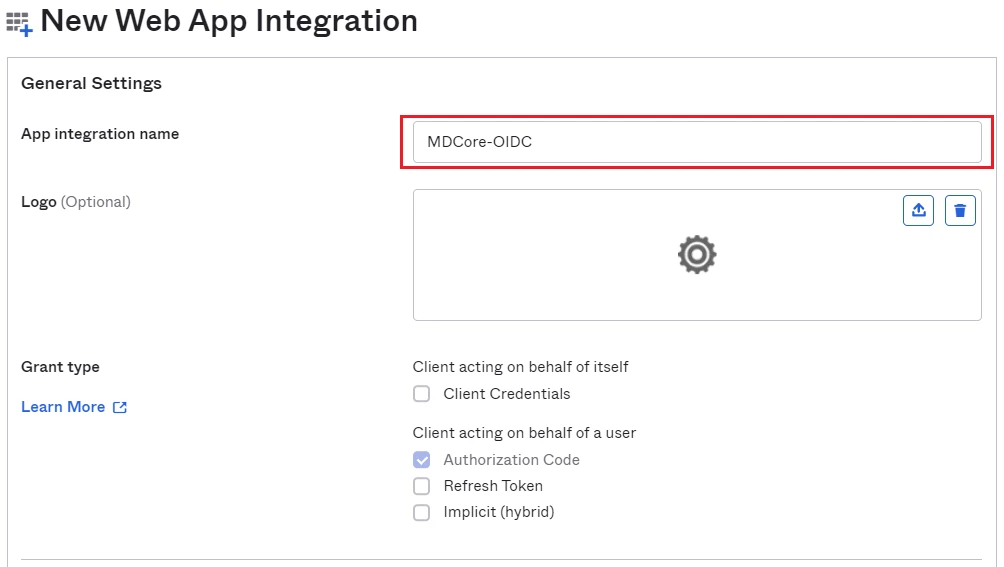
Fill "App name", MDCore-SAML for example and hit "Next".
Create OIDC directory on MetaDefender Core
Login to MetaDefender Core management console.
Under "Dashboard", hit "User Management" in sidebar.
Under "User Management", choose "Directories" tab and hit "Add directory" on the top right

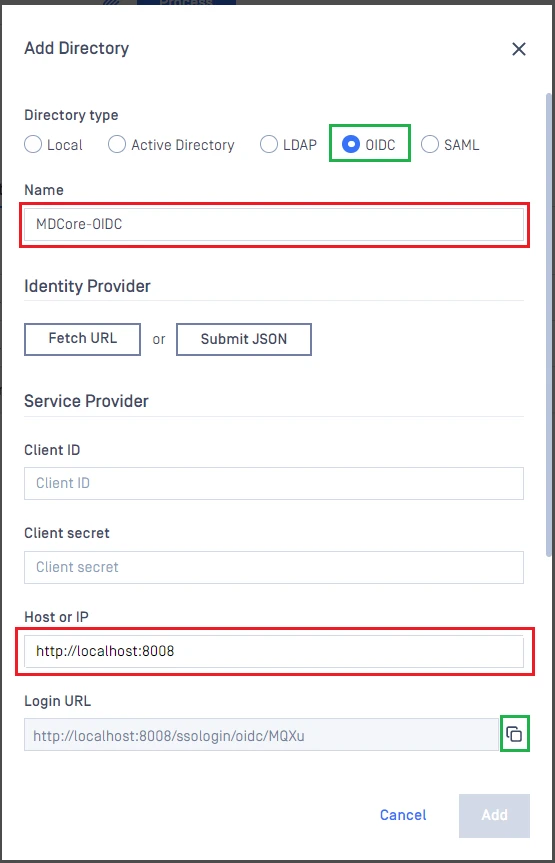
In "Add Directory" page, choose "OIDC" in Directory Type.
Fill "Name" of the new directory, MDCore-OIDC for example.
Under "Service Provider", fill in "Host or IP" where MetaDefender Core is being hosted, https://localhost:8008 for this example.
Configure Okta
Switch to "Applications" screen on Okta home page.
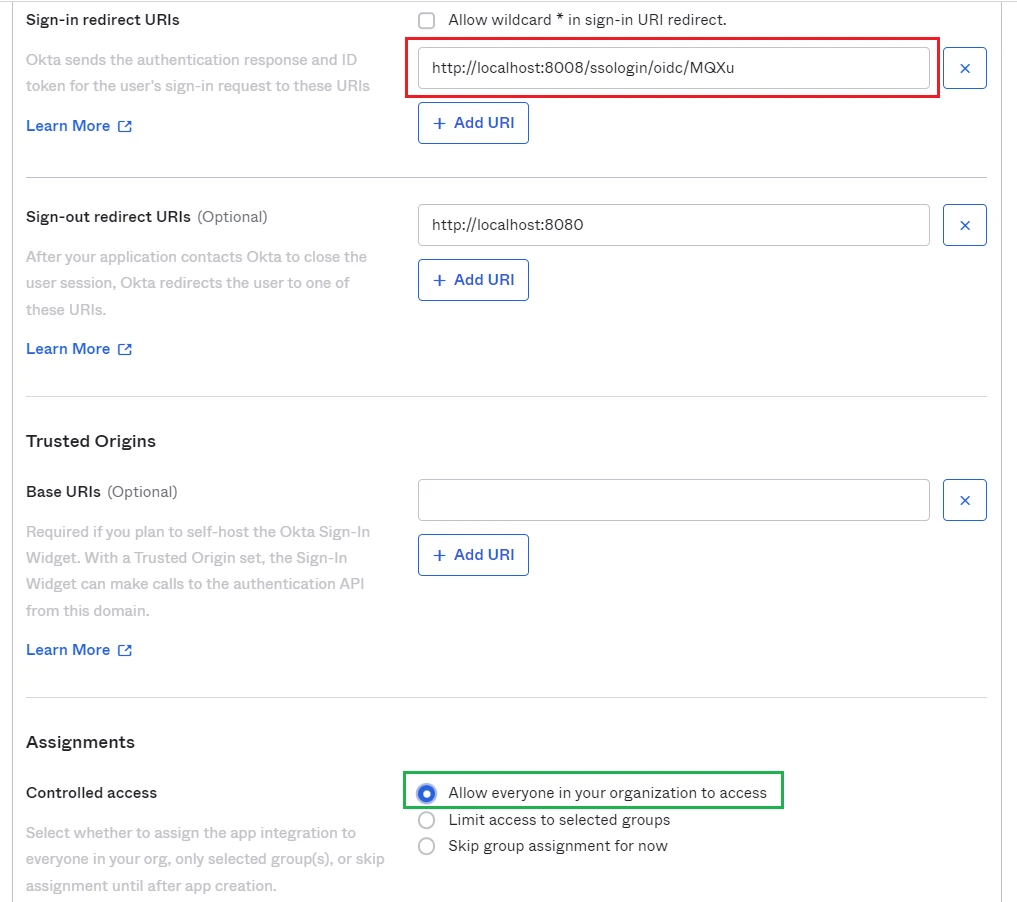
Paste the "Login URL" from MetaDefender Core into "Sign-in redirect URIs" and grant permission for everyone to access our application in "Assignments" then hit "Save".
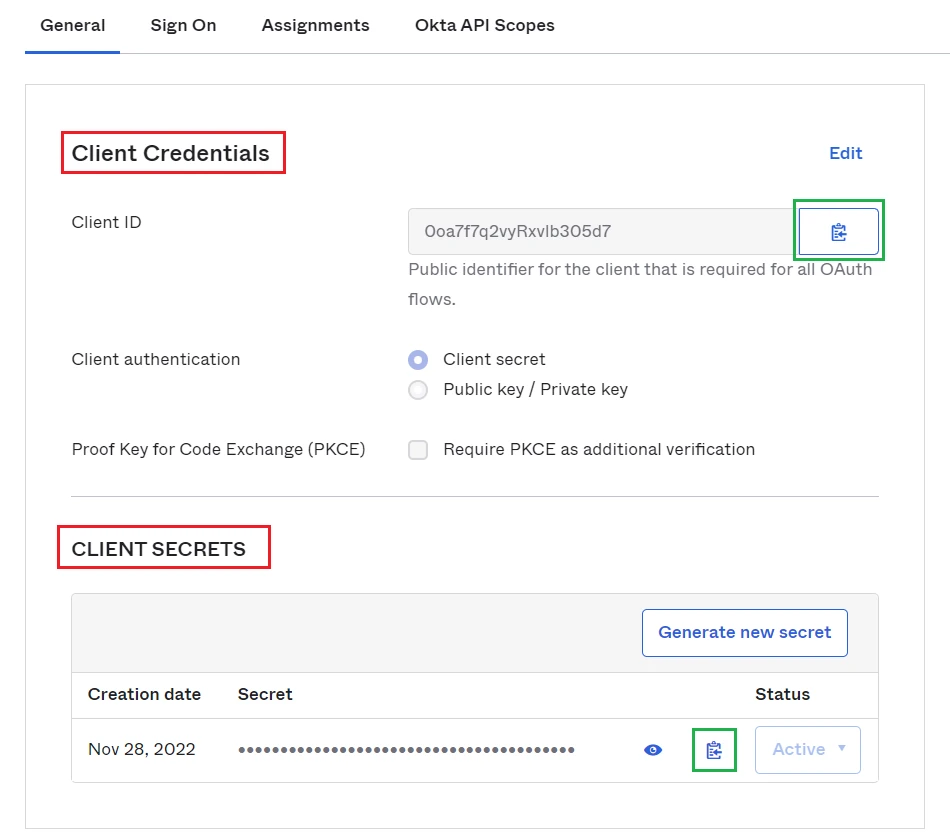
Copy "Client ID" and "Client Secrects".
Complete configuration on MetaDefender Core
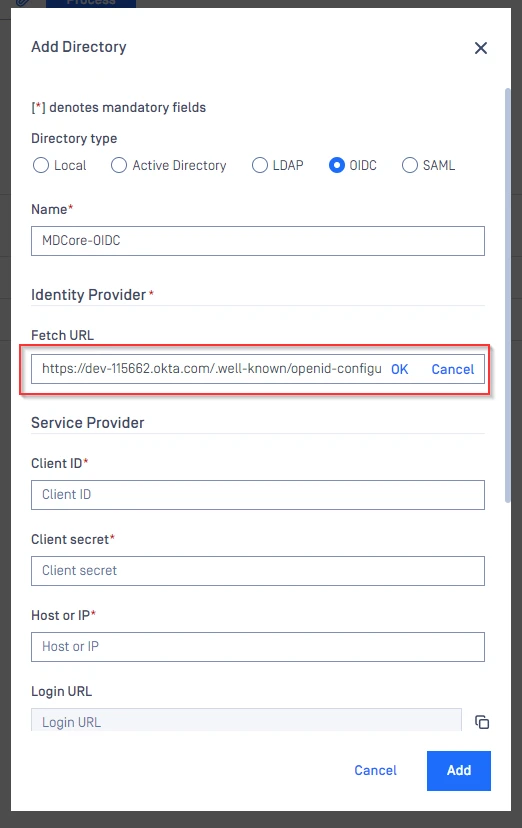
Switch to MetaDefender Core screen, under "Identity Provider", hit on "Fetch URL".
OIDC link will be built by appending /.well-known/openid-configuration to your okta domain url (Referred Okta document). For example
dev-115662.okta.com/.well-known/openid-configurationPaste OIDC configuration link above to the box under "Fetch URL" and hit "OK" to ensure MetaDefender Core can set Okta as its IdP.
Under section Service Provider, paste the value of "Client ID" and "Client secrets" that you copied from Okta respectively.
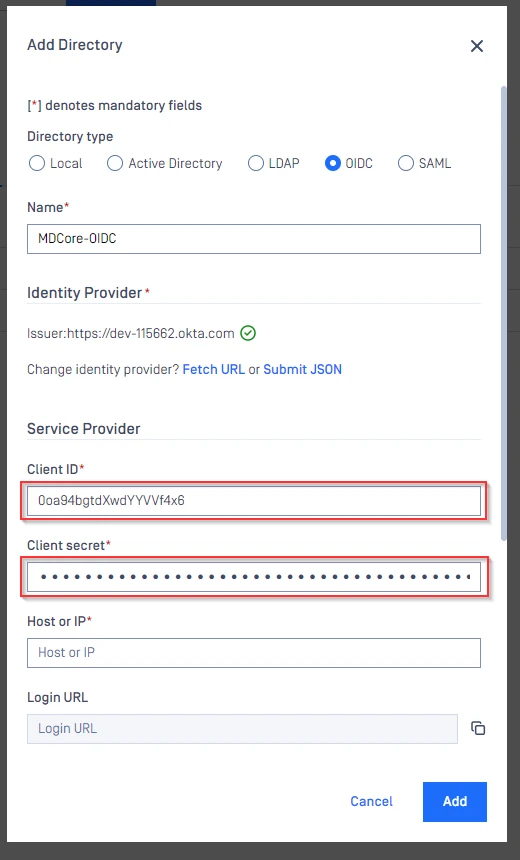
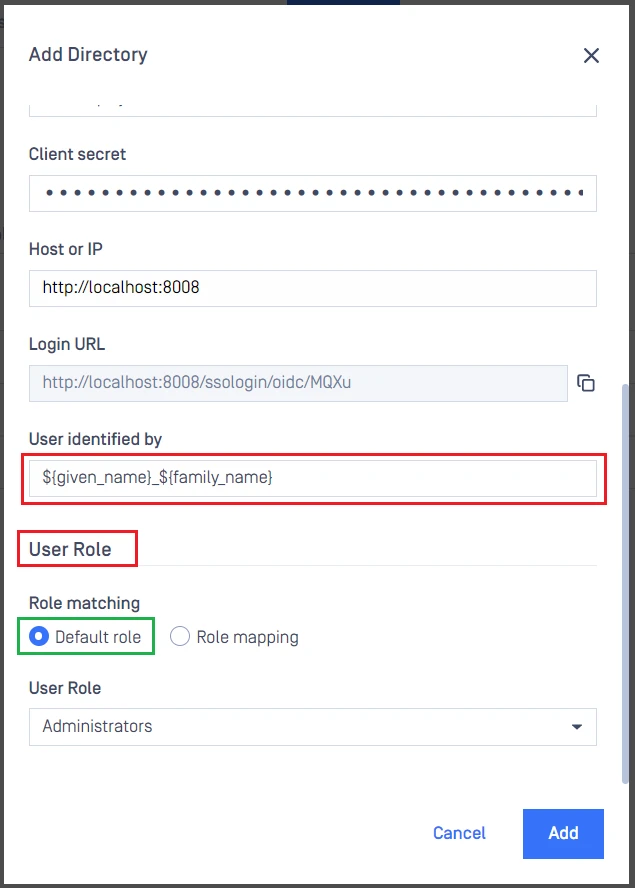
Under "Service Provider", fill in user identity under "User identified" by with ${first_name}${last_name}_ for example.
Select correct role for the user under "User Role".
Hit "Add" to complete the settings.
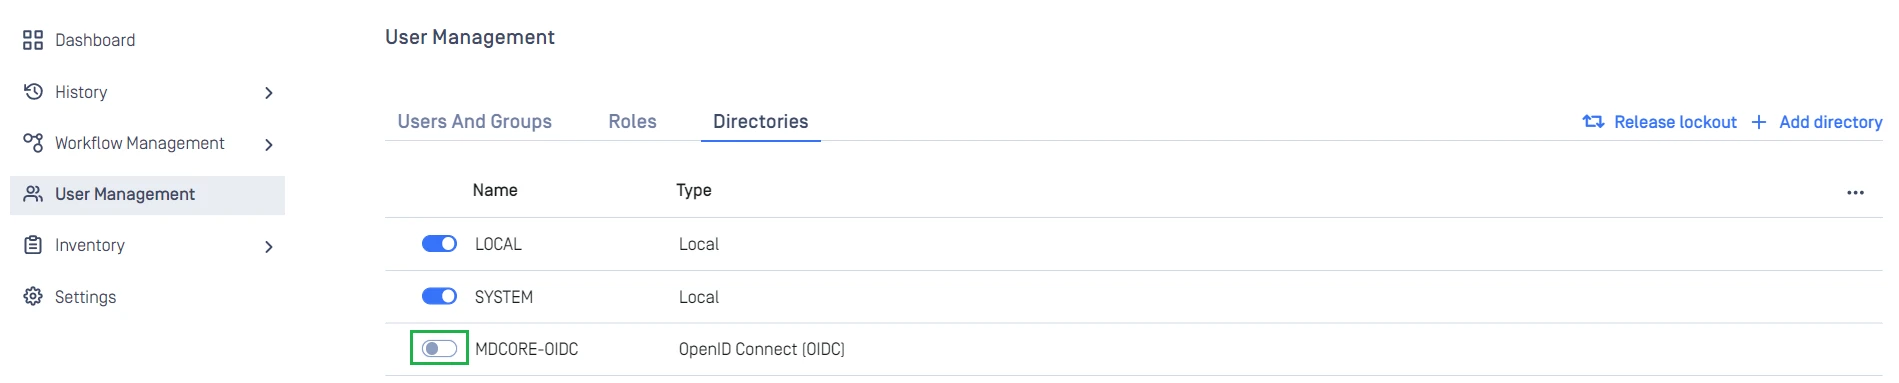
On screen "User Management", toggle the new directory, MDCORE-OIDC in this example. A dialog box is shown to confirm the action. Once "Enable" is hit, all existing sessions will be expired immediately and Okta will be used to authenticate users going forward.
Test the integration
Browse MetaDefender Core, hit "Login", user is redirected to Okta's login page.
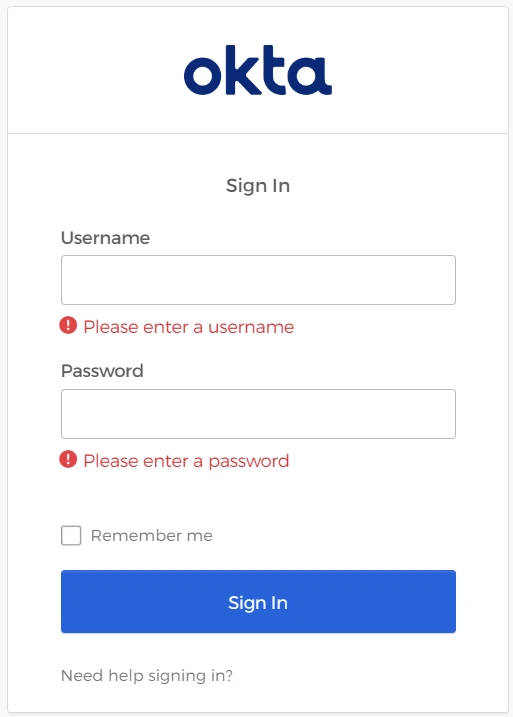
Login by the account registered in Okta.
If everything goes right, MetaDefender Core dashboard is shown with user identity set at the top right corner.

For troubleshooting, browse <mdcore-host>#/public/backuplogin.