Metadefender Core displays detailed information on scan nodes and the status of engine updates including anti-malware engines, archive engines, etc.
Certificates
On this page, path to certificates and private keys for signing scan batches or HTTPS configuration can be given.
Certificate should be in a Base64-encoded X.509 certificate file (.crt, .cer) format.
Private key should be a privacy-enhanced electronic mail file (.pem) format and it should not be locked by password.
Adding certificate-key pair to the library
Go to Library → Certificates page
Click on Add Certificate button
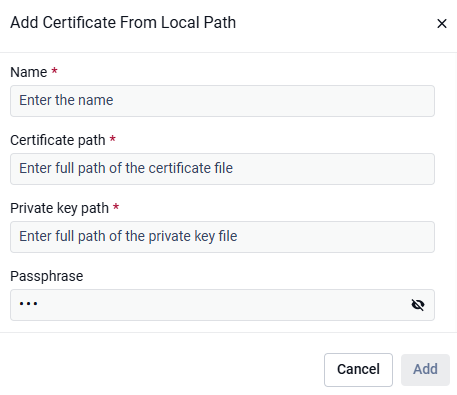
Fill out the Add new certificate form using one of the following methods: Method 1: Add From Local Path
Name: Certificate name
Certificate Path: Absolute path to the certificate file
Private Key Path: Absolute path to the private key file
Passphrase: Enter the passphrase for the private key (if required)
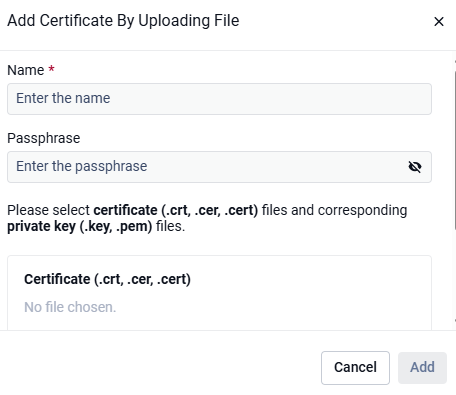
Method 2: Add By Uploading File
- Name: Certificate name - Certificate: Upload the certificate file - Private Key: Upload the private key file - Passphrase: Enter the passphrase for the private key (if required)
Click Add button

Checking the details of a certificate
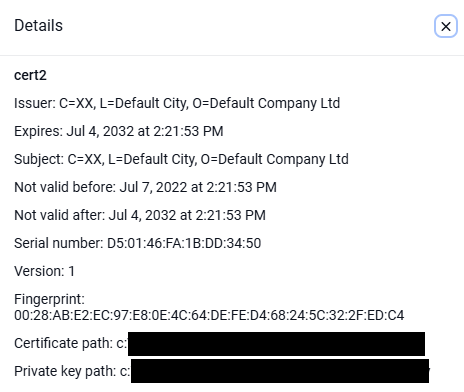
By clicking the line of the certificate, the "Certificate viewer" pops up and shows the details of the certificate.
Modifying the name, passphrase or the paths of a certification
Hover the mouse cursor over the line that is to be modified and click on the pen picto. The Modify certificate modal pops up and the fields can be edited.
The certificate file and the key file should be readable by the user who owns the ometascan process.
Webhook Authentication
While leveraging webhook on MetaDefender Core, the callback connection stays at un-secured by default. To harden the security, MetaDefender Core supports a mutual authentication mode between the server (MetaDefender Core) and client (where the callback is sent to), and prevents the man-in-the-middle attack (scan results could be possibly altered unauthorizedly).
How this security feature works
Admin user to request MetaDefender Core to generate a private-public key pair (the private key is encrypted within the product, and could not be seen or readable by anyone)
Admin user to download and keep that public key in their secret vault on the client side (where the callback is sent to).
Admin user to configure MetaDefender Core to use the private key in a desired workflow rule, for each scan request:
MetaDefender Core to calculate the signature of scan result using the selected private key.
MetaDefender Core to include the calculated signature into the callback response header before sending back to client.
Client side (where the callback is sent to) to use the stored public key to:
Decrypt the signature included in the callback response header.
Calculate SHA256 hash checksum from the callback reponse body (which is the entire scan result).
Compare the calculated SHA256 hash checksum to the hash value decrypted from the callback response header.
MetaDefender Core also supports admin users to configure the user role for whom allowed to see and modify webhook authentication settings.
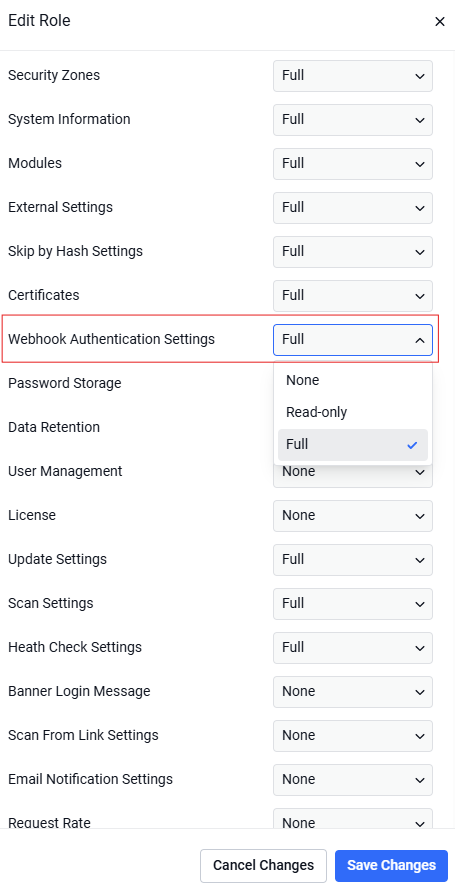
Create a new certificate-key pair for webhook authentication
Go to Library → Webhook Authentication page
Click on Add certificate button
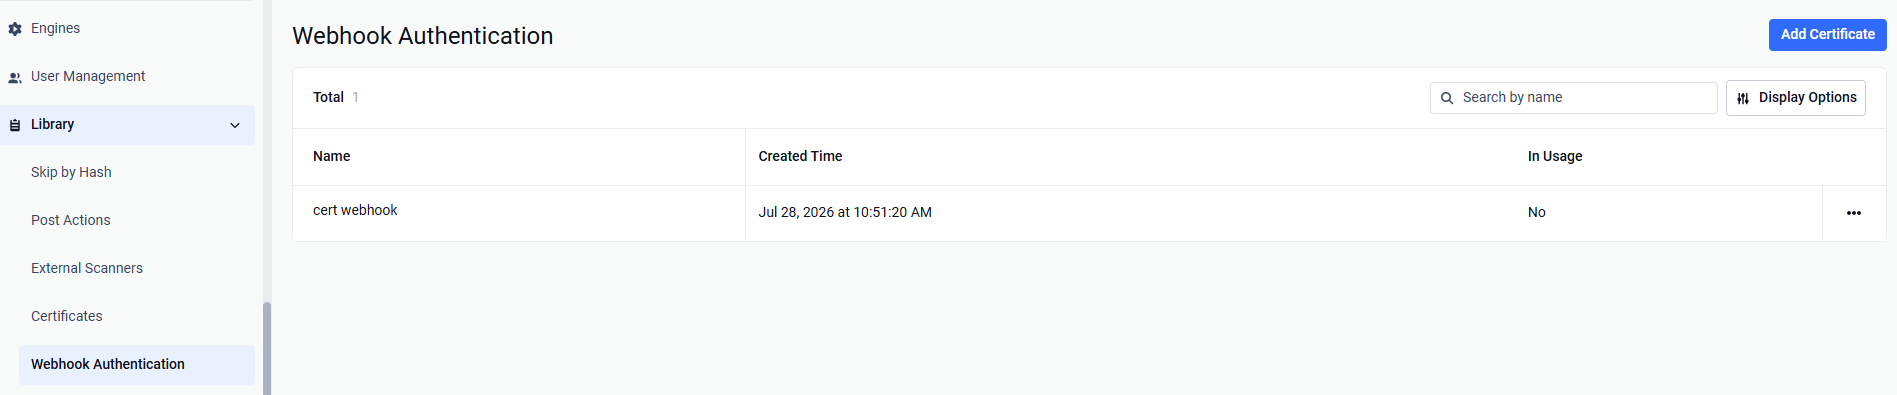
Skip by hash
This page contains three lists which belong to similar but different features. Note that rules listed in these there features are globally applied, not per workflow.
Skip engines
Allowlist
Blocklist
Hash can be either MD5, SHA1, SHA256 or SHA512.
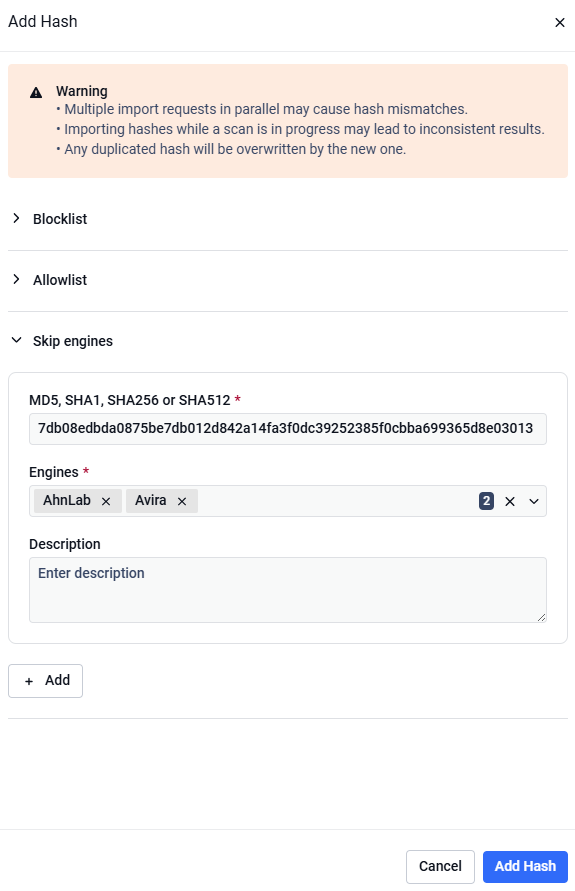
Skip engines
On this page, users can define rules on what files should be skipped by what engines. That is, a file with the given hash will not be processed by the listed engines.
Hash and at least one engine are mandatory to give, comment is optional.
Allowlist
Files whose hashes listed here will be globally allowlisted, so they won't be processed in any workflow and will be allowed.
Hash is mandatory to give, comment is optional.
Blocklist
Files whose hashes listed here will be globally blocklisted, so they won't be processed in any workflow and will be blocked.
Hash is mandatory to give, comment is optional.
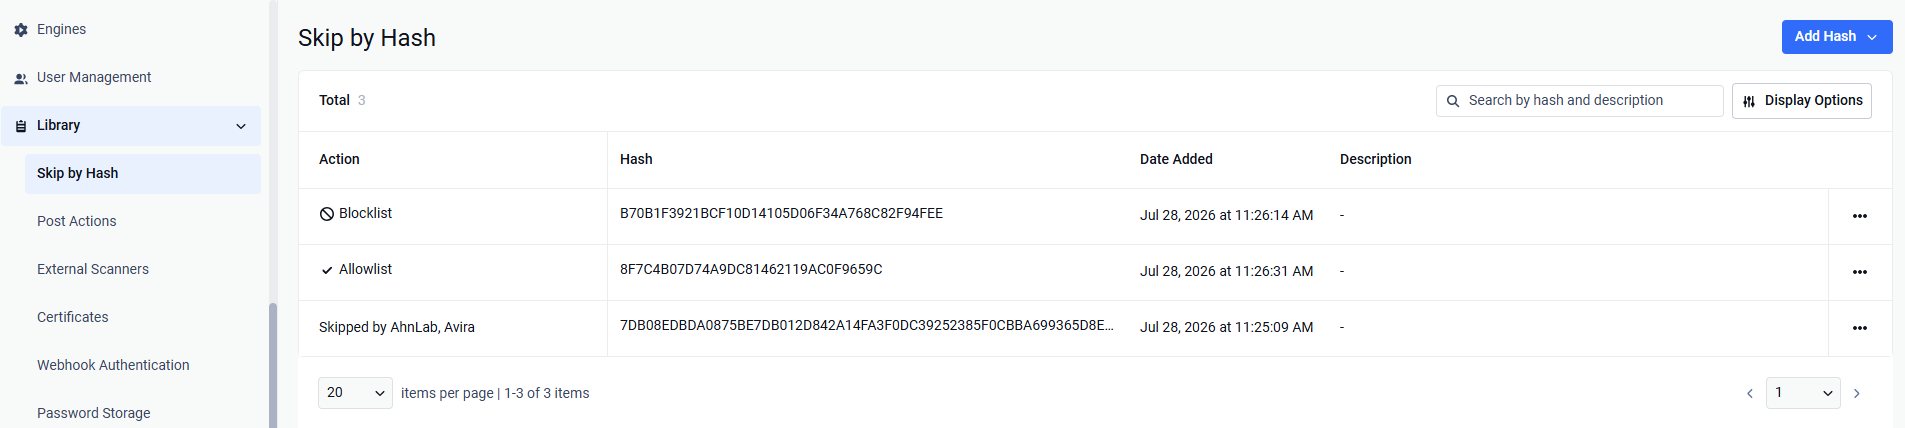
Adding a hash to skip list
On the Skip by Hash page click the "Add hash" button on the top right. There are 2 ways for Administrators to add hashes to the application.
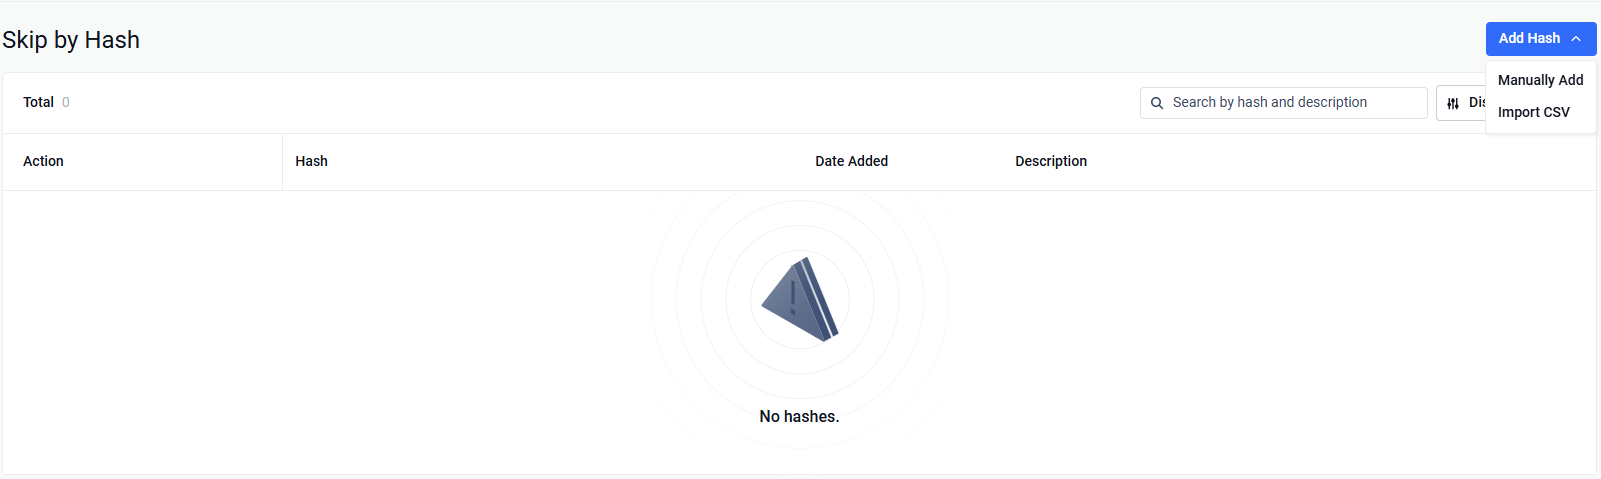
Manually Add:
Allow you to input hashes and information manually.
Import CSV:
Enable you to prepare a list of hashes and upload all at once to the application.
A CSV template is downloadable for easy content input.
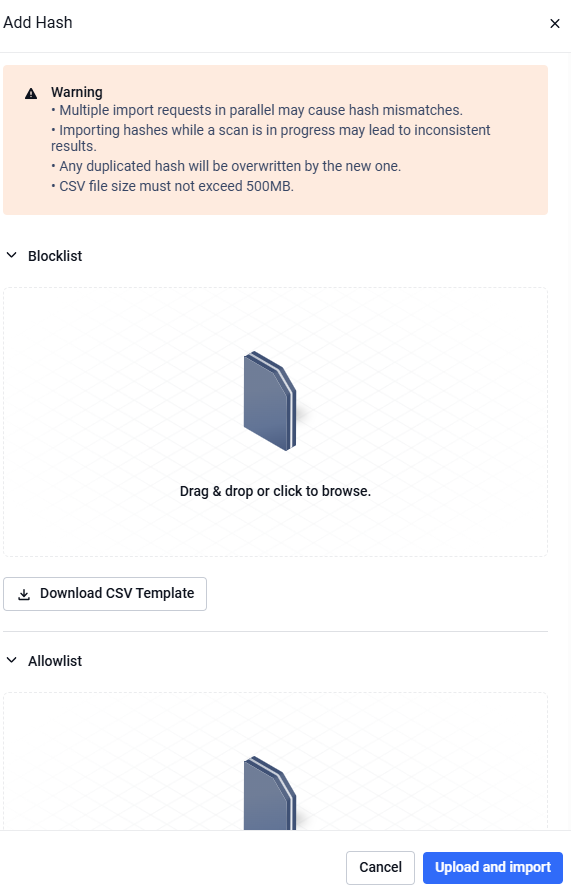
Select your desired way, then "Add hash" page appears.
After giving the necessary information, click on the Add button.
Password Storage
Users can define and manage lists of passwords used for file decryption, streamlining the process when handling encrypted or password-protected files.
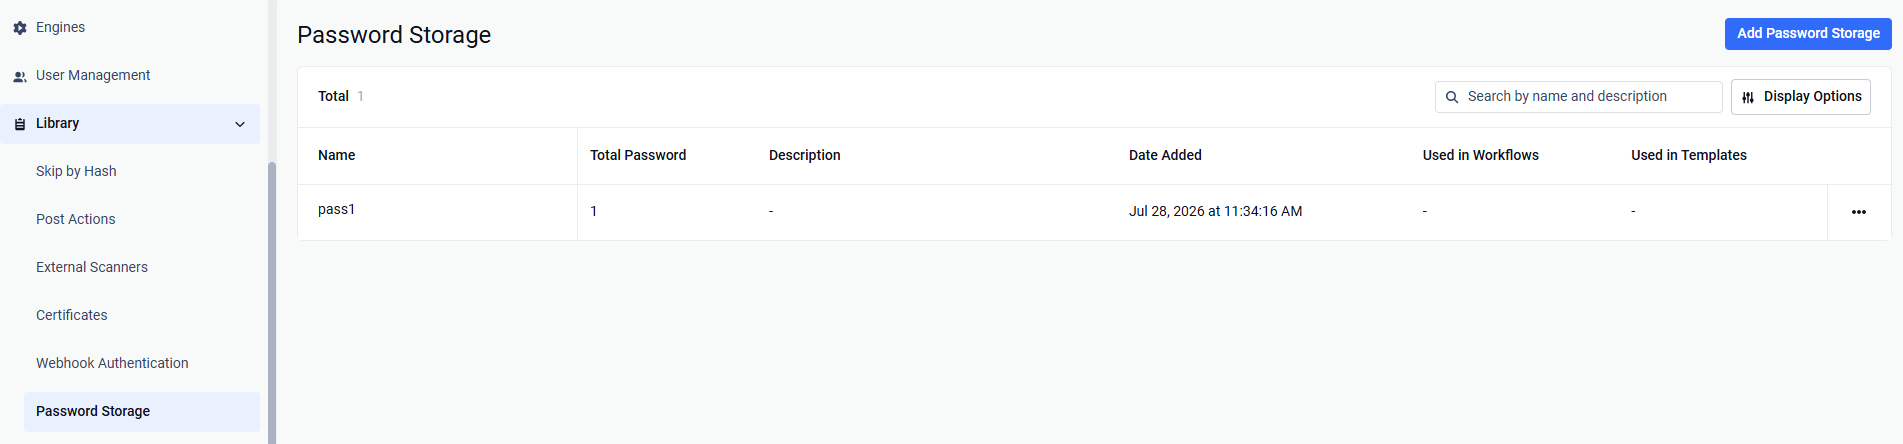
We can add up to 50 password storage and each password storage can contains up to 10 passwords
Click the "Add Password Storage" button for adding new password storage
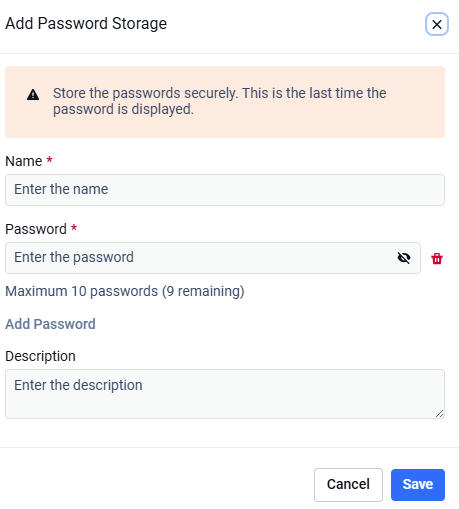
We also can add more passwords in the list for later, click to any password storage to modify
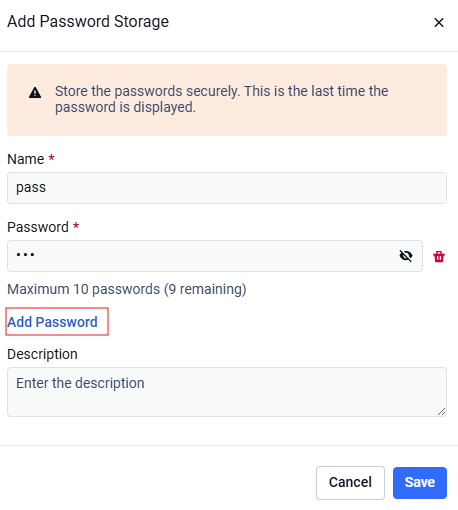
We can only add more passwords to the list, we cannot modify the old passwords or remove them from the list. To remove the password lists, we need remove the whole password storage.
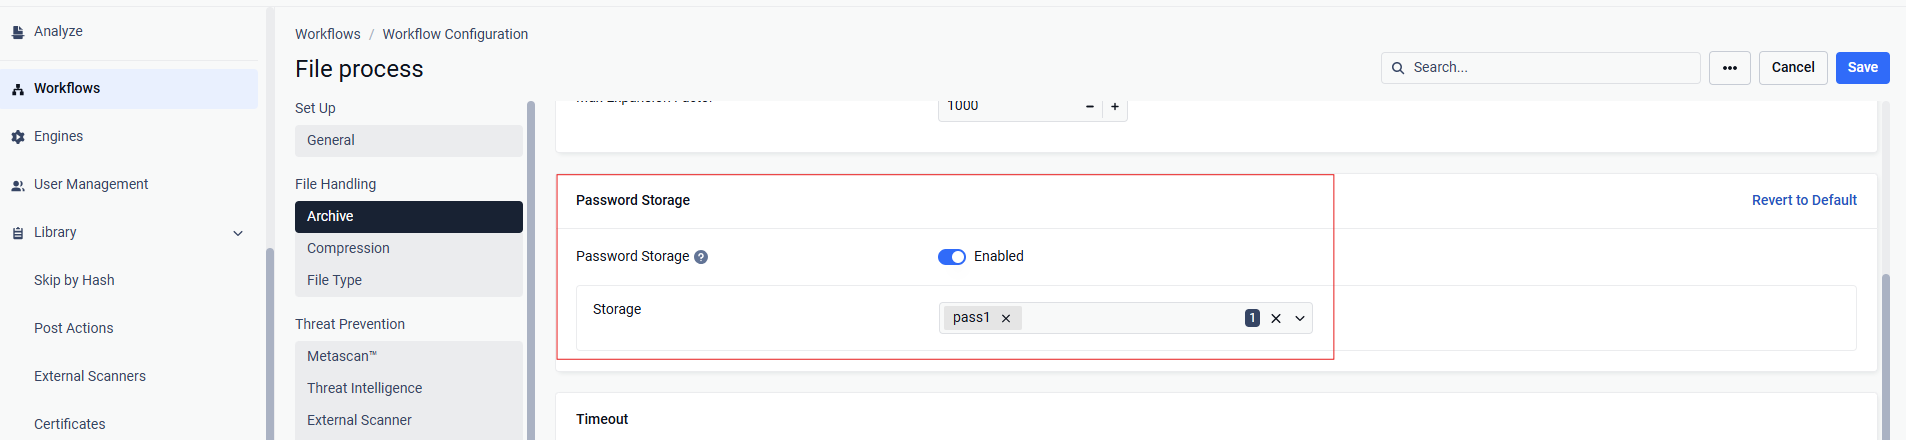
After creating the password storages, we need to go to the workflow rule setting to select the password storages that we want to use for a specific workflow rule.
Workflows > Workflow Configuration > Select a workflow rule > Archive tab > Scroll down and check Password storage