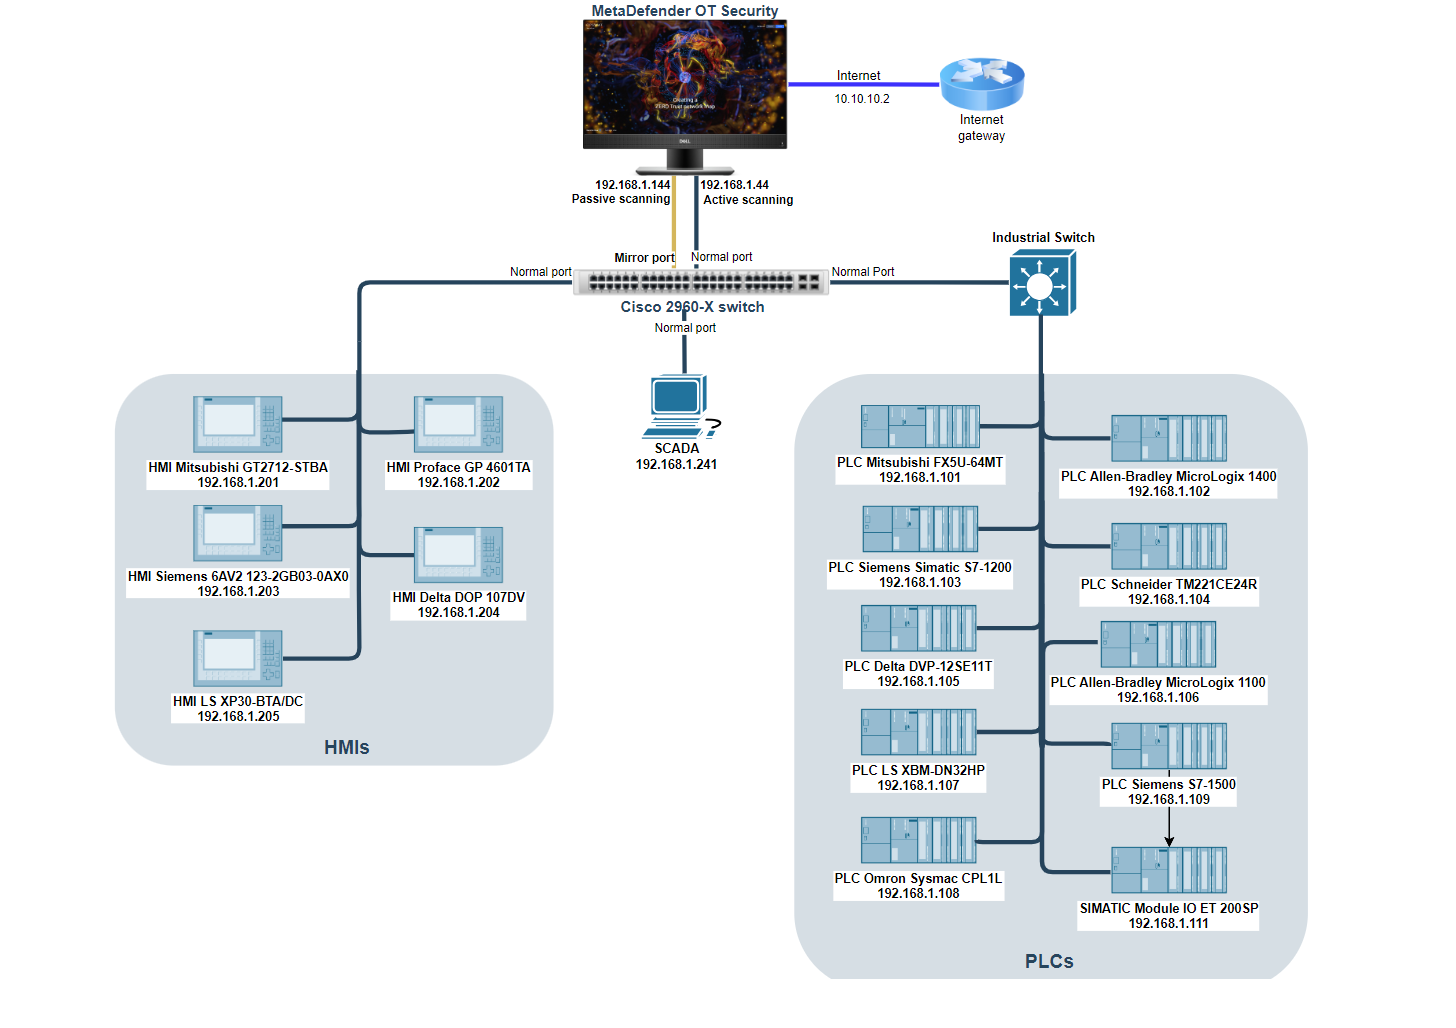
Currently, MetaDefender OT Security need to run with at least 2 NICs, one for active scanning connected to normal port on switch and one for passive scanning that connect to mirror port.
Below is the example basic setup for the system with MetaDefender OT Security.
Switch Port Mirroring
On the switch, user have to configure mirror port to monitor all other ports. The mirror port will copy all traffics that go through other ports and sent back to MetaDefender OT Security.
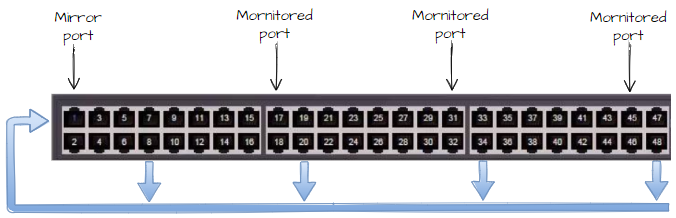
If user configure port Fa0/1 is mirror port, one of MetaDefender OT Security network interface cards must be connected to this mirror port for passive scanning, the second interface card can be connected to others (normal/monitored port) for active scanning.
Note: Please make sure that the switch OS version supports LLDP. For Calalyst 2960, the OS version must be higher 12.2(350)
Example for configuring port mirroring on Cisco switch:
After completing port mirroring configuration and connect MetaDefender OT Security to the switch, user can turn on All-in-one machine and MetaDefender OT Security will start automatically.
At the first time starting MetaDefender OT Security application, user need to do the Wizard setup so that MetaDefender OT Security can know which network should be scanned. The MetaDefender OT Security will be available only after you have successfully finished this wizard.
To start the Wizard, click on Start.
License Agreement
At the first page you can find License Agreement. You have to accept the terms before moving on. Please read through the License Agreement carefully and if you agree with it, check I accept the terms in the License Agreement and click Continue.
Select Language, Visual Effects, and Use on-screen keyboard
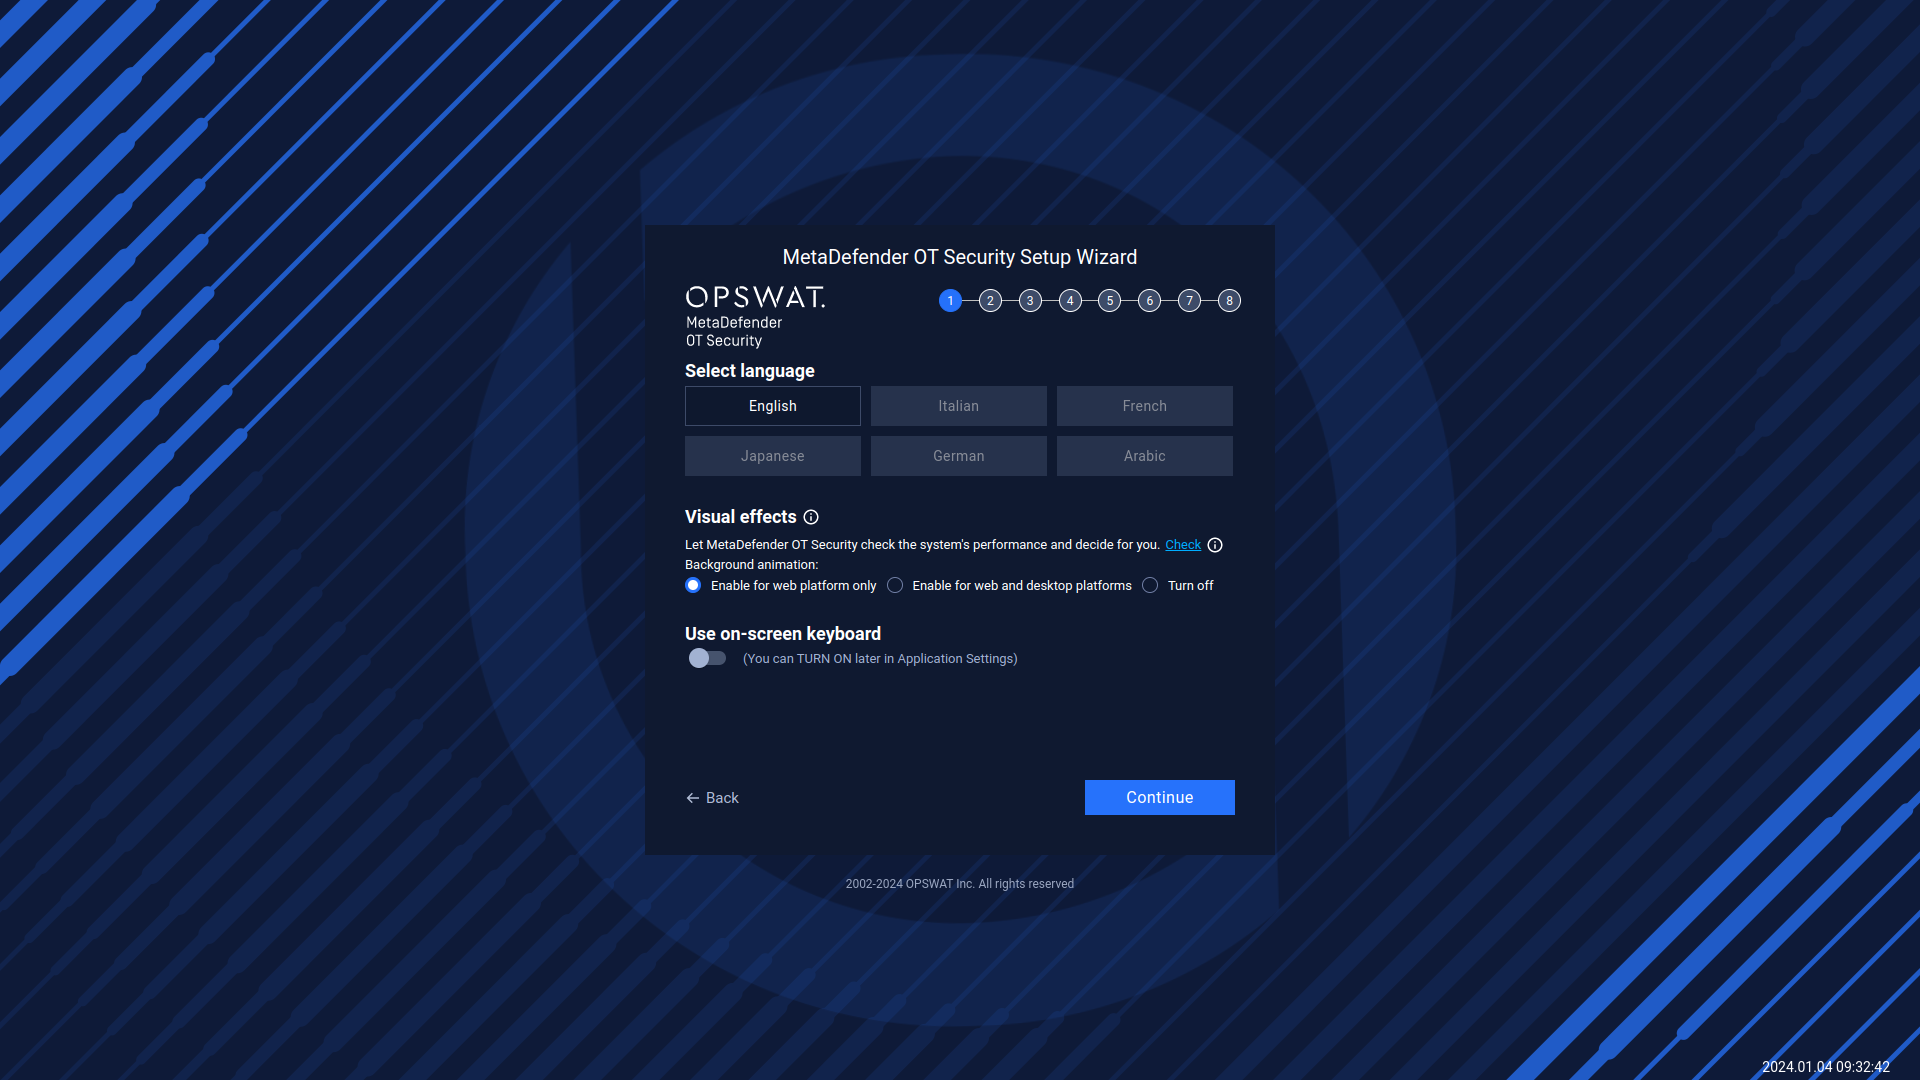
MetaDefender OT Security supports multiple languages. The default language is English, however, you can also change to a another language.
Choose a specific language and then you can go to the next step.
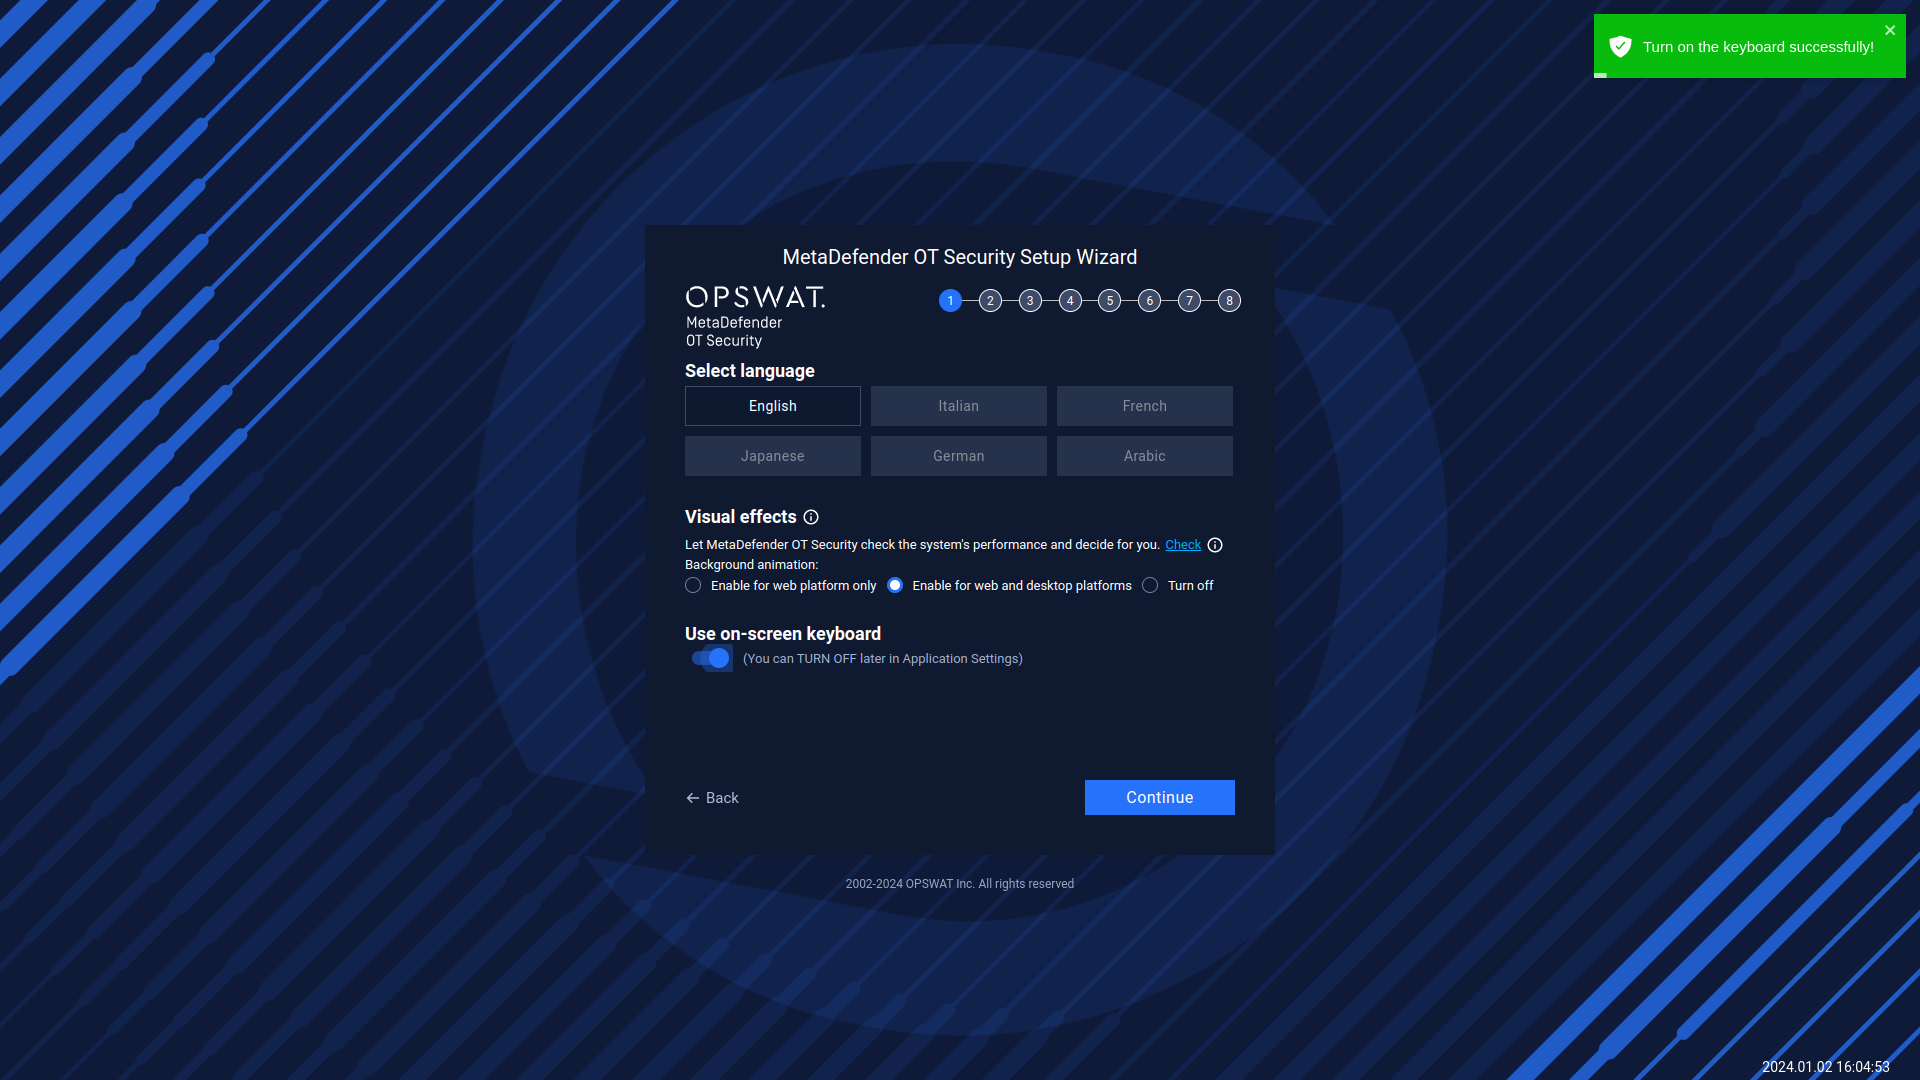
Turn on/off the toggle to use the on-screen keyboard. You can TURN OFF later in Application Settings, and then you can go to the next step.
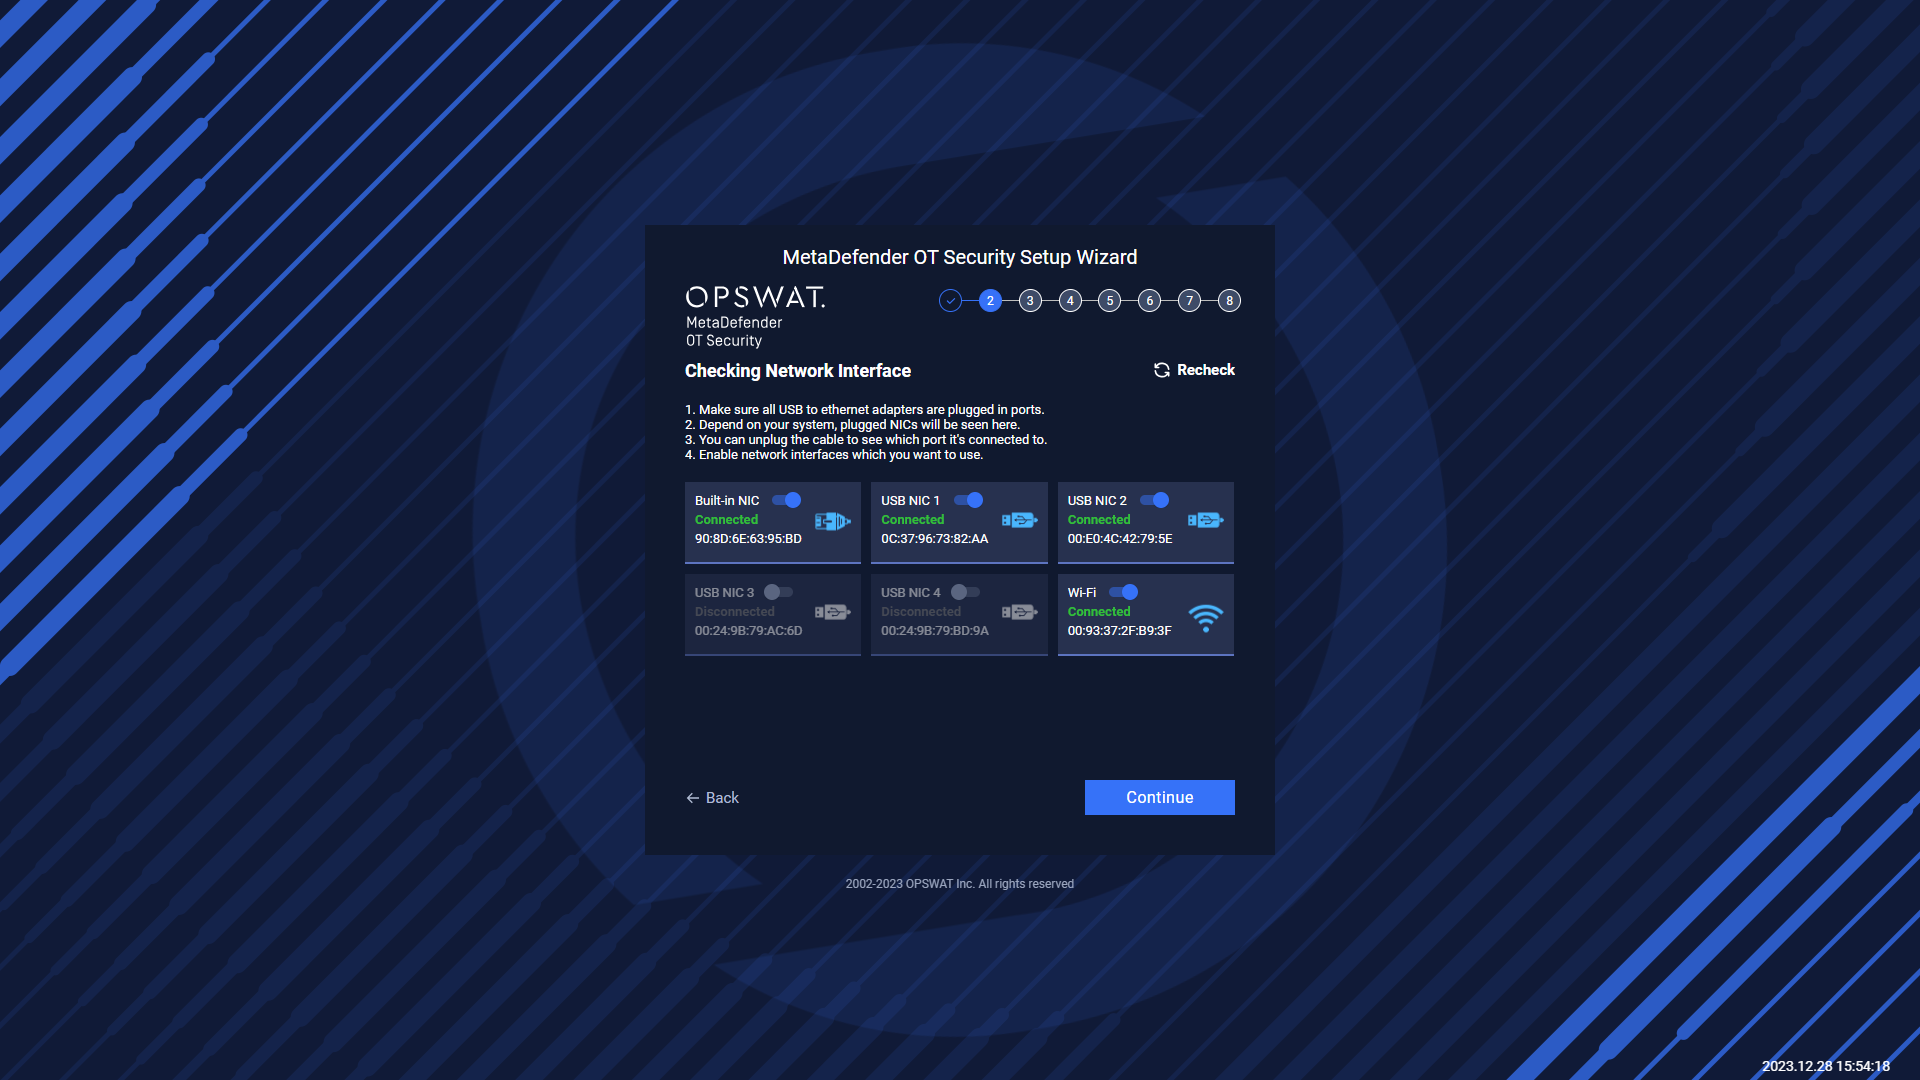
Checking Network Interface
During this step, our application will detect the Network Interface Cards (NICs) that are currently plugged into your computer. This allows our application to determine which NICs are available for use with our software.
If you have multiple NICs connected to your computer (such as a Built-in NIC, USB NIC 1, and USB NIC 2), our application will display all available NICs on the screen. To help you identify which port each NIC is connected to, you can unplug the cable and the status of the NIC will be changed to "Unavailable" in our application.
If our application is unable to detect all of your available NICs, you can click the "Recheck" button in the top right corner of the screen to make the application re-scan for all NICs.
To enable a NIC for use with our software, simply click the blue toggle button next to the NIC name. If you have NICs that you do not wish to use with our software, you can leave them disabled.
Note: Disabling a NIC will disconnect it from your computer, and it will not be available for use until you re-enable it. Thus, you need to enable the NICs that you want to use in MetaDefender OT Security before going to Step 03.
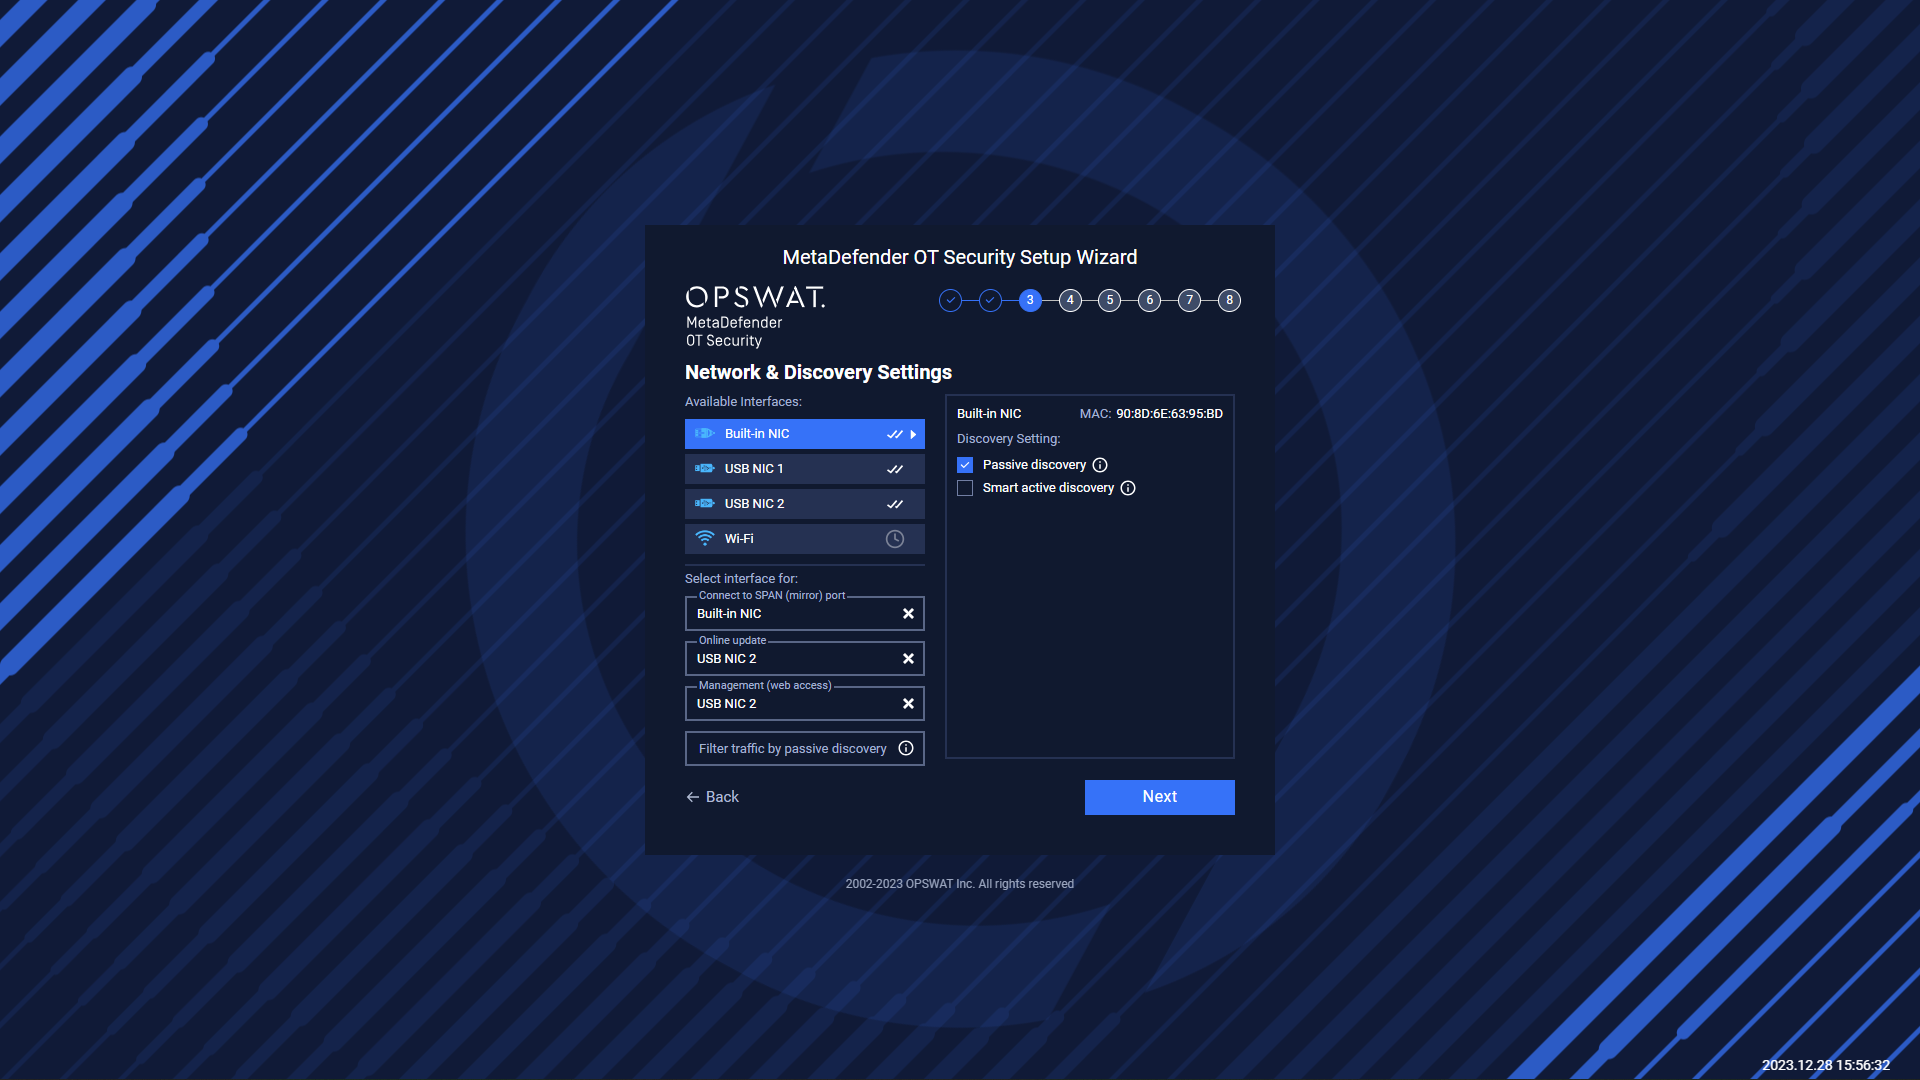
Network & Discovery Settings
In this step, you can view and configure a list of Available Interfaces (NICs) for your network. To configure a NIC, simply click on it to access the configuration options.

You can set up discovery settings for each NIC by selecting either "Passive discovery" or "Smart active discovery". The system will do the scanning base on the network configuration for NICs that you set up (for both active and passive scanning). Particularly:
Passive discovery: This setting allows the NIC to receive packets from Switch. This is useful for monitoring network traffic without disrupting it. Passive discovery requires the selected NIC to be connected to the SPAN (mirror) port of the switch. We recommend the users use built-in NIC for passive scanning to have better performance.
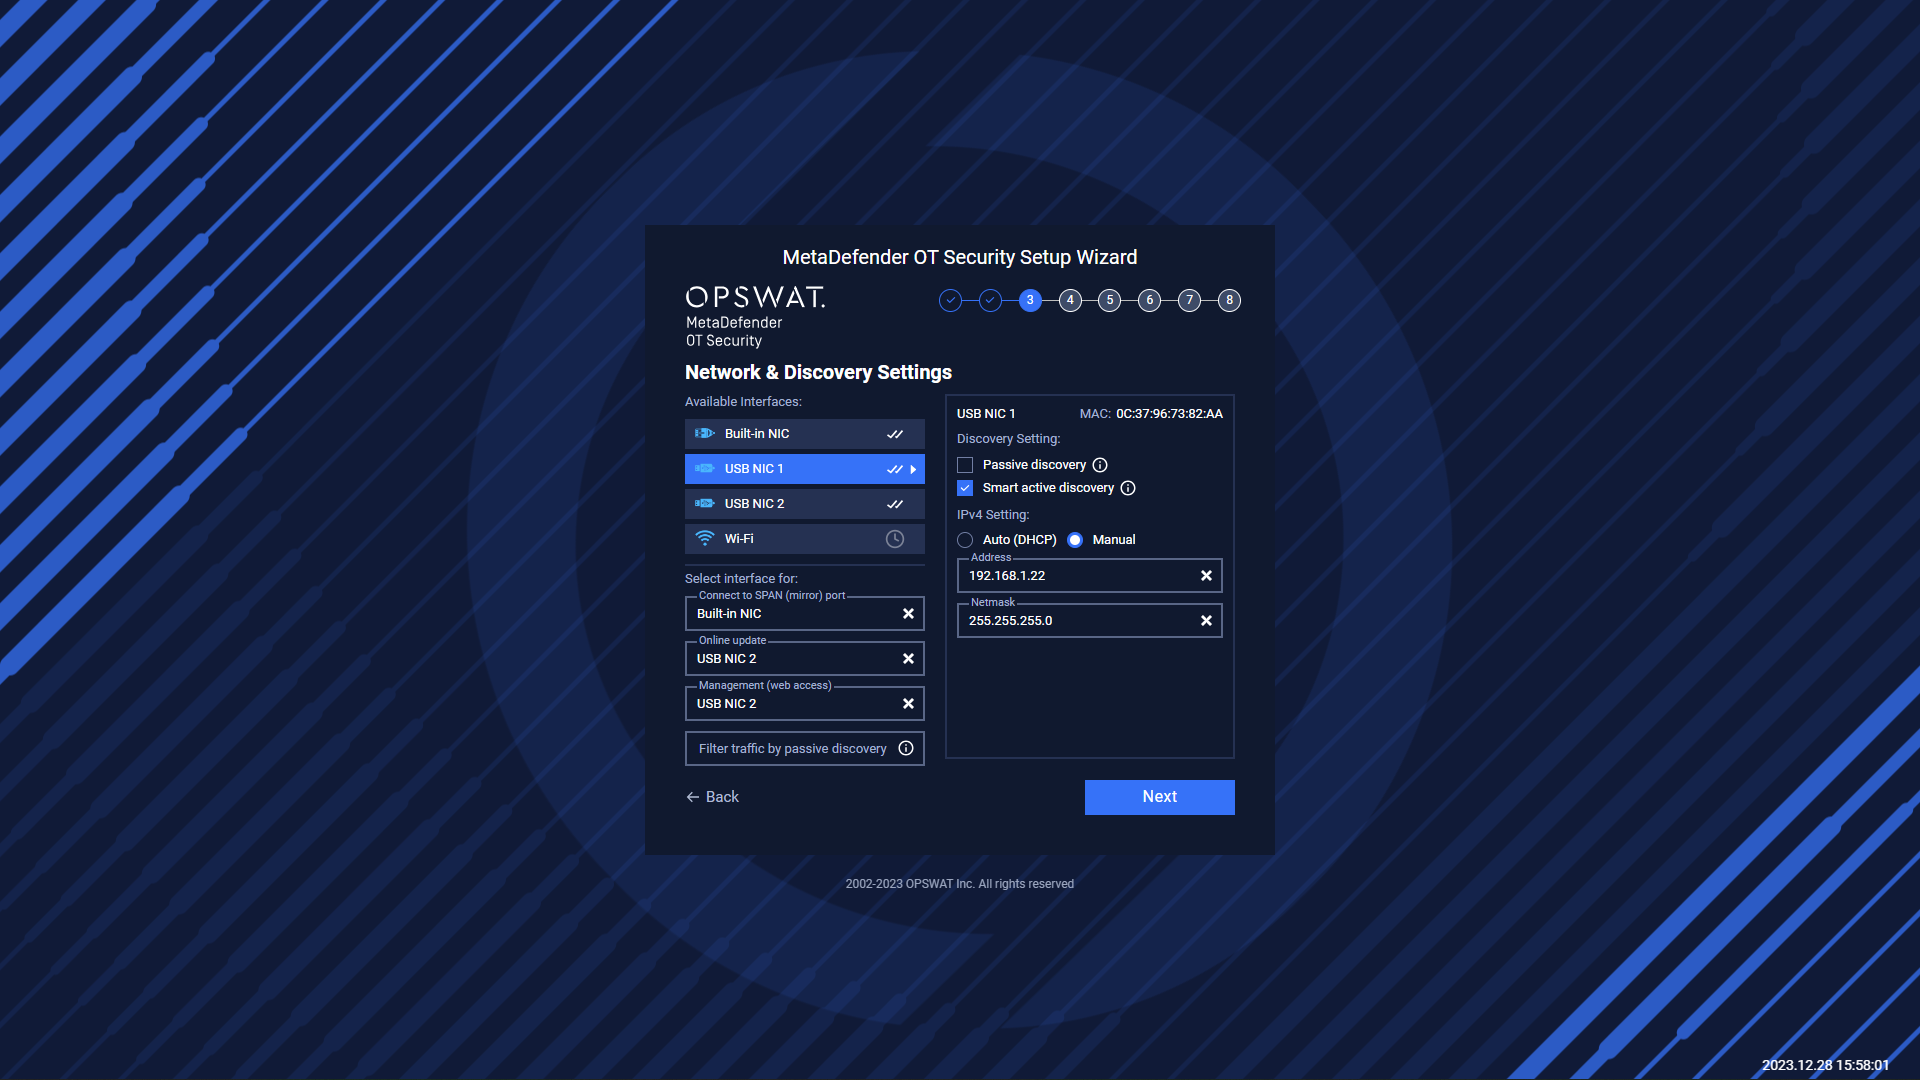
Smart active discovery: This setting sends packets to probe the network and discover other devices. This is useful for identifying network topology and detecting potential issues. Smart active discovery requires the selected NIC to NOT be connected to the SPAN (mirror) port of the switch.
For each NIC, you can set up the IPv4 address by selecting either "Auto (DHCP)" or manually inputting the address, netmask, and gateway. This allows you to customize the network settings to fit your specific needs.
It should be noted that:
You need to configure IPs only for NICs selected to use as Active Discovery, Online Update, and Management (Web access).
You do not need to configure the IP for the NICs used as Passive Discovery.
MetaDefender OT Security captures only traffic from NICs that are configured as Passive Discovery or Active Discovery. It does not capture traffic from Online update or management NICs.
In addition to configuring the NICs, you can also select specific interfaces for each of the following purposes:
Connect to the internet for online updates: This allows the NIC to access the internet for online updates and downloads. Please select the NIC that you want to use for the internet.
Connect to SPAN (mirror) port: This allows the NIC to monitor network traffic on the SPAN (mirror) port of the switch.
Management (web access): This allows the NIC to be used for web access management.
Filter traffic by passive discovery: This filter-down traffic is applied for all interfaces selected for passive discovery. You can enter an IP range to filter the traffic. If this field is empty, MetaDefender OT Security will scan all possible traffics from NICs with passive discovery.
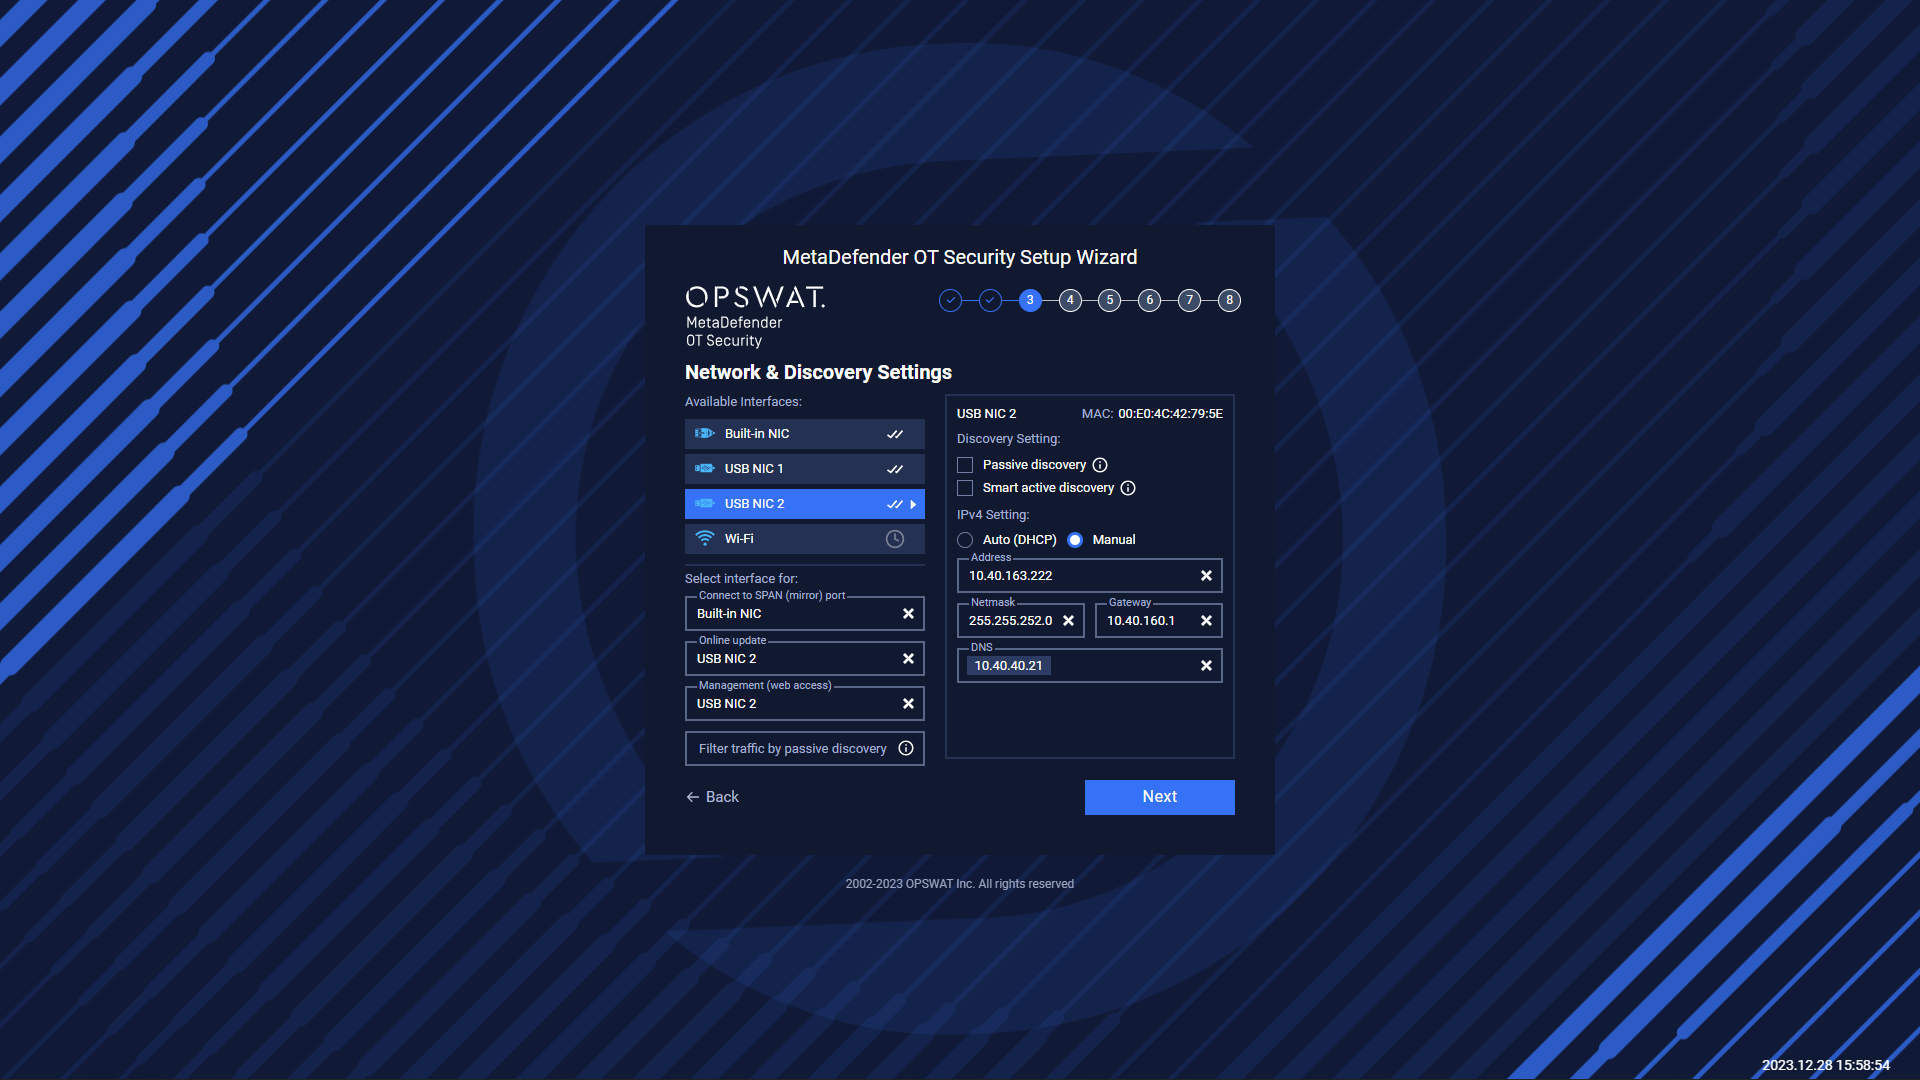
Here is one example of MetaDefender OT Security NICs Configuration.
The Filter traffic by passive discovery: we can input ranges IP of the discovery network like the picture above for example. Or if this field is empty, MetaDefender OT Security will scan all possible traffics from NICs with passive discovery.
If we don’t need to scan the network NIC USB NIC 2, we can disable all scanning options.

If you need to use only one NIC for both active and passive scanning, you can leave the "Connect to SPAN (mirror) port" field blank and check both Passive discovery and Smart active discovery for that NIC.

You can also use Wifi for Online update. You can configure it by clicking on Settings next to the gear icon.
Please navigate to Settings → Discovery Settings to see more detail about Wifi configuration.
Click on “Next“ to go to the NICs summary screen.
Once you have configured your network settings, a "Network Configuration Changed" pop-up might appear to confirm that the list of NIC configurations has been updated. This pop-up will display the time of each change to help you keep track of any updates.
If the configurations are correct, you can simply click "Cancel" to dismiss the pop-up.
If you notice any errors or need to make further changes, click "OK". You can go back to Step 2, "Checking Network Interface” to check the network configuration again.
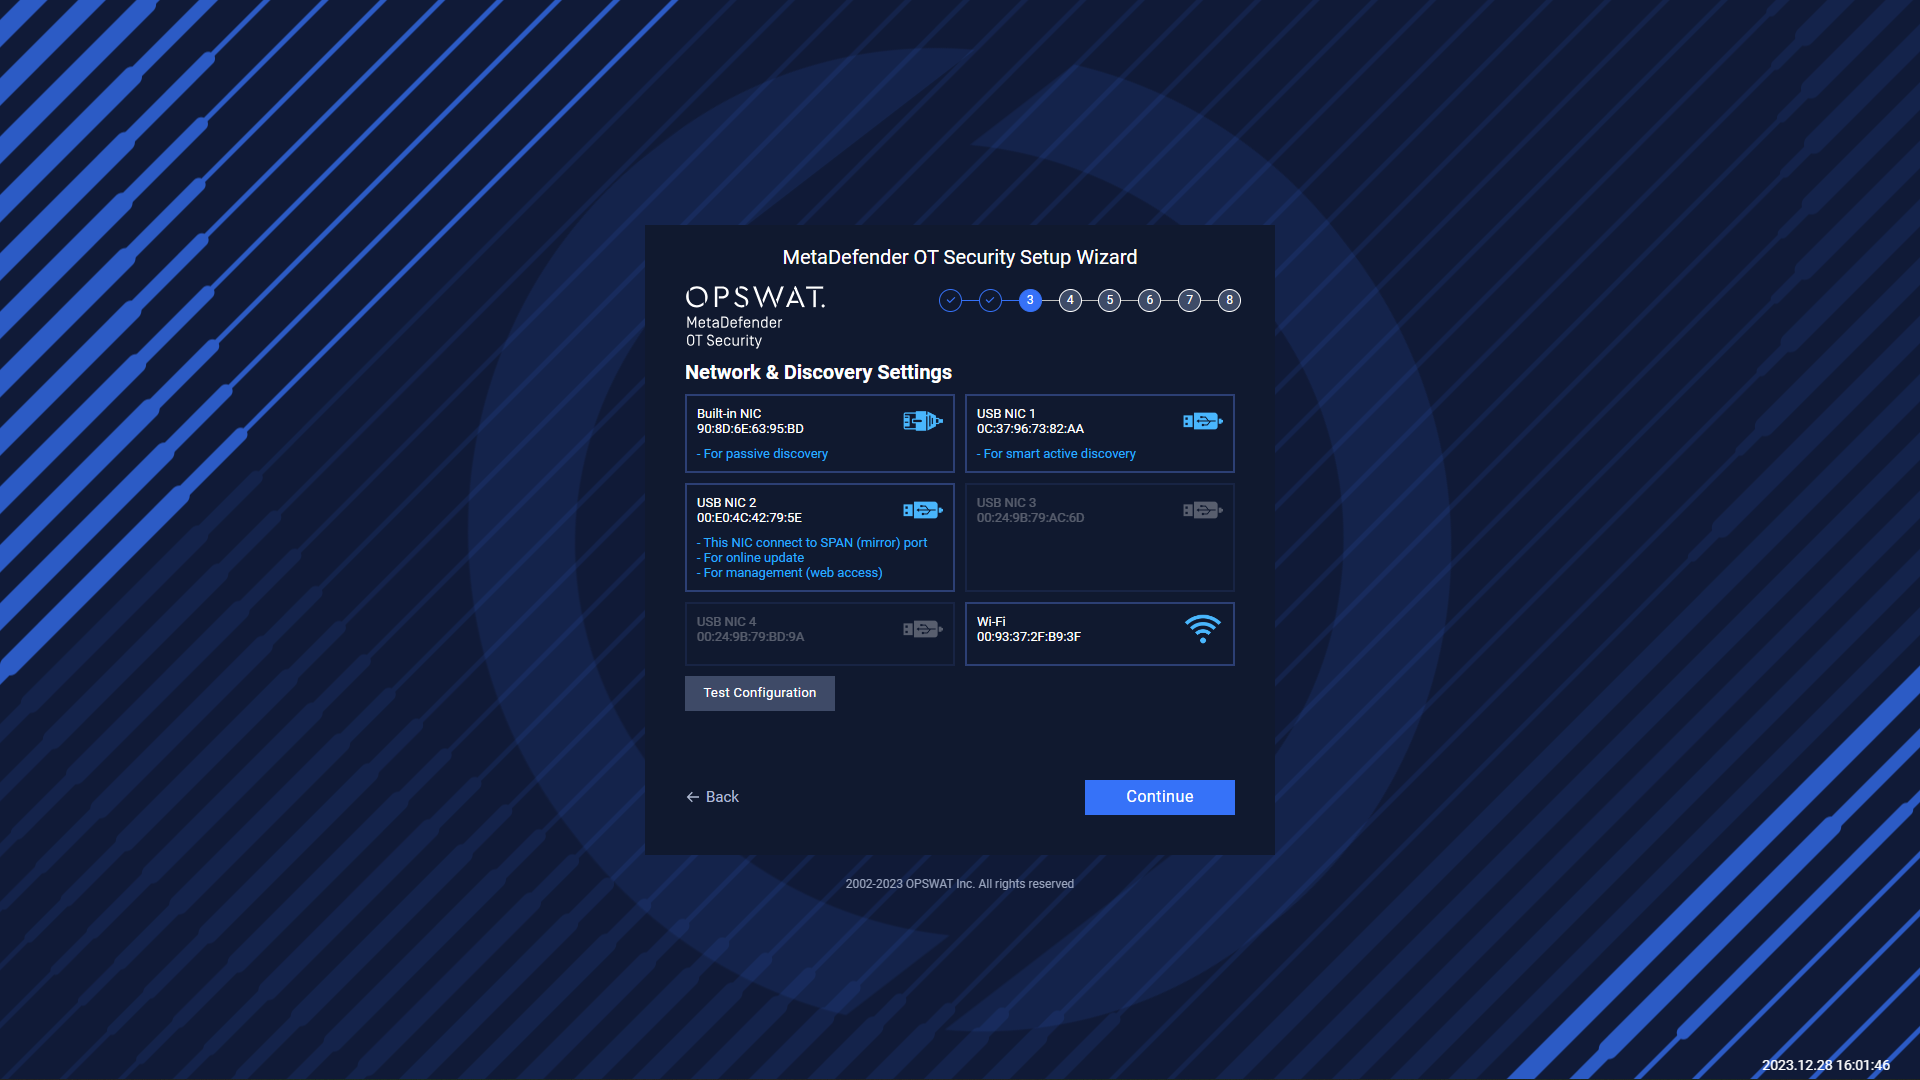
Once you click the "Next" button, a summary of your previous NIC configurations will be displayed. It is important to carefully review this summary to ensure that your configuration is correct. If needed, you can click the "Test Configuration" button to check the basic functionality of each NIC based on your configuration settings.
The "Test Configuration" feature allows you to check the connectivity of each NIC and ensure that they are functioning properly. This can be particularly helpful if you are unsure whether your configuration settings are correct or if you want to verify that each NIC is properly connected to your network.
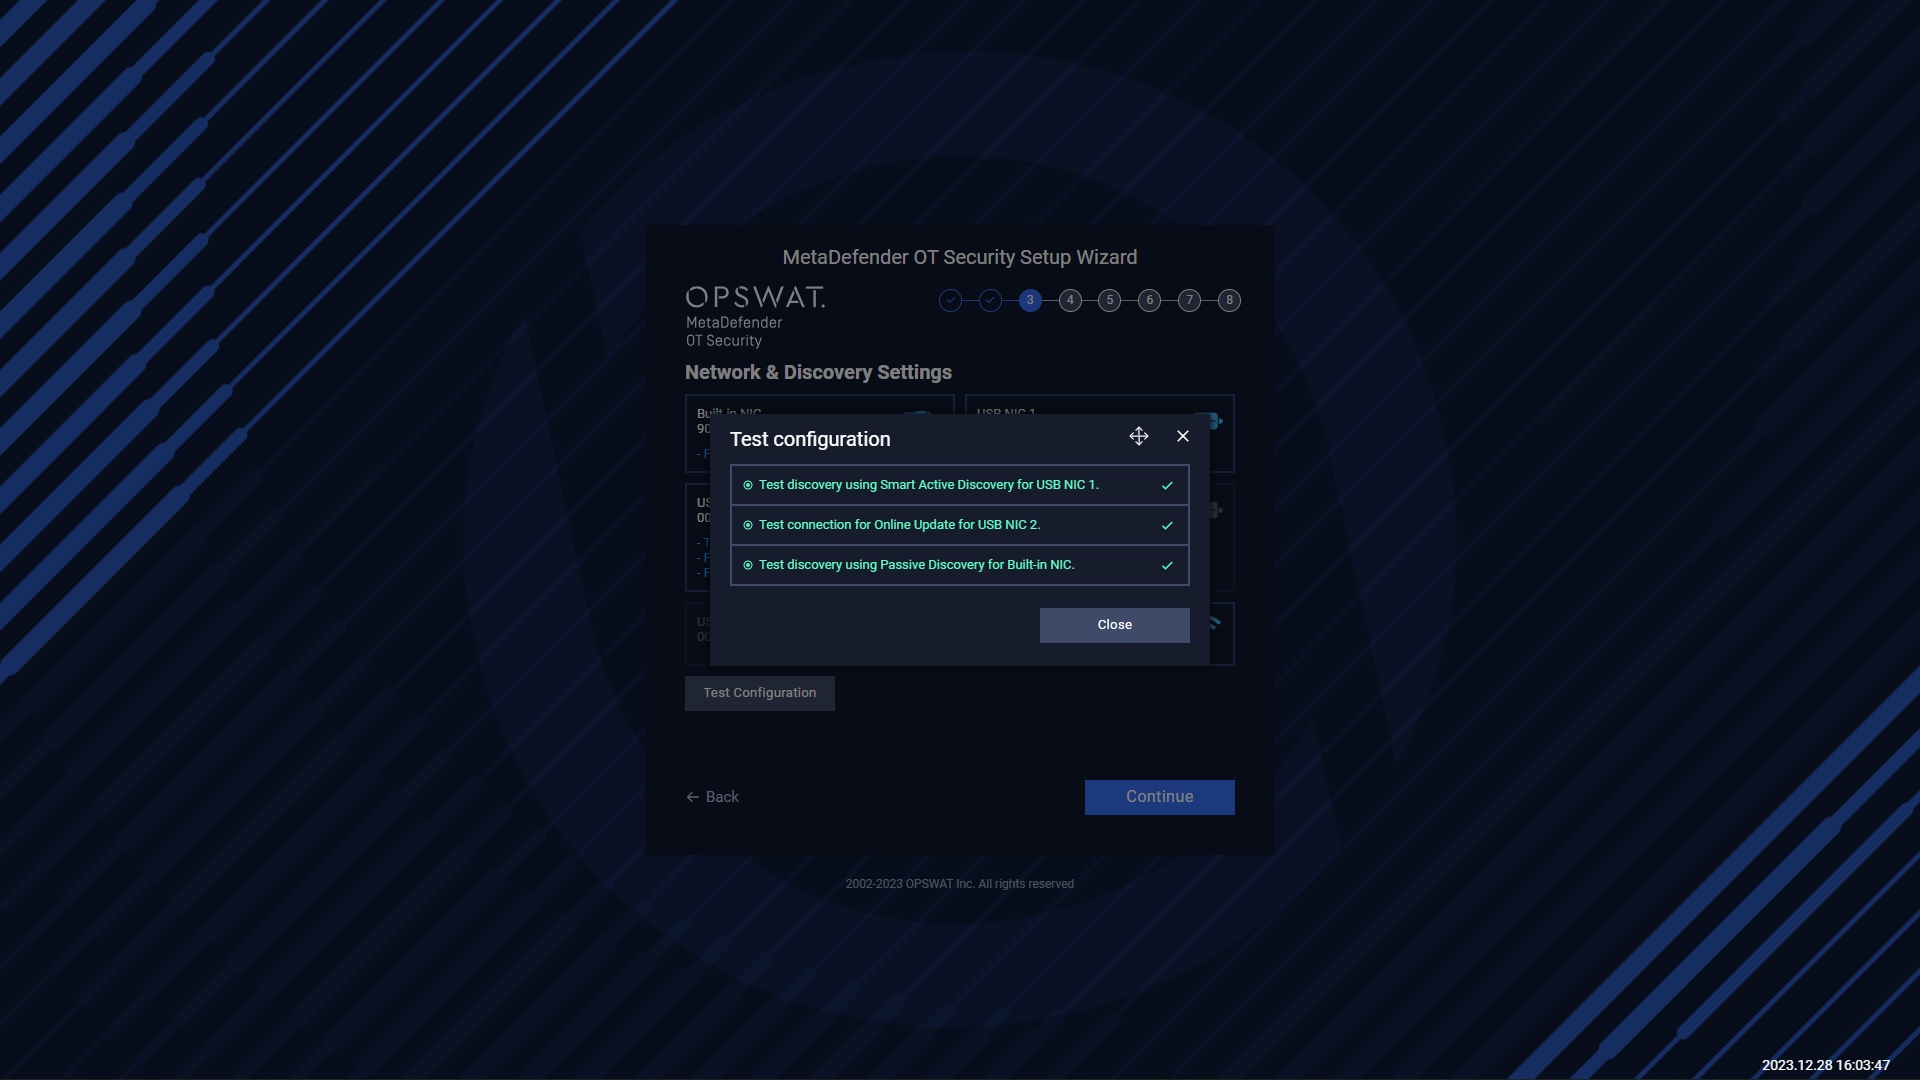
Click on Continue to go to the next step.
Select TimeZone
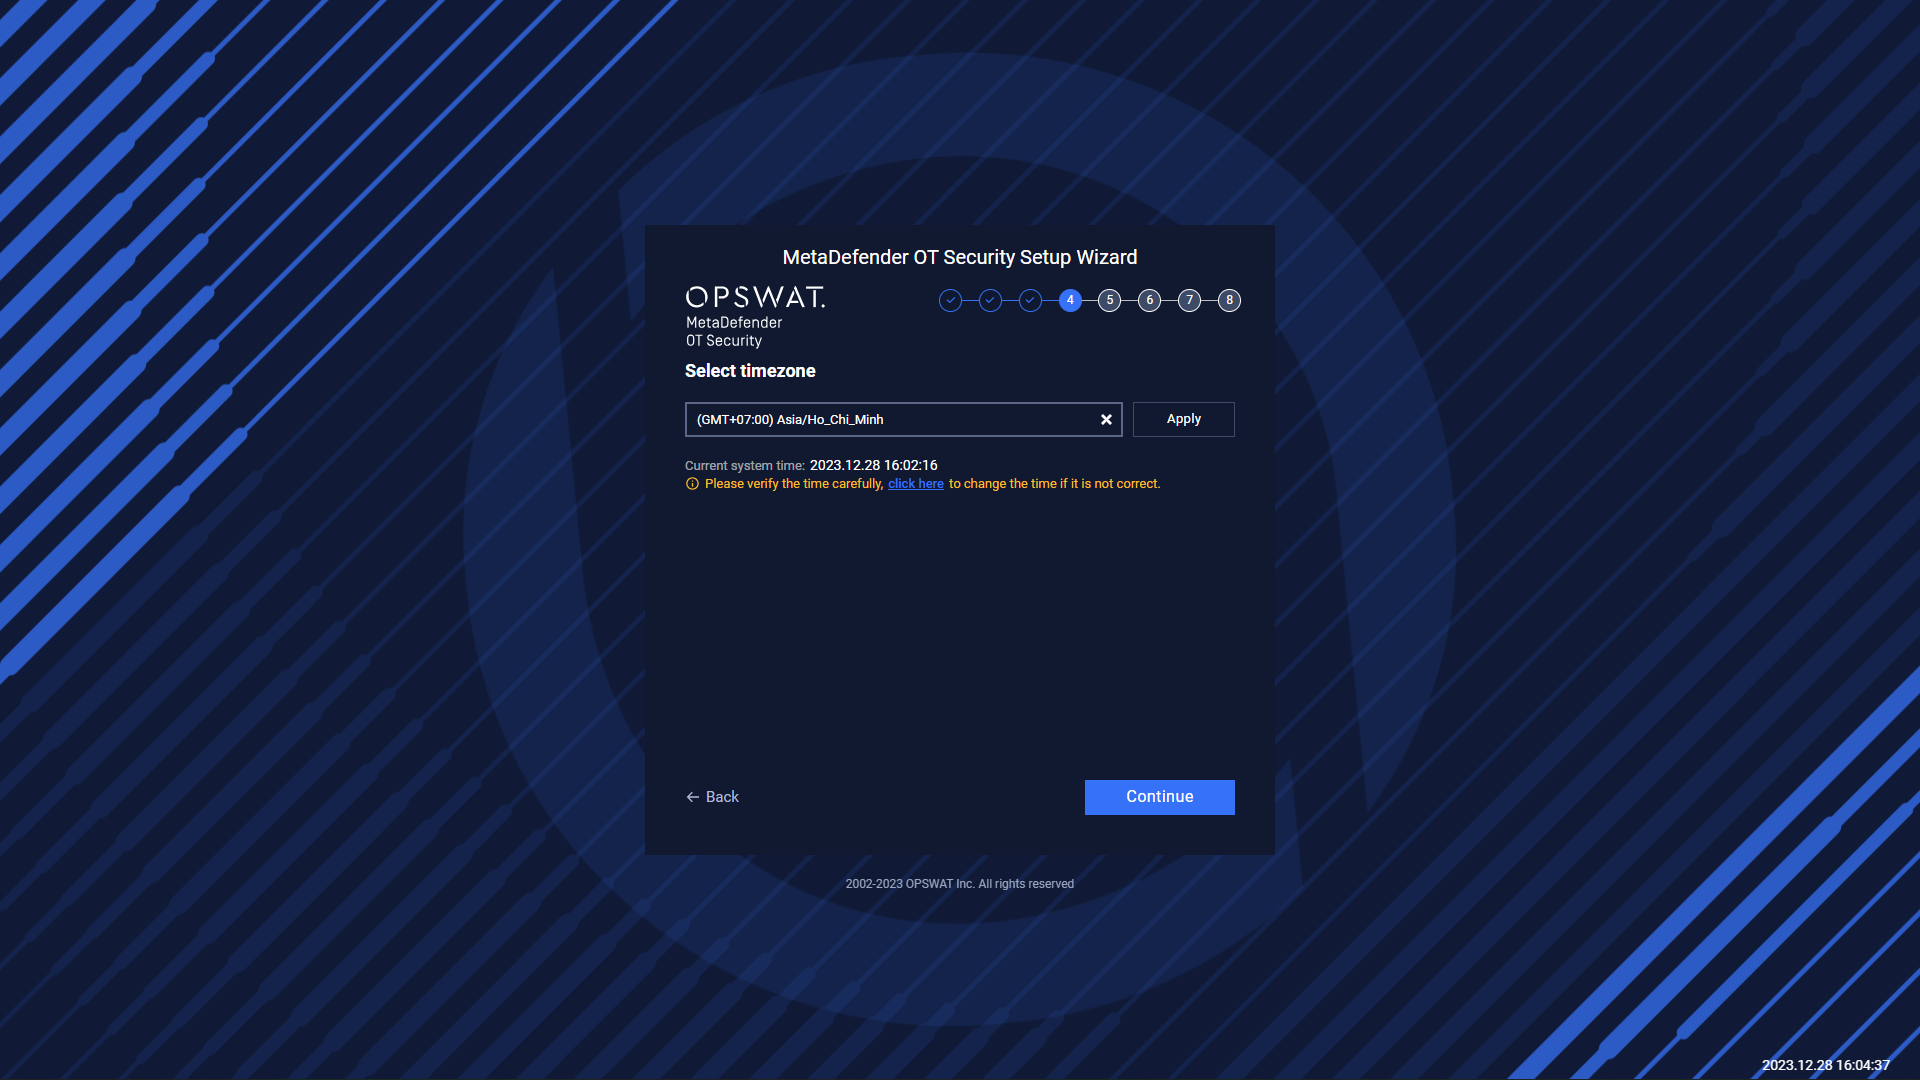
Select the timezone for the system
In case, after selecting a specific Time Zone the time displayed is wrong. The user can click here to change if it is not correct.
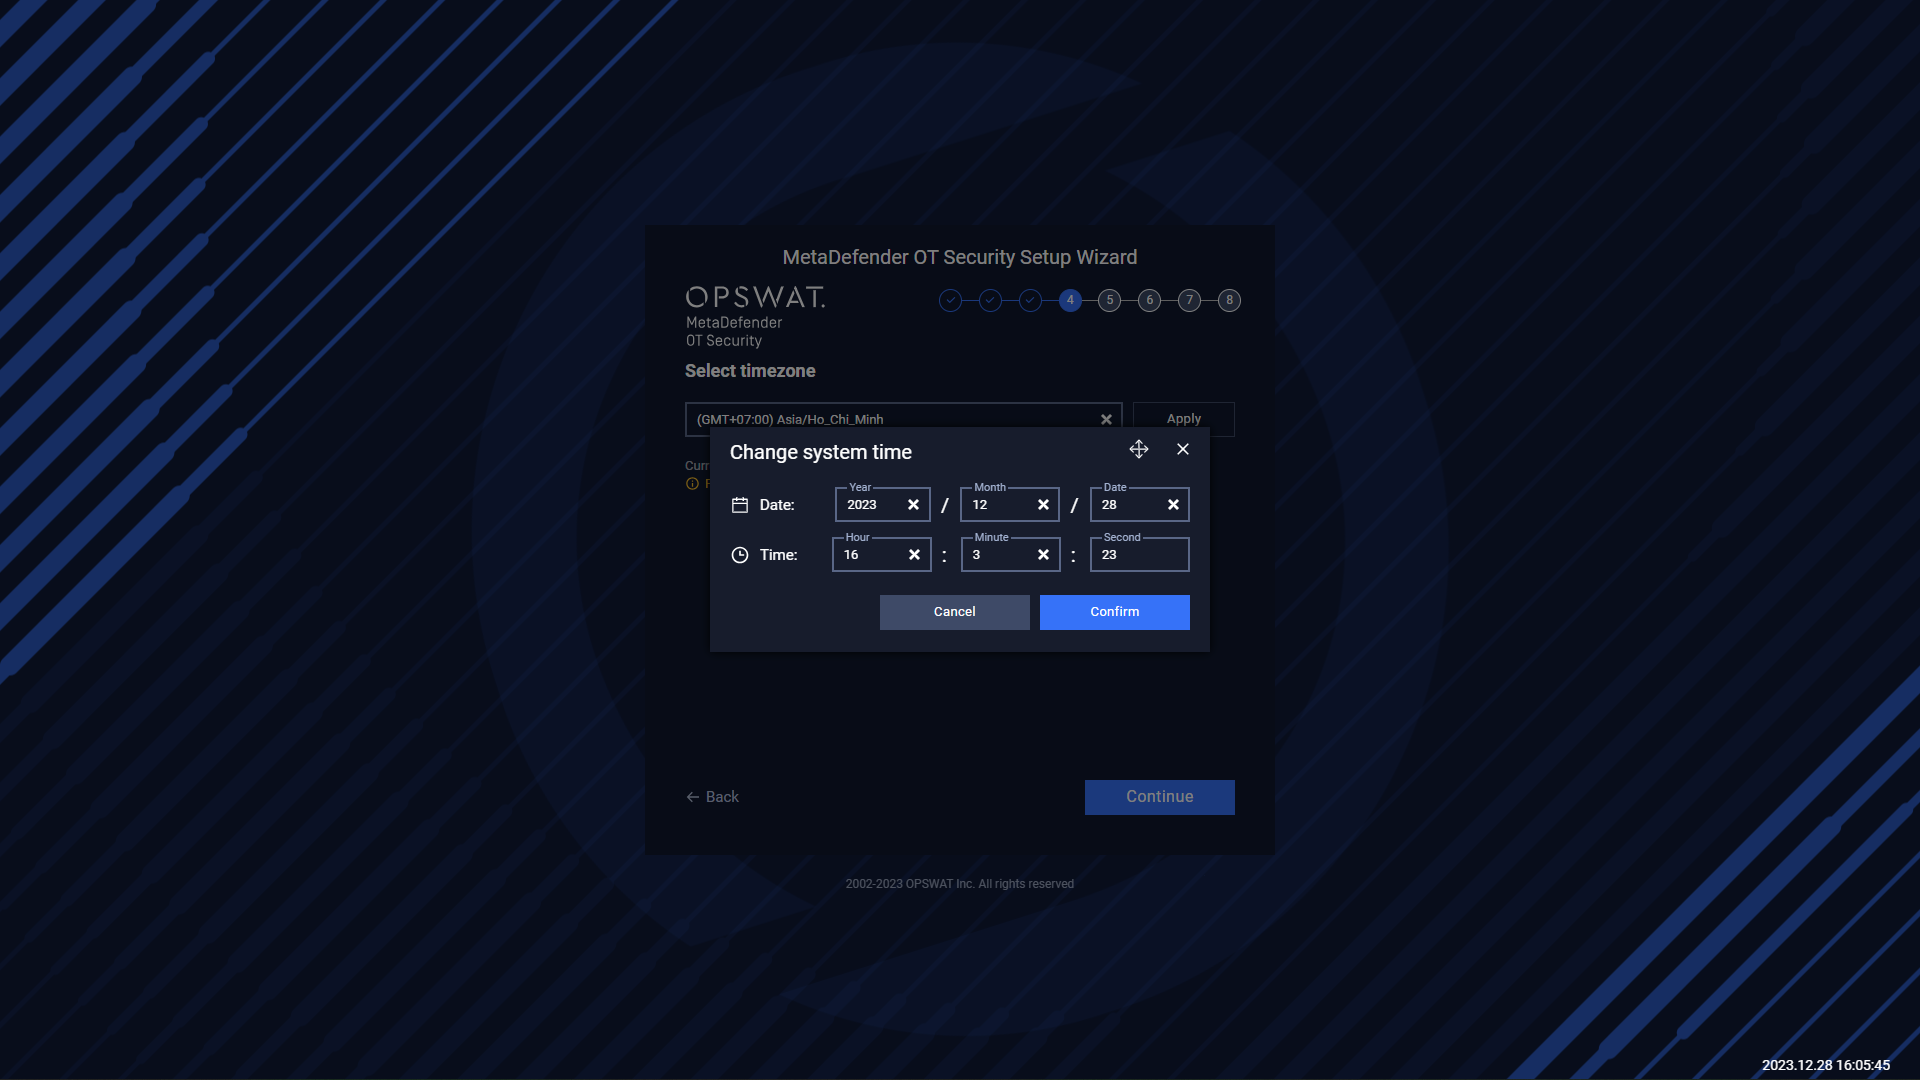

Then select Confirm and Apply
Click Continue to go to the next step.
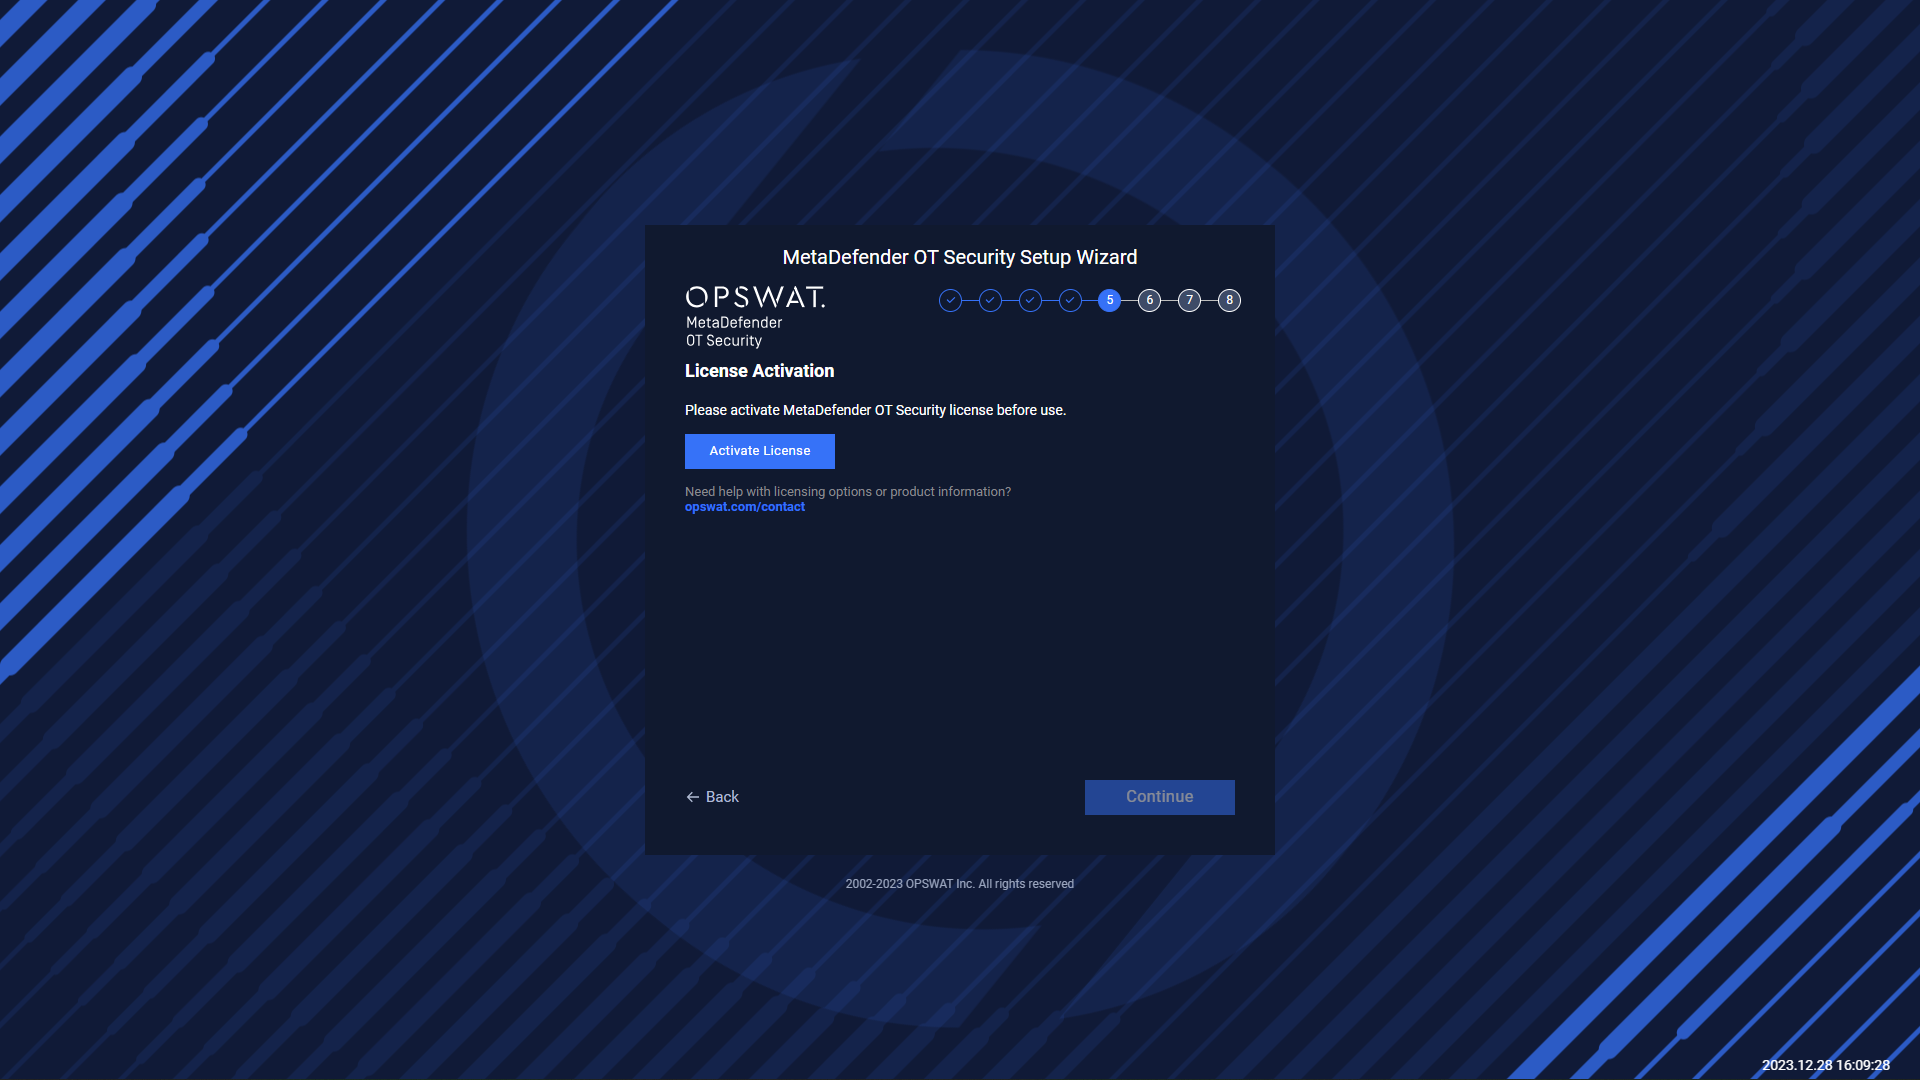
License Activation
Click on Activate License to open activation option.
There are two types of activation:
Online: User need to input activation key.
Offline: The user needs to get the deployment ID from MetaDefender OT Security, download the license file from My OPSWAT (http://my.opswat.com ), and copy it to the USB. Then plug the USB into the MetaDefender OT Security AIO machine to activate.
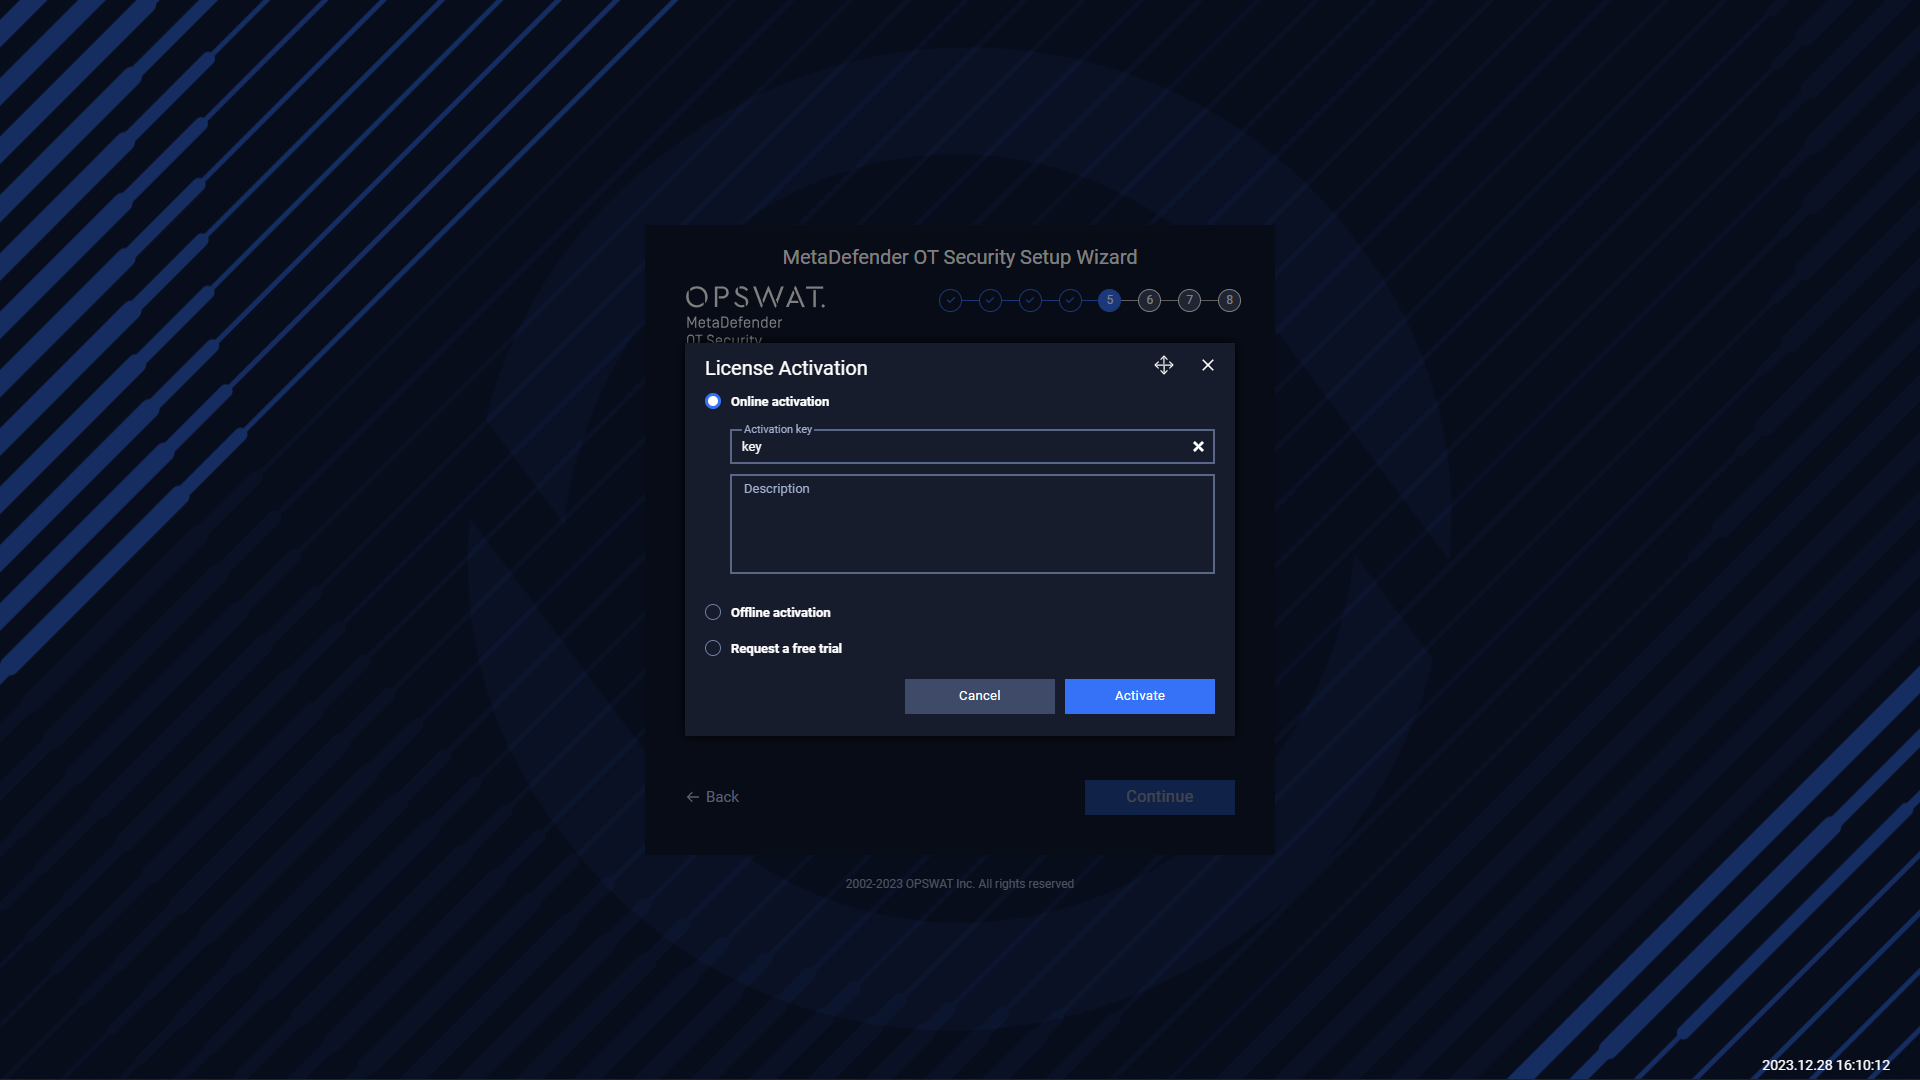
Click Activate to continue the next step
Create System Admin user
Enter the password to continue.
OPSWAT Central Management Configurations
Enable/Disable the toggle to open OPSWAT Central Management configurations
Default the toggle is disabled
Please navigate to Settings → Application → Integration to see more details about OCM configuration.
Select Learning Time and Predefined Alert Policies
You can input the time for MetaDefender OT Security to learn the normal system status before turning on Anomaly Detection.
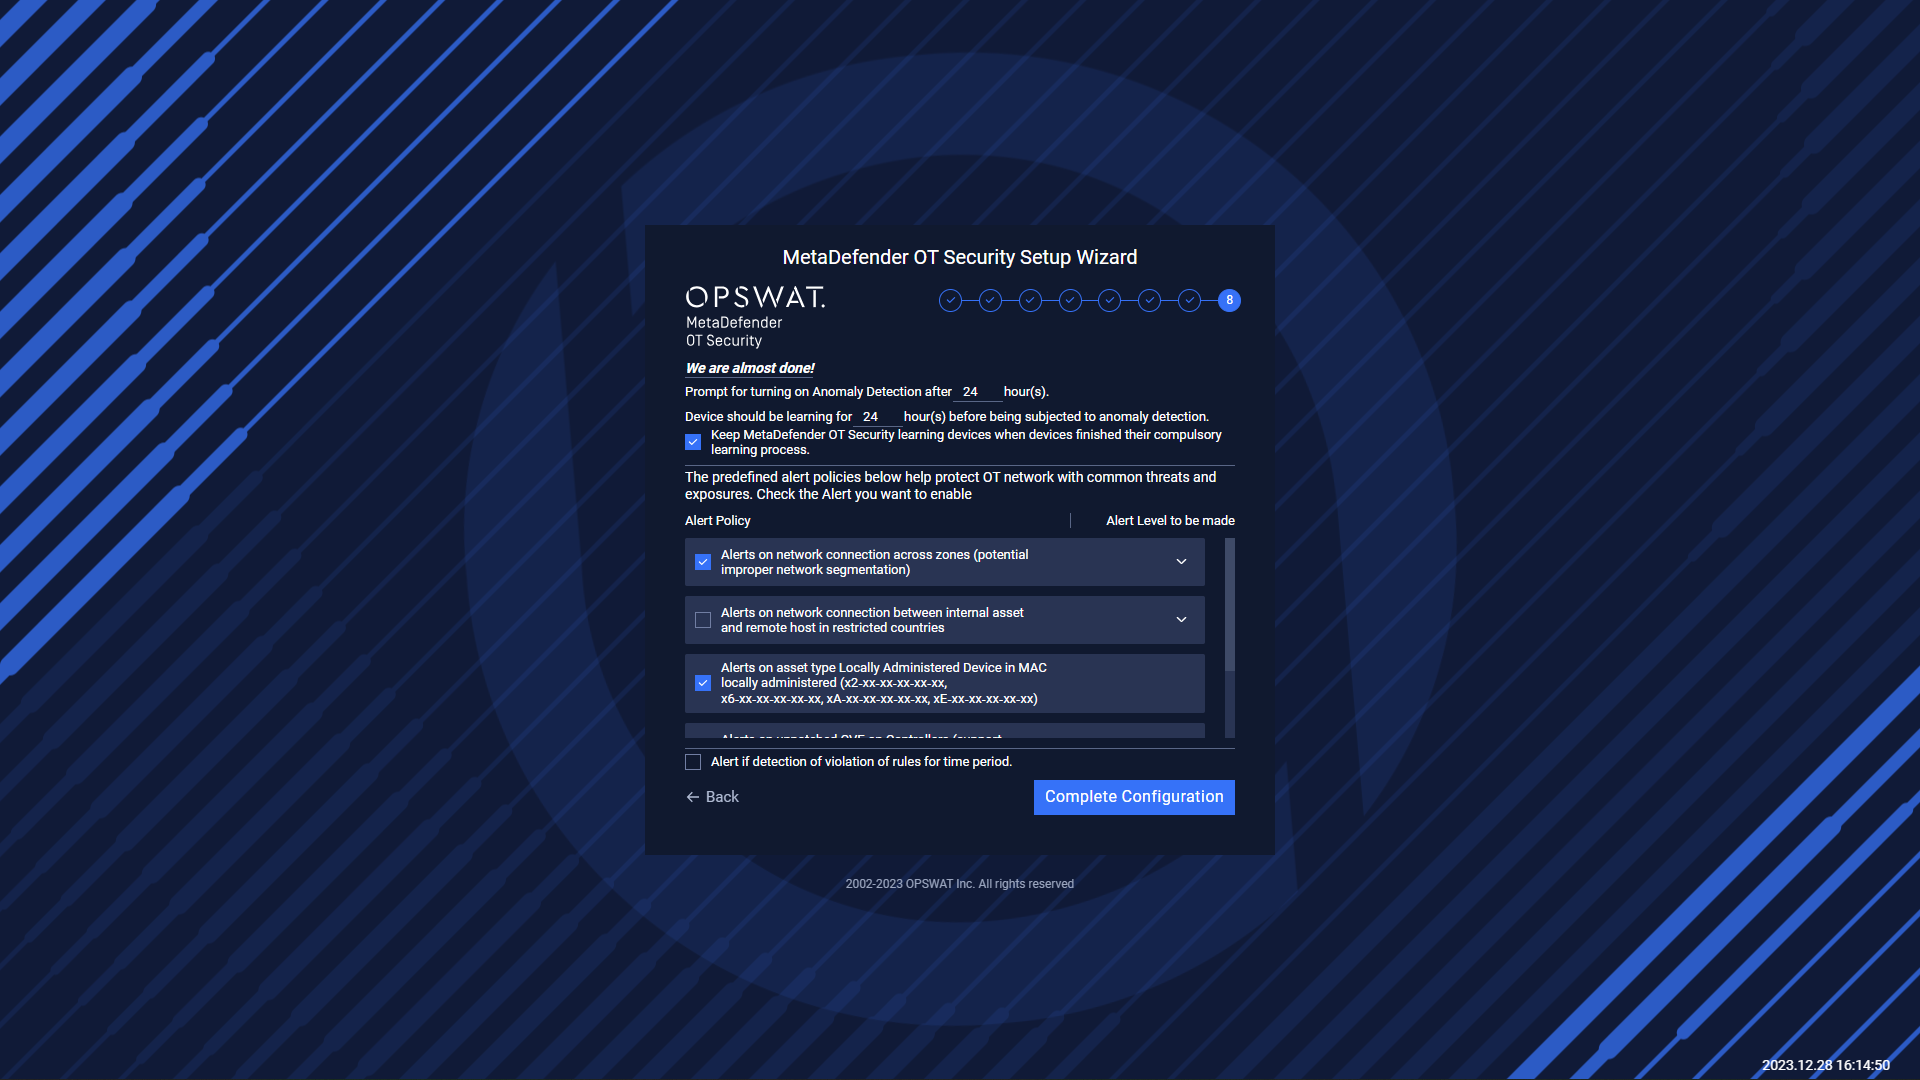
You can choose the common alert policies by check on them. Or click on them to expand more detail about that policies.
Then click Start MetaDefender OT Security and wait for MetaDefender OT Security is ready.
Note: Note: Please wait for 15 seconds after the MetaDefender OT Security application starts for the best experience. MetaDefender OT Security is not supported for multi-tab.