Configuration
MISP (Threat Intelligence) Integration is accessible under Integrations > MISP (Threat Intelligence) of the MetaDefender OT Security Enterprise Manager
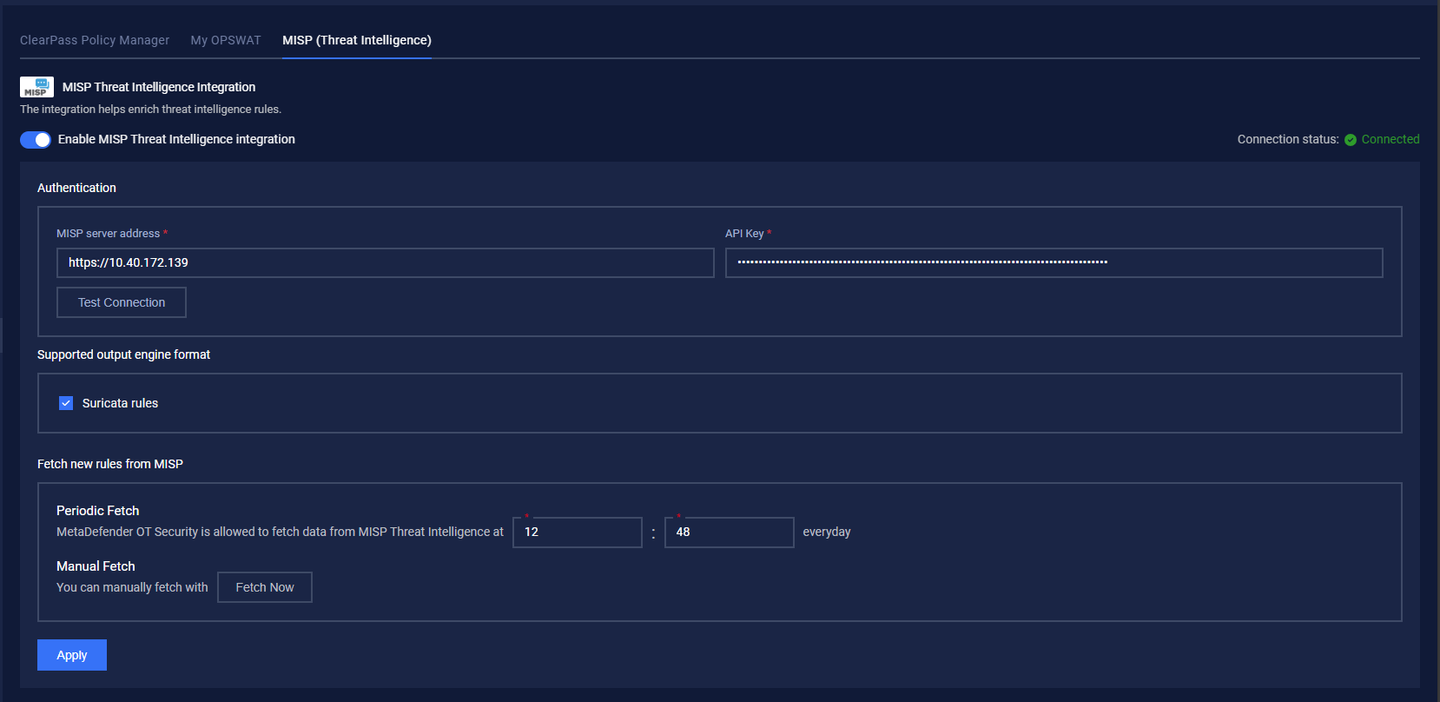
After clicking "Enable MISP Threat Intelligence Integration", the configuration screen appears. Below is an overview of the setup process:
1. Authentication
All fields in this section are required. Use the values collected during the MISP Threat Intelligence configuration. Use the API key for authentication.

Configuration Authentication
The table below explains the fields used for configuration in detail:
| Field Name | Value/Notes |
|---|---|
| MISP server address | Enter the MISP IP Address. |
| API Key | Use the API key for authentication. |
2. Supported output engine format:
Configure the output format for the data retrieved from MISP.

3. Fetch new rules from MISP:
Once fetched, new rules will be added to the Threat Intelligence Database, enhancing detection capabilities.

3.1. Periodic Fetch
Configure an automatic schedule to ensure regular updates.
3.2. Manual Fetch
Click the "Fetch Now" button to retrieve the latest rules instantly.
4. Test Configuration and Apply
Test Connection: Click "Test Connection" to validate the settings. If successful, a message "Test successfully" appears in the top-right corner.
Apply Configuration: Click "Apply" to save the configuration. A confirmation message "MISP integration applied successfully" appears.
Once successfully applied, the connection status will change to "Connected", confirming a successful integration.
