The following guideline describes how to add an existing MetaDefender Managed File Transfer instance to OPSWAT Central Management.
Go to the MetaDefender Managed File Transfer management page under Inventory in the sidebar.

Click the ADD NEW INSTANCE button in the top right panel.
The dialog Add Instance will be opened and then select the Add an existing instance button.

Fill the proper inputs and then click the TEST CONNECTION button to check the connection status.
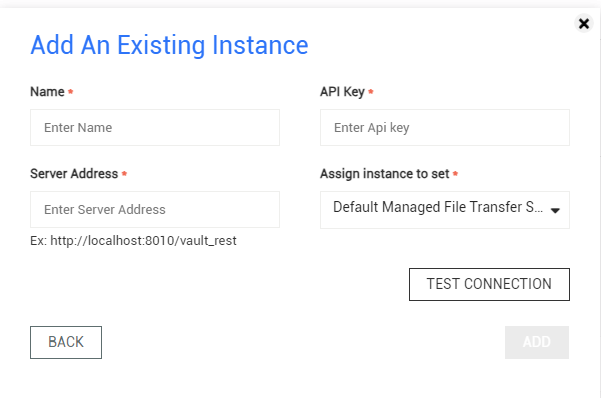
- Name: The name you want to assign to the new MetaDefender Managed File Transfer instance.
- API Key: The API Key of the MetaDefender Managed File Transfer instance to authenticate the request.
Server Address: The address of the MetaDefender Managed File Transfer instance. This should be in the format of <protocol>://<host>:<port>/vaultrest, such as http://example:8010/vault_rest.
Assign instance to set: The set of MetaDefender Managed File Transfer instance.
If this instance is already managed by another OPSWAT Central Management, the force takeover instance dialog will show the information and ask you if you want to force takeover this instance to your OPSWAT Central Management. Click FORCE to proceed.

The dialog will be closed and the MetaDefender Managed File Transfer page will be reloaded automatically if the result is successful.

The status of the newly added instance is Connected after fetching its version information successfully.