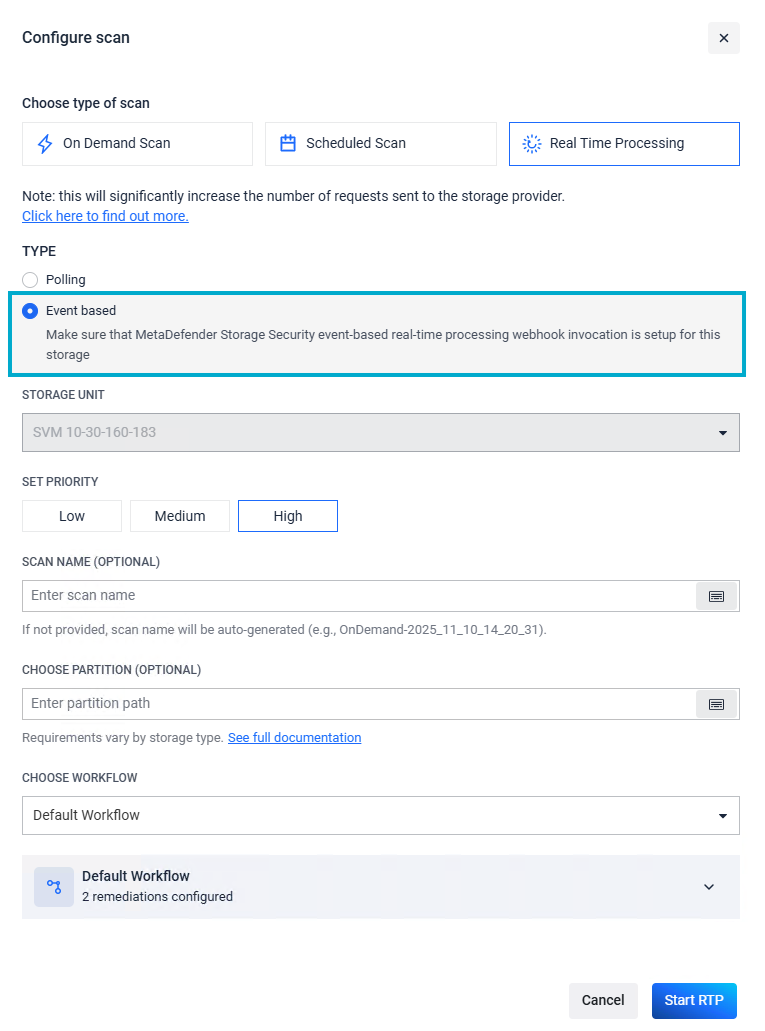
When Vscan is enabled, multiple SVMs can be connected to the same MDSS instance.
Step 1: Add the SVM on ONTAP AV Connector
From MDSS machine, open the Configure ONTAP LIFs app provided by NetApp and available with the ONTAP AV Connector installation.
Add the additional SVMs (can be either data LIF or management LIF). In our example, we have used Data LIF as does not require authentication
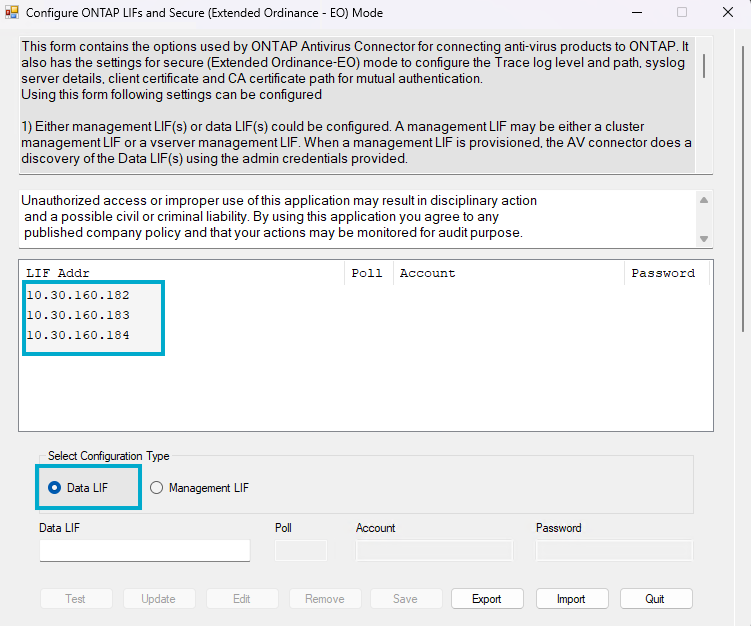
Once all the SVMs are added, save and quit.
Step 2: Add each SVM as a different storage unit in MDSS
Navigate to MetaDefender Storage Security UI
Go to Storage Units -> Add new storage unit -> Choose NetApp -> Add new Account
For the Account, input:
name
username and password of the privileged user configured on ONTAP
Host (IP) of the SVM
For the Storage, input:
name
Share Path. In case you want to add all the SMB shares created under the SVM, input ONTAP_ADMIN$ (privileged path created by ONTAP) that is available only for the privileged user.
Here is an example of how the form should look like
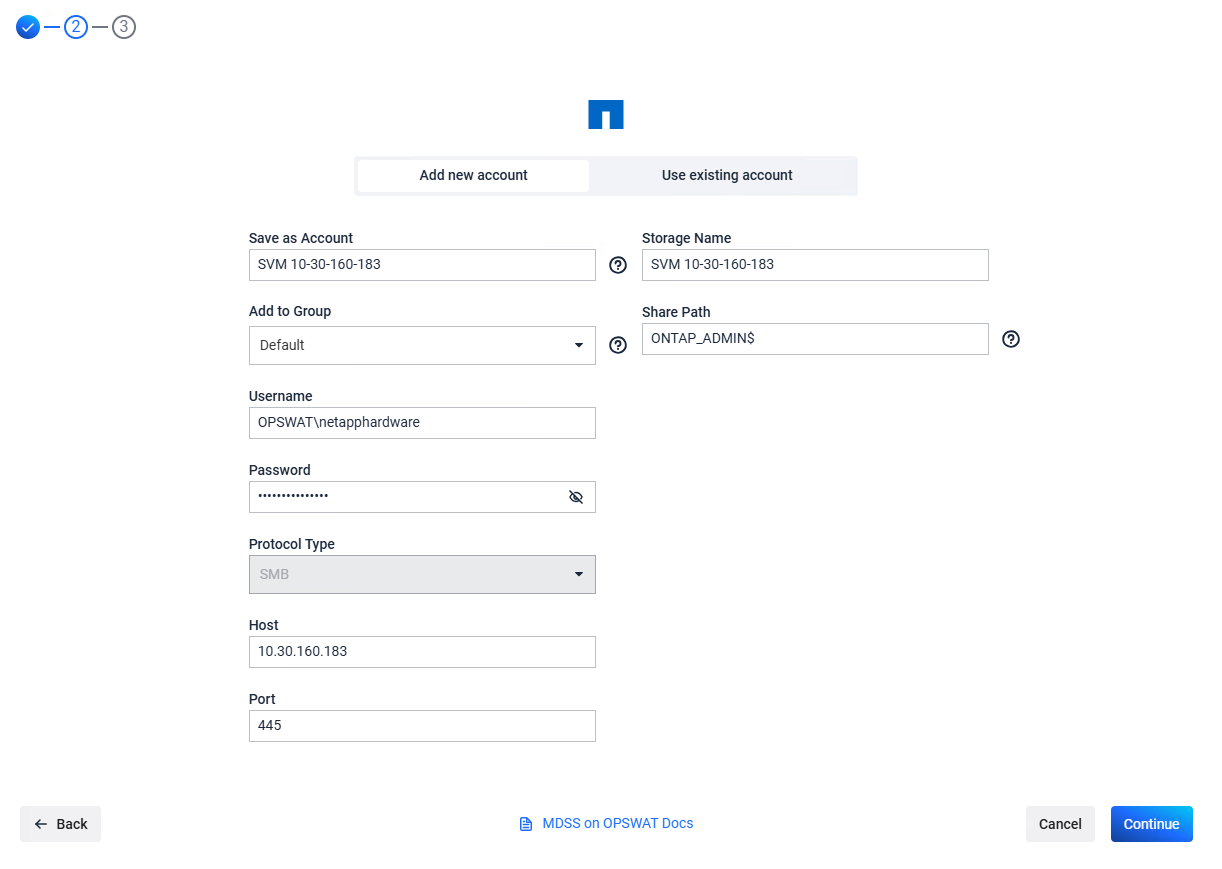
Click Continue and wait for the storage to be added.
If OPSWAT ONTAP Connector is installed, do not download or install it.
Repeat the steps with all the SVMs you want to add
Step 3: Add each SVM in the OPSWAT ONTAP Connector config file
From MDSS machine, navigate to C:\ProgramData\OPSWAT-ONTAP-Connector
Open config.ini file
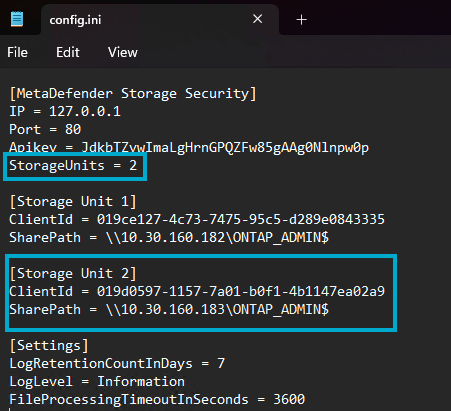
Set Storage Units to the number of SVMs you have added in MDSS
Add each Storage Unit and its corresponding details.
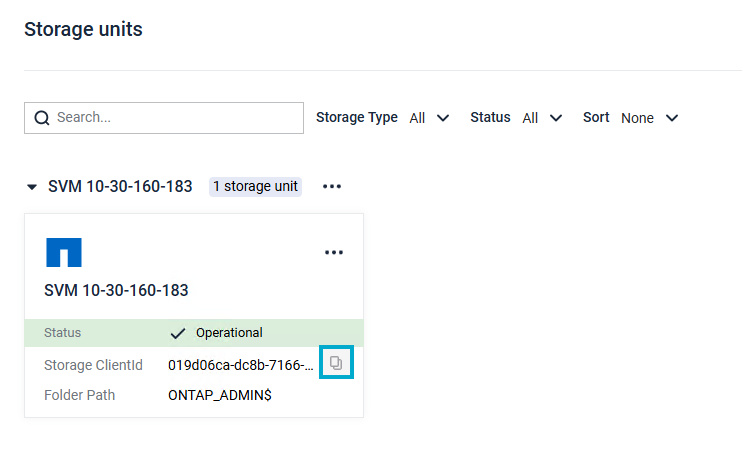
ClientId can be copied from MDSS UI by Navigating to Storage Units -> Your storage unit card and click the copy button
Here is an example of how the config file should look like:
Step 4: Restart OPSWAT ONTAP Connector service
This service needs to be restarted for the changes to take effect

Step 5: Enable RTP with Event-Based
One last step is to enable Real Time scan with Event-Based for all the storage units corresponding to your SVMs, so that MDSS can processed the new files