
In order to integrate Azure Blob with MetaDefender Storage Security you will be required to create an application registration, assign the necessary permissions and roles, and then generate a secret key. Please follow these steps:
From the left side menu, navigate to Storage units, click on Add storage unit and choose Azure Blob
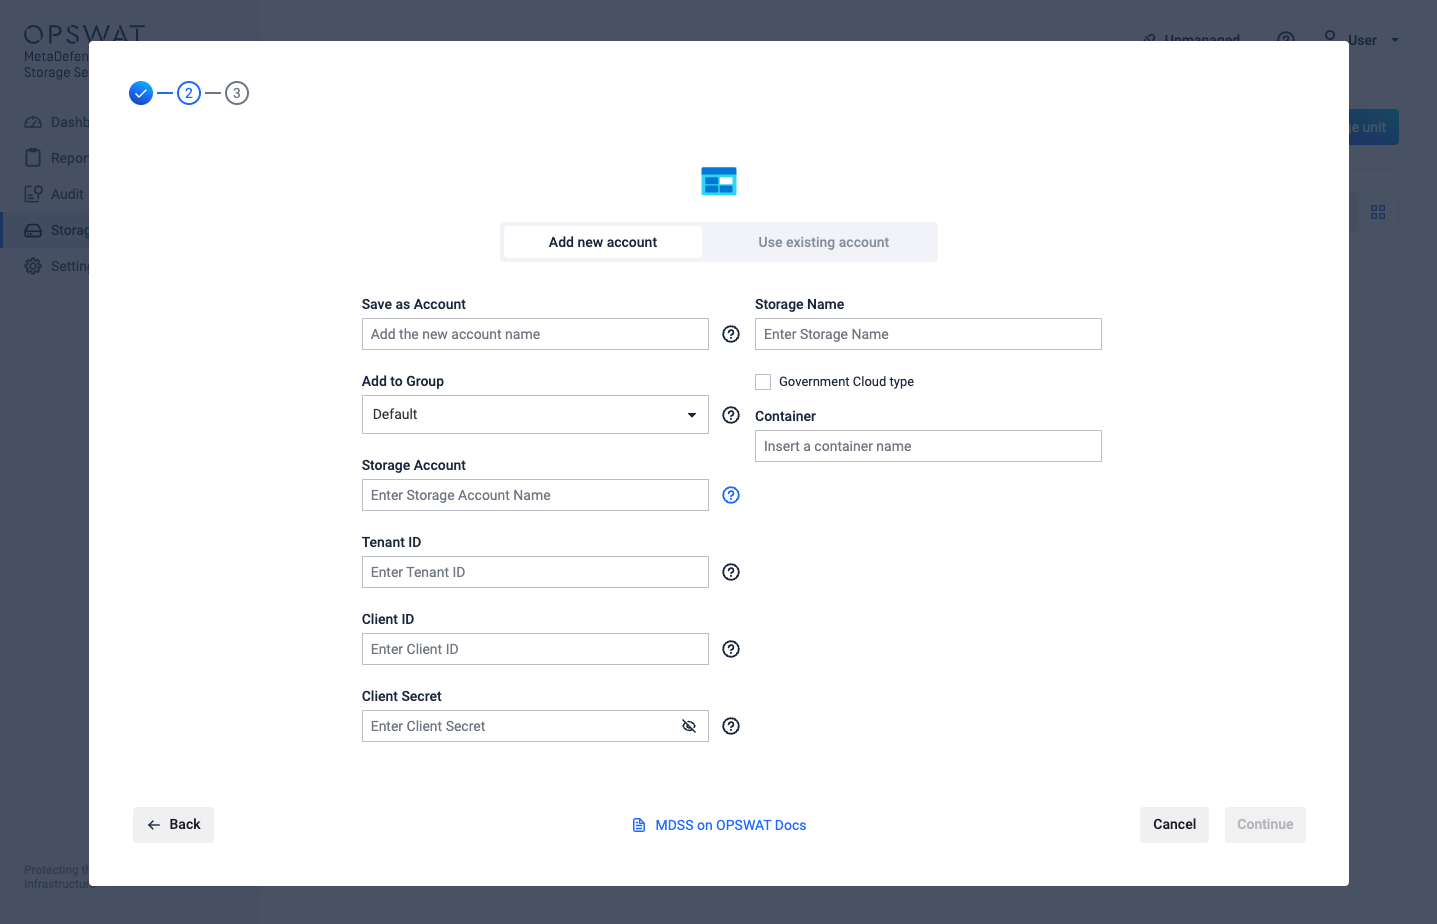
Give your account a name so you can easily identify it later
Give your storage a name so you can easily identify it later.
Select Government Cloud type if the storage belongs to Azure US Government Cloud.
Enter the Storage Account name.
Enter your Tenant ID. Scroll to the end of this page for more details.
Enter your Client ID. Scroll to the end of this page for more details.
Enter your Client Secret. Scroll to the end of this page for more details.
Enter the name of a container to process objects from a particular container.
Select Add in order to finish the process.
How to create an Azure Blob application?
In order to process your Azure Blob objects with MetaDefender Storage Security you will be required to add a new app registration in your Microsoft Entra ID Azure Portal.
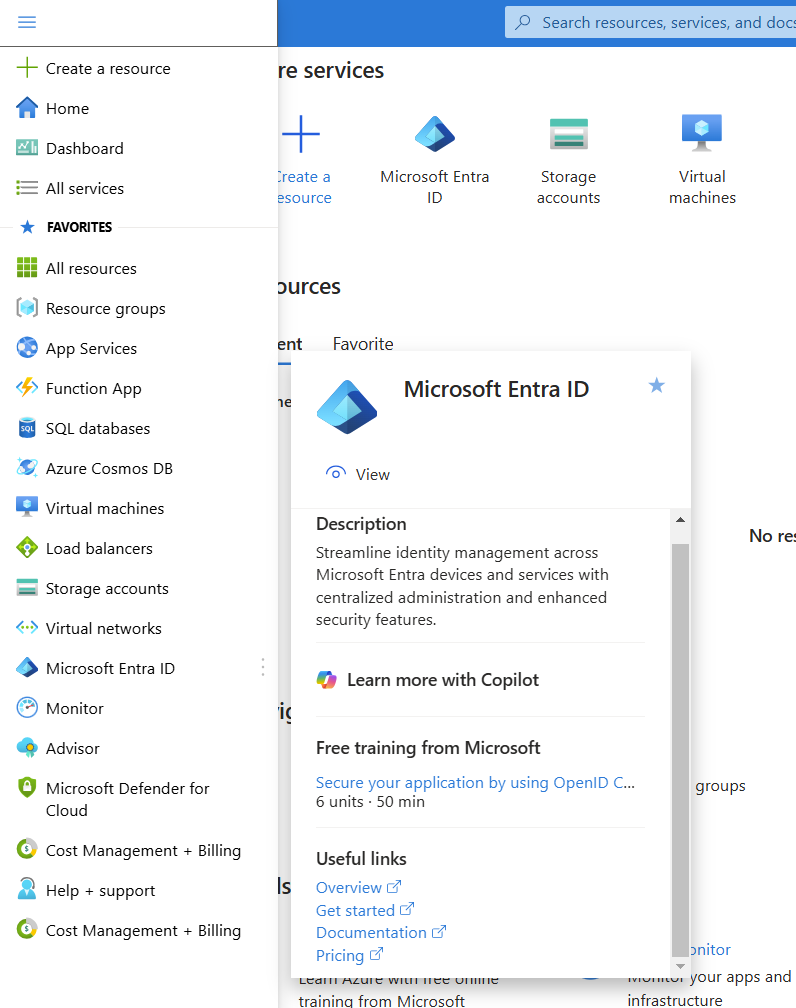
Log in to Azure Portal and from the left navigation menu choose Microsoft Entra ID
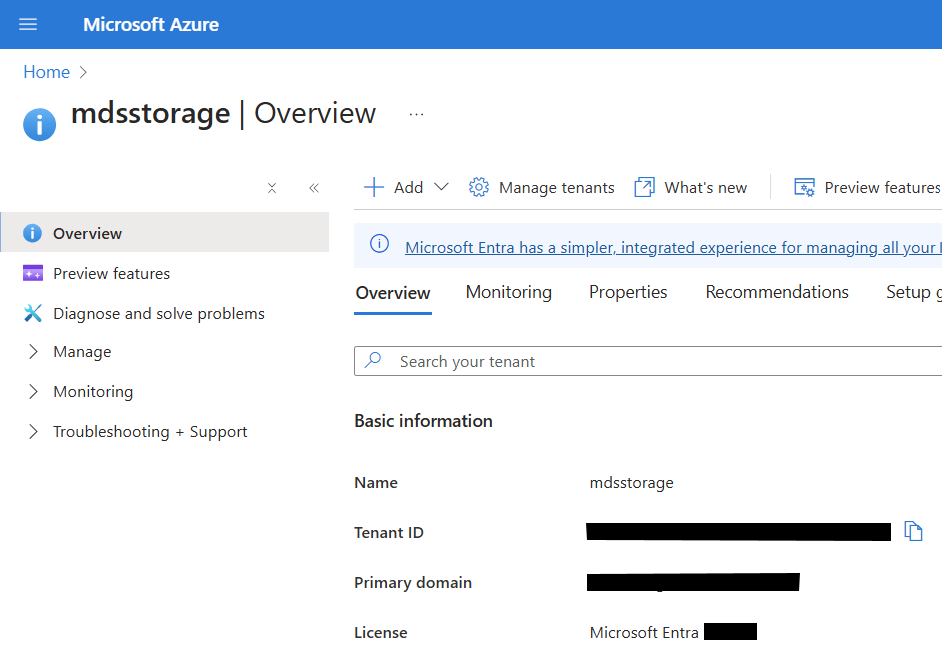
Make a copy of the Tenant ID from the overview page
From the left side menu, choose App registrations
Click New registration
Give your app a name so you can easily identify it
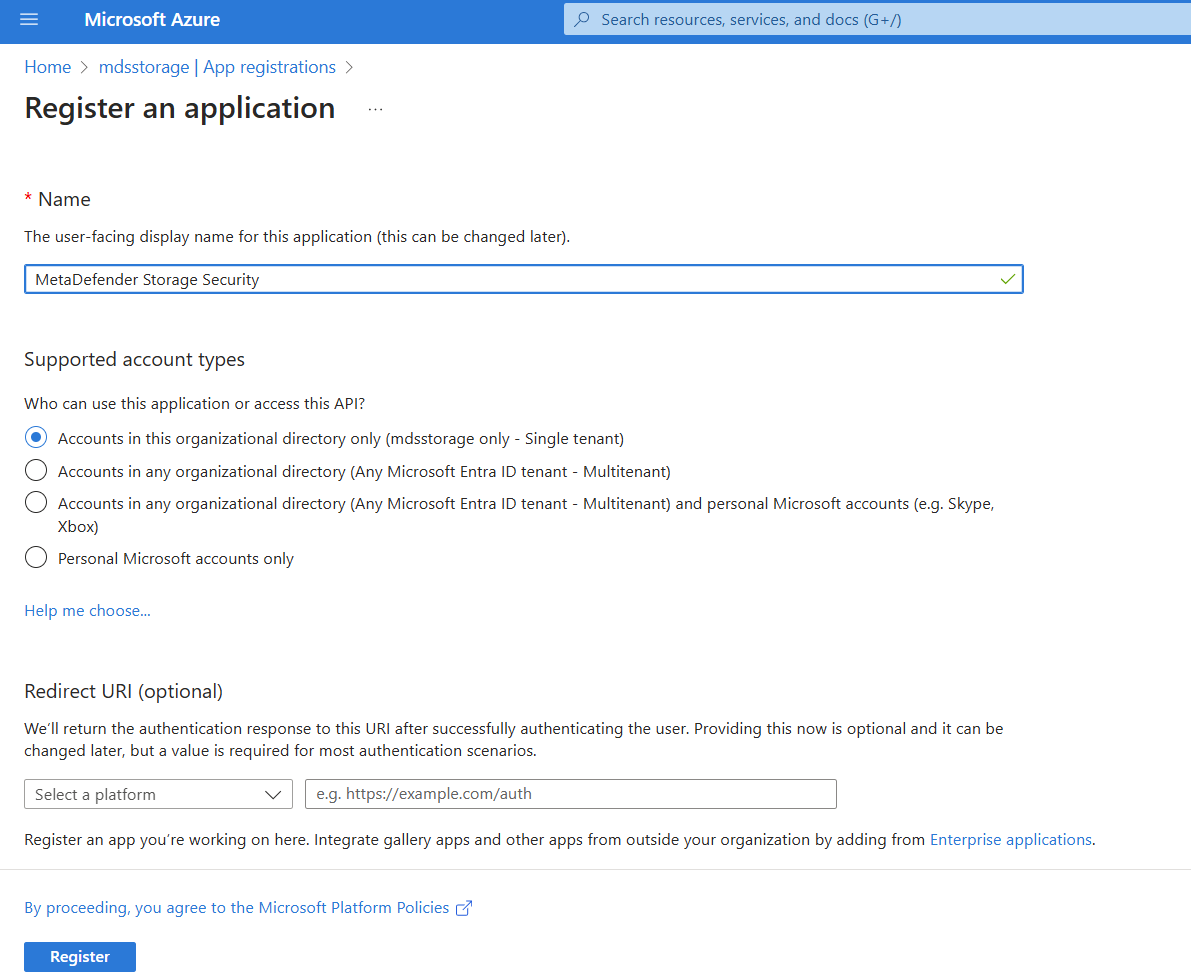
There is no need to modify the other properties. When ready, please click Register
From the Overview page of your newly created application, make a copy of Application (client) ID
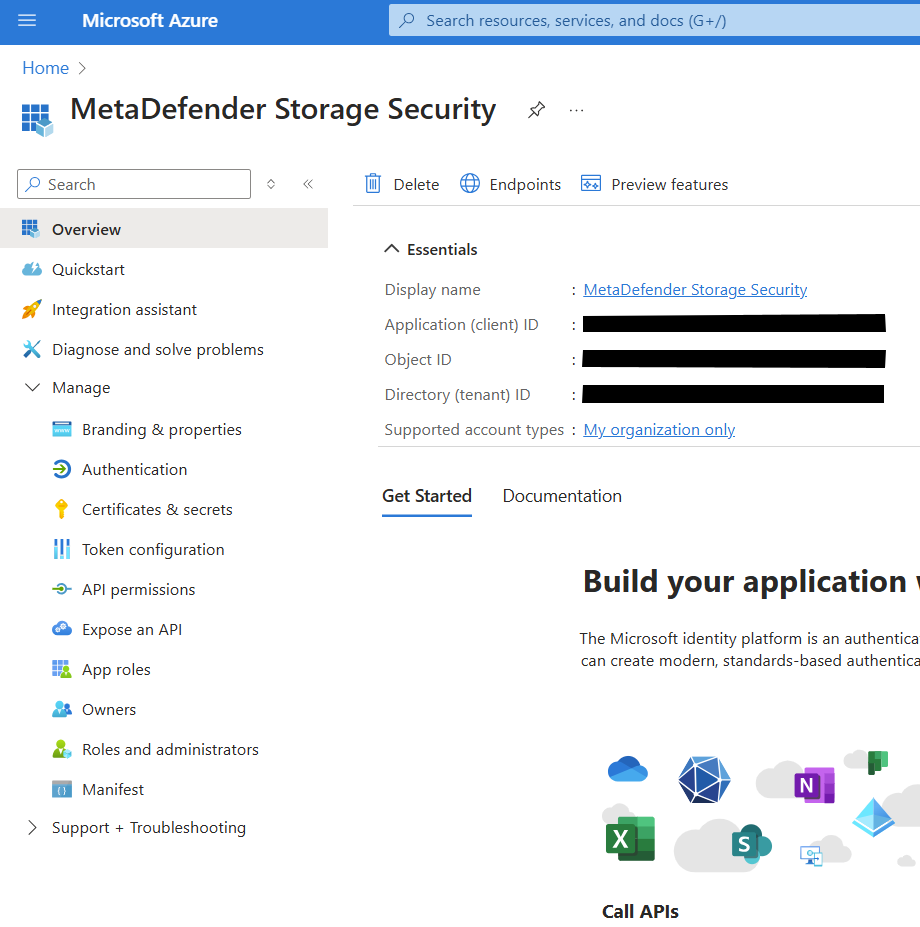
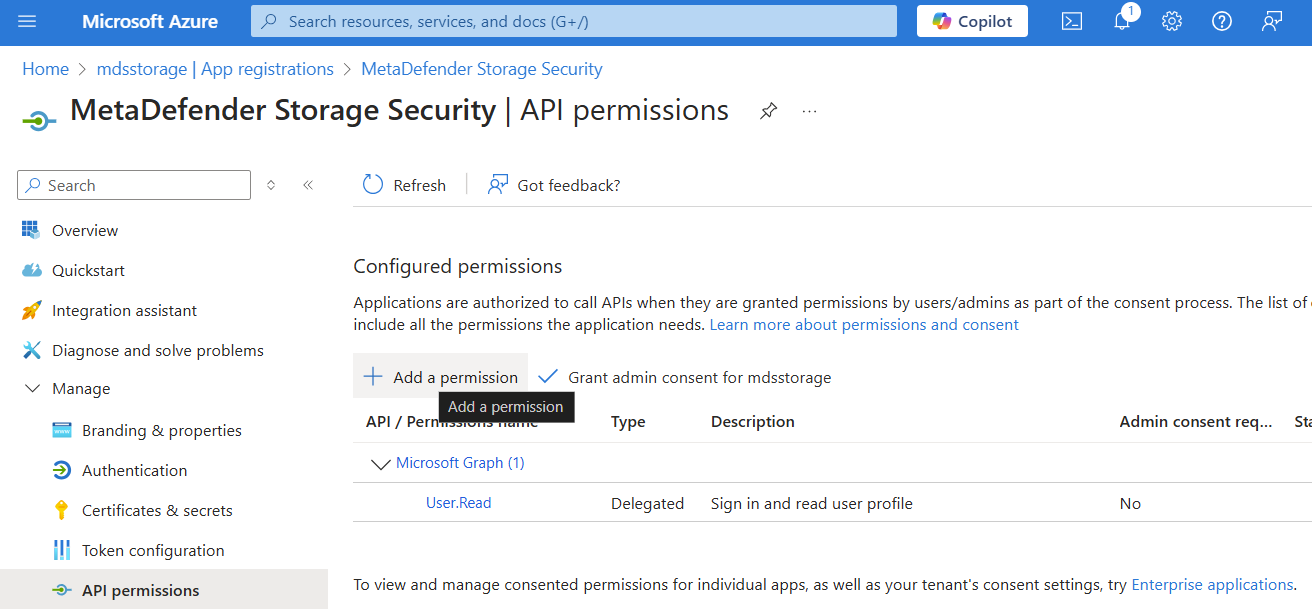
You now need to specify which permissions should the application have. To do this, please navigate to API permissions from the left-side menu
Click Add a permission
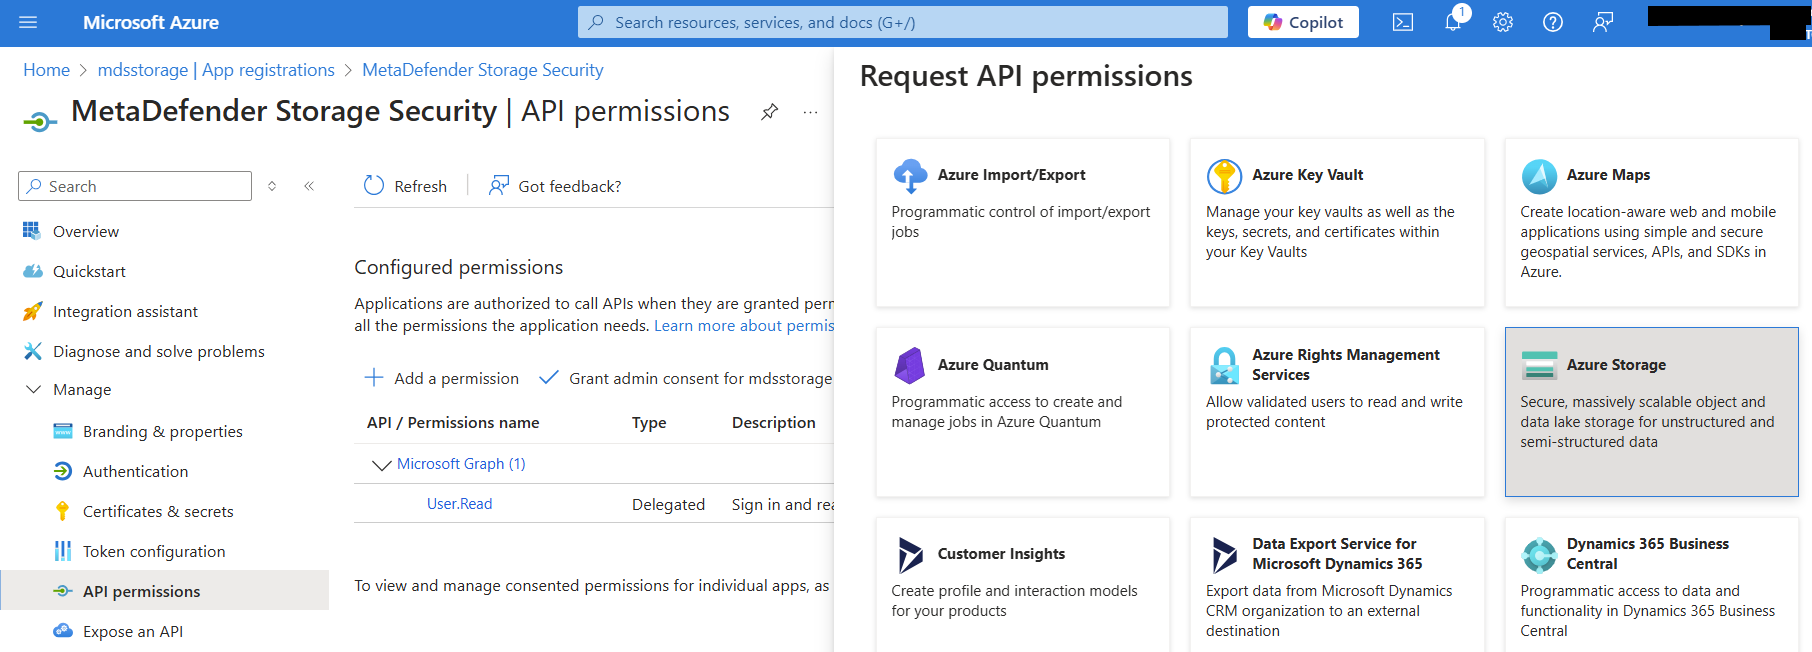
Select Azure Storage from the right-side menu
Select Delegated permissions
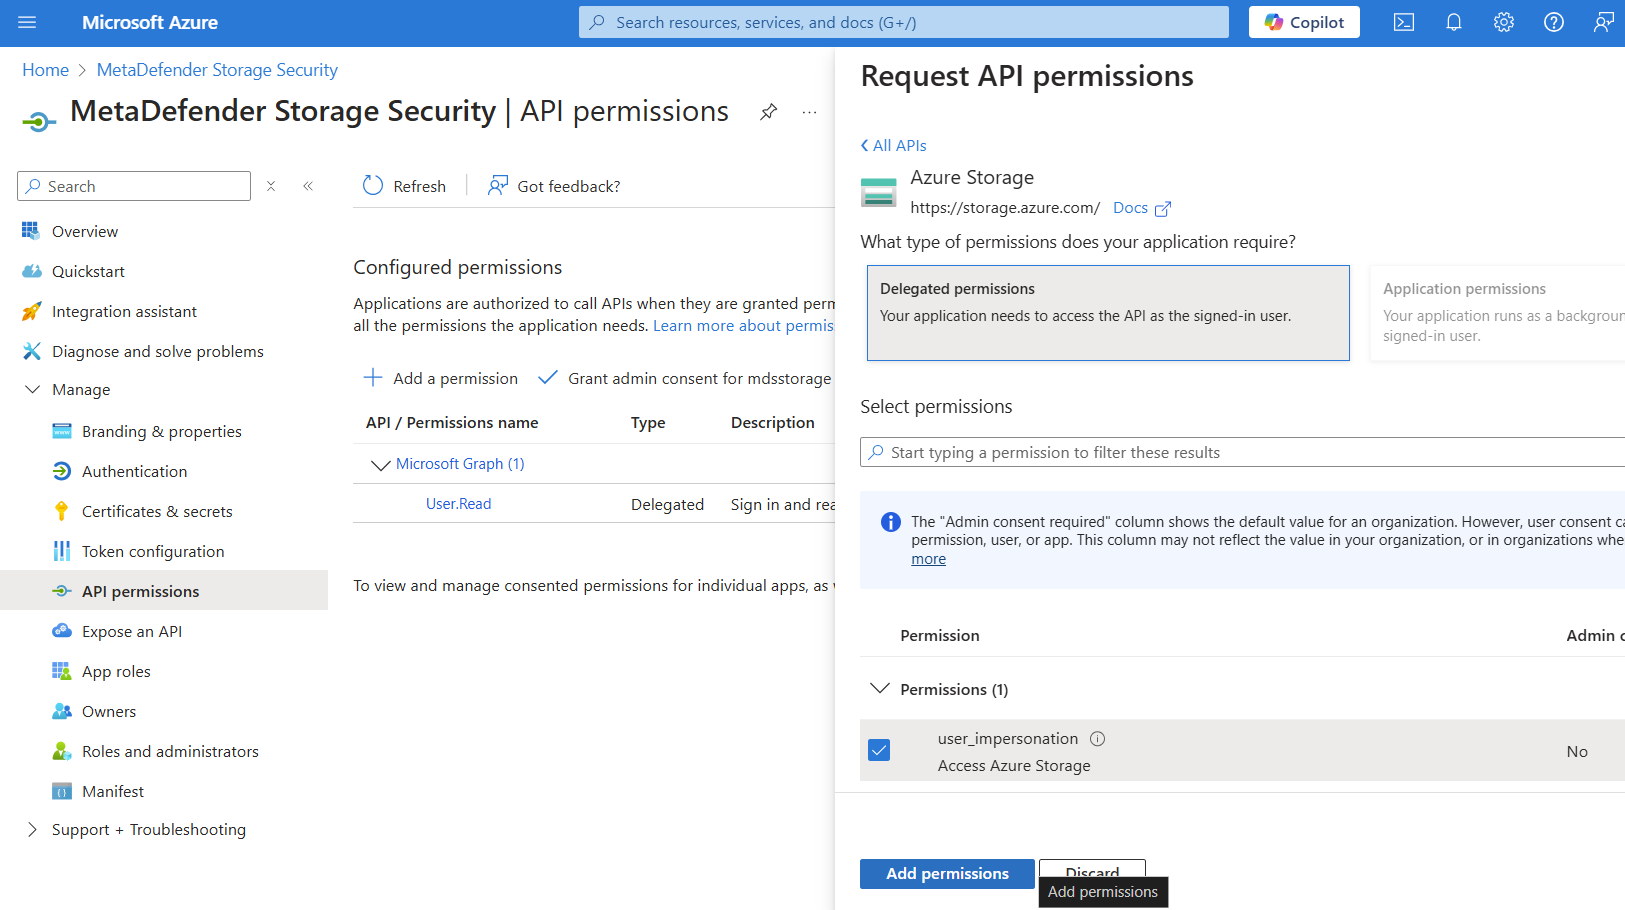
In order for MetaDefender Storage Security to correctly work, please add the following permission: user_impersonation
When ready, click Add permissions
Now that the required permissions are in place, please navigate to Certificates & Secrets from the left-side menu
Click New client secret and choose Expires in 24 months
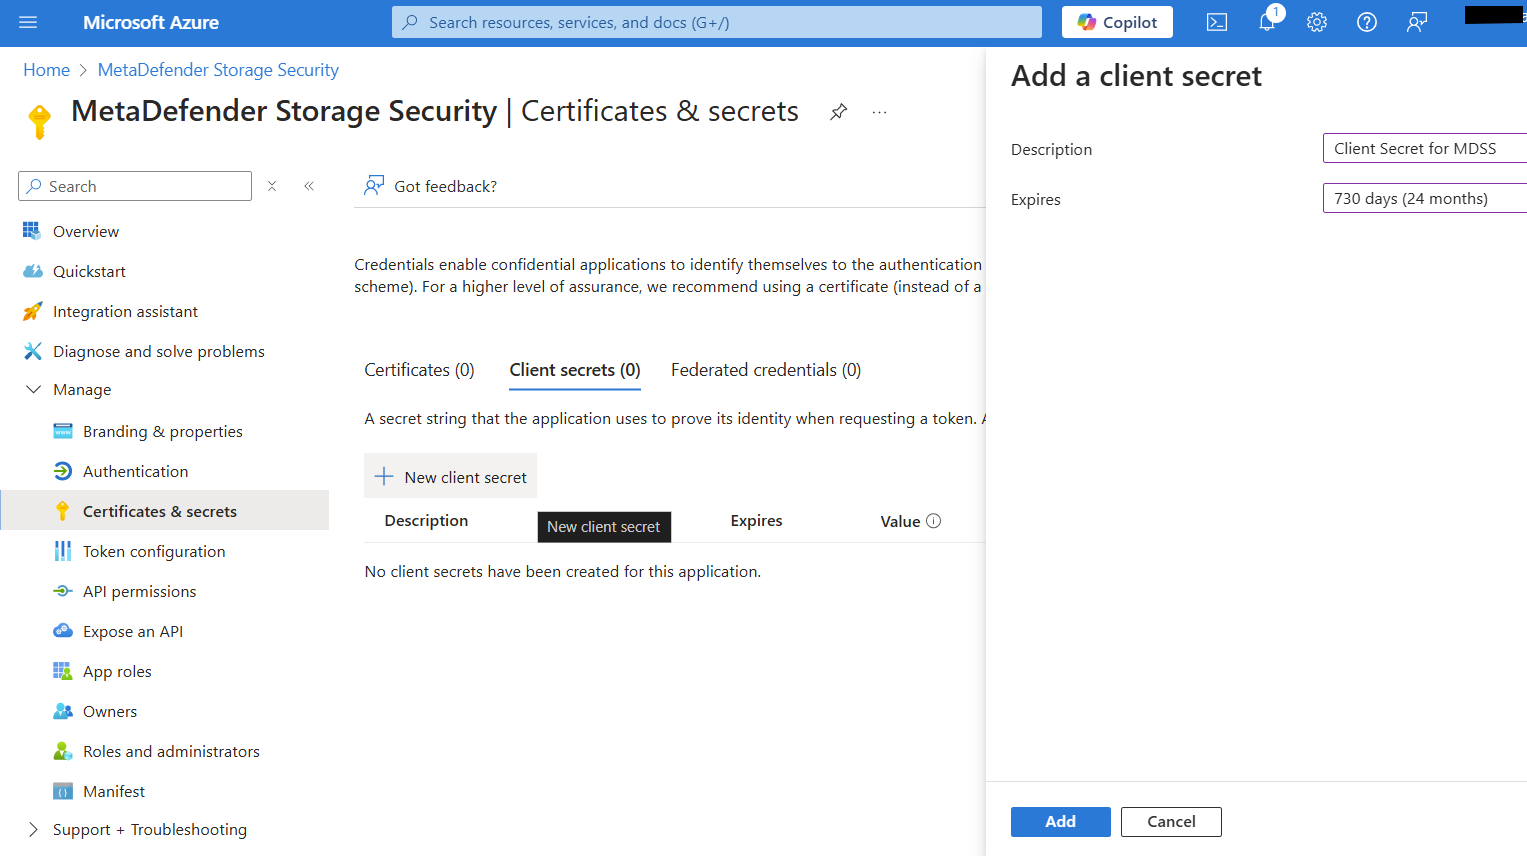
Click Add and then you will need to make a copy of the generated secret key because it will not be available later
Navigate to your Storage Account and select the Access Control (IAM) menu
Select the Role assignments tab, then select the Add role assignment option from the Add dropdown.
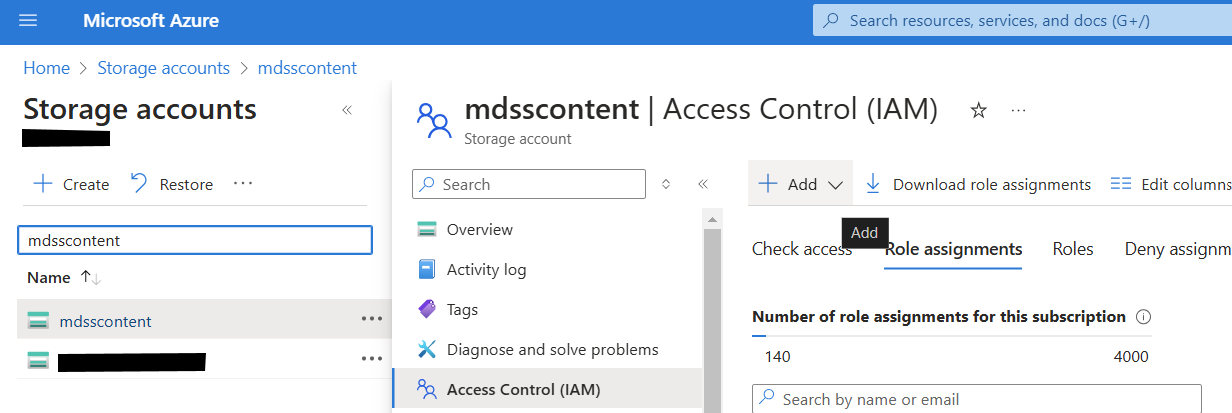
Assign the following roles to the client application you previously registered:
Storage Blob Data Contributor
Reader
Now that you have the Tenant ID, Client ID and the Client Secret Key, you can go back in MetaDefender Storage Security and finish the Azure Blob integration. Congratulations!
For additional configuration of how MetaDefender Storage Security handles blobs please check custom configuration.