Configuration
3.5.1
Search this version
Configuration
Configuration
Title
Message
Create new category
What is the title of your new category?
Edit page index title
What is the title of the page index?
Edit category
What is the new title of your category?
Edit link
What is the new title and URL of your link?
Azure AD Specific Configuration
Copy Markdown
Open in ChatGPT
Open in Claude
To set up Azure AD SSO for MDSS, follow these steps:
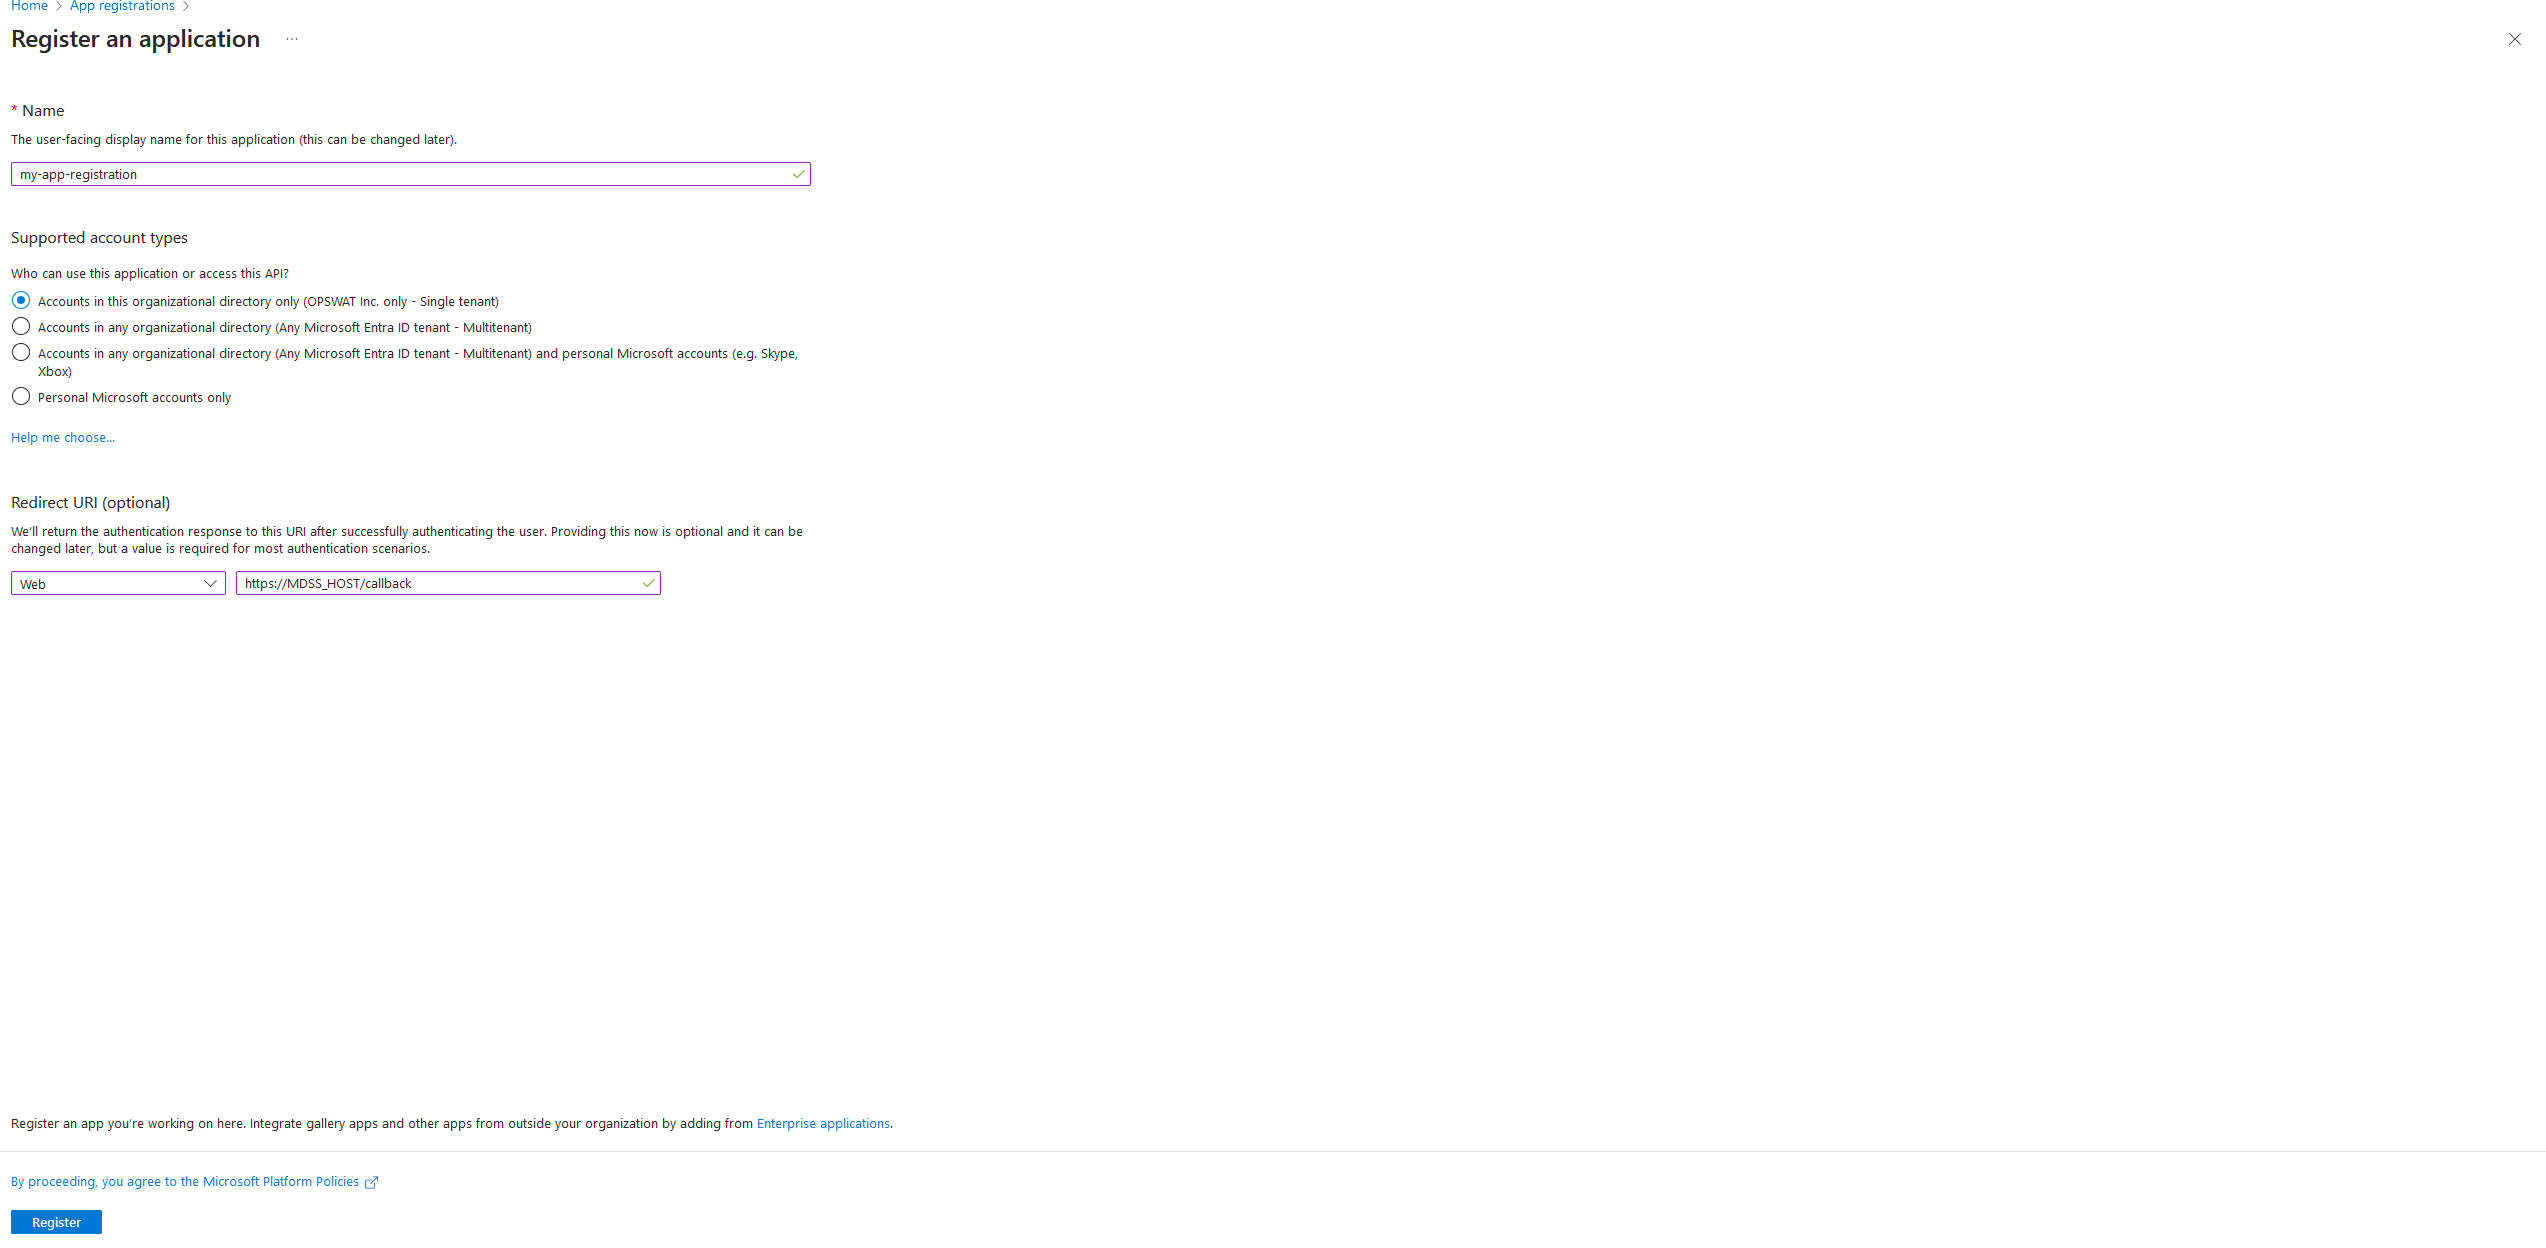
- In the Microsoft Azure portal, navigate to App registrations and click on New registration

- In the Register an application window, enter a name for your application, select your preferred configuration for Supported account types (recommended is Single tenant), and configure the Redirect URI. The redirect URI should be composed of the address where MDSS is deployed, along with the /callback suffix added to the path.
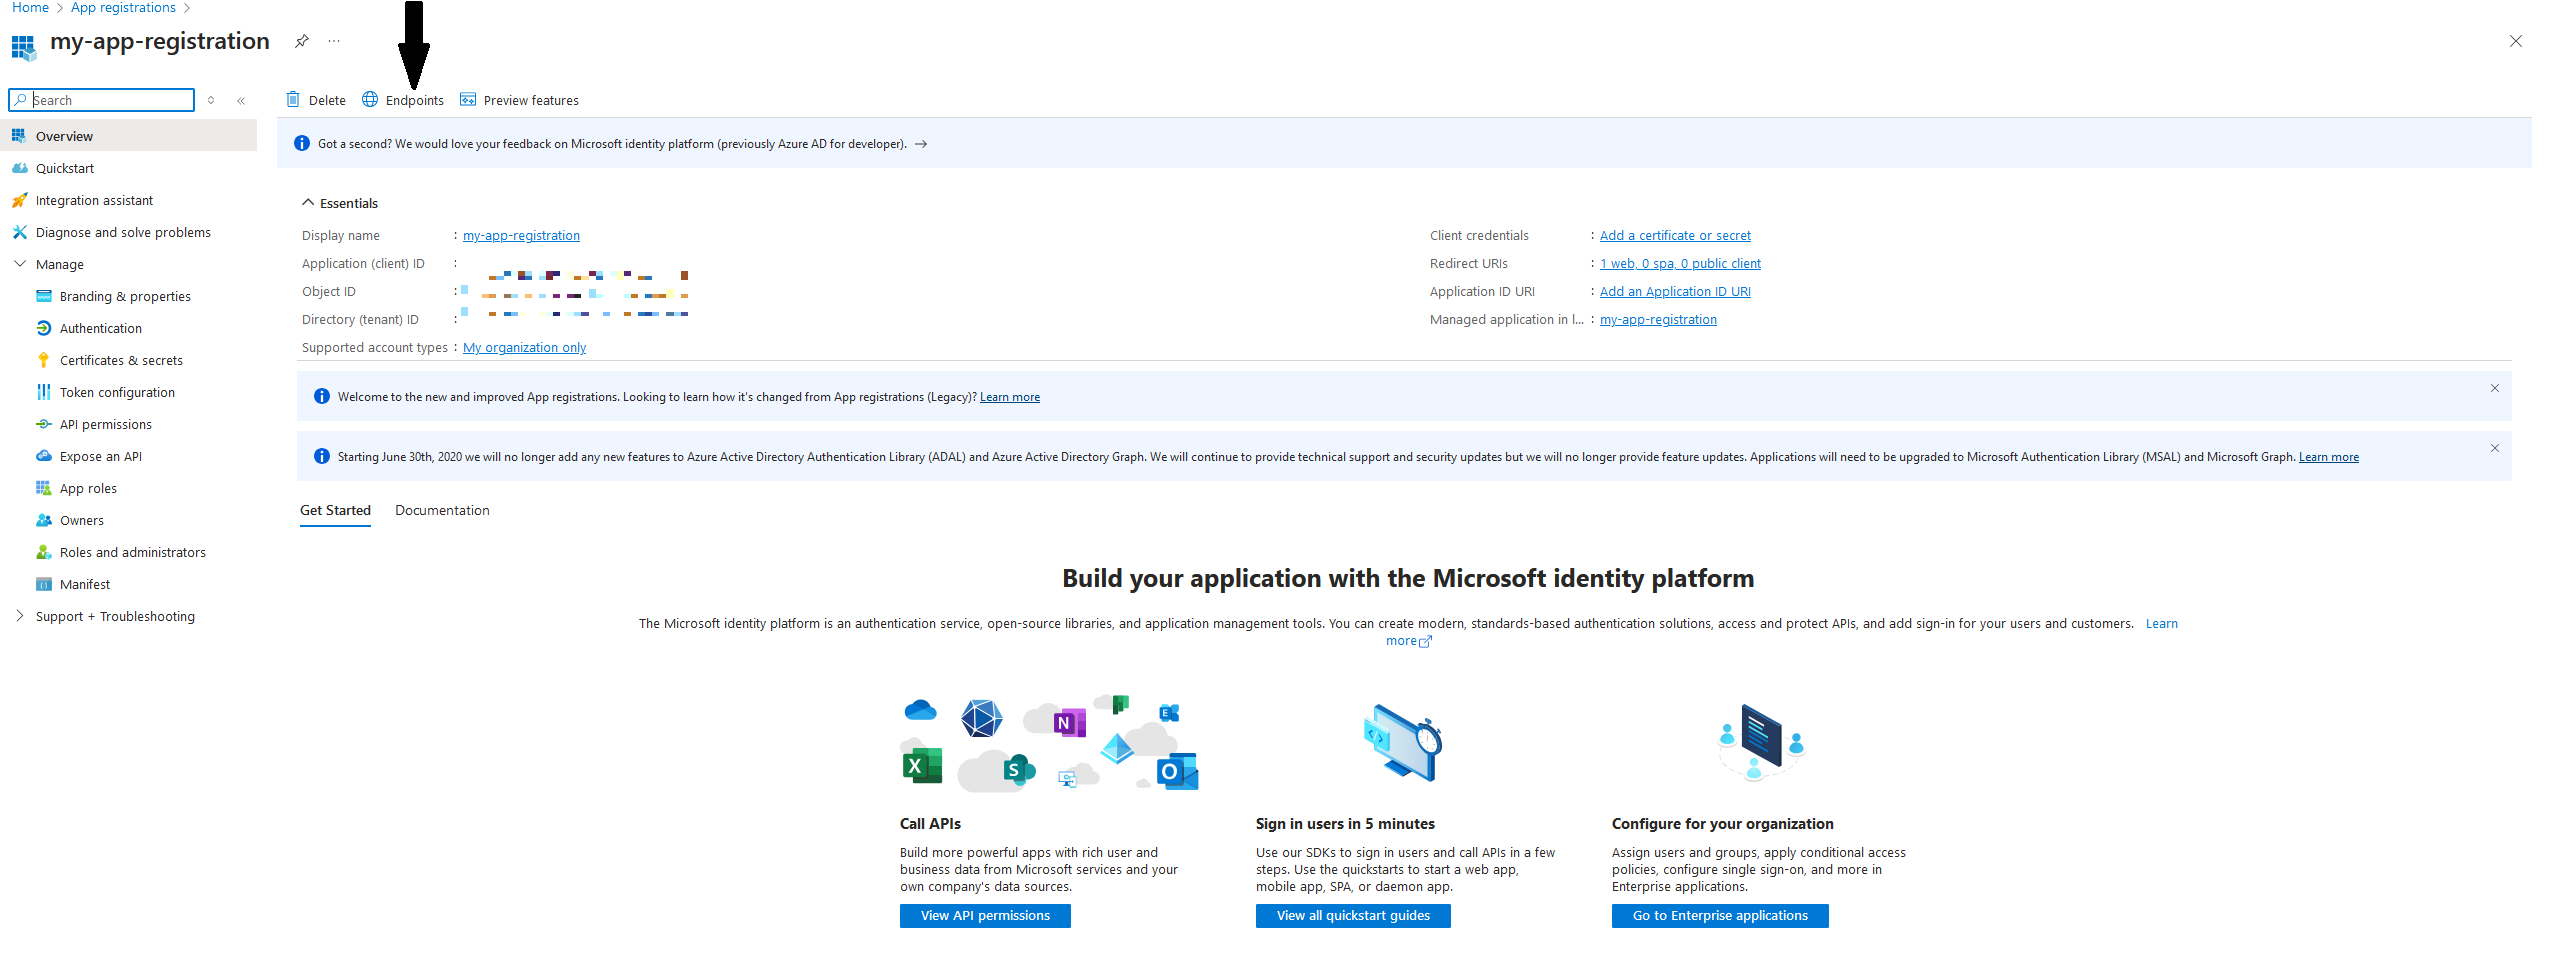
- Afterwards, navigate to the Overview tab. There, to successfully configure the SSO Configuration in MDSS afterwards, store the Application (Client) ID and the Direcory (Tenant) ID somewhere safe on your computer. Then, click on the Endpoints button.
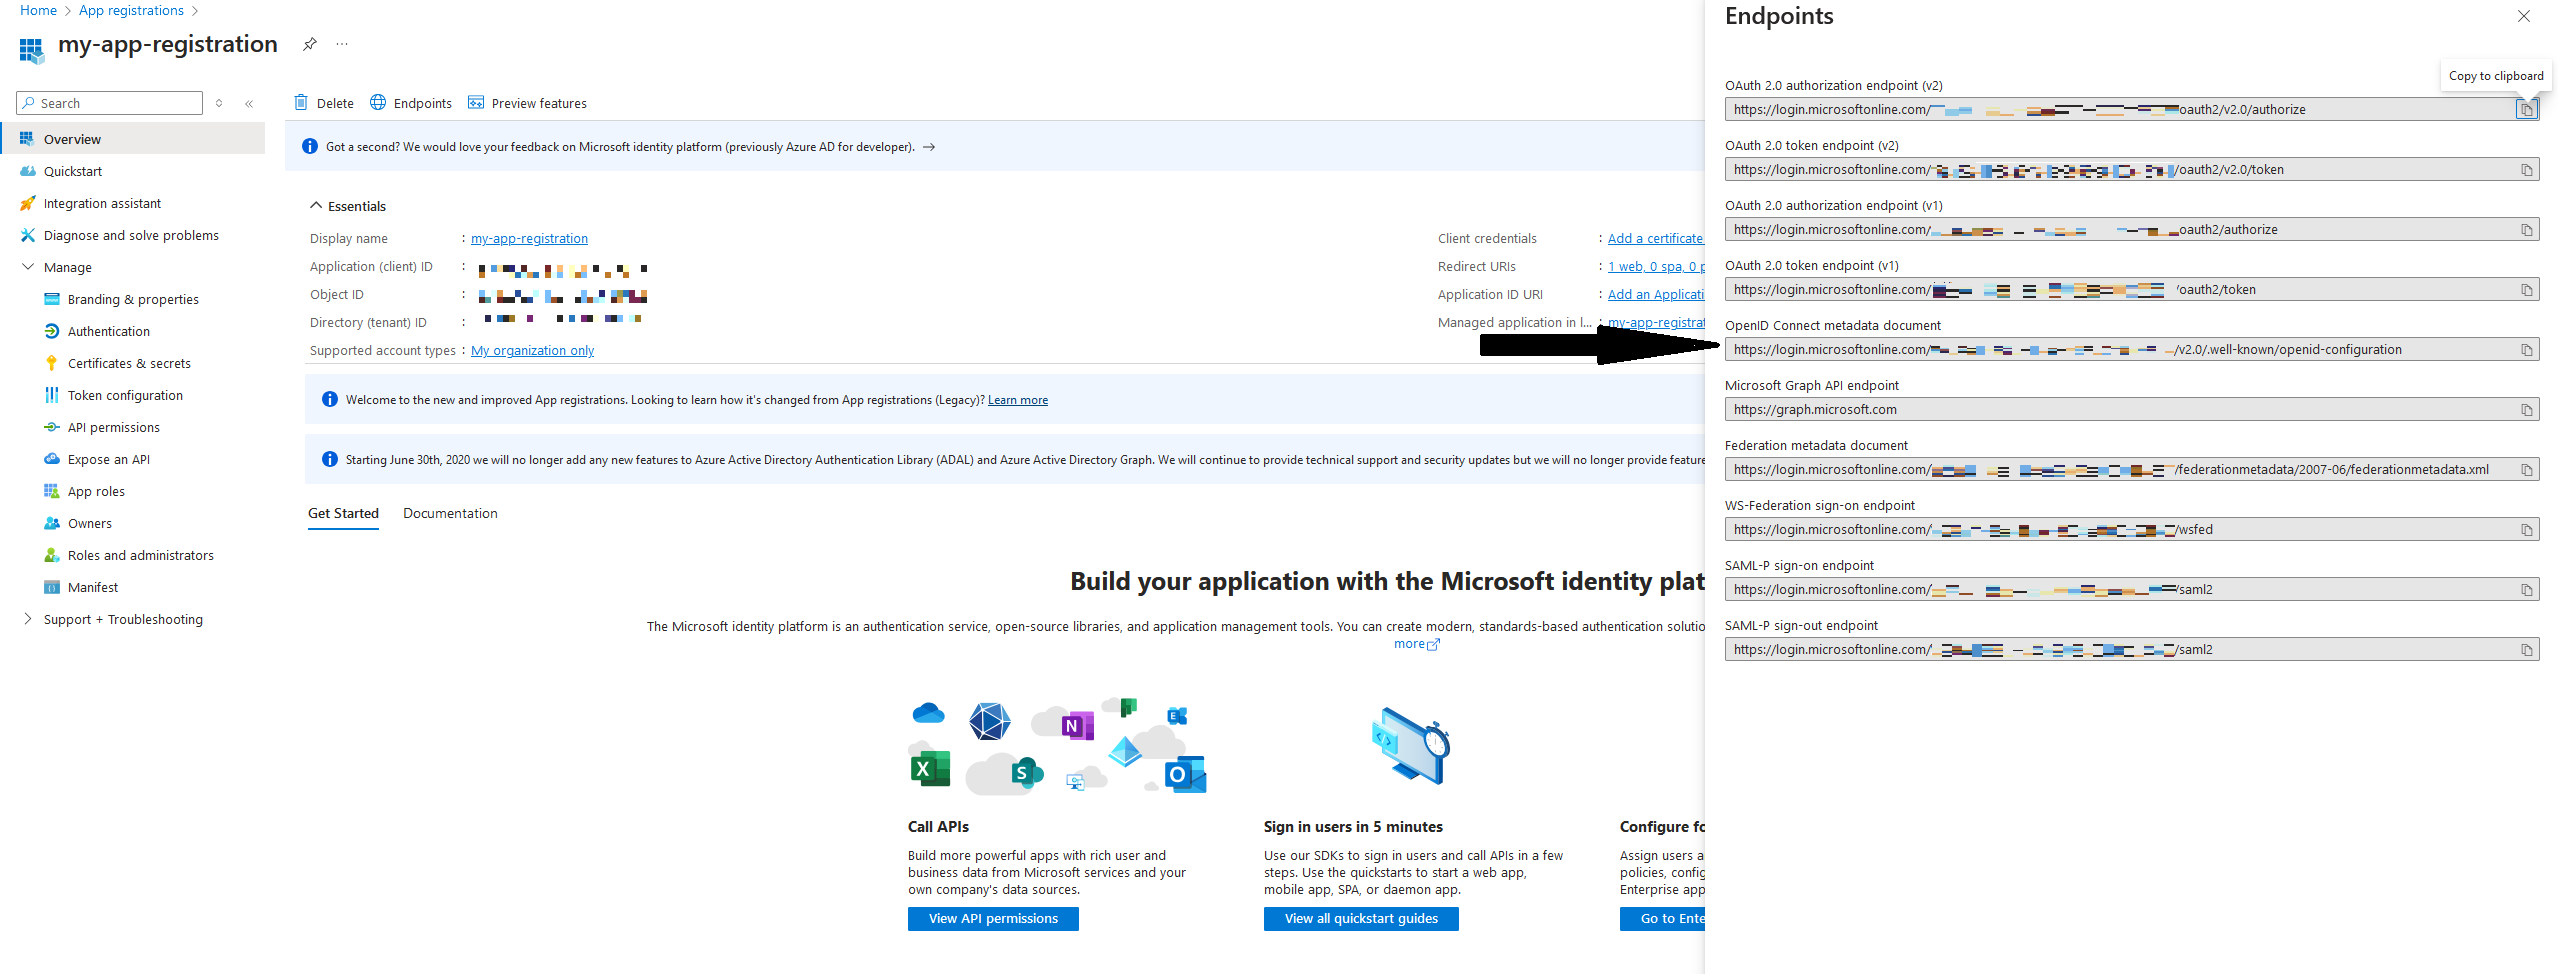
- There, the authority URL is located in the right-hand side menu and is the following: "https: //login.microsoftonline.com/<YOUR-TENANT-ID >/v2.0"
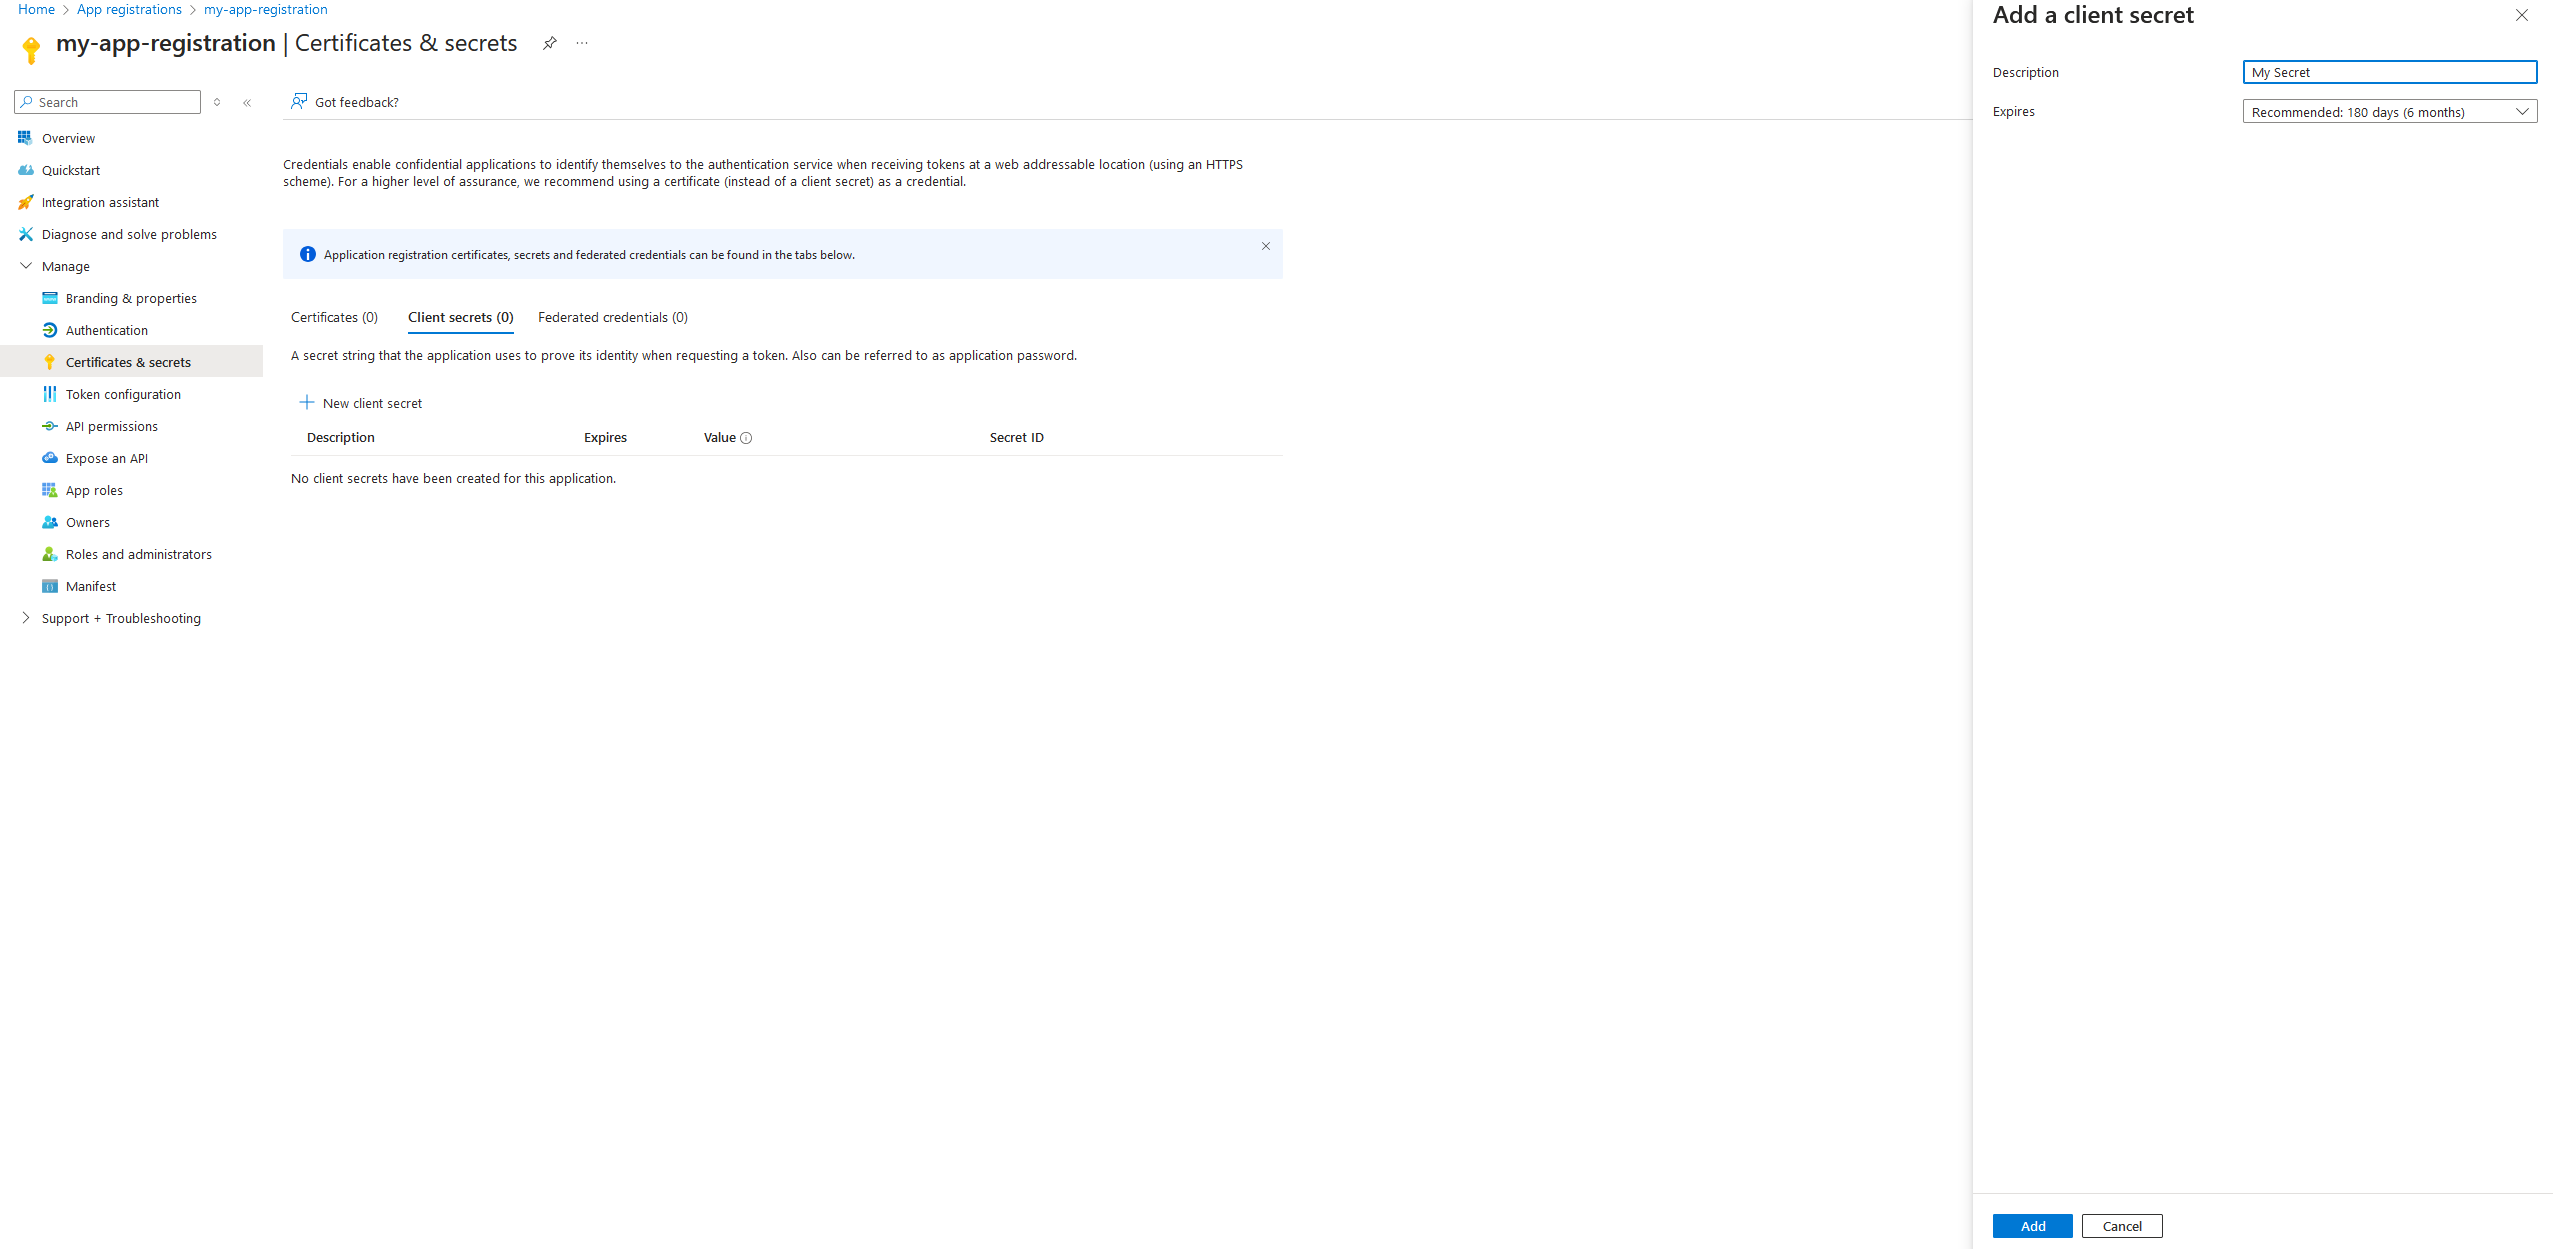
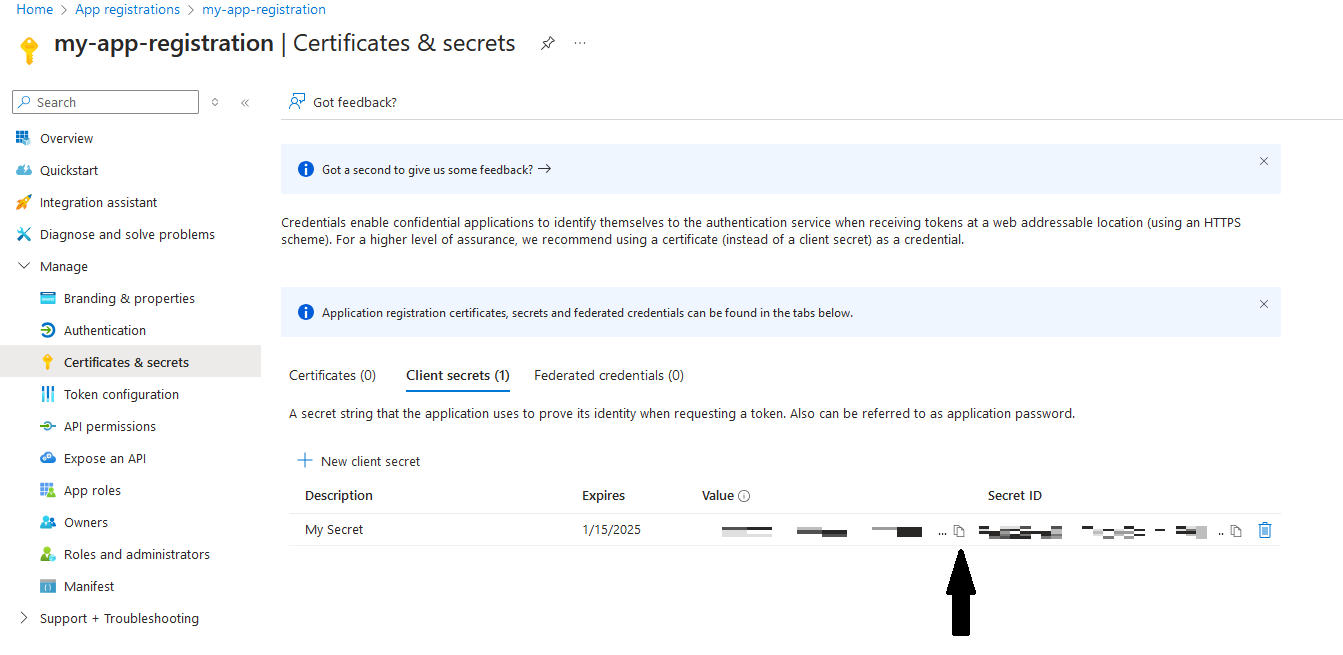
- Navigate to the Certificates & secrets tab and click on New client secret

- Give a description to your client secret, configure the expiration to your liking, and add it
- Copy your secret value and store it somewhere safe on your computer (you will only be able to copy it at this stage)
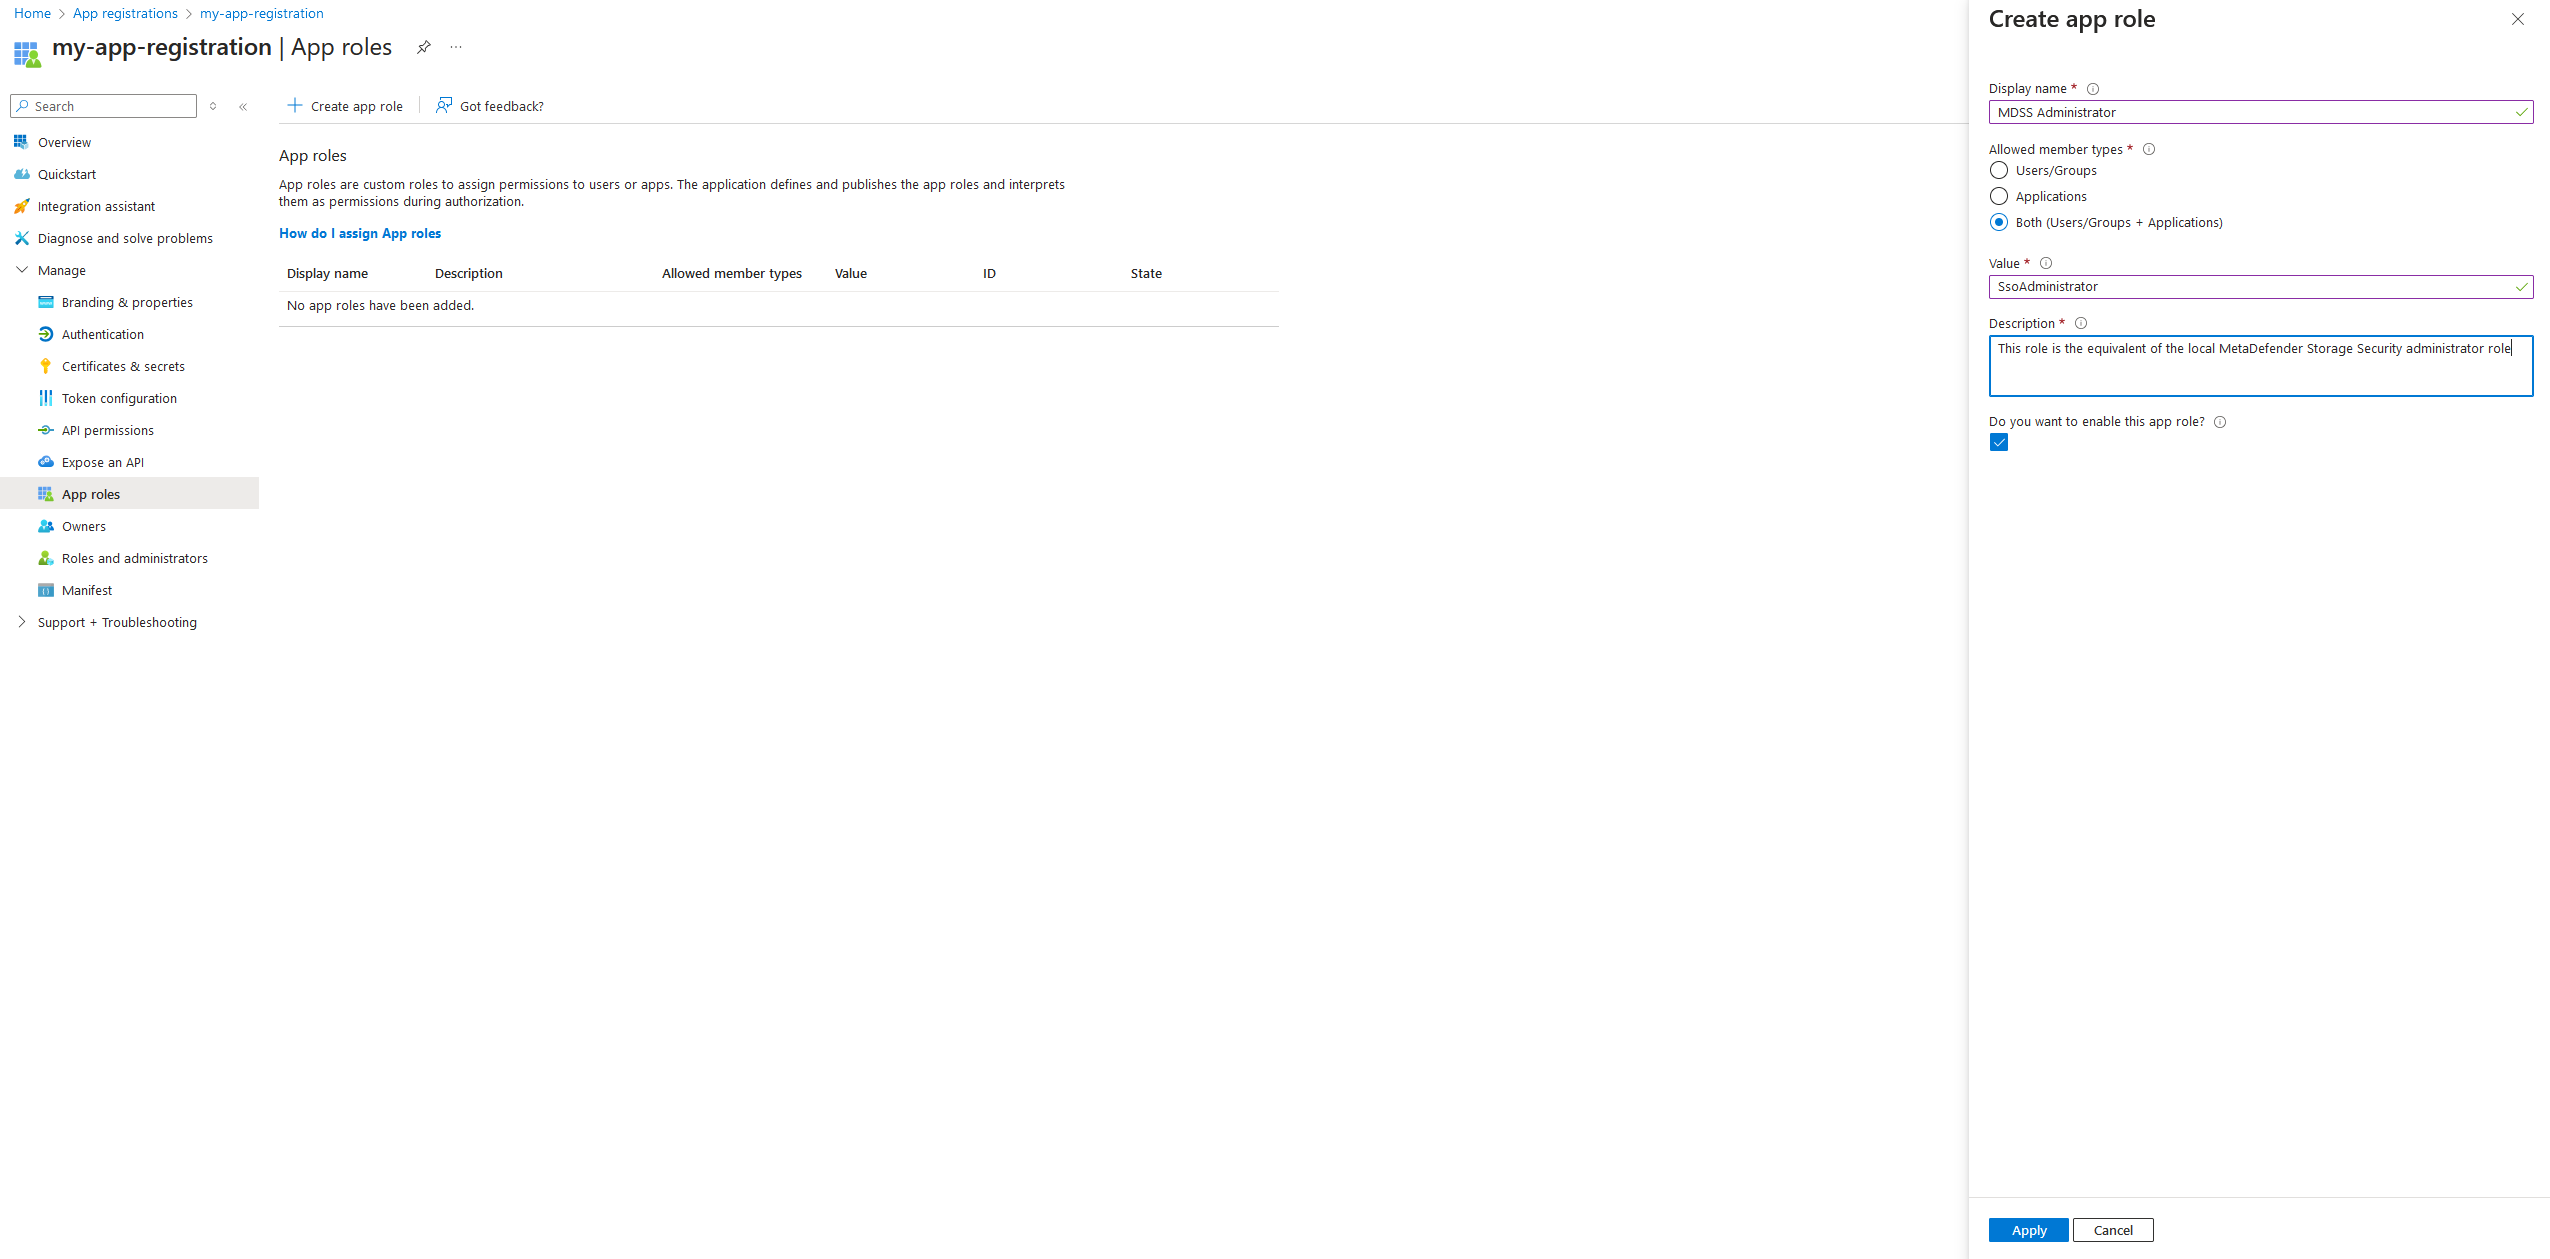
- Navigate to App Roles and click on Create app role

- Give your role a Display name, configure the Allowed member types to be set to Both (Users/Groups + Applications). Then, for the value, give one of the two values to determine the role that this user will have within MDSS:
- SsoAdministrator - equivalent to the administrator role in MDSS
- SsoReadOnlyAdministrator - equivalent to the read-only admin role in MDSS
- Navigate to the API permissions and click on Add a permission. Then, select the My APIs tab and find your app

- Click on your app and select the app role you have configured.
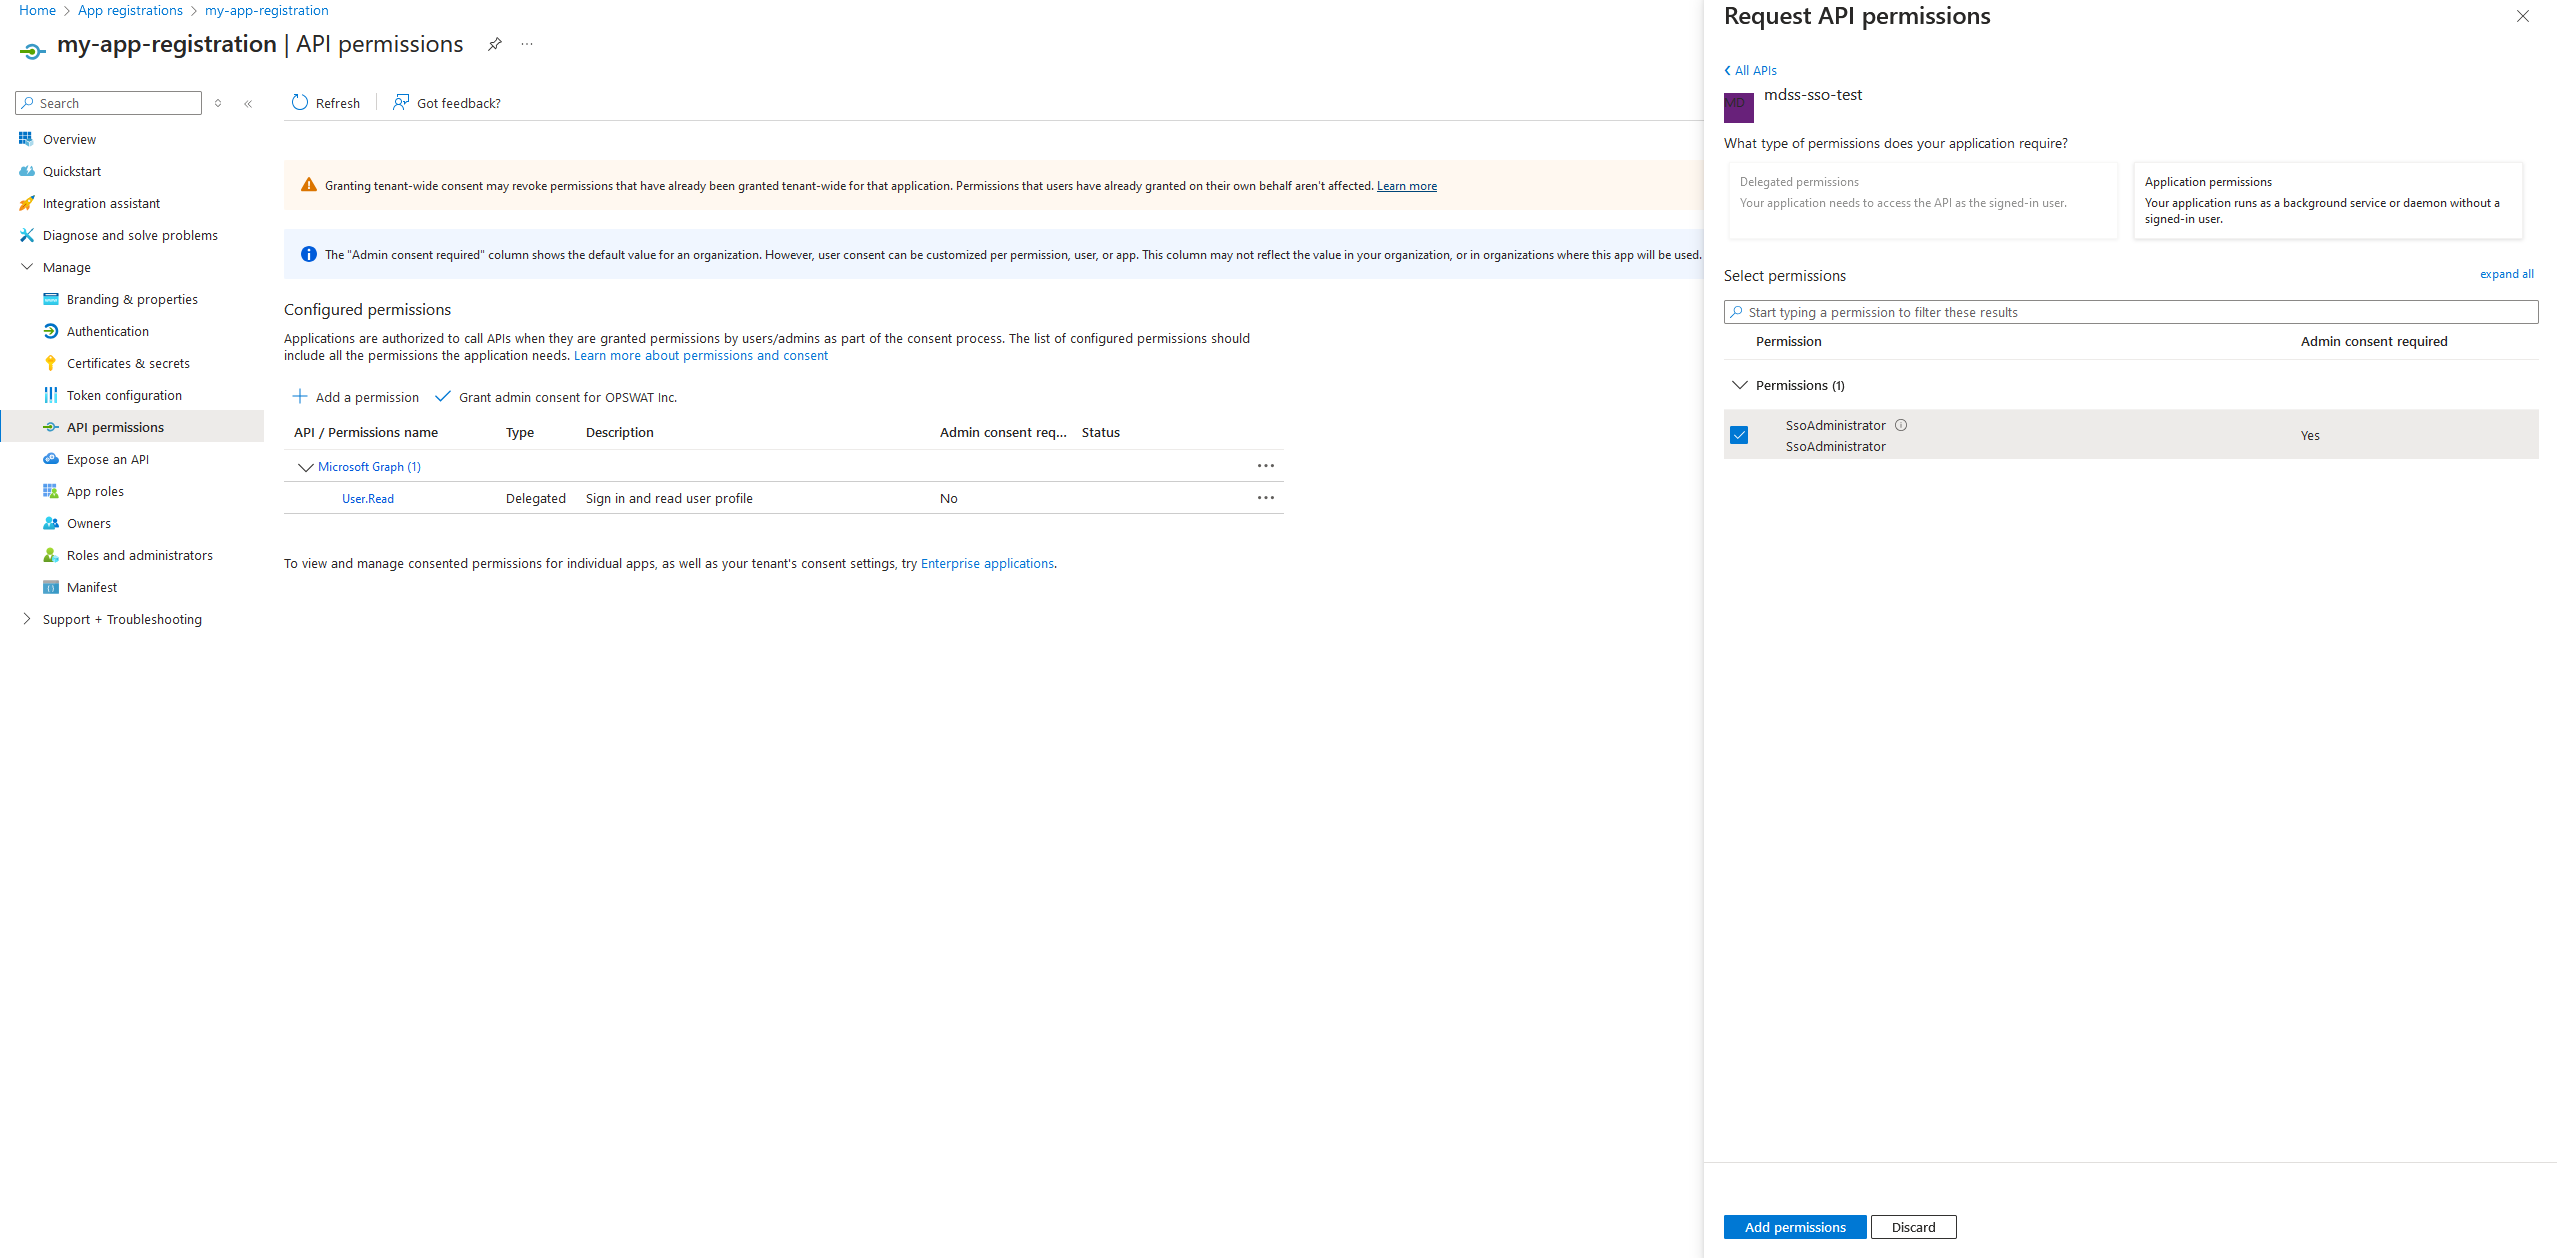
- Next, click on Grant admin consent

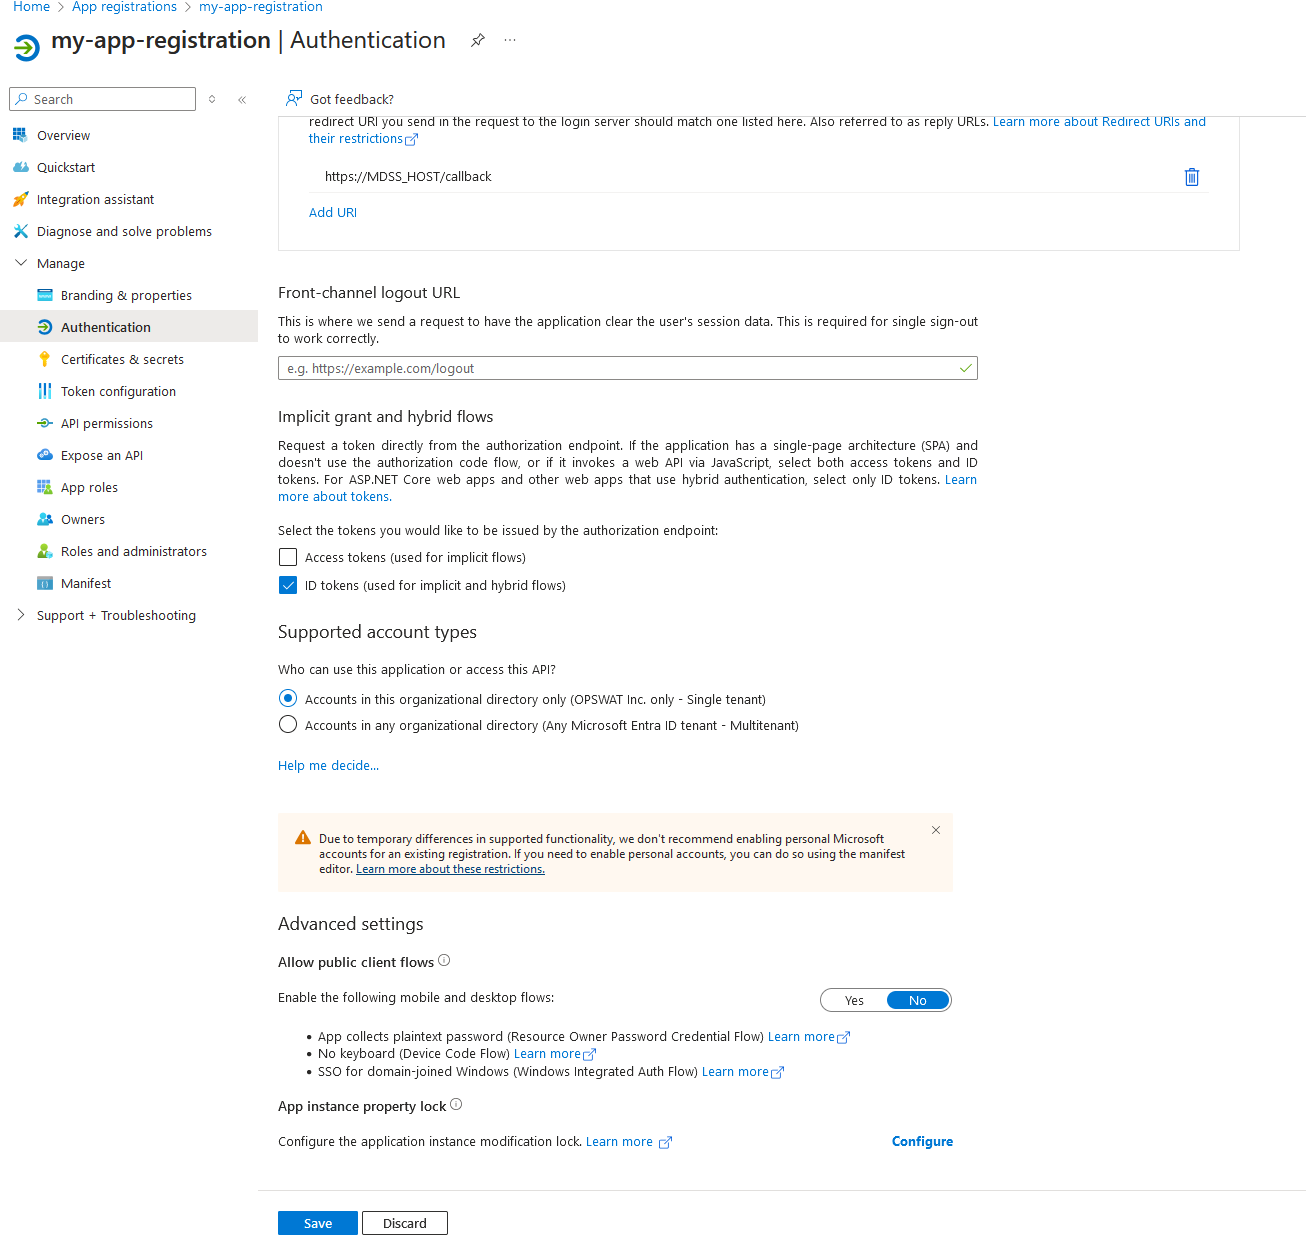
- Go to the Authentication tab. Here, click on the checkbox for ID tokens and also for Supported account types, select whatever you prefer (recommended is Single tenant).
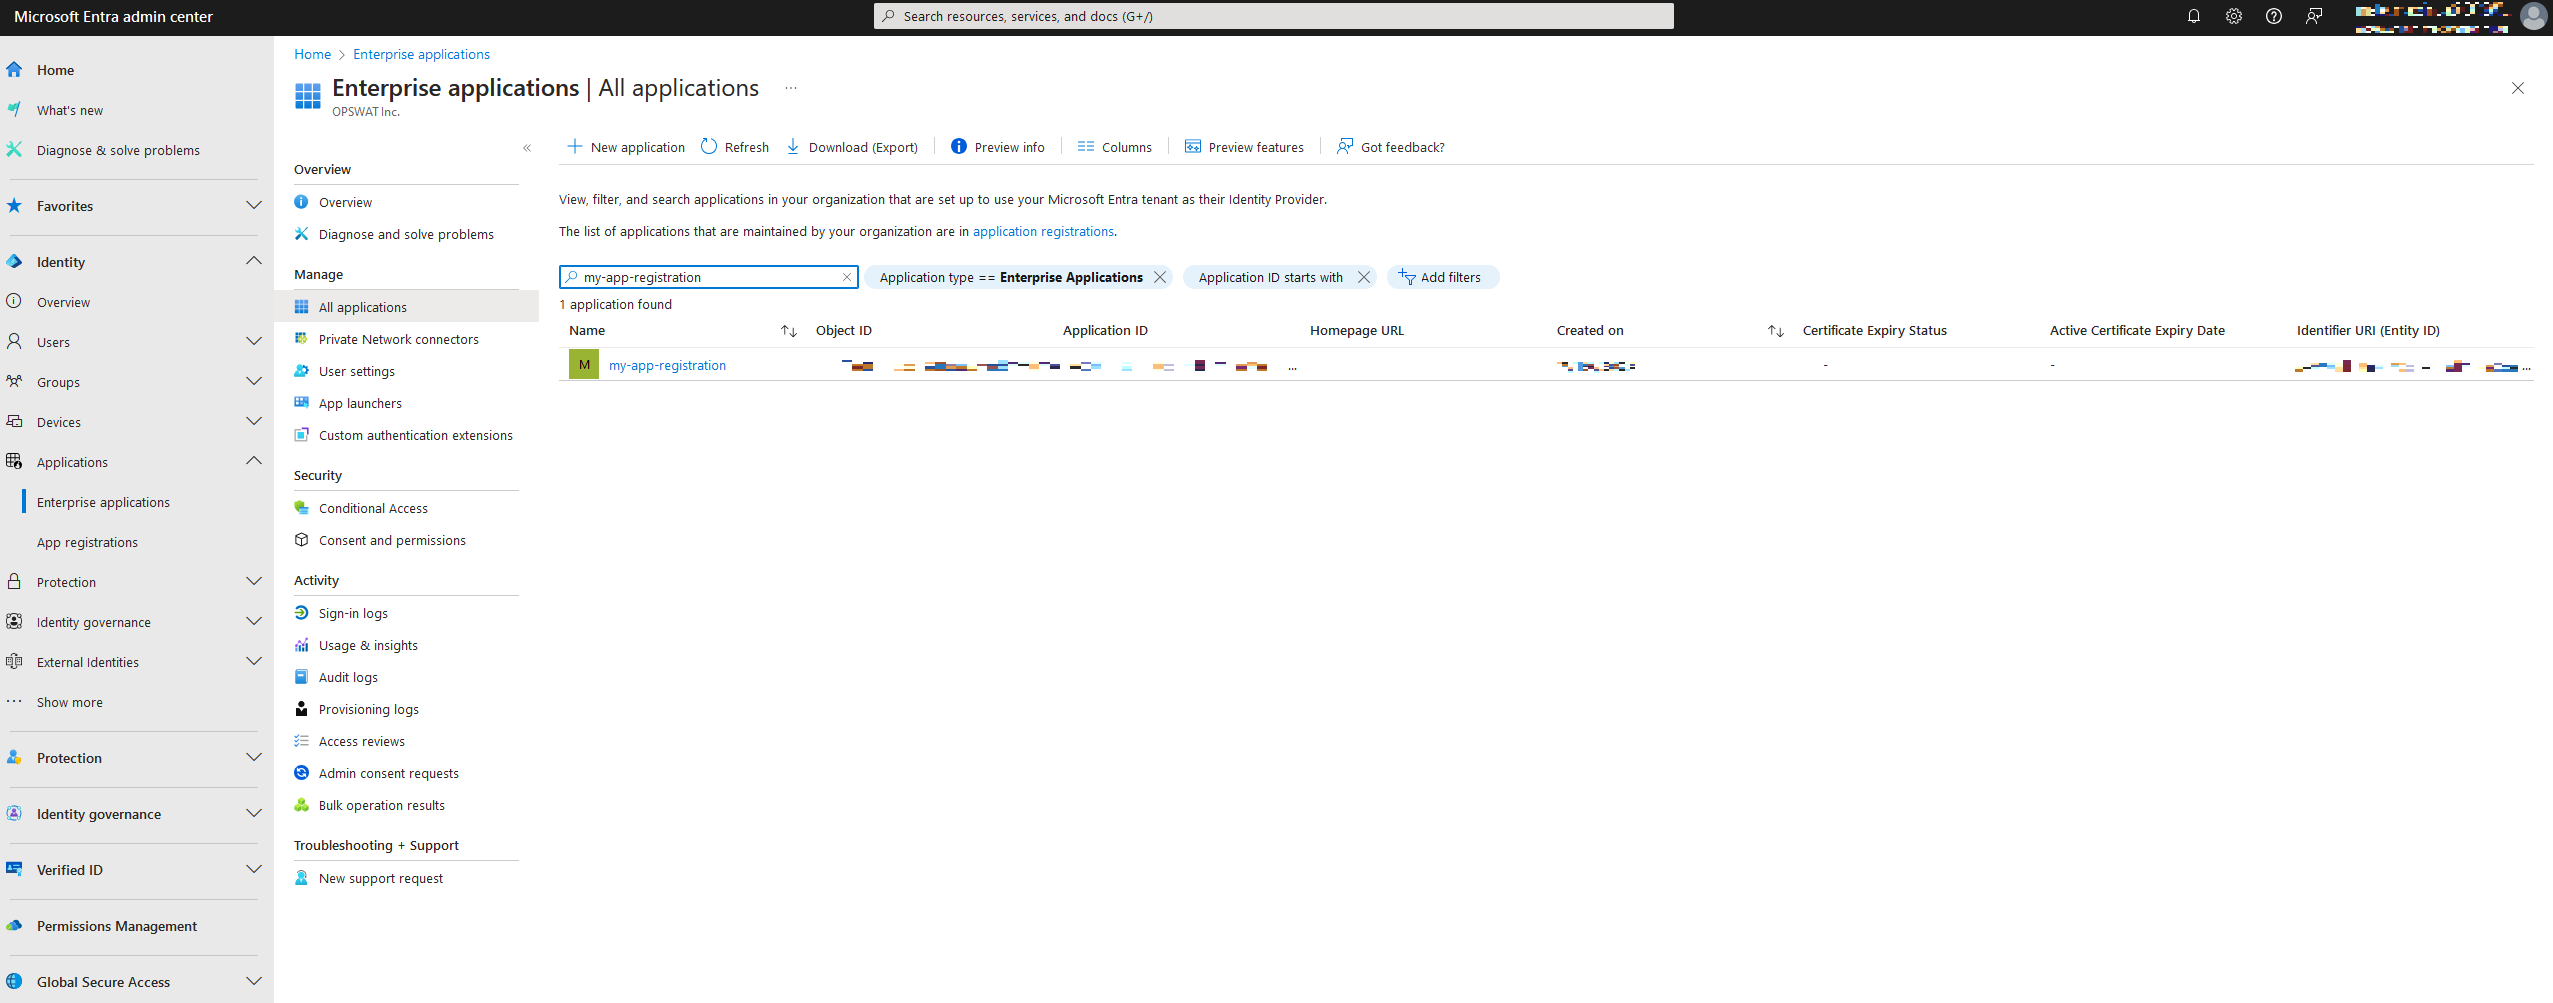
- Now, leave the Azure Portal and navigate to the Microsoft Entra admin center. Here, find the Enterprise applications window under the Applications tab on the left. Search for your configured app.
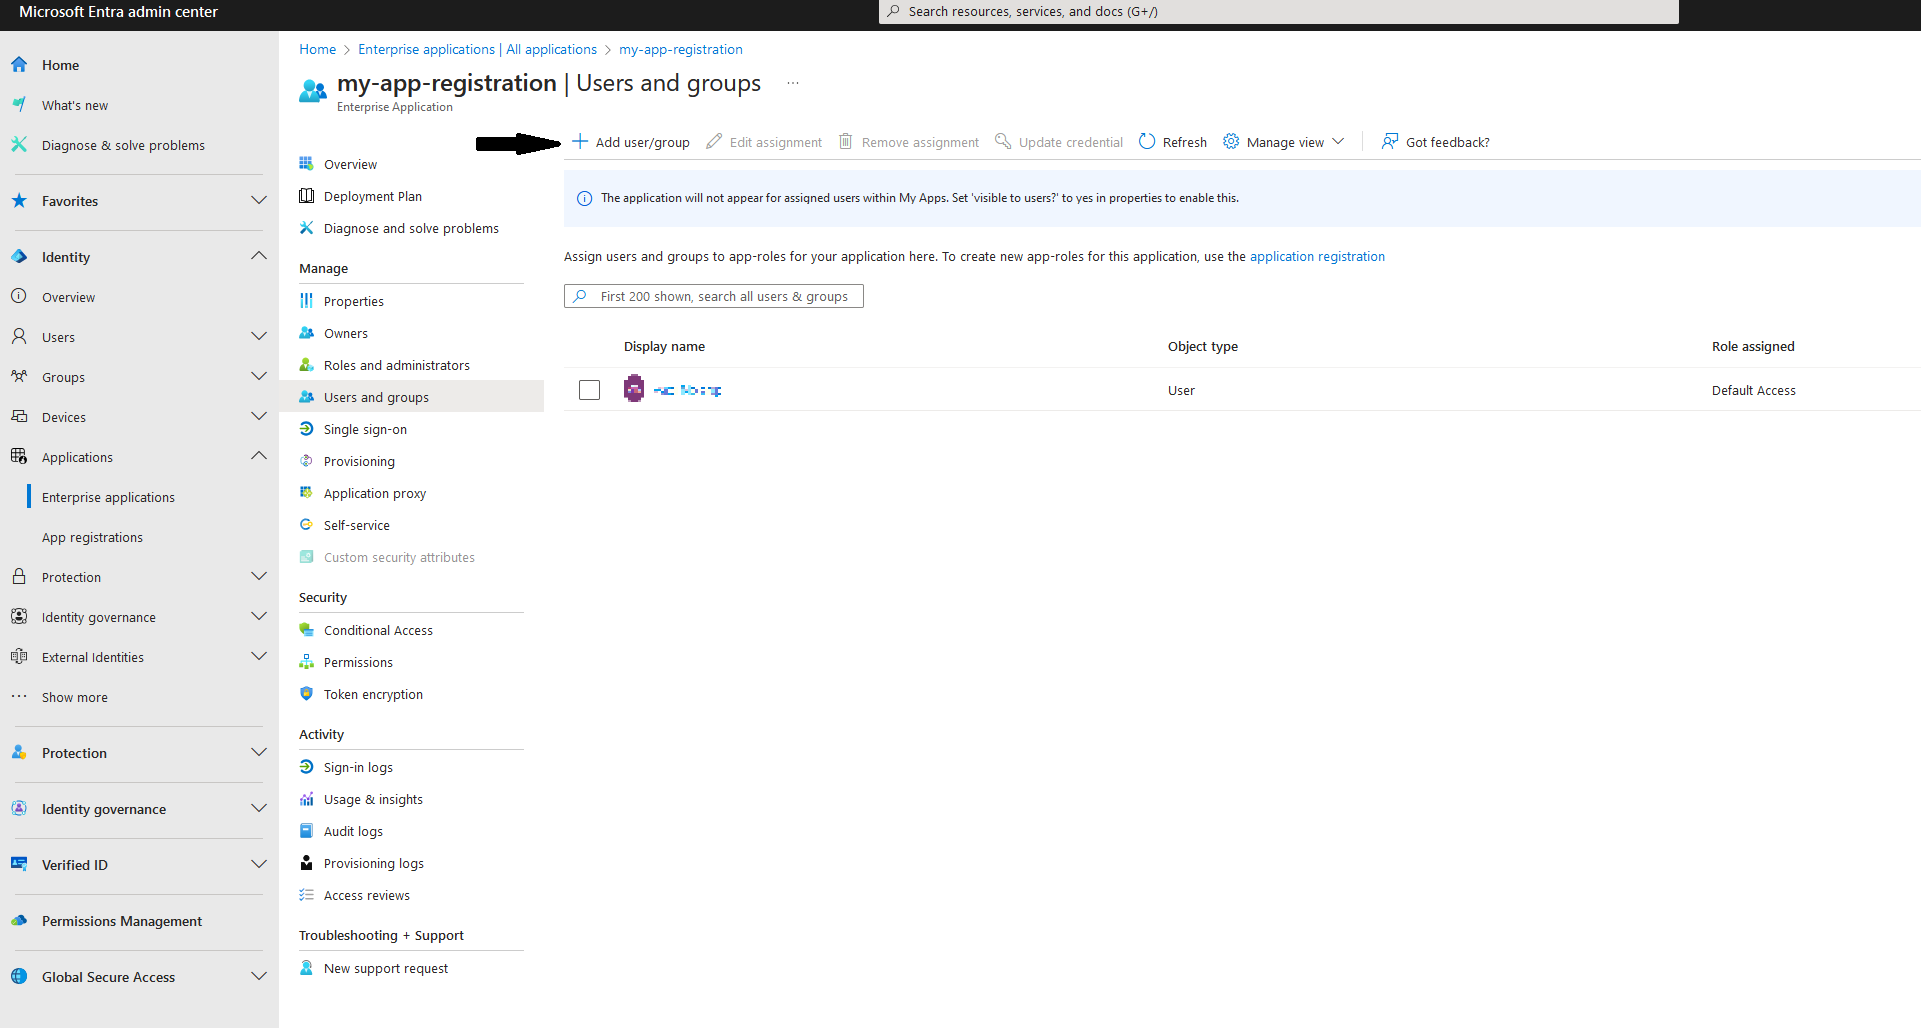
- Navigate to the Users and groups tab and select Add user/group
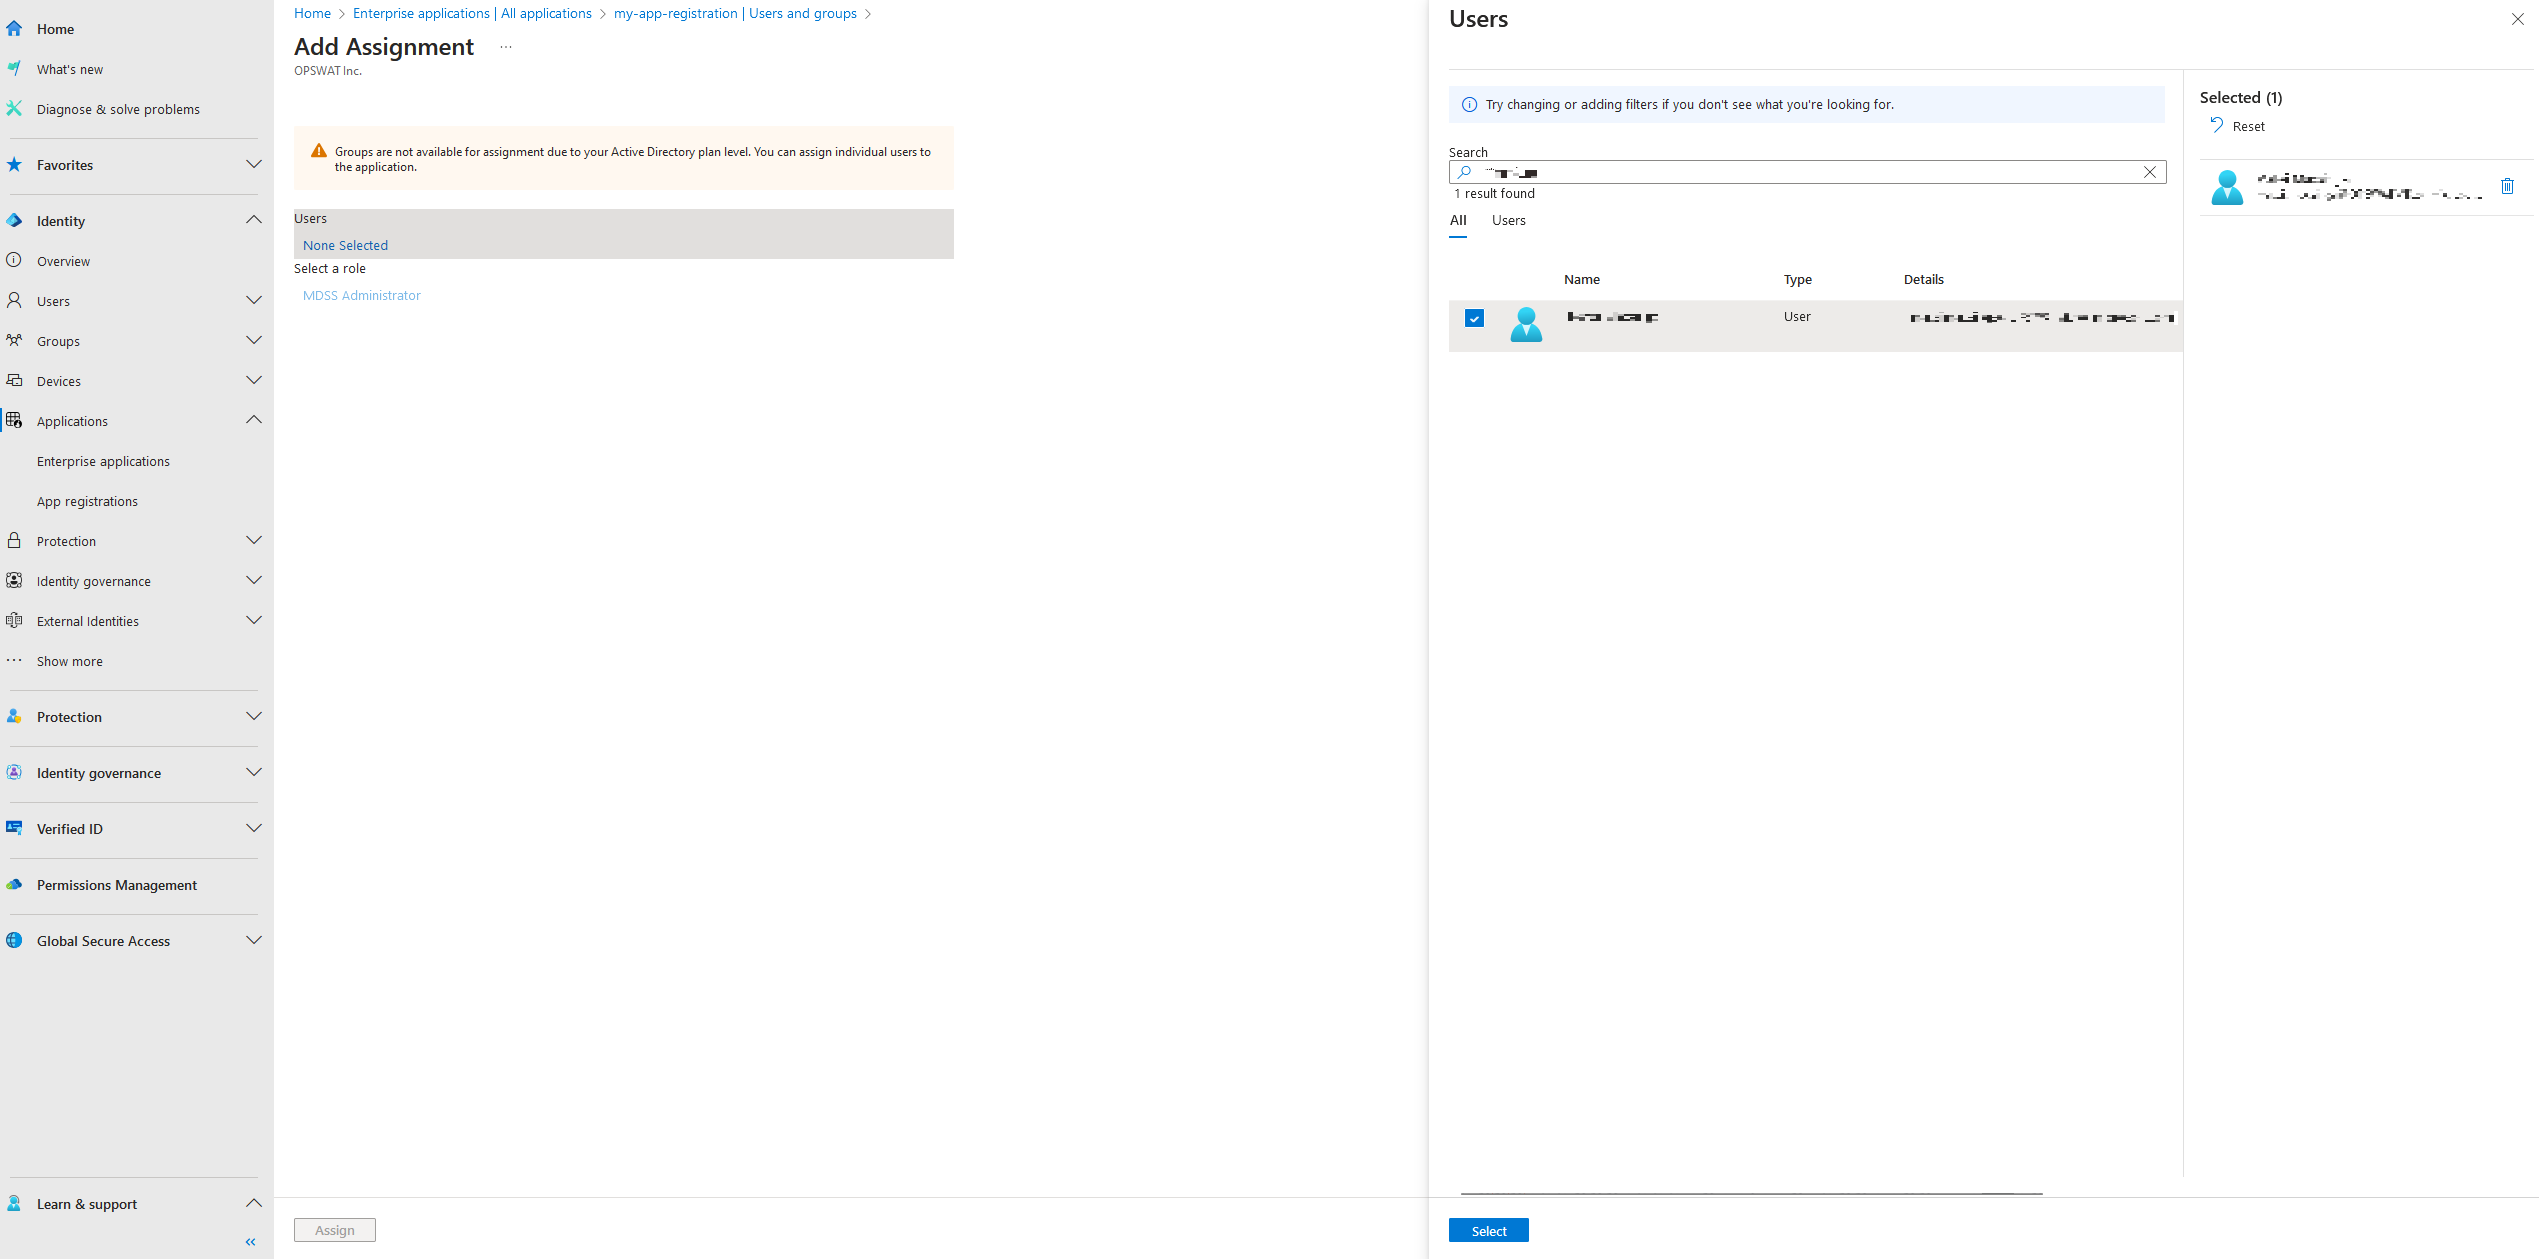
- Find your user and assign the configured App Role to it.
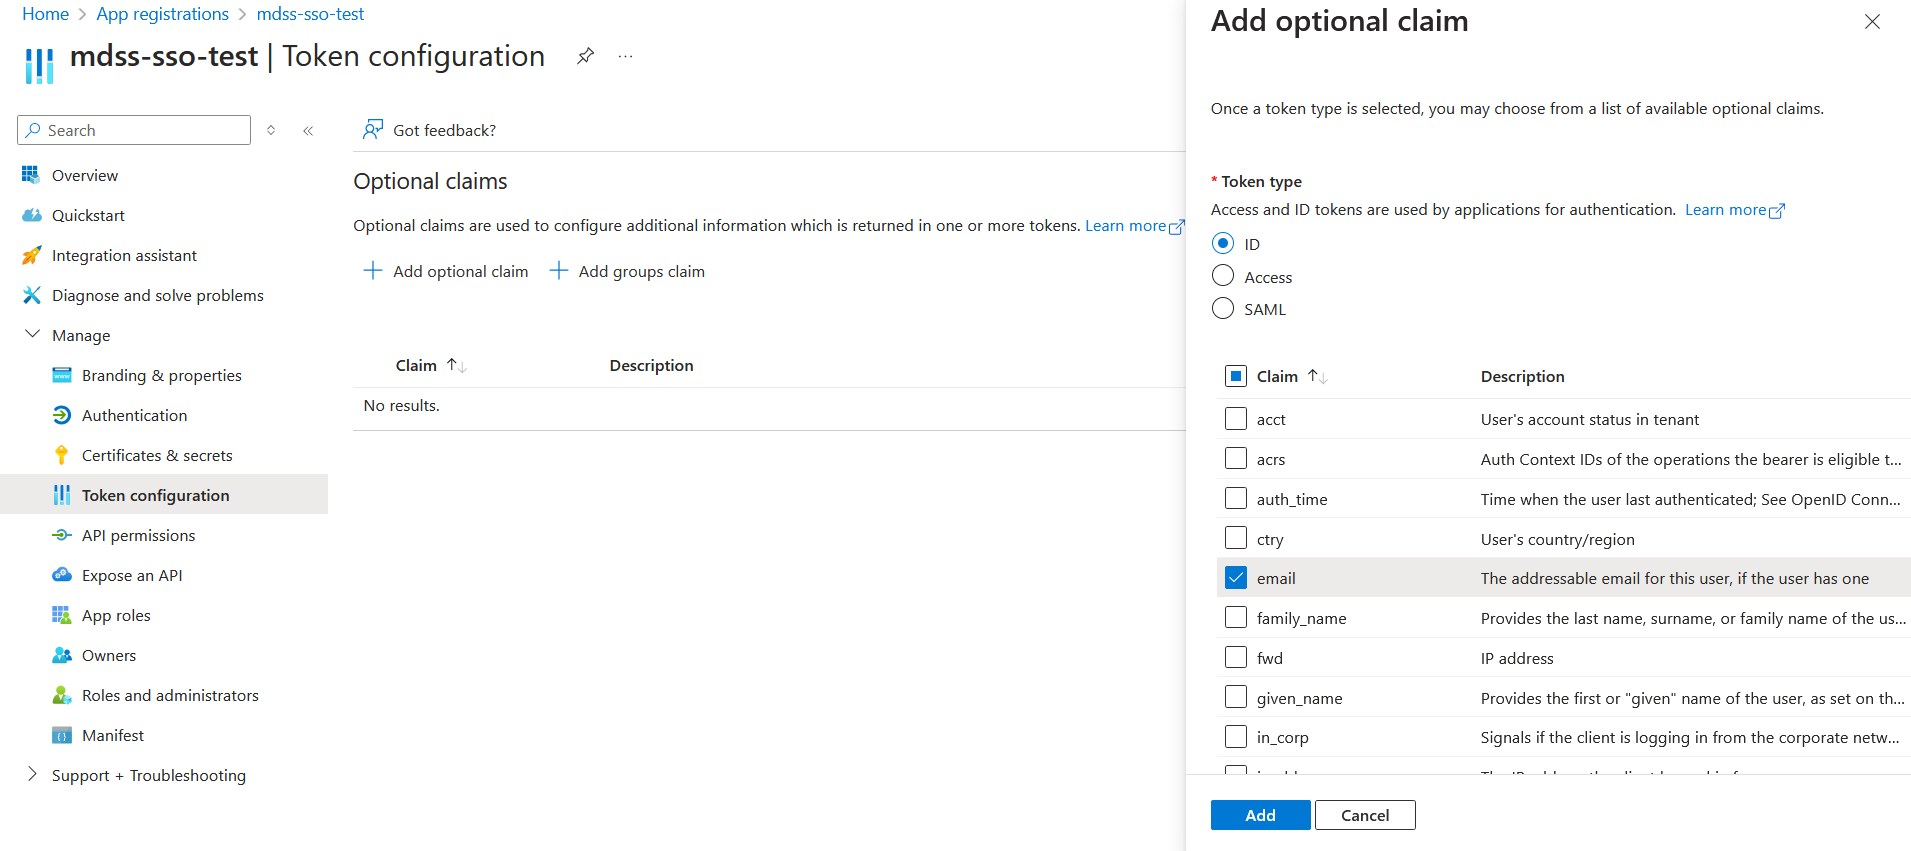
- Lastly, navigate to App registrations, find your app and click on the Token configuration. There, click on Add optional claim, select ID, and add the email claim.
Type to search, ESC to discard
Type to search, ESC to discard
Type to search, ESC to discard
Last updated on
Was this page helpful?
Next to read:
PingFederate Specific ConfigurationDiscard Changes
Do you want to discard your current changes and overwrite with the template?
Archive Synced Block
Message
Create new Template
What is this template's title?
Delete Template
Message

