For steps 1 and 2, please see this page
3. Setting up the NFS Client machine
On the same machine where MetaDefender Storage Security is installed, run this powershell command from an admin console:
Install-WindowsFeature NFS-ClientWith the default options, a user has read permissions when mounting an NFS share using the anonymous user. We can give the anonymous user write permissions by changing the UID and GID that it uses to mount the share.
To change the UID and GID we must make a simple change to the Windows registry by performing the following steps:
- Open regedit by typing it in the search box end pressing Enter.
- Browse to
HKEY_LOCAL_MACHINE\SOFTWARE\Microsoft\ClientForNFS\CurrentVersion\Default. - Create a new New DWORD (32-bit) Value inside the Default folder named
AnonymousUidand assign the UID 0 - Create a new New DWORD (32-bit) Value inside the Default folder named
AnonymousGidand assign the GID 0 - Reboot the machine to apply the changes.
4. Mount the NFS share
The below command needs to be run as NTSYSTEM user because NFS service is running as NTSYSTEM user.
To run terminal as NTSYSTEM, please do the following:
- download and extract PsTools
- Open an Administrator console
- cd to PsTools folder
- run
.\PsExec.exe -i -s cmd.exe. It will open another terminal as a NTSYSTEM user
In the above-opened terminal, run the following command:
mount -o "nolock,sec=sys" {nfs-server-ip}:{nfs-share-location} {mounted-drive}For example, the NFS share will be mounted in the Y drive:
mount -o "nolock,sec=sys" 192.168.207.139:/srv/company-public-files/ Y:5. Add the NFS share in MDSS UI
In order to integrate NFS with MetaDefender Storage Security, please follow these steps:
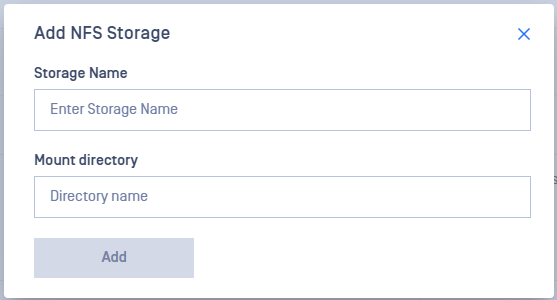
- From the left side menu, navigate to Storage units and from the Network-Attached Storage tab, choose Add NFS Storage:

- Assign a meaningful name to your NFS storage for easy identification later.
- Input the mount drive used at step 4. In this example, should be
Y:\ - Click Add in order to finish the process.
Please follow the Microsoft recommendations for file and directory names.

