Integrate with Active Directory Federation Services
Integration with Active Directory Federation Services as Single Sign-On provider is only available for AD FS servers running Windows Server 2016 AD FS or Windows Server 2019 AD FS.
Below you can find a step by step tutorial on how to integrate Active Directory Federation Services IdP with MetaDefender Vault using the OpenID Connect protocol.
- Open the Server Manager Desktop App and navigate to Tools → AD FS Management

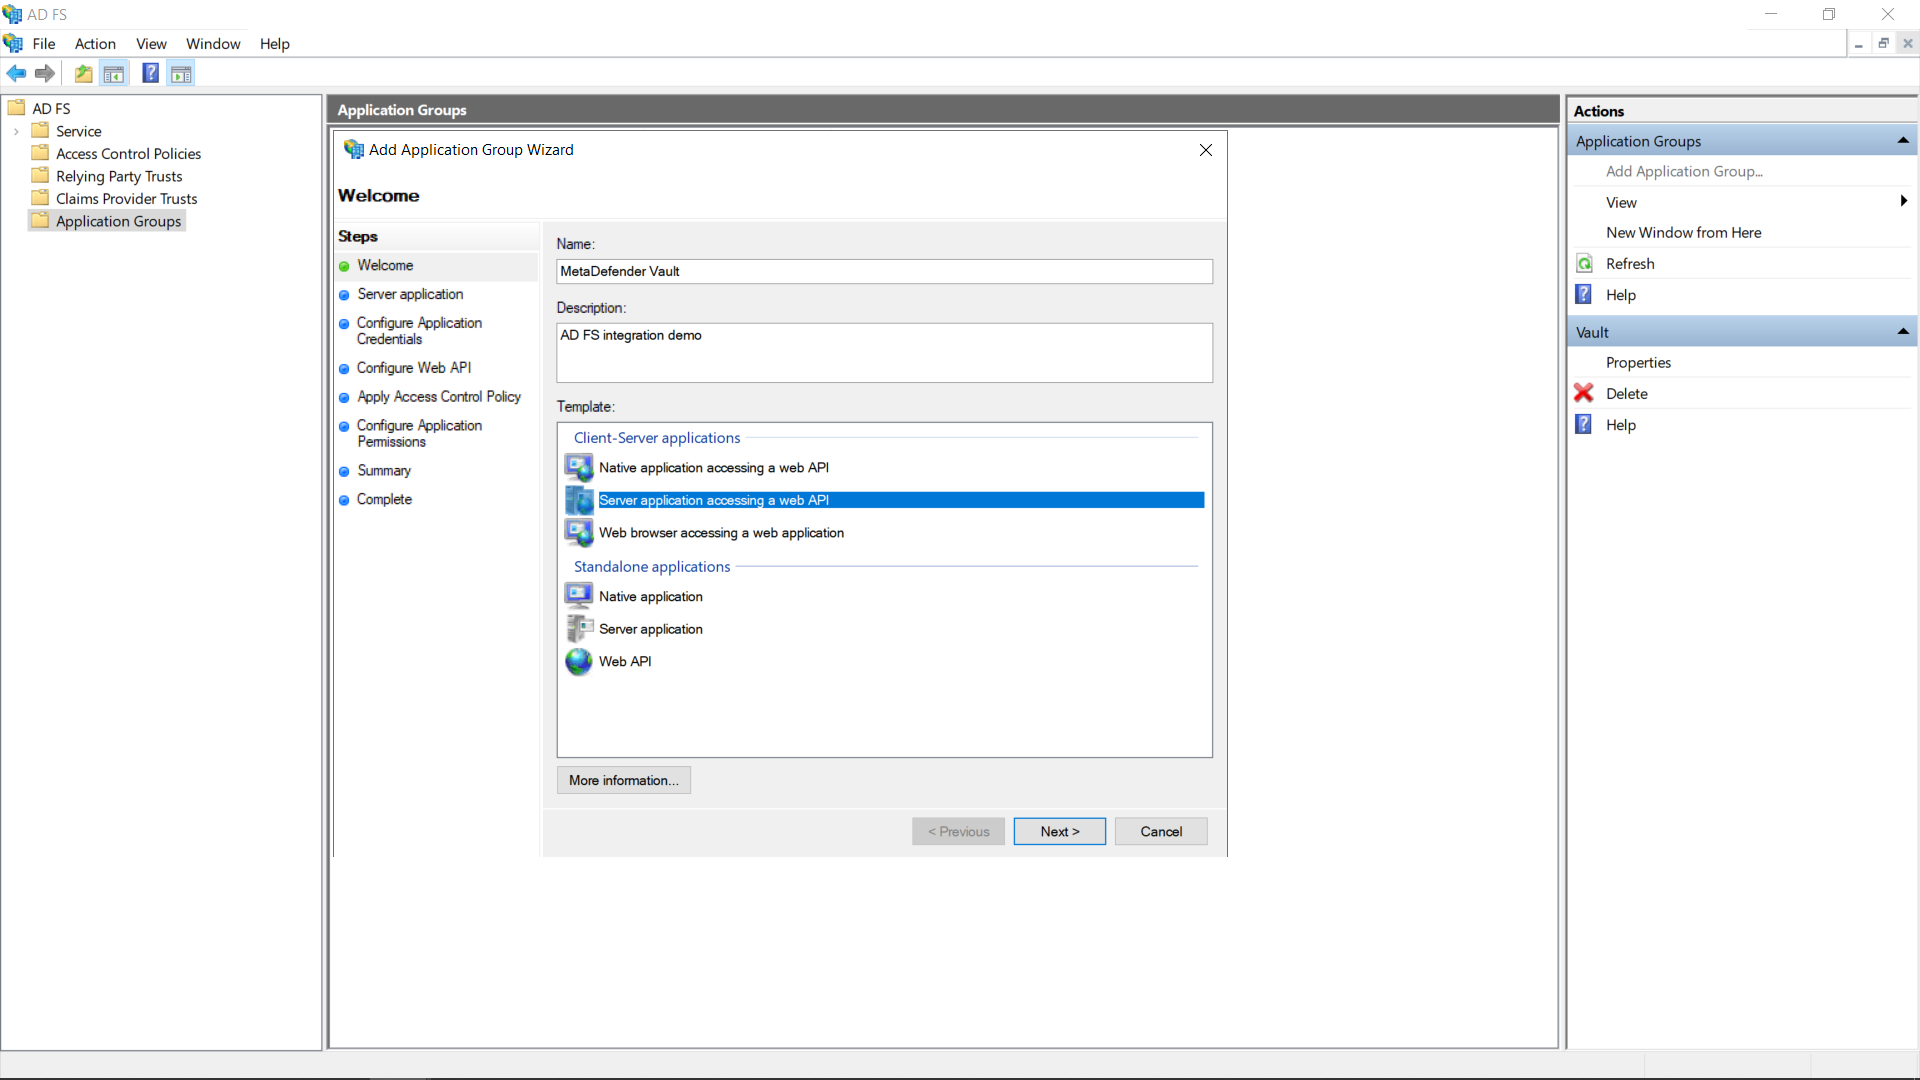
- Inside the AD FS Management app navigate to Application Groups → Add Application Group
- Enter a descriptive name for the application group and select the Server application accessing a web API template
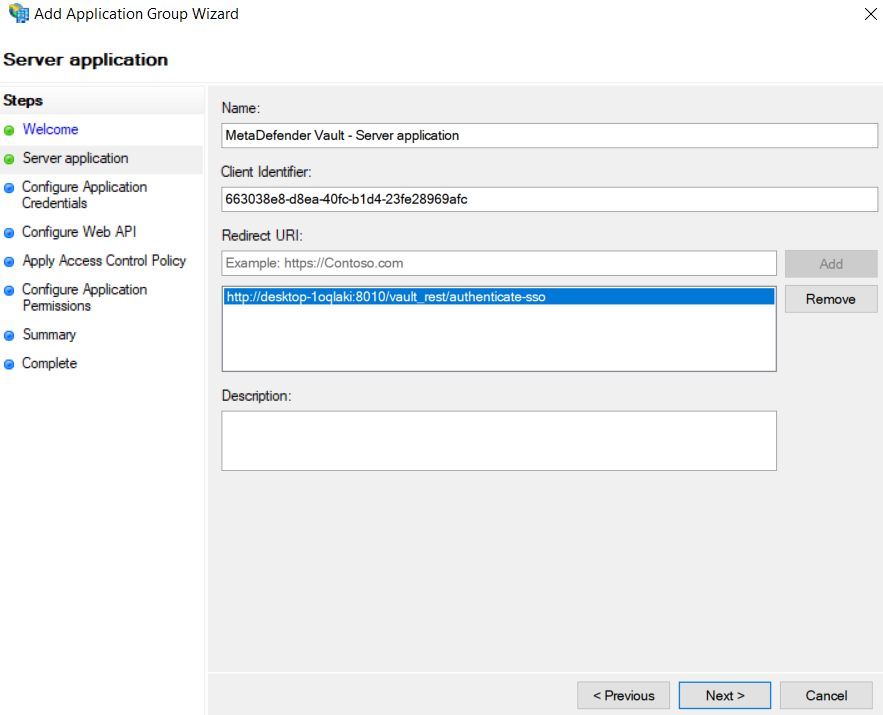
- To find the Login redirect URI
- Go to MetaDefender Vault web console and navigate to Settings → Single Sign-On
- Turn on Enable Single Sign-On
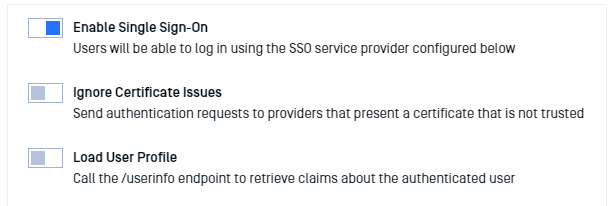
- It might be necessary to turn on Ignore Certificate Issues if the AD FS server is using a self-signed certificate
- Turn off Load User Profile because AD FS 2016 and newer do not yet support calling the “/userinfo” endpoint
- Authority should point to your AD FS URL. You can compose the URL by appending “/adfs“ to the AD FS server’s fully qualified domain name (FQDN for short)
- IP Address or Domain should point to the location of your Vault instance. Once you fill this information, Vault will automatically generate the Redirect URI
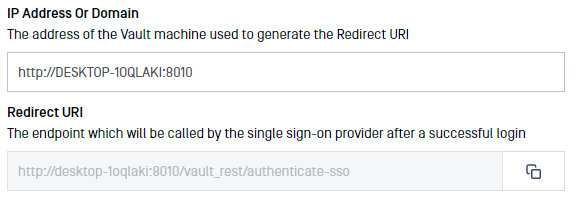
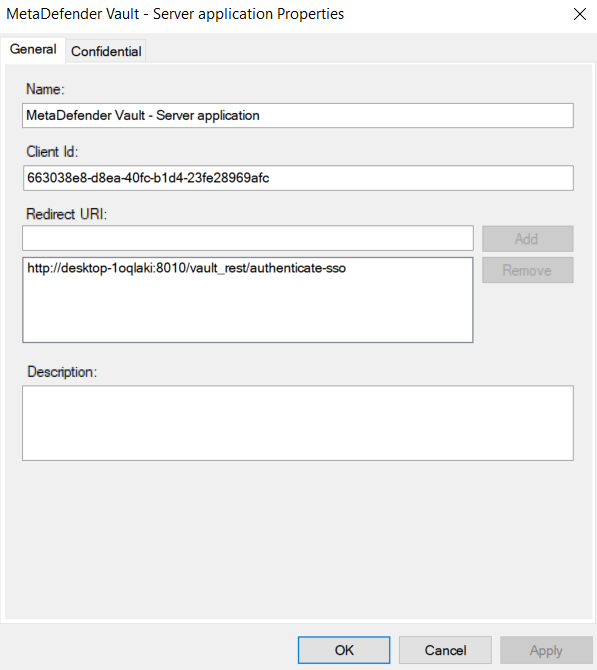
- Copy the Redirect URI and go back to the AD FS Application Settings and paste it (step 5)
- Add the copied URI to the list of known redirect endpoints and save the Client Identifier for later use
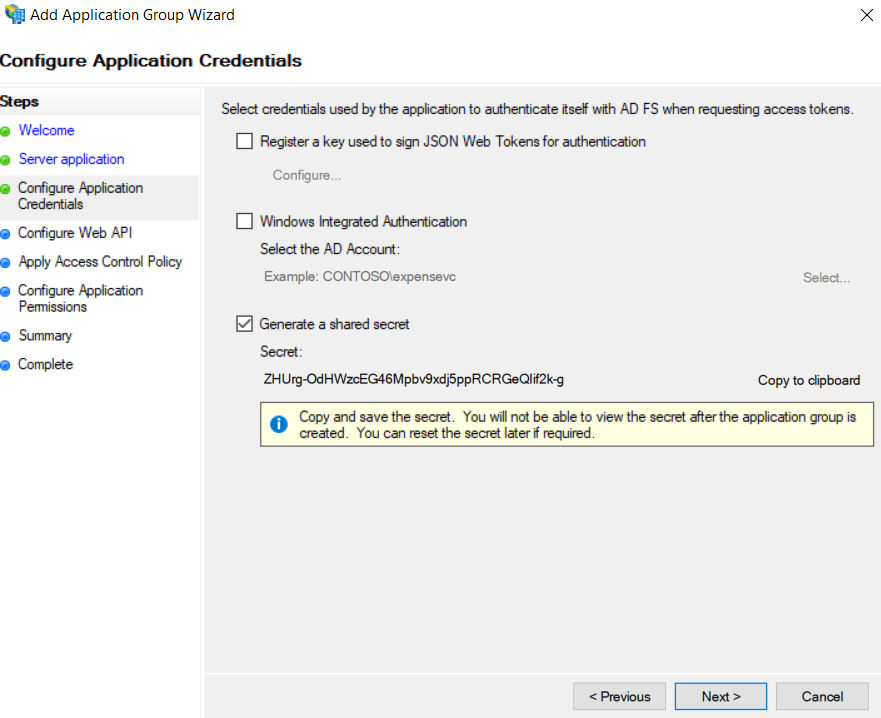
- We will require a client secret, so select the Generate a shared secret action and copy the generated GUID for later use
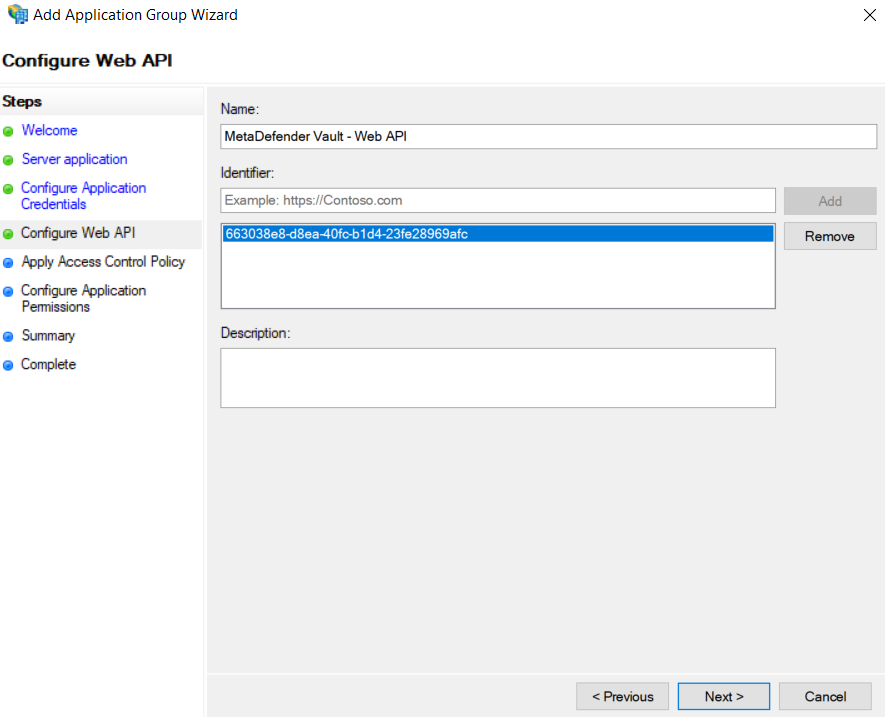
- Add the client identifier (generated at step 5) to the list of known clients
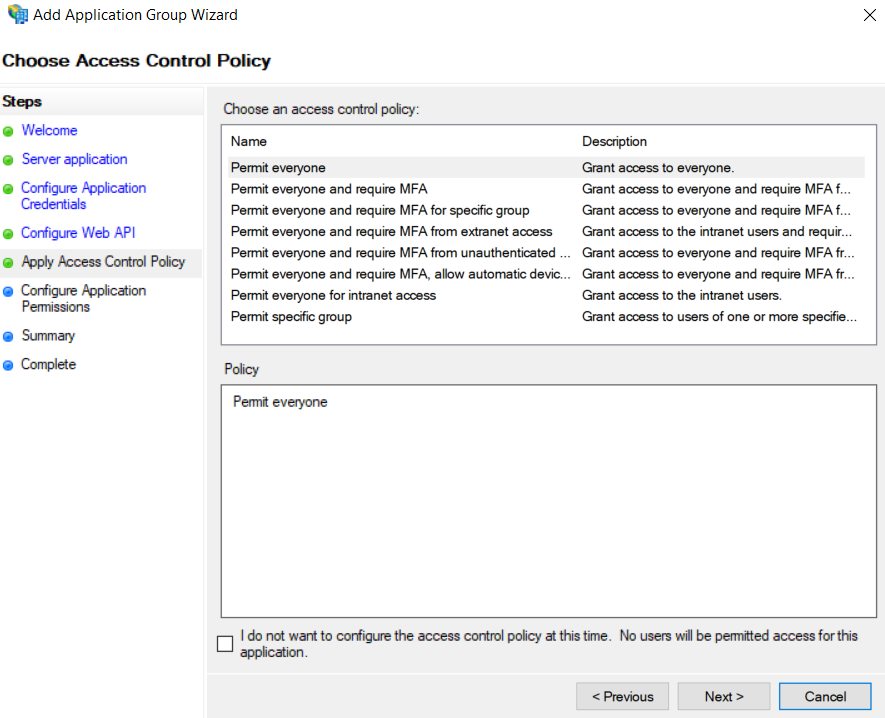
- Choose which users will be allowed to authenticate. For the purpose of this tutorial we will be allowing everyone
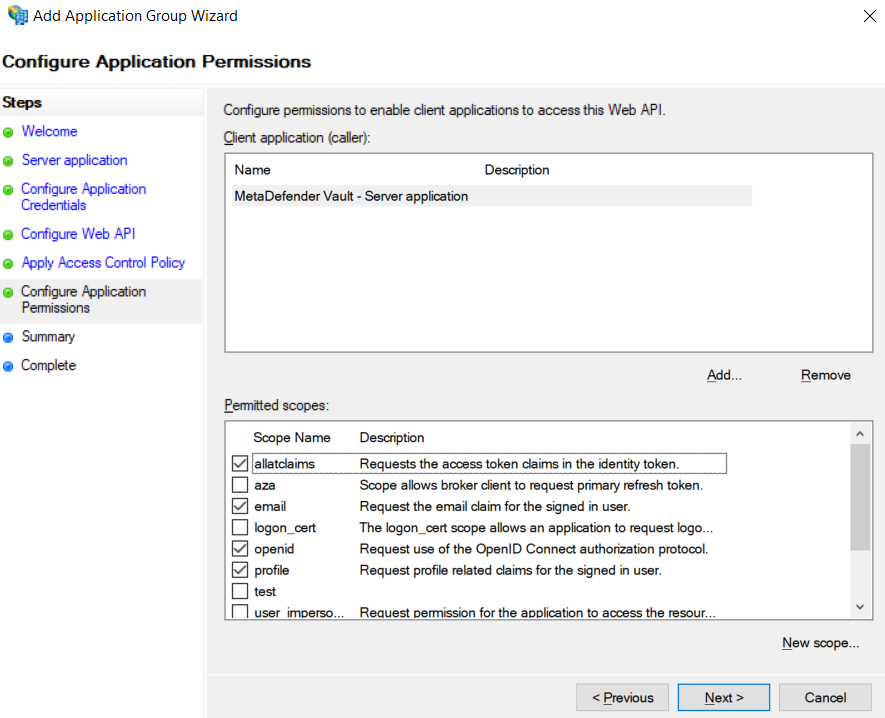
- Last but not least we must configure the allowed scopes.
It is mandatory to select:
- openid → for enabling the OpenID Connect protocol
- profile → to receive the user’s name related claims (upn, display_name, first_name, last_name)
- email → to receive the user’s email claim (necessary for administrator role asignment)
- allatclaims → to allow the profile and email related claims to be contained in the identity token, since AD FS does not allow loading profile related claims from the userinfo endpoint
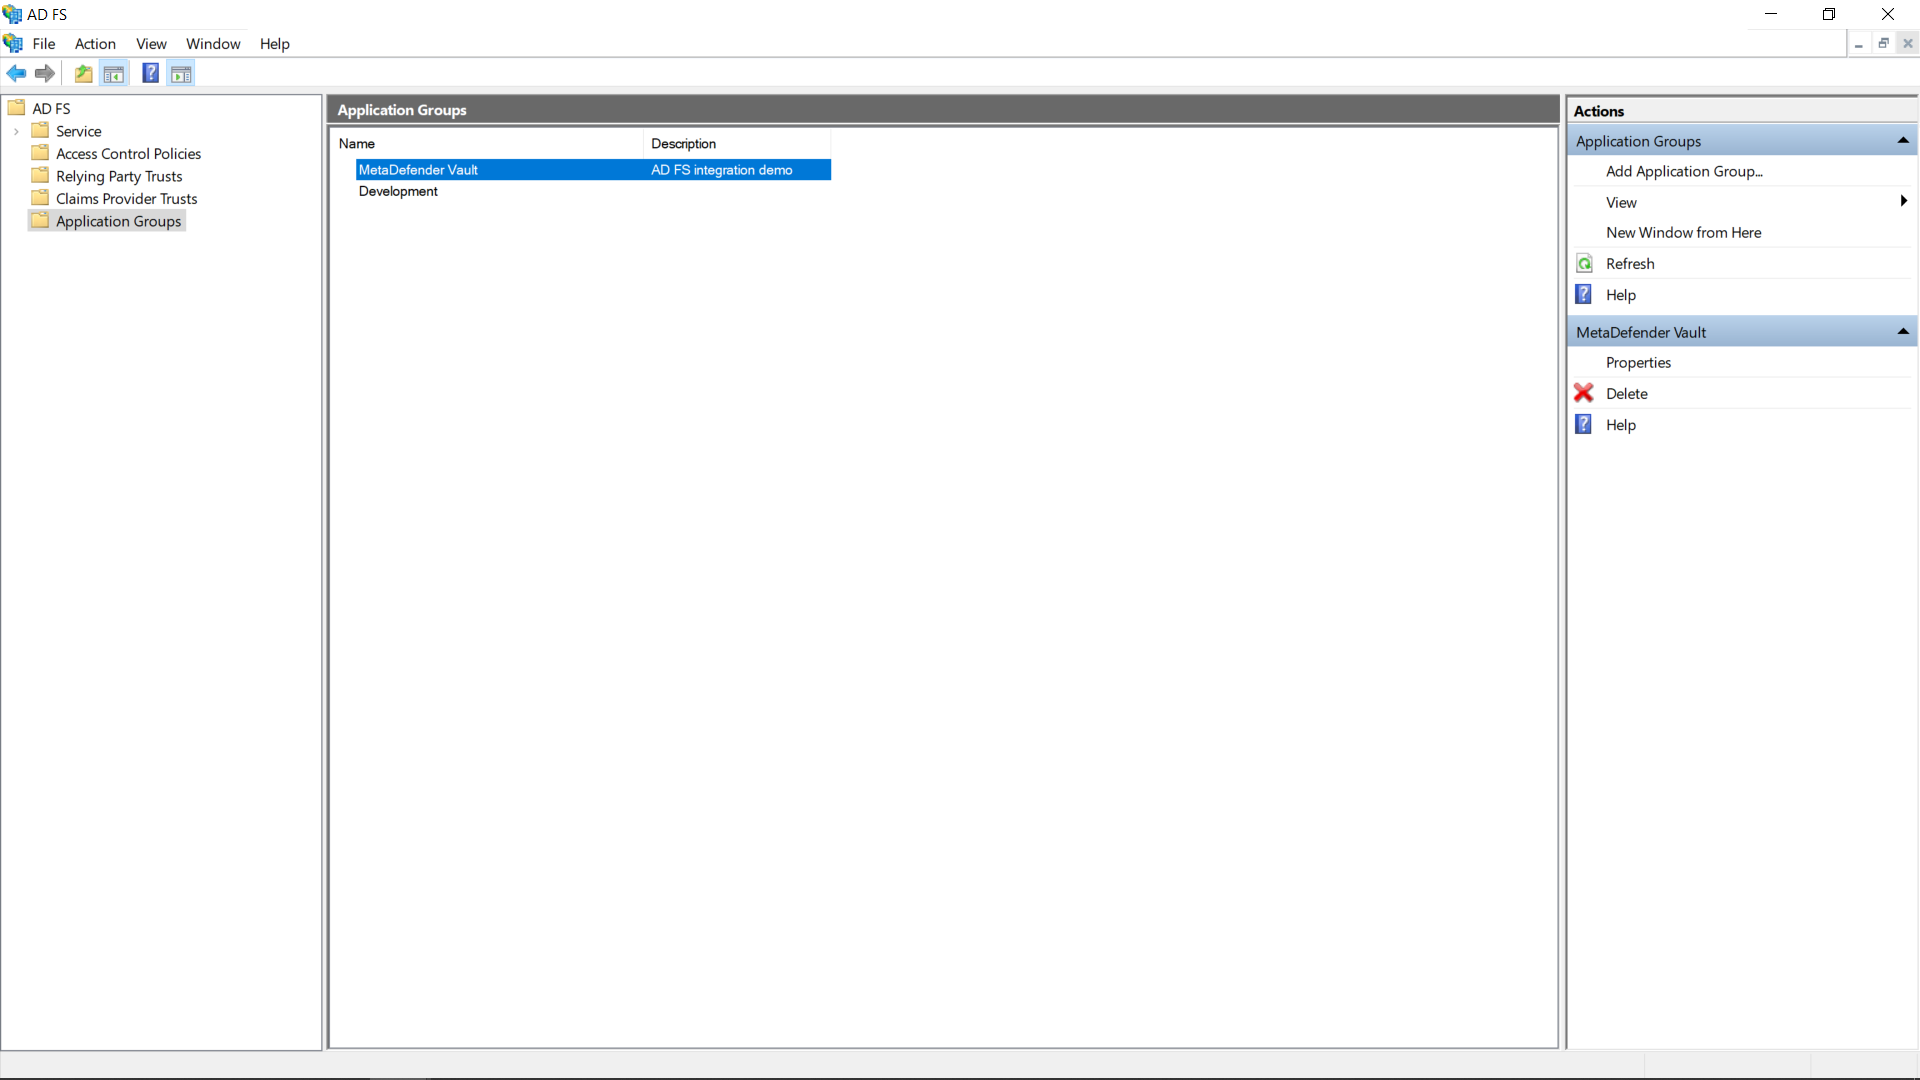
- After the above setup is complete, the newly created application group should be displayed in the application groups list
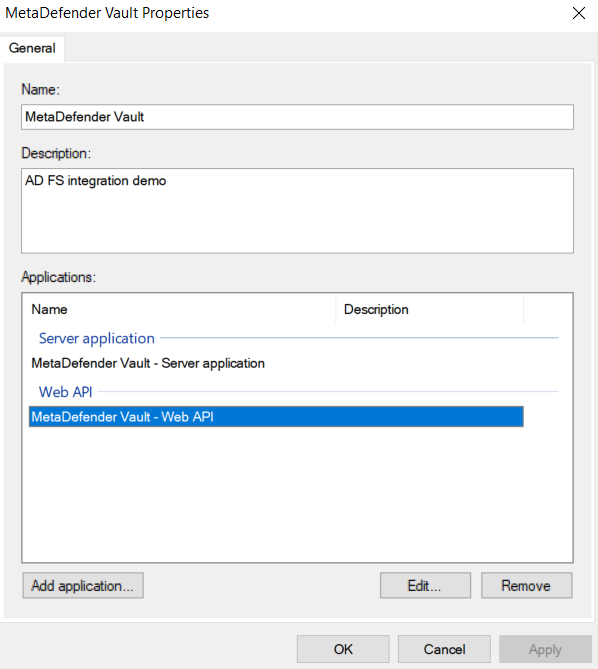
- There is just one more step to complete on the AD FS server side, attribute to claim mapping. Double click the newly created application group and edit the Web API
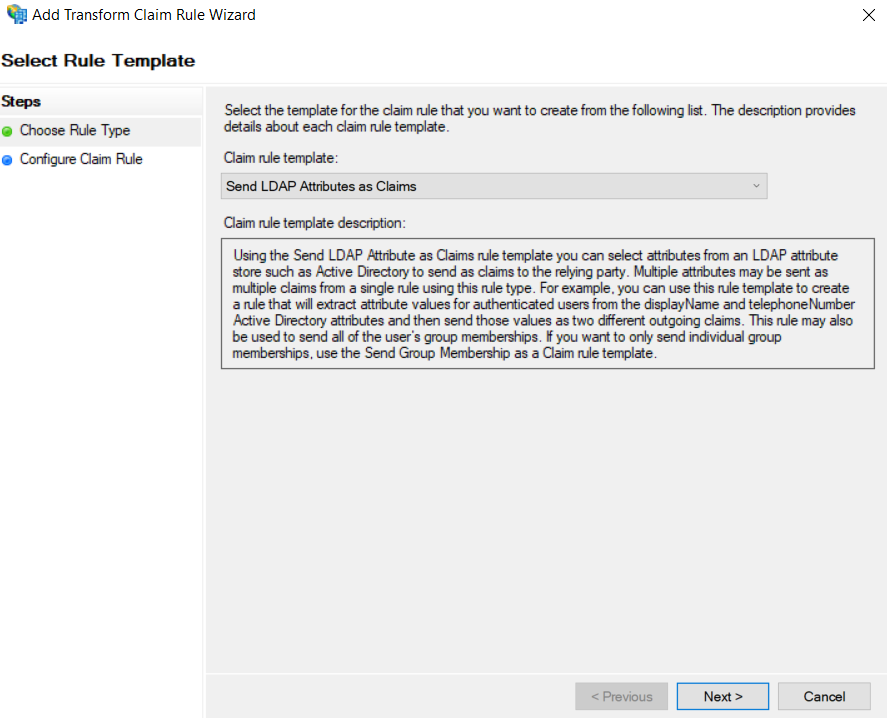
- Navigate to the Issuance Transform Rules tab and click Add Rule…
- Select the Send LDAP Attributes as Claims template and click Next
- Select Active Directory as an Attribute store and create the following mappings.
MetaDefender Vault recognizes the following claims:
- upn (required)
- email (required)
- name (optional)
- given_name (optional)
- family_name (optional)
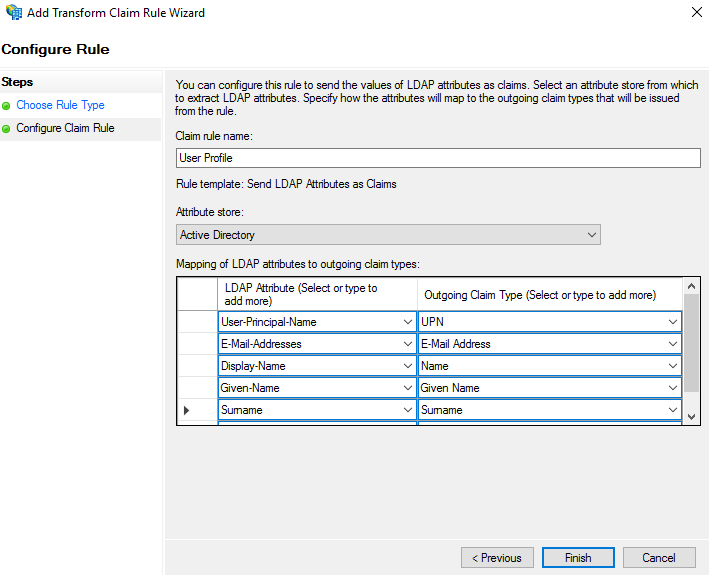
- Click Finish and Apply
- On Vault’s side, input the Client ID (created at step 5) and Client Secret (created at step 6)
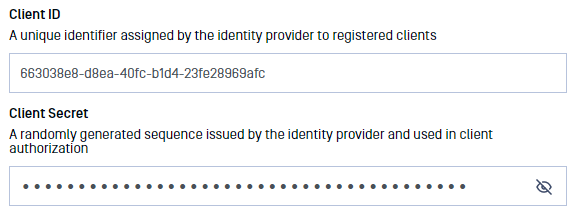
- In case of misplacement, the Client ID and Client Secret can be fetched by accessing the application group’s affiliated server application

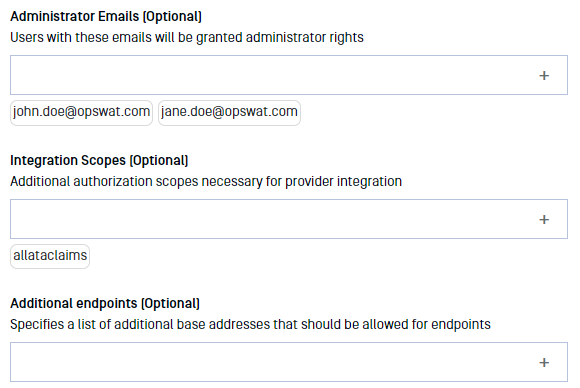
- Add relevant Administrator Emails to select which users should be granted administrator rights and add the allatclaims scope to Integration Scopes
- If everything is ready, click Update.
Testing the integration
To test the integration:
- Log out of MetaDefender Vault
- You will notice that there is a new LOGIN WITH SSO button on the login page
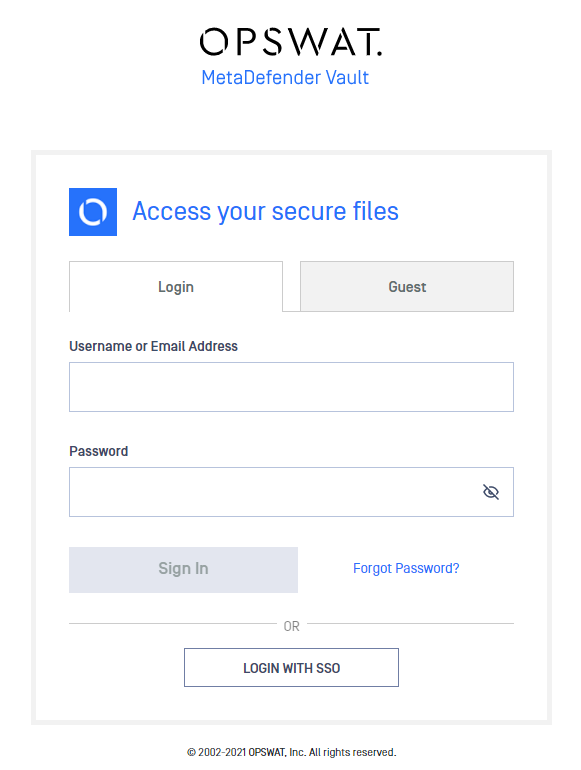
- Click LOGIN WITH SSO. You should be redirected to Active Directory Federation Services to login. Once logged in, you will be redirected back to MetaDefender Vault and automatically logged in.
Was this page helpful?