
The Properties & Membership page lets you specify the name and description for a MetaDefender Kiosk workflow. It also lets you manage the users or groups assigned to that workflow. To be able to configure workflows with users, the Kiosk system must be part of the domain or be able to authenticate with a remote Active Directory. To be able to configure workflows with groups, the Kiosk system must be able to authenticate with a remote Active Directory.
Each user or group can be assigned to multiple workflows but only one workflow is selected for a session. See Logging In on the User Authentication Screen for more details
1. Assignment from available User/Group
When set up with AD authentication, if the KIOSK can successfully query users and groups, the User/Group available to add section will show users and groups from all configured ADs in their respective User and Group tabs.
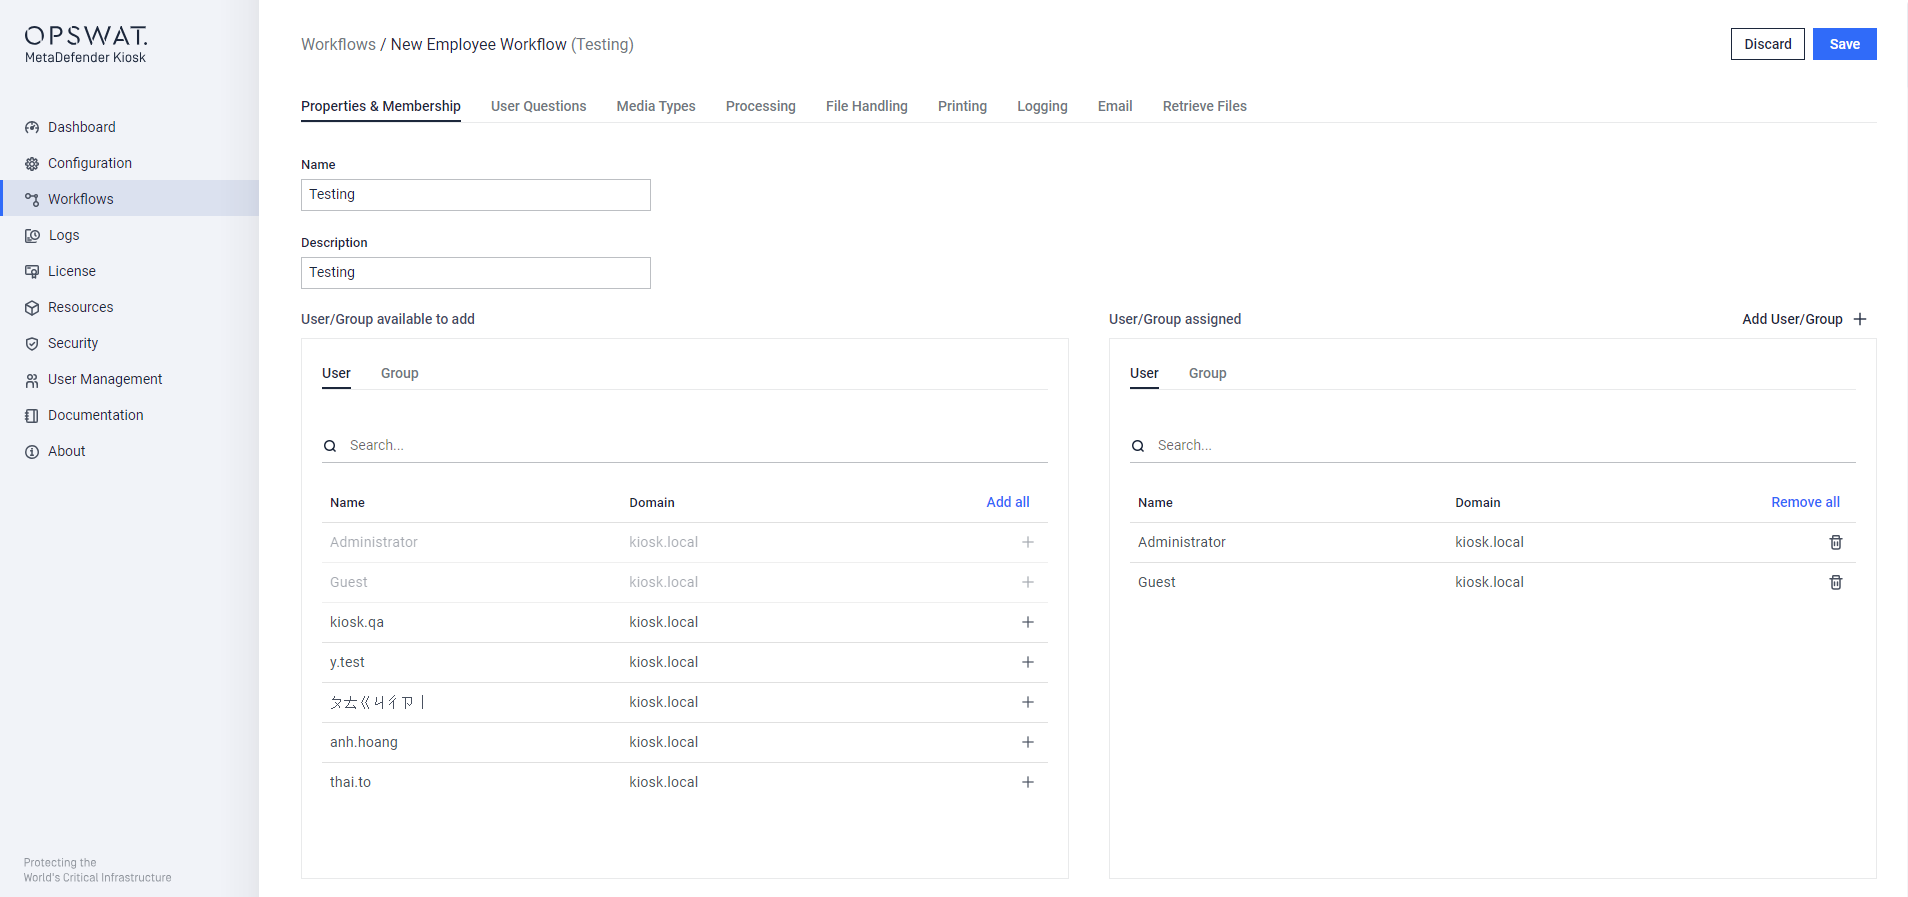
The admin can also specify a user/group in the search box, the search will narrow down the available data which contain the search pattern. Different from Visitor Management, manage the search accepts sAMAccountName (an attribute in AD server) to search through AD server.
Flow the following steps to assign users/groups to the workflow:
Step 1. Select user(s)/group(s) from the User/Group available to add section by clicking on (+) or Add all buttons on corresponding tab.
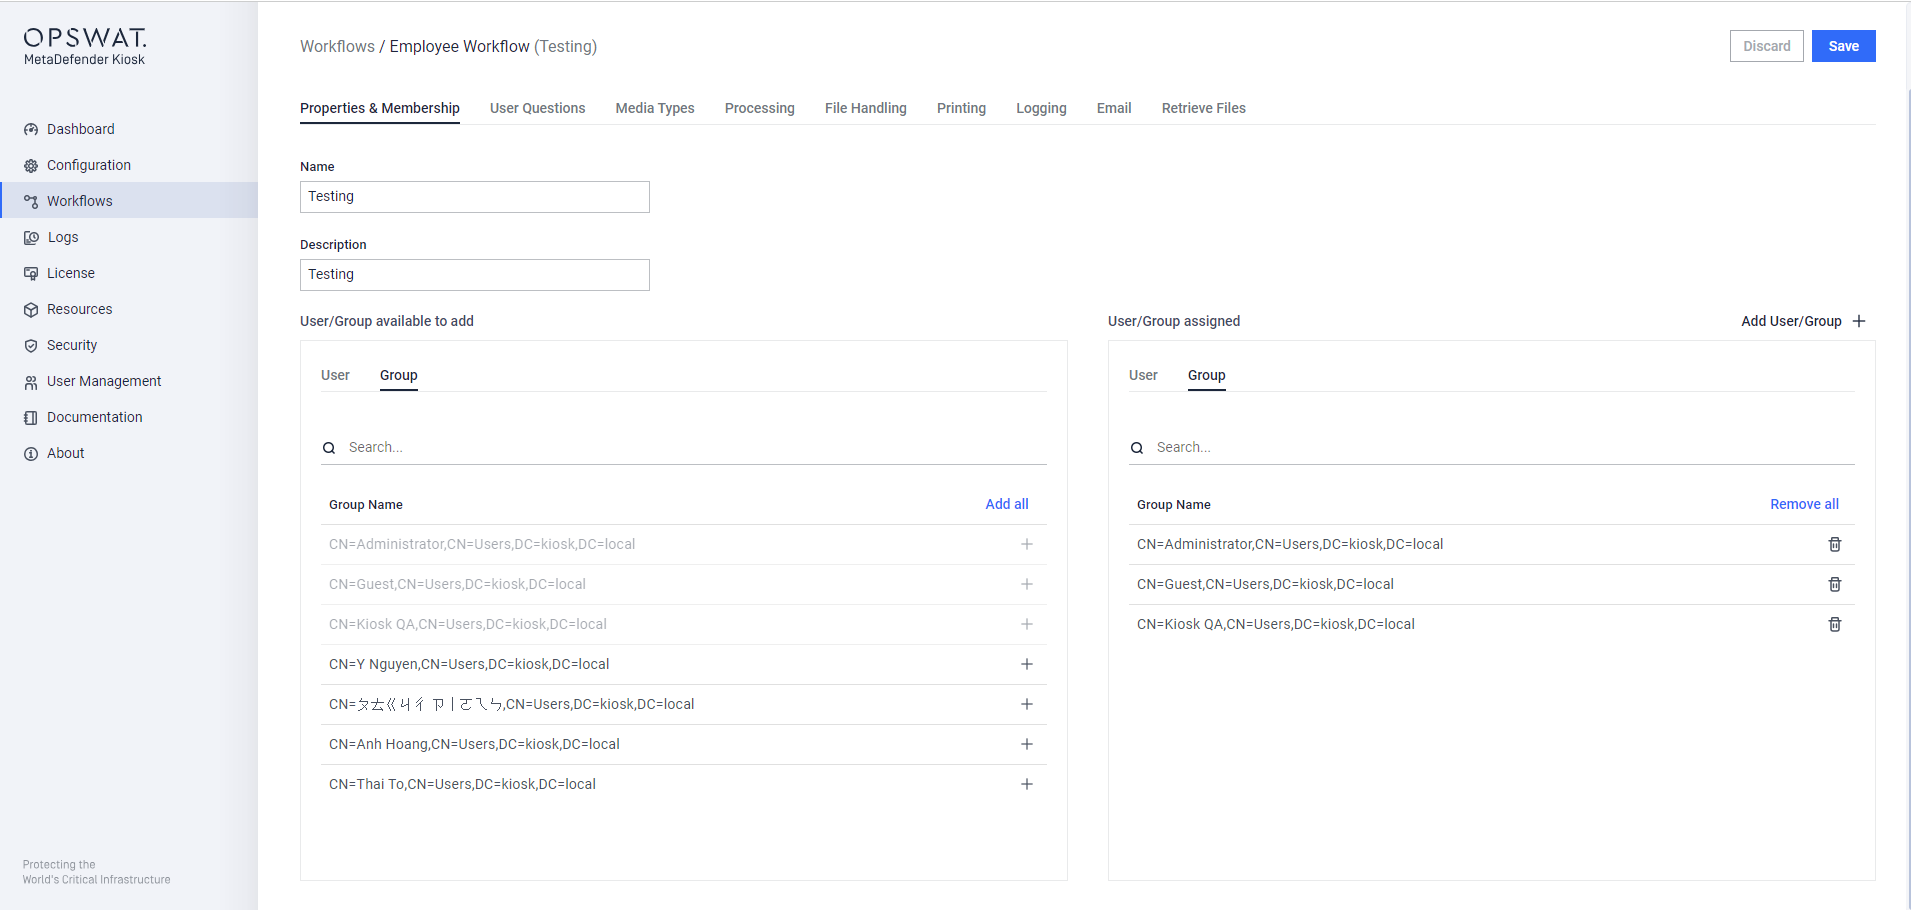
To reduce the loading duration, only 500 users/groups are loaded for each tab.
Step 2. The chosen user(s)/group(s) will be grayed out in the User/Group available to add section and displayed in the User/Group assigned section for review and adjustment.
Step 3. Click on Save to finish.
2. Manually input User/Group assignment
The KIOSK feature enables the manual addition of users or groups along with their identity information.
a. Manually input a user
Step 1. Click on Add User/Group button on the top right of User/Group assigned section
Step 2. On appeared window, check on User option.
Step 3. Enter the user identity information.
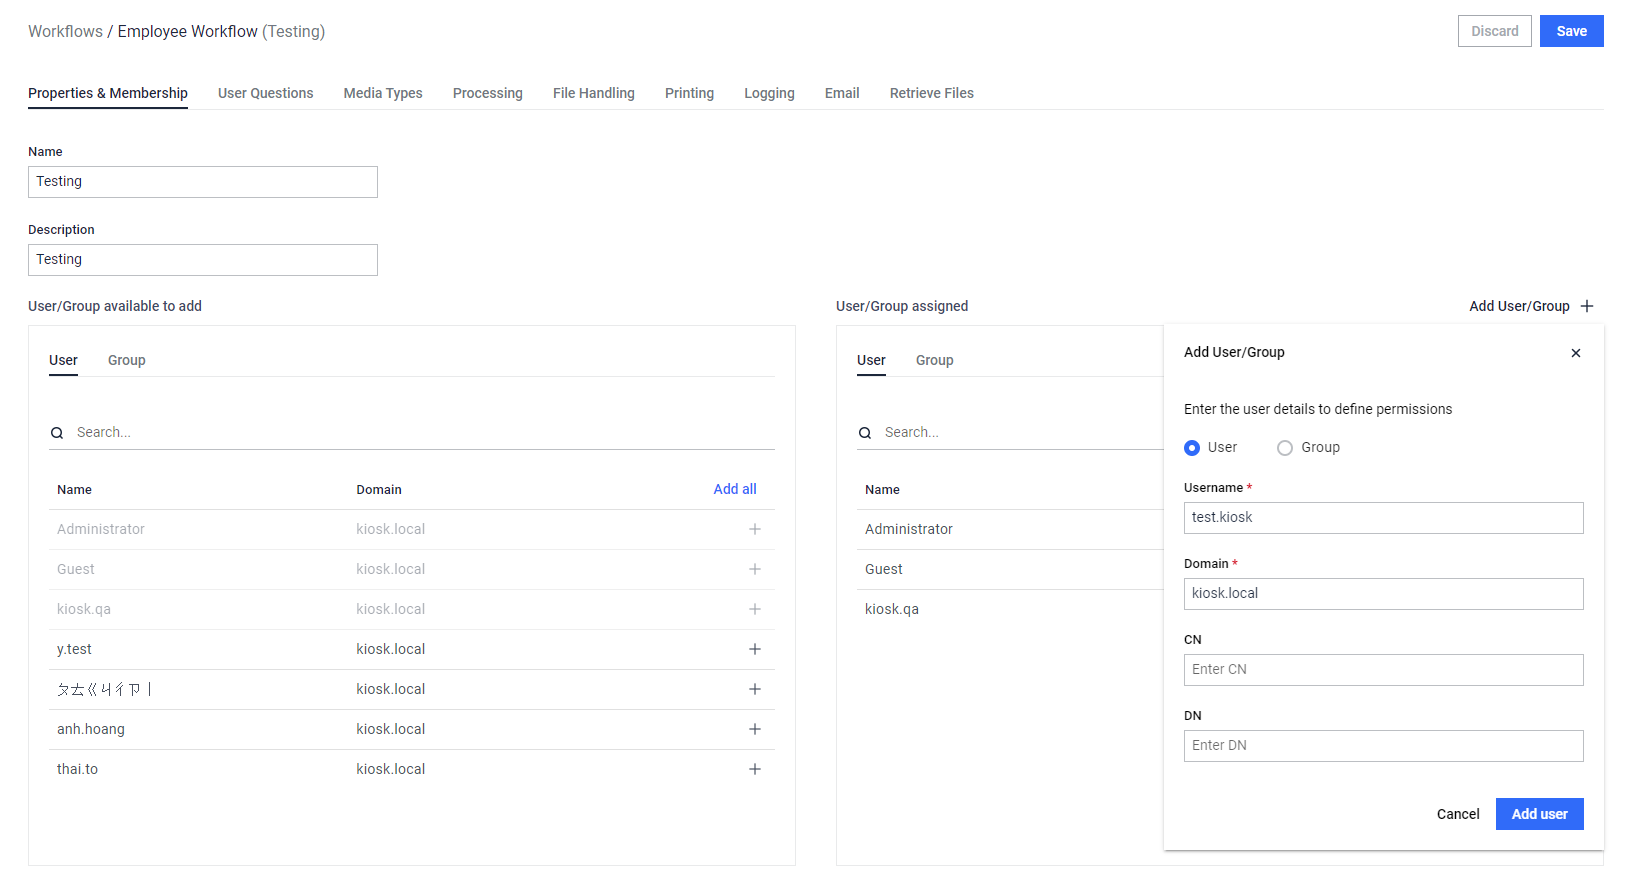
In which:
Username (required): sAMAccountName of the user
Domain (required): Domain to which the user belongs
CN (optional): Common name of the user
DN (optional): Distinguished Name of the user
Step 4. Click on Add user button.
Step 5. The added user(s) will be displayed in the User/Group assigned section for review and adjustment.
Step 6. Click on Save to finish.
b. Manually input a group
Step 1. Click on Add User/Group button on the top right of User/Group assigned section.
Step 2. On appeared window, check on Group option.
Step 3. Enter the group identity information.
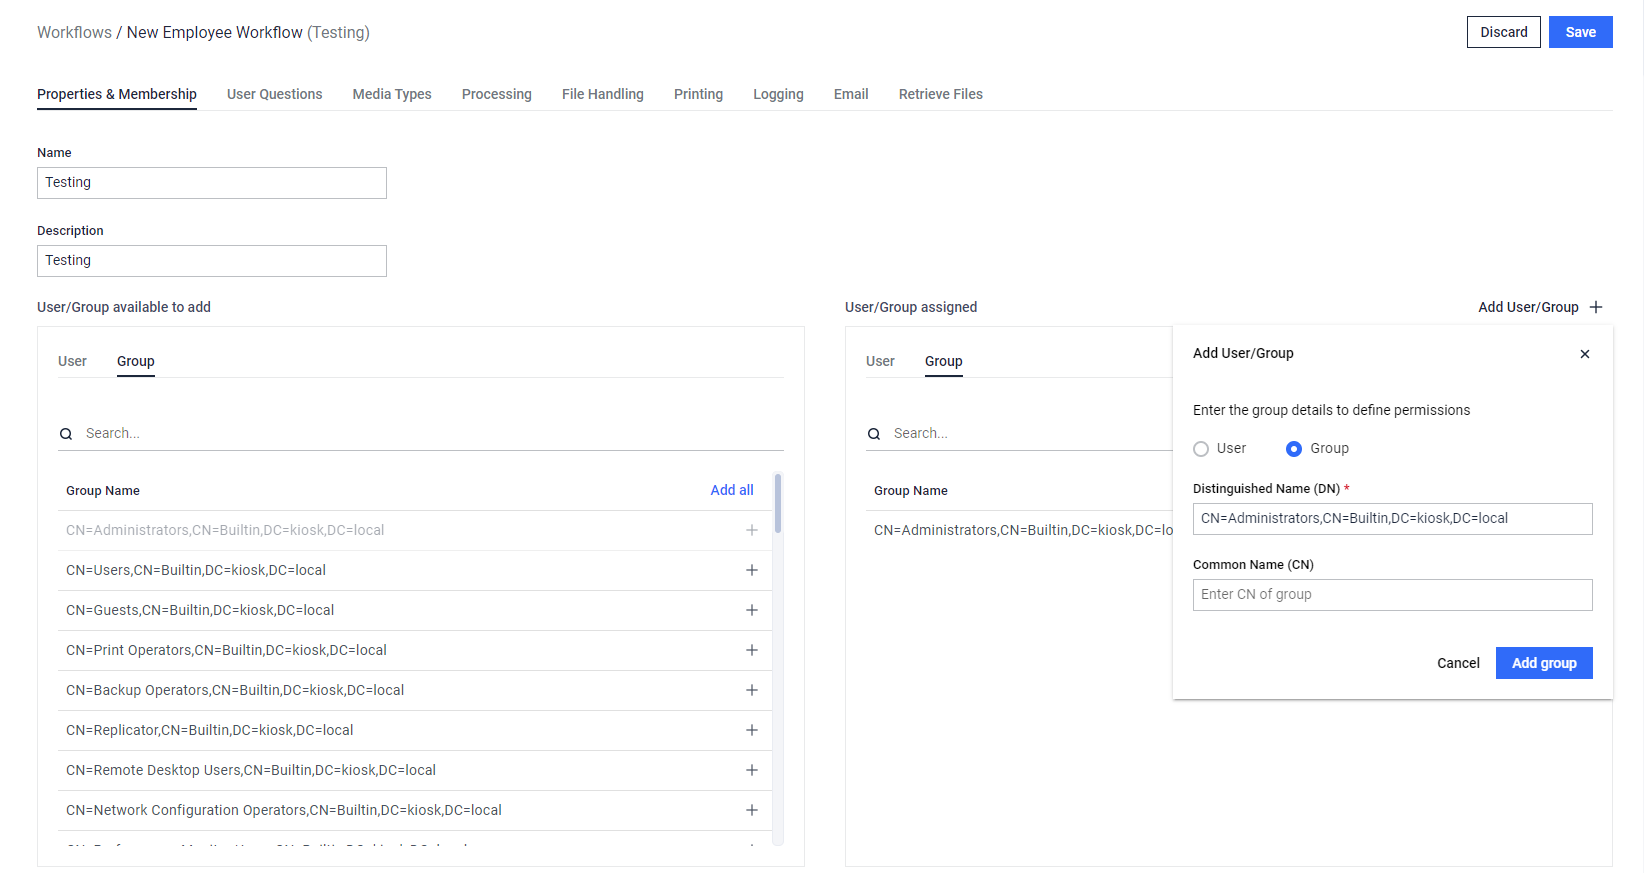
In which:
Distinguished Name (required): the Distinguished Name (DN) of that group. For example:
CN=Administrators,CN=Builtin,DC=kiosk,DC=localCommon name (optional): the Common Name (CN) of that group.
A DN is a sequence of relative distinguished names (RDN) connected by commas. See Distinguished Name for more details about syntax and example.
Step 4. Click on Add group button.
Step 5. The added group(s) will be displayed in the User/Group assigned section for review and adjustment.
Step 6. Click on Save to finish.
c. Assign an SSO group
If the workflow's default login method is single sign-on (SAML, OpenID Connect, or Microsoft Entra ID), you can assign an entire identity provider group to the workflow instead of adding users one at a time.
Step 1. Click on Add User/Group button on the top right of User/Group assigned section.
Step 2. On the appeared window, check the Group option.
Step 3. Enter the group identity information:
Group Name — a name identifying the group. For Microsoft Entra ID, enter the group's object ID (a GUID), since Entra ID reports group membership by ID rather than by display name.
Group claim/attribute — the attribute name (for SAML) or claim name (for OpenID Connect) that your identity provider uses to report a signed-in user's group membership.
Step 4. Click on Add group button.
Step 5. The added group will be displayed in the User/Group assigned section for review and adjustment.
Step 6. Click on Save to finish.
Any user whose sign-in response includes a matching value for that attribute is placed into this workflow automatically. Group names must be unique within a workflow, though the same claim/attribute can be reused across more than one group entry.
If your identity provider supports nested groups (a group that contains other groups as members), a user only needs to belong to the nested group to satisfy a workflow assigned to the parent group — this is honored for Active Directory Federation Services (ADFS) and Microsoft Entra ID.
If a user belongs to more than one SSO group and those groups are assigned to different workflows, they will consistently land in the same workflow every time they sign in — not a different one on each attempt. If a signed-in user doesn't belong to any assigned group and wasn't added individually, they won't be placed into a workflow.
3. Remove users/groups from the assigned workflow
Step 1. Click on detele icon to delete specific users/groups on User/Group assigned section or Remove all button to remove all of added ones.
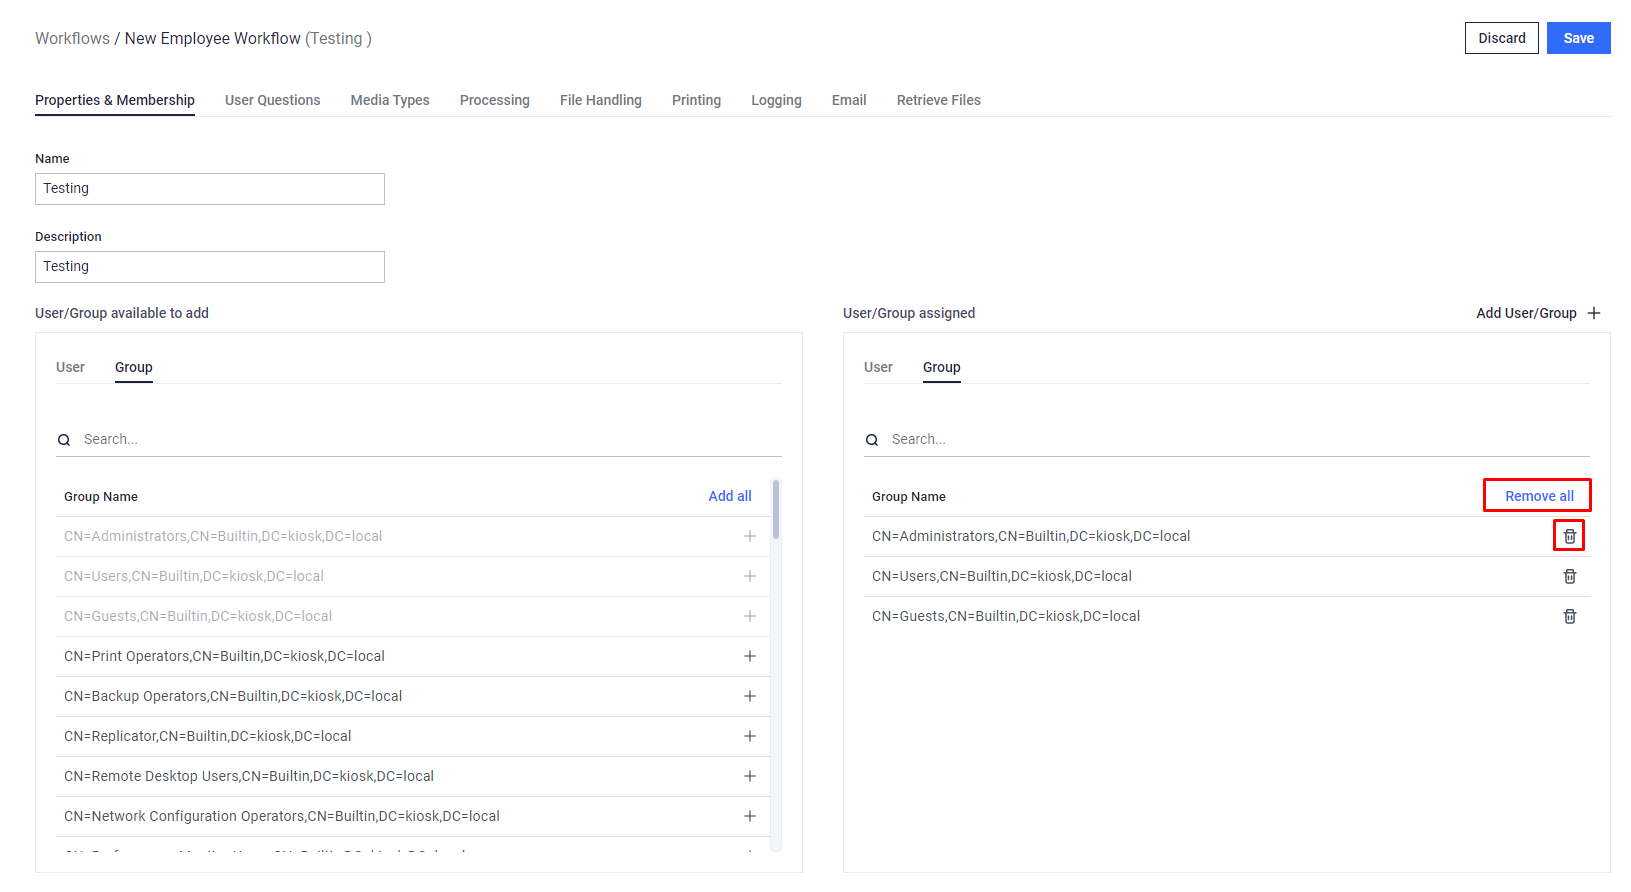
Step 2. Click Save to finish.
4. Important notes
If there are connection issues with Active Directories, Kiosk might take longer to retrieve users and groups. The timeout for the user/group fetching from each AD is about 1 minute. The more ADs with connection issues, the longer the fetching is.
When an AD is not available at some time, the user belonging to a workflow is not able to log in Kiosk UI, the admin can check the application log to trouble shoot any login failure in this case.
When an user is removed from AD, the workflow is not synced up with that removal. The admin must remove that user from the workflow.
SSO groups have no directory lookup at all — since they're entered by hand, double-check that the group name and claim/attribute exactly match what your identity provider sends.