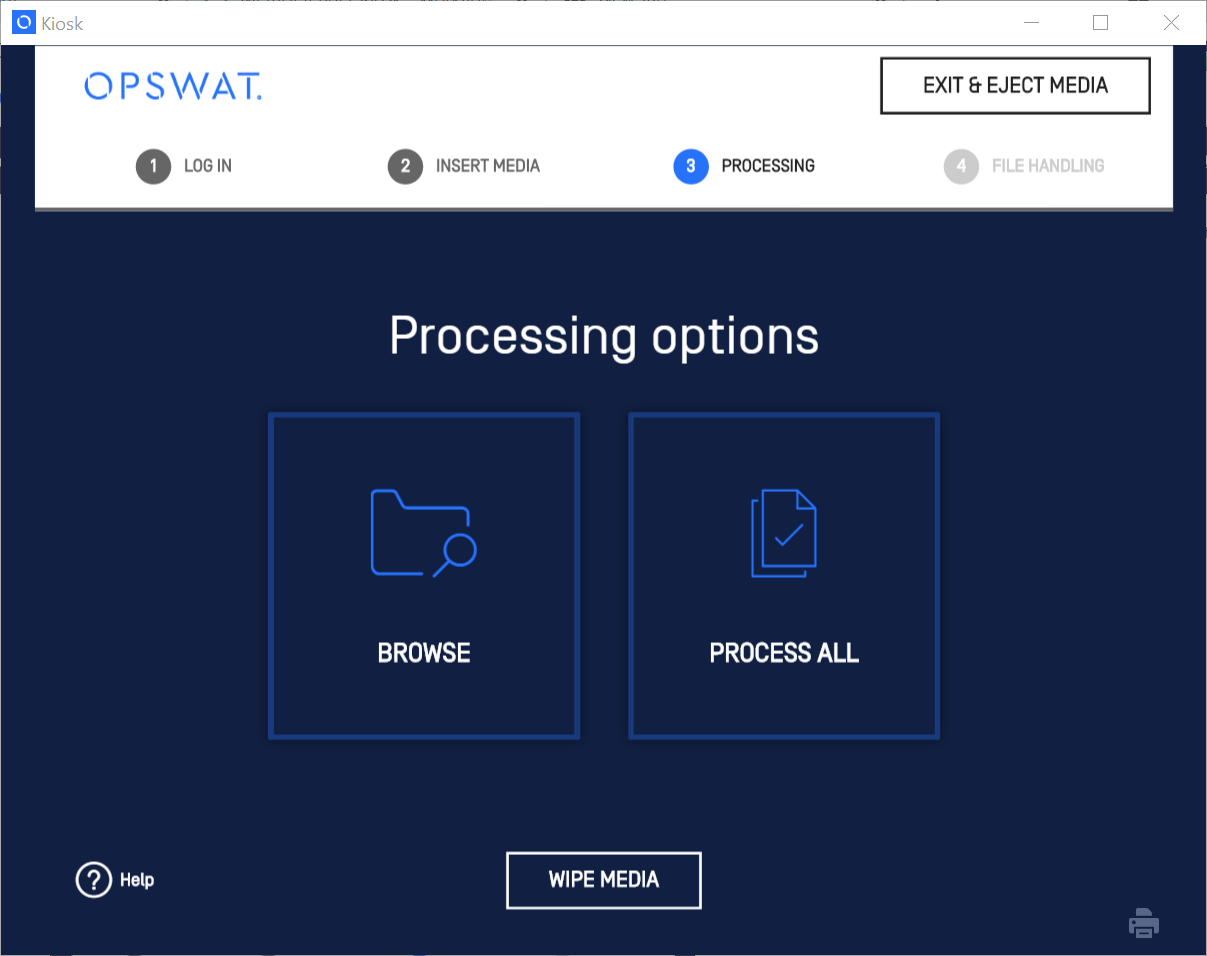
Insert the media you want to proceed. The "Processing options" screen will appear on Kiosk UI.
Click Browse . (If you want to proceed the entire media, click Process All and skip to step 5) All detected removable media devices will be displayed.
Note: Click Wipe Media to remove all data from the detected media and overwrite the entire disk with random data, it will depends on the configuration settings in the MetaDefender Kiosk Management Console.
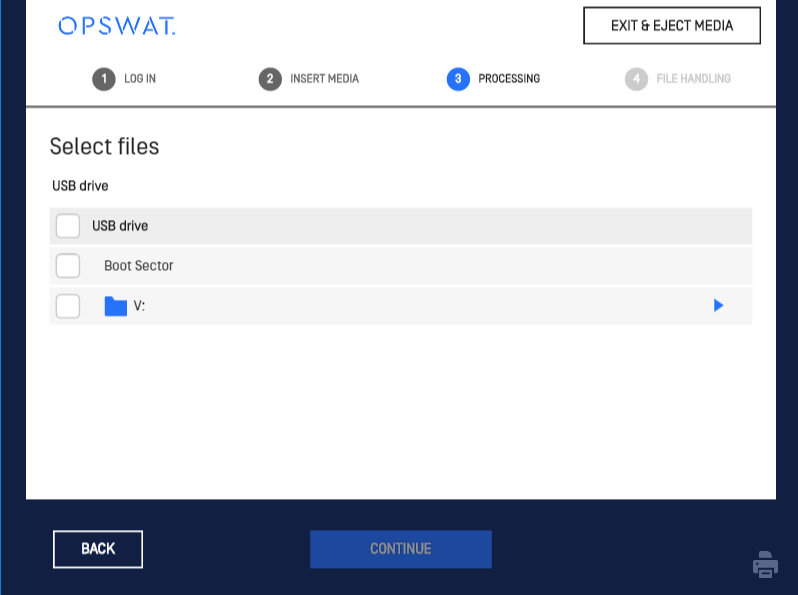
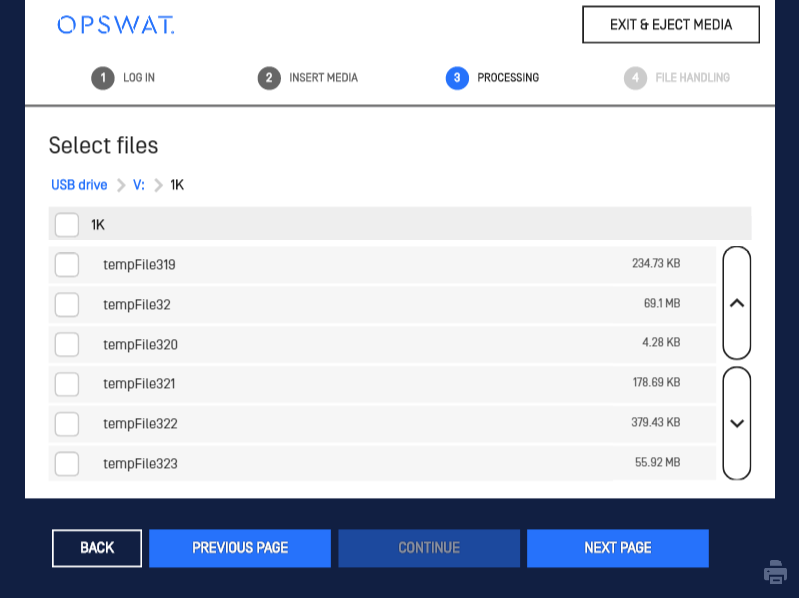
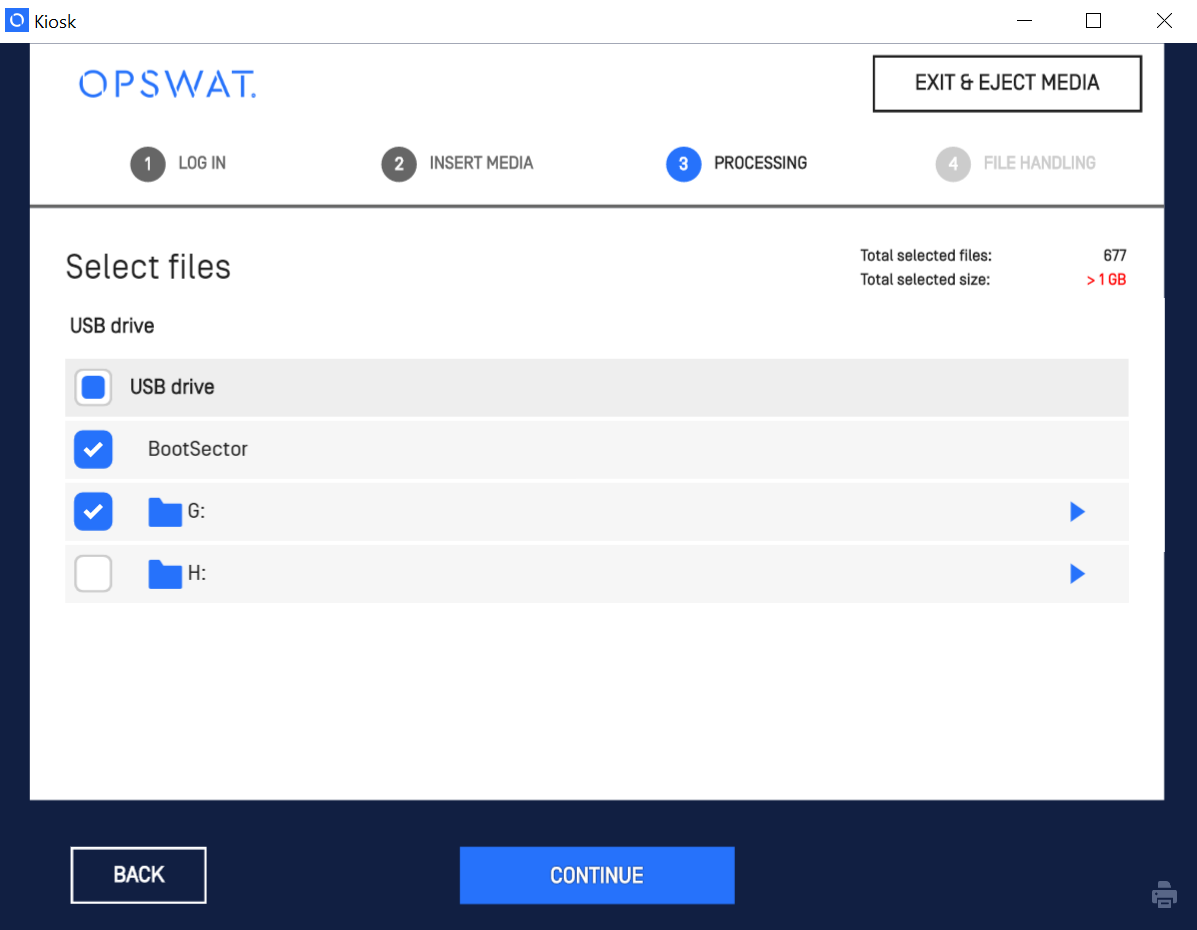
Select the drive, folders, or files (including system files) you want to scan and click Continue. Files are displayed on pages for directories with a large amount of files and can be navigated via the Previous Page and Next Page buttons.
Remark: Boot Sector in the figure below are the Master Boot Record and Volume Boot Record; they will be proceeded when user click into that option on Kiosk UI.
Note: If the Size Summary is set, users can observe the total size of selected files and folders.
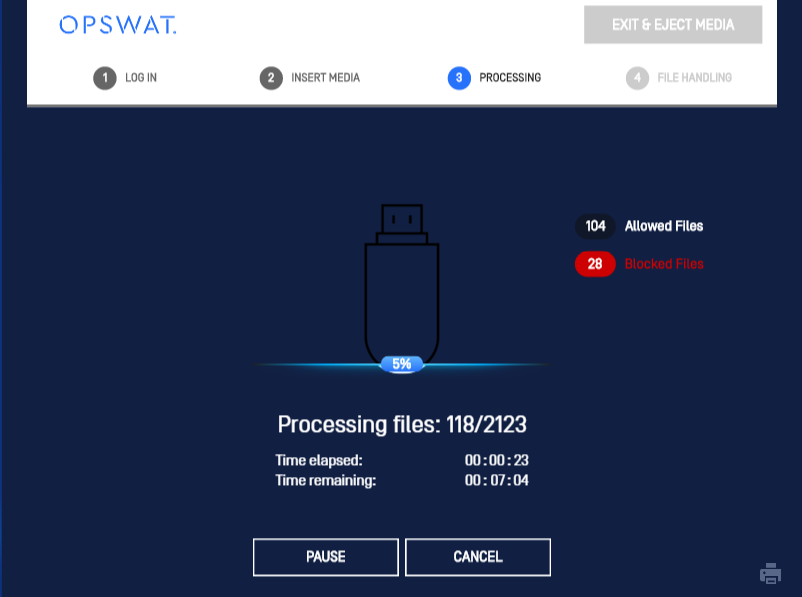
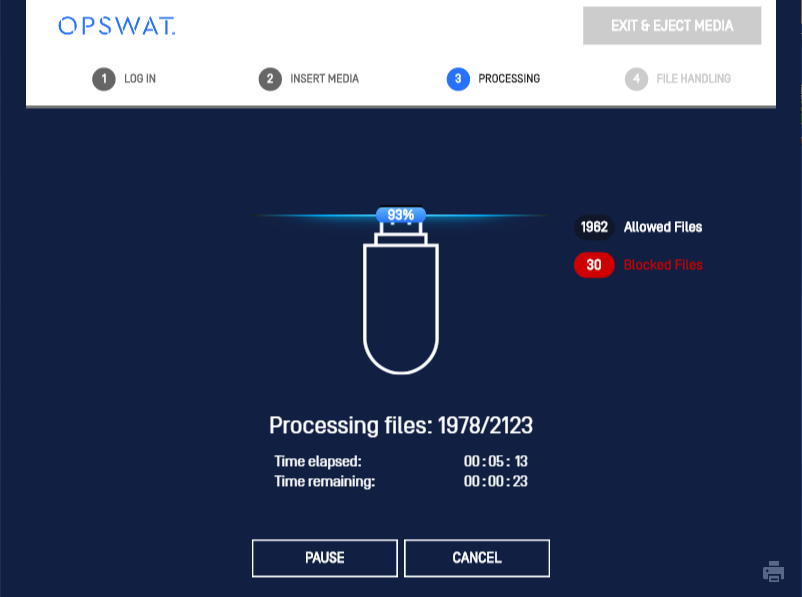
The "Processing files" on Kiosk UI displays following information:
How many files scanned by the Kiosk (e.g. allowed files, blocked files, skipped files)
Scanning duration: demonstrated by percentage number on USB icon, when the scanning is completed, the percentage number will be 100%.
The number of files of processed out of the total number files to be processed
Total elapsed time when scanning the files.
Total remaining time requirement for Kiosk to scan all the selected data and files on Kiosk.
Note: If the inserted media does not have Windows-readable partitions, or if multiple partitions have been disabled in the MetaDefender Kiosk Management Console and the drive has multiple partitions, the No volumes mounted for the selected device error message appears and you will be returned to the Idle screen. This error message also appears if MetaDefender Kiosk is unable to read a partition because it is a private or encrypted partition.
If at least one encrypted archive is found and encrypted archive decryption is enabled in the MetaDefender Kiosk Management Console, a list of the encrypted files is displayed. See 9.5. Processing Encrypted Archives for additional information.
When the scanning process is complete, the Sessions Results screen will be displayed. See 9.6. Viewing the Session Results.
Note: If you click Cancel during scanning process, the Session Results screen will be displayed. If media is removed during scanning, the session will end and return to the idle screen.
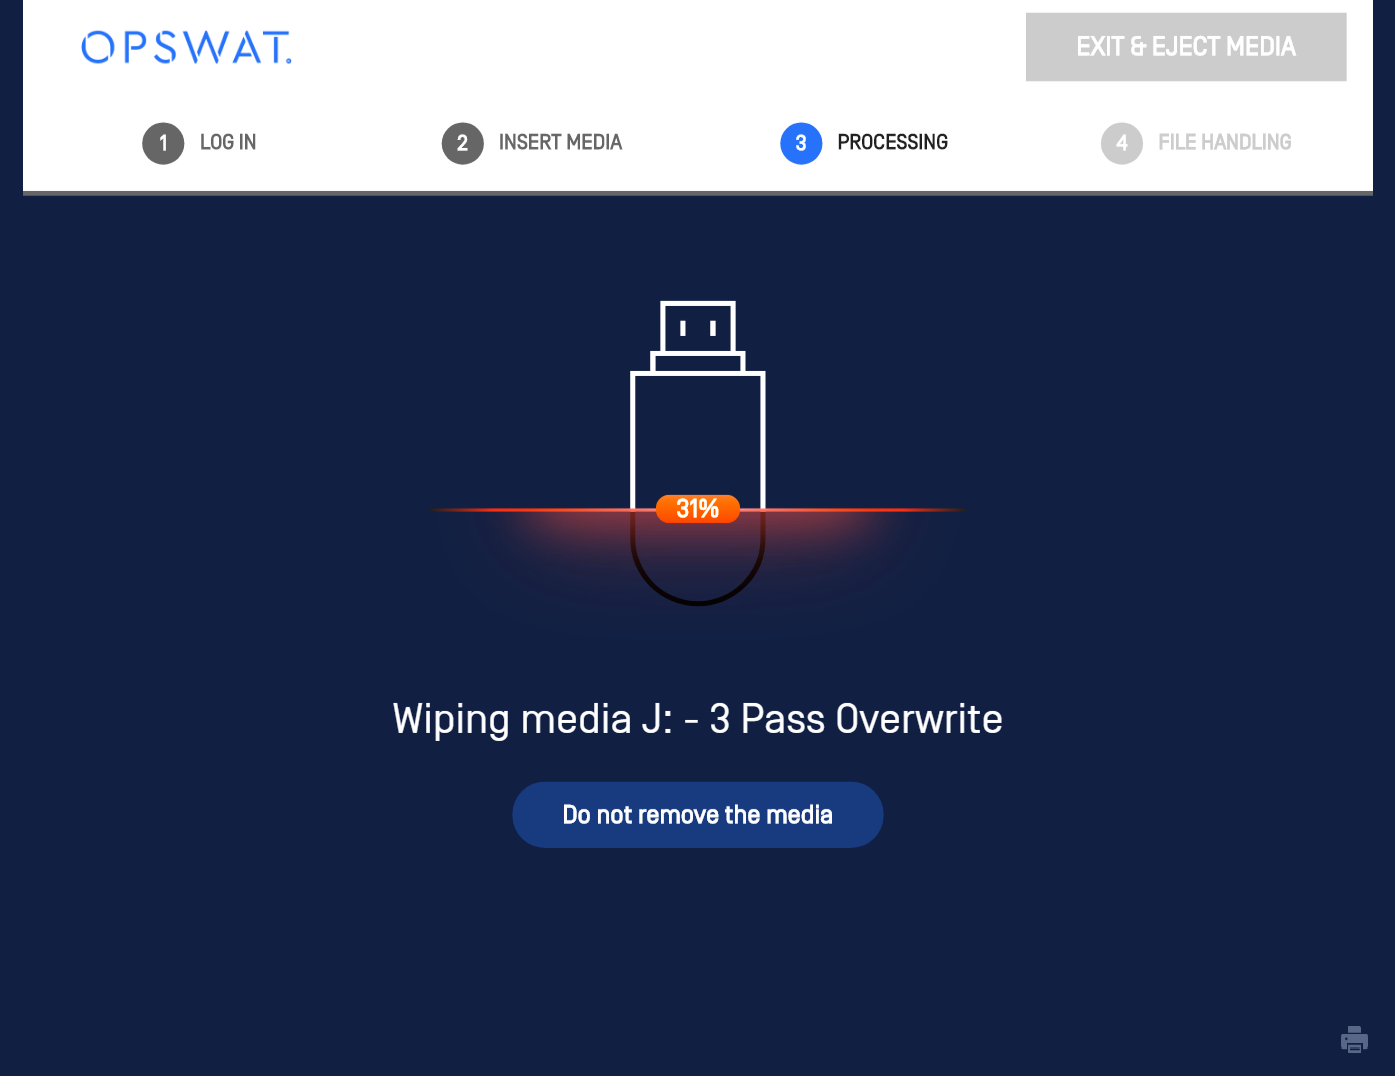
Wiping Media
Media can be wiped to delete all files on the device and the data hardly recovered even using specialized tools that can read the remnants of files that were previously on the disk.
Multiple removable media devices can be inserted at the wipe option selection screen, after that the wipe selection will be applied to all the removable media device plugged in. Detailed index of the devices will be displayed under each option.
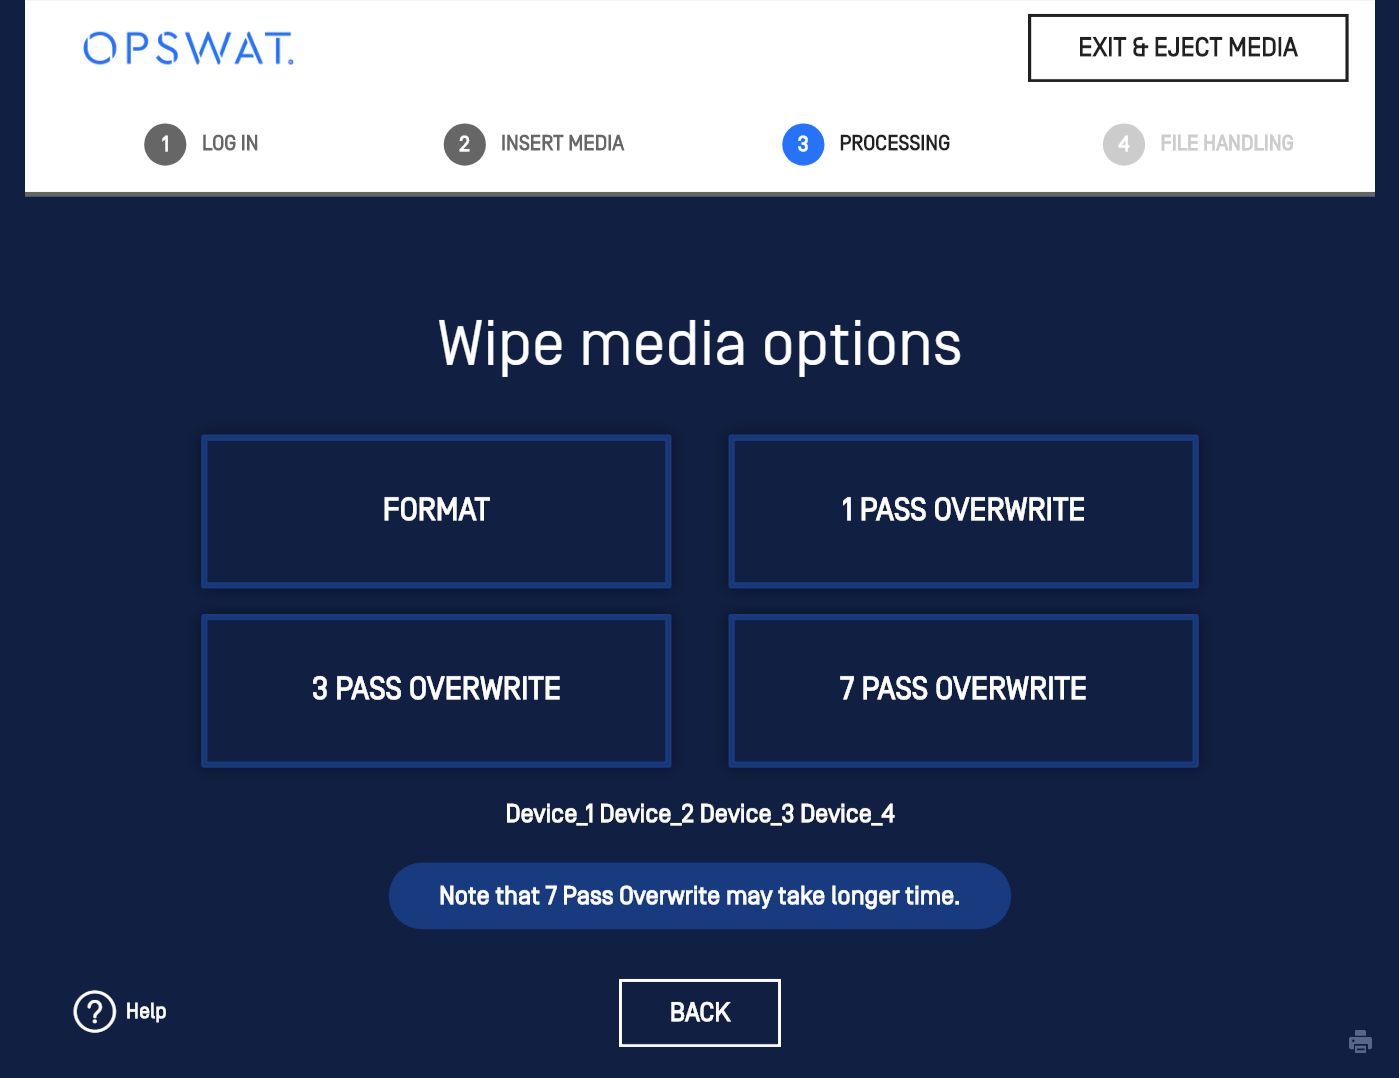
There are four options:
Format
1 Pass Overwrite
3 Pass Overwite
7 Pass Overwrite
Format is the fastest option, but it simply removes the references to the files on the drive without overwriting those portions of the drive. The 1, 3, and 7 pass wipe options write over the entire drive with differing algorithms, making it much more difficult to retrieve the data that was originally stored on the drive. The United States Department of Defense (DoD) recommends using a 7 pass wipe to clean media. OPSWAT does a low-level sector by sector wipe of the media.
Using the wipe feature will completely erase and reformat ALL information on the device. This includes the partition table and master boot record along with any file system information.
Algorithm Details
Num. of Passes | Algorithm Steps in Order | Security Standard |
|---|---|---|
1 |
|
|
3 |
|
_We use pseudorandom instead of a fixed pattern as our final pass *_We select 0xFF and 0x00 (reverse of standard), then pseudorandom data instead of a fixed character for our final pass |
7 |
|
|
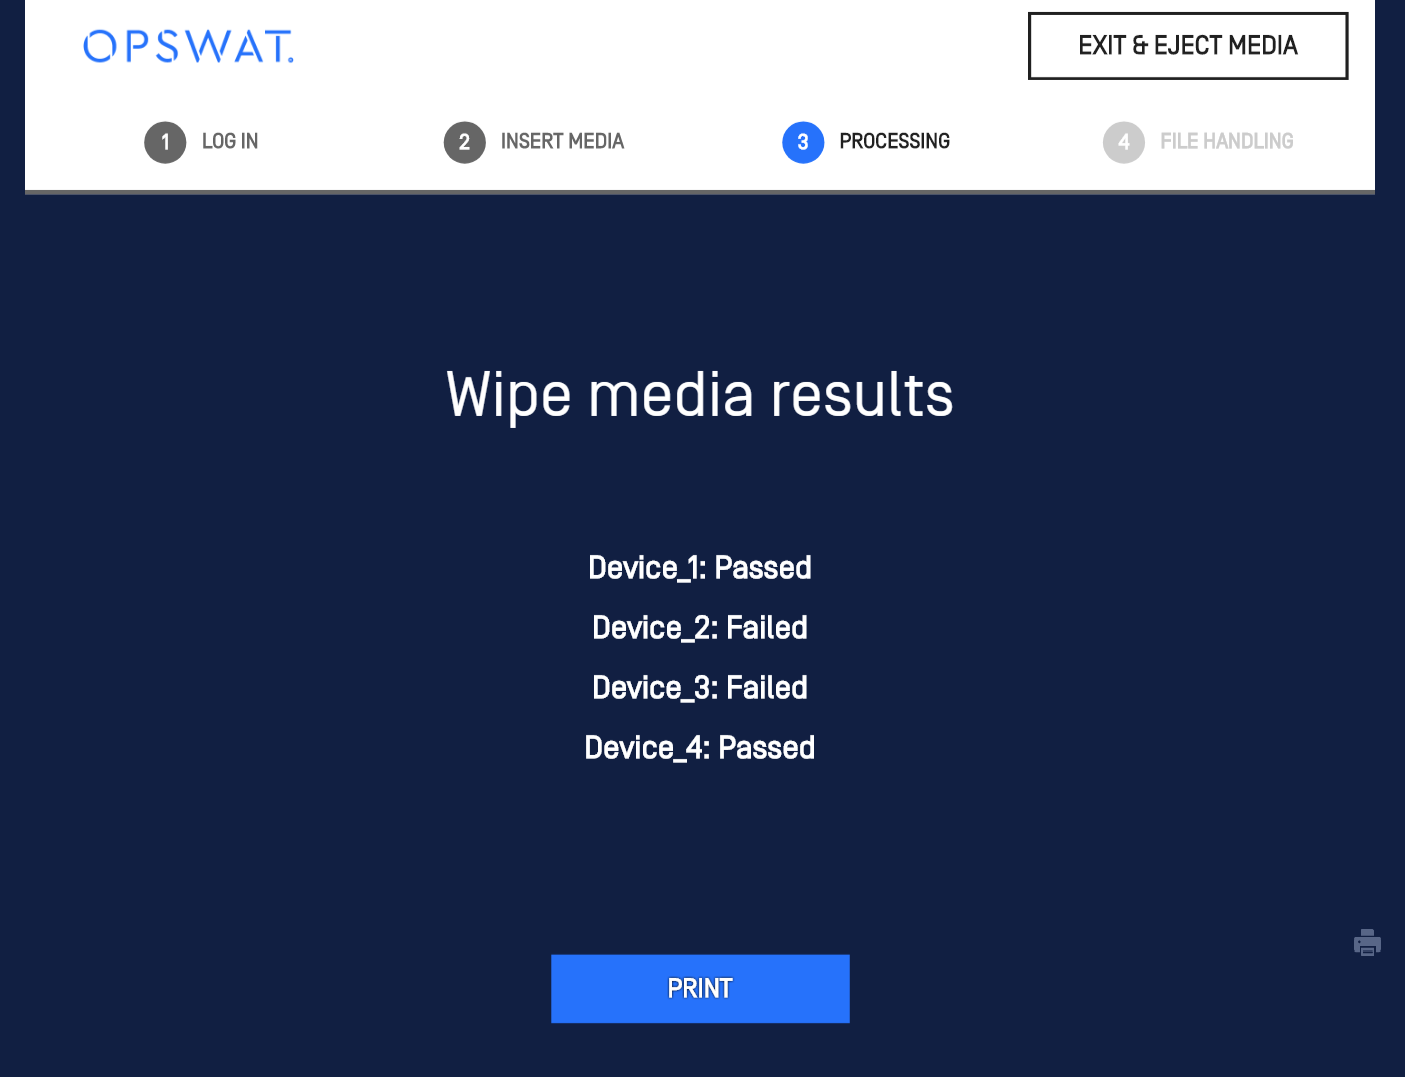
Wiping will occur among each media one-by-one with the final results displayed at the end.
The wiping of CD/DVD is not supported by Kiosk, Wipe Media button is not available with this media type.