
Pre-requisites
A PC running Windows 7/8/8.1/10
A USB flash drive (at least 32GB).
Instruction
Download and extract the Hardened Image archive file.
Locate to the extracted folder.

Run the rufus-3.14.exe file.
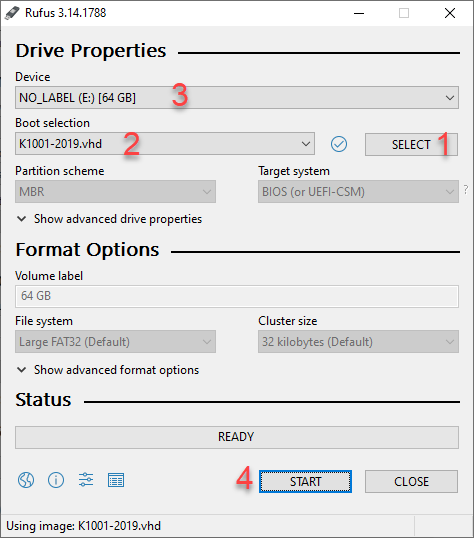
Select the vhd file under the extracted folder.
Select the available USB flash drive.
Press START Button.
NOTE: All of the data on your USB will be formatted.
Select OK to confirm the format.
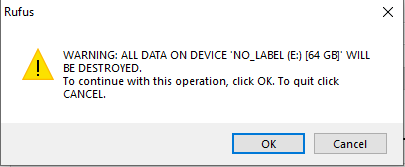
The setup process takes around 20 minutes to complete.

Installing the MetaDefender Kiosk Hardened Image
You can now use this deployment USB to flash a device with the Hardened image.
In order to apply the image to a device please do the following:
Insert your deployment USB into the device.
Boot the device from the off state and initiate the keyboard shortcut to enter the system BIOS or “one-time” boot menu. (This keyboard shortcut varies based on motherboard manufacturers)
Select the deployment USB in the boot menu. Ensure you are booting into UEFI mode or the image will not boot properly.
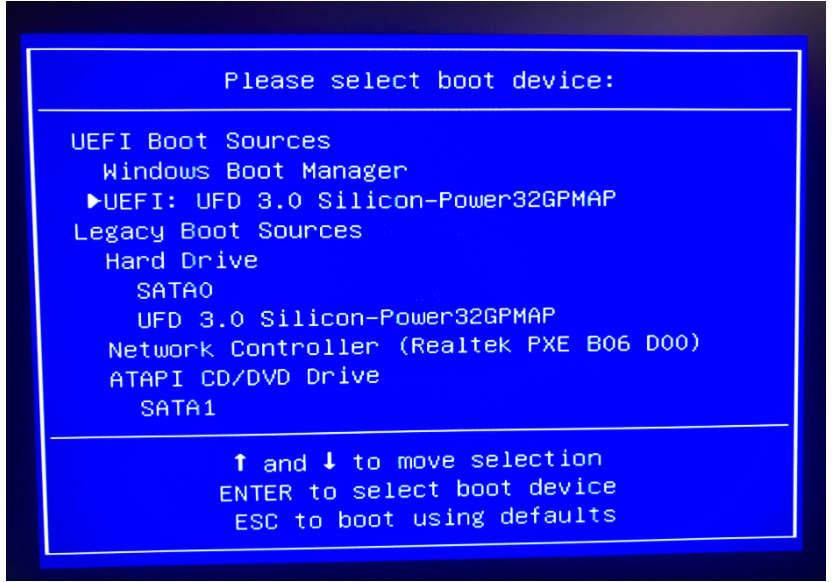
Boot up the PC with the USB that we just created
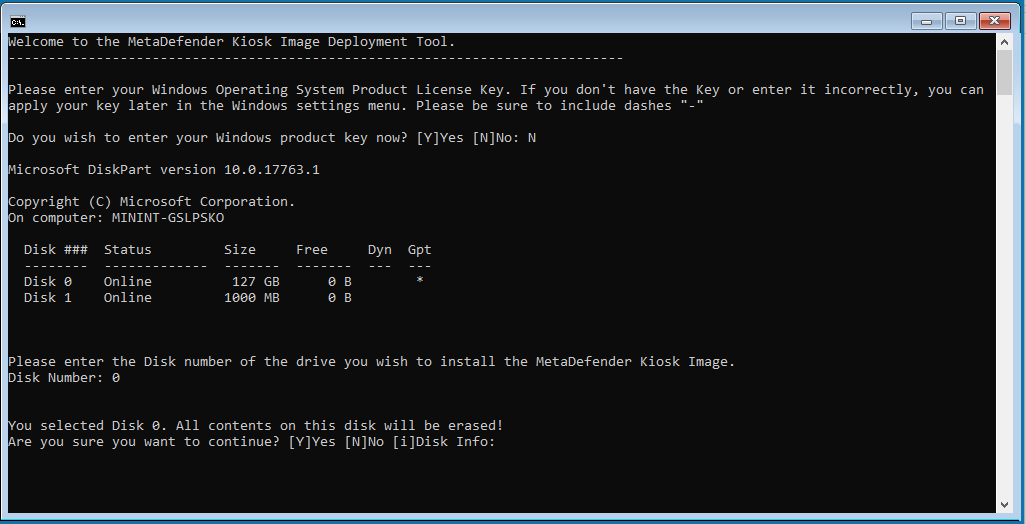
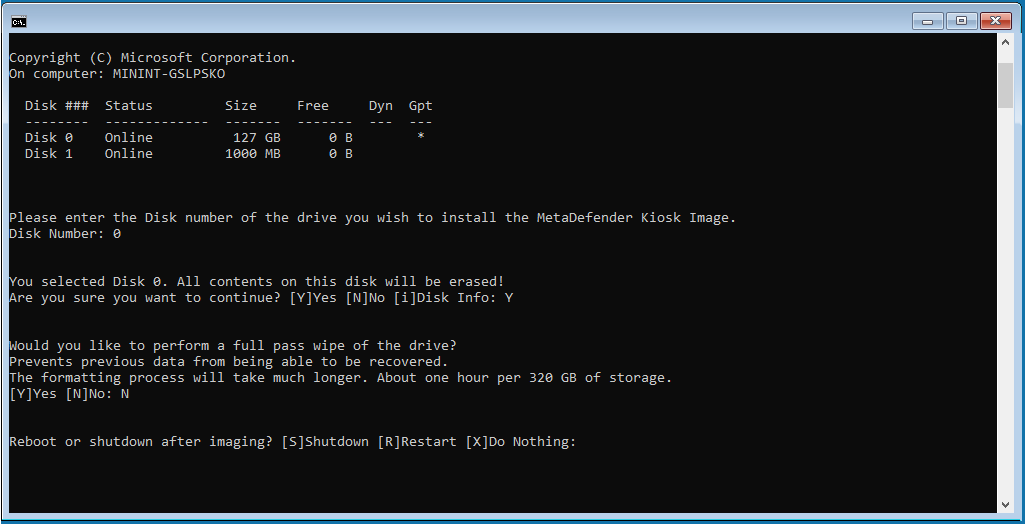
Follow the on-screen command prompt questions:
If available enter your Windows License key.
Select the drive to install the image. All data will be wiped.
Choose whether or not to do a full pass wipe (Selecting "Yes" will take much longer).
Choose whether or not to restart the device when complete.
Post Installation Actions
Change default log-in information for the local windows account:
Username: KioskUser
Password: Opswat1234!
Run setup wizard on MetaDefender Core.
MetaDefender Core and MetaDefender Kiosk will need to be activated.
Go to http://localhost:8008 and follow the wizard in order to activate MetaDefender Core.
Connect MetaDefender Core with Kiosk following the instructions on this page: Configuring with MetaDefender Core
Run setup wizard on MetaDefender Kiosk.
To activate MetaDefender Kiosk, please go to http://localhost:8009/ and follow the wizard to create an account and apply your license.
Accept any changes from baseline in Kiosk UI.