Settings can be configured for each MetaDefender Kiosk Linux instance by clicking on the cog icon and selecting Settings in the inventory list.
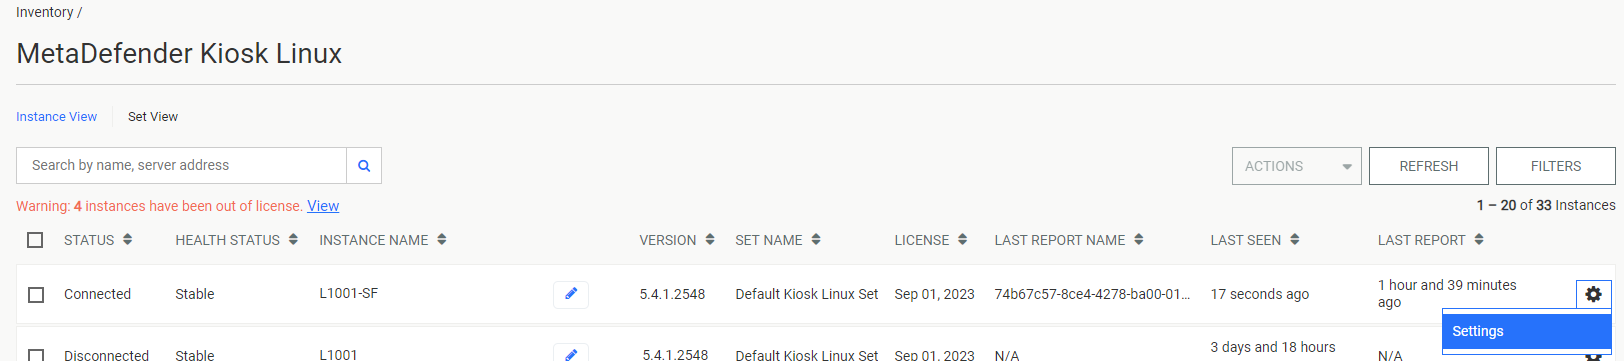
Settings
The General tab contains the configuration settings for Kiosk Linux.

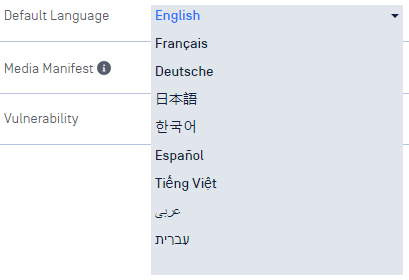
Default Language
Set the default display language for the Kiosk UI
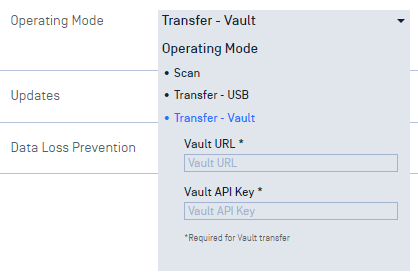
Operating Mode
Set Kiosk to Scan, Transfer - USB, or Transfer - Vault mode
Operating Mode
Scan Mode - scan the entire contents of the inserted media and obtain results of files that were Blocked & Allowed
Transfer - USB Mode - users select specific files to scan and copy only Allowed or sanitized\redacted files to another USB device
Transfer - Vault Mode - users select specific files to scan and copy only Allowed or sanitized\redacted files to the configured Vault Server
Vault URLDirect MetaDefender Vault connection
Vault server URL (note:
/vault_restdoes not need to be appended to the url)
Using OPSWAT NetWall in between Kiosk & Vault
URL of the NetWall BLUE side
Refer to the NetWall user guide for further details on setup for connecting to Vault
Vault API KeyEnter a valid administrator API Key for the MetaDefender Vault server
It cannot be determined if the Kiosk will have a valid connection to Vault when the configuration is being set.
Please review the Vault Connection guide to understand where to look and ensure a successful connection.
User Identification
Enables the User Identification page in the Kiosk UI. Click the User Identification drop down to select which questions the user must answer.
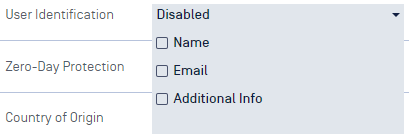
When any field is enabled, a user will be presented with a form, at the start of a session, displaying the field and require input from the user. This information will be included in the session report available in Central Management.
Media Manifest
Media Manifest is a signed file that records all the file results of the content on the scanned media and can be validated by other OPSWAT products such as Client or OPSWAT Media Validation Agent without the need for re-scanning file content.
In Scan mode, the manifest will be copied to the scanned media after the scan completes.
In Transfer - USB mode, the manifest will be copied to the secondary media.
In Transfer - Vault mode, the manifest is not created.
Regardless of operating mode, Media Manifest can only be copied to media that is writeable. If the USB device is read-only the Media Manifest feature will not work. Discs are not currently supported for this feature.
Enable Generate Media Manifest - select this option to generate a Media Manifest.
Certificate - upload the Public and Private key files to generate the Media Manifest
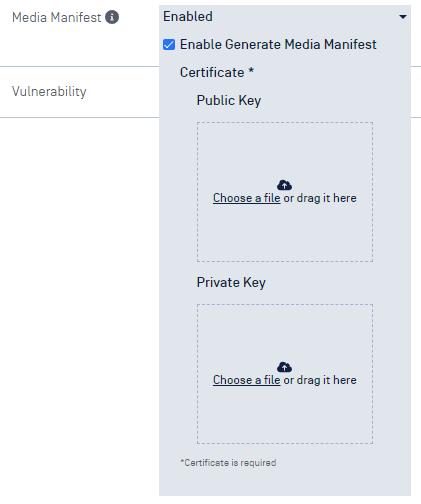
Certificate should be in a Base64-encoded X.509 certificate file (.crt, .cer) format
Private key should be a privacy-enhanced electronic mail file (.pem) format and not be locked by password
Updates
Configuration for setting an auto-update schedule.
Enable Auto-update - Check this box to allow automatic updates for Kiosk Linux.
Daily update time - Configure a convenient time for Kiosk Linux to update itself. Leave this empty or click the
xicon to allow Kiosk to update as soon as an update is ready to be applied.

Zero-Day Protection
Zero-Day Protection detects any active content embedded in a file such as macros, hyperlinks, etc... and attempts to reconstruct a file without such potential threat vectors.
In Scan mode, files with active content will be marked as Blocked and detected items will be listed.
In Transfer - USB or Transfer - Vault mode, a copy of the original file without the active content will be created and copied over to the secondary media.
In all operation modes, the original file on the original media will remain un-changed.
To enable Zero-Day Protection, check the Enable box in the drop down menu.
Vulnerability
The vulnerability engine determines if there are any known Common Vulnerabilities and Exposures (CVE) associated with a file. Any CVEs detected will cause the file to be marked as Blocked.
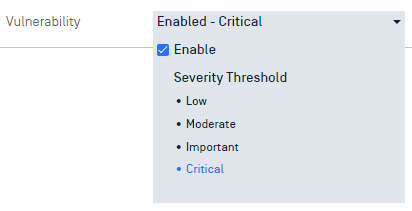
Enable - check this to enable vulnerability detection
Severity Threshold - configure the minimum severity that will be reported:
Low - reports Low, Moderate, Important, and Critical CVEs
Moderate - report Moderate, Important, and Critical CVEs
Important - report Important and Critical CVEs
Critical - only report Critical CVEs
Data Loss Prevention
The Data Loss Prevention (DLP) engine can detect Personally Identifiable Information (PII) such as Social Security or Credit Card numbers. If the engine identifies any PII within a file, the file will be marked as Blocked and results will show how the certainty level of detection.
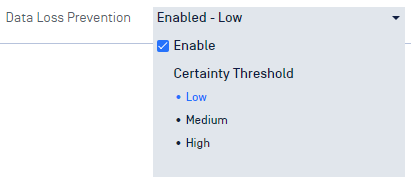
Enable - check this to enable PII detection
Certainty Threshold - configure the minimum certainty that will be reported:
Low - report Low, Medium, and High certainty of detection
Medium - report Medium and High certainty of detection
High - only report High certainty of detection
Country of Origin
The Country of Origin (COO) engine is utilized to detect Supply Chain Risk issues. The engine scans any executable files to determine the country the binary originated from. Any executable found to be originating from a country in the Forbidden list will be marked as Blocked.
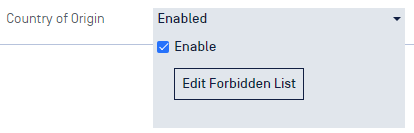
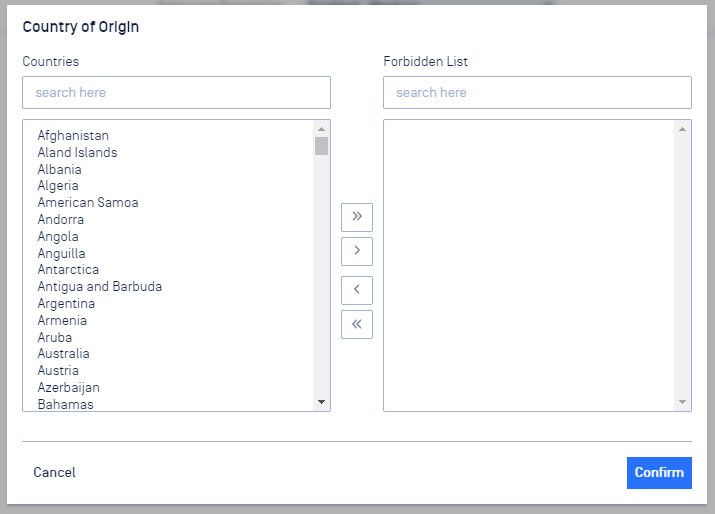
Click the checkbox to enable, then click Edit Forbidden List to select the Countries you wish to block files from. Use the arrow buttons in the middle to move selected countries between the two lists. Click Confirm to save the changes.