
This documentation is based on FortiGate 5.4.3 documentation using web-based manager and CLI. For different version of FortiGate or missing information, refer to FortiGate user guides.

Configuration via Web-Based Manager
Enabling ICAP feature
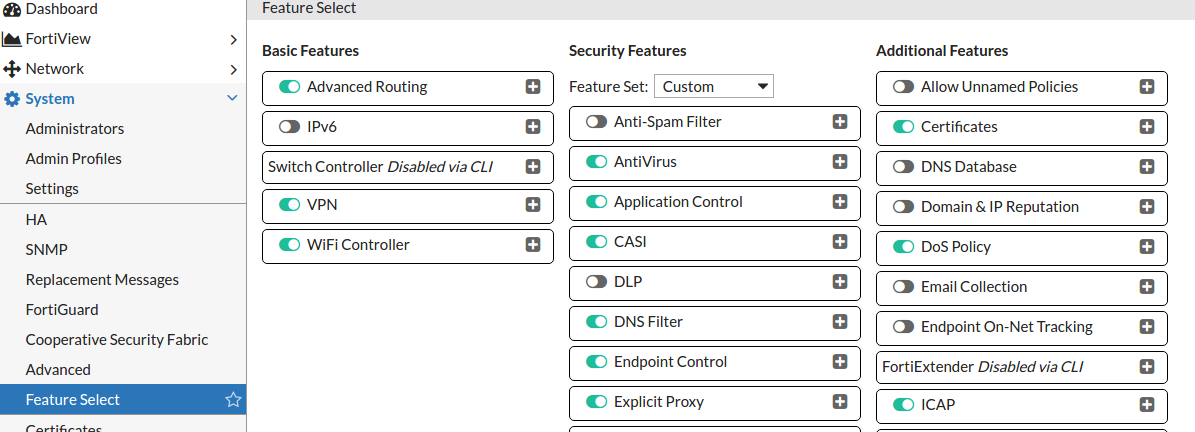
ICAP does not appear by default in the web-based manager, it has to be enabled by going to System → Feature Select and enabling ICAP. You may need to refresh the page in order to see the changes.
Adding ICAP server and profile
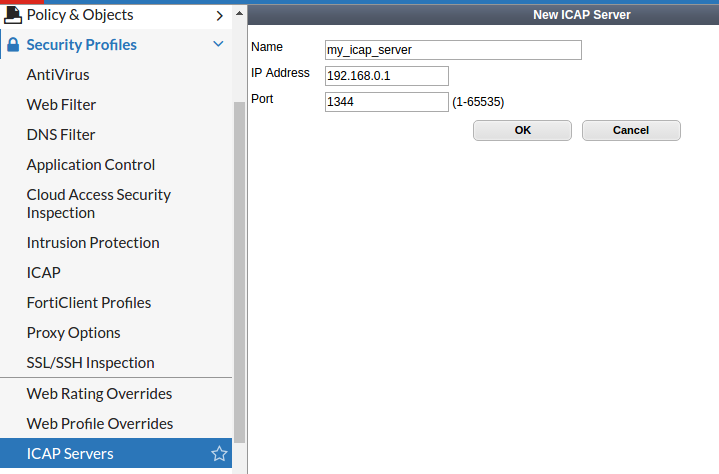
Add ICAP server
Select Security Profiles → ICAP Servers.
Create new or edit an existing entry.
The IP address and port should be the ones used by MetaDefender ICAP Server
Add ICAP profile
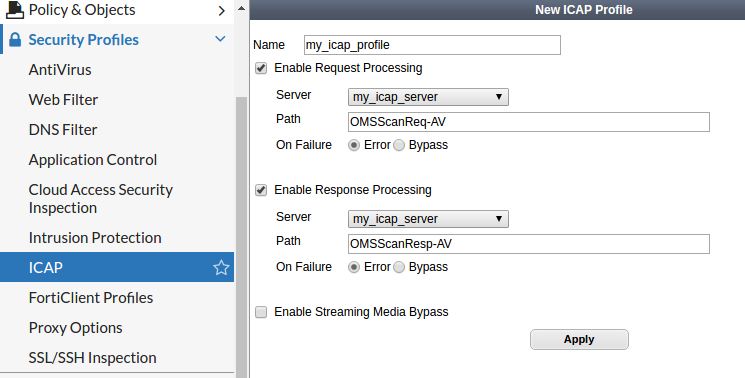
Select Security Profiles → ICAP.
Create new or edit an existing entry.
Select the 'Enable Request Processing' check-box, select your server's name from the drop-down list and in the 'Path' field, type in 'OMSScanReq-AV'.
Select the 'Enable Response Processing' check-box, select your server's name from the drop-down list and in the 'Path' field, type in 'OMSScanResp-AV'.
Apply the changes.
Apply the ICAP profile in your policy/policies
Select Policy&Objects → IPv4 Policy | Explicit Proxy Policy.
Create new or edit an existing policy
In the section 'Security Profiles', switch on ICAP and select the previously created profile.

Configuration via CLI
Add ICAP server
The example shown above in the web-based manager would look like this in the CLI:
Add ICAP profile
The example shown above in the web-based manager would look like this in the CLI:
Apply the ICAP profile policy (policy can be replaced by explicit-proxy-policy when setting ICAP for an Explicit Proxy Policy)
The example shown above in the web-based manager would look like this in the CLI:
If you want to disable the ICAP profile for a given policy you should write
Scanning HTTPS content
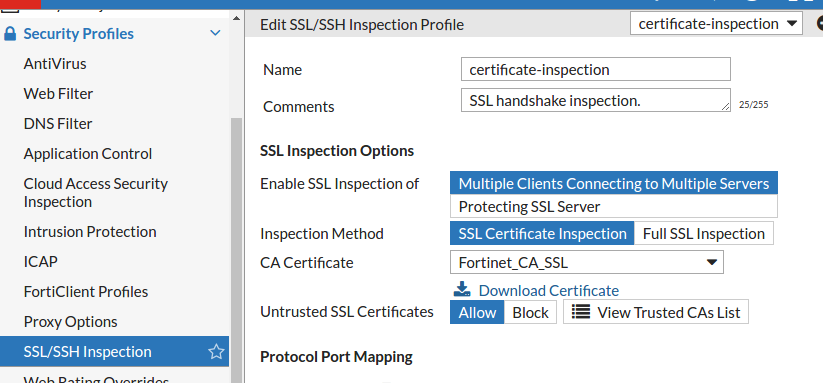
To be able to inspect and scan SSL/SSH traffic you have to enable it in Fortigate. After enabling this option you should download the certificate used by Fortigate and install/import it to the browsers which communicate with Fortigate. Otherwise you might see SSL/security related notifications or errors, or even not working web pages.
The certificate can be downloaded under Security Profiles→ SSL/SSH Inspection
Enable SSL inception via GUI
Navigate to Policy&Objects and select the policy you would like to enable SSL inception to (for example an Explicit Proxy Policy)
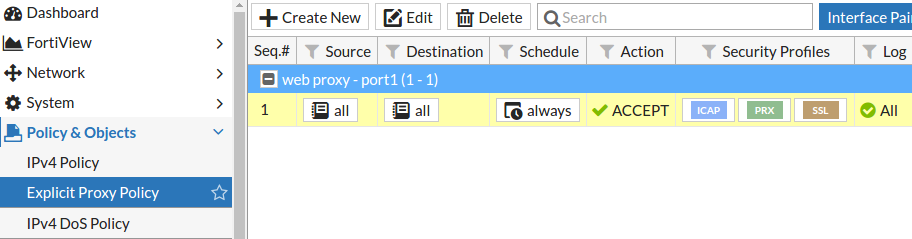
In the Edit page of the selected policy locate the Security Profiles section
Turn SSL/SSH Inspection on and set it to deep-inspection
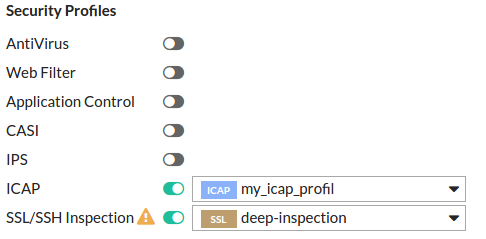
Enable SSL inspection via CLI
The steps shown above would like this via CLI: