Network & Discovery settings is accessible under Settings --> Network & Discovery.
On this page, you can change the configuration of the Network Interface Cards (NICs) for network scanning purpose.
Network & Discovery settings
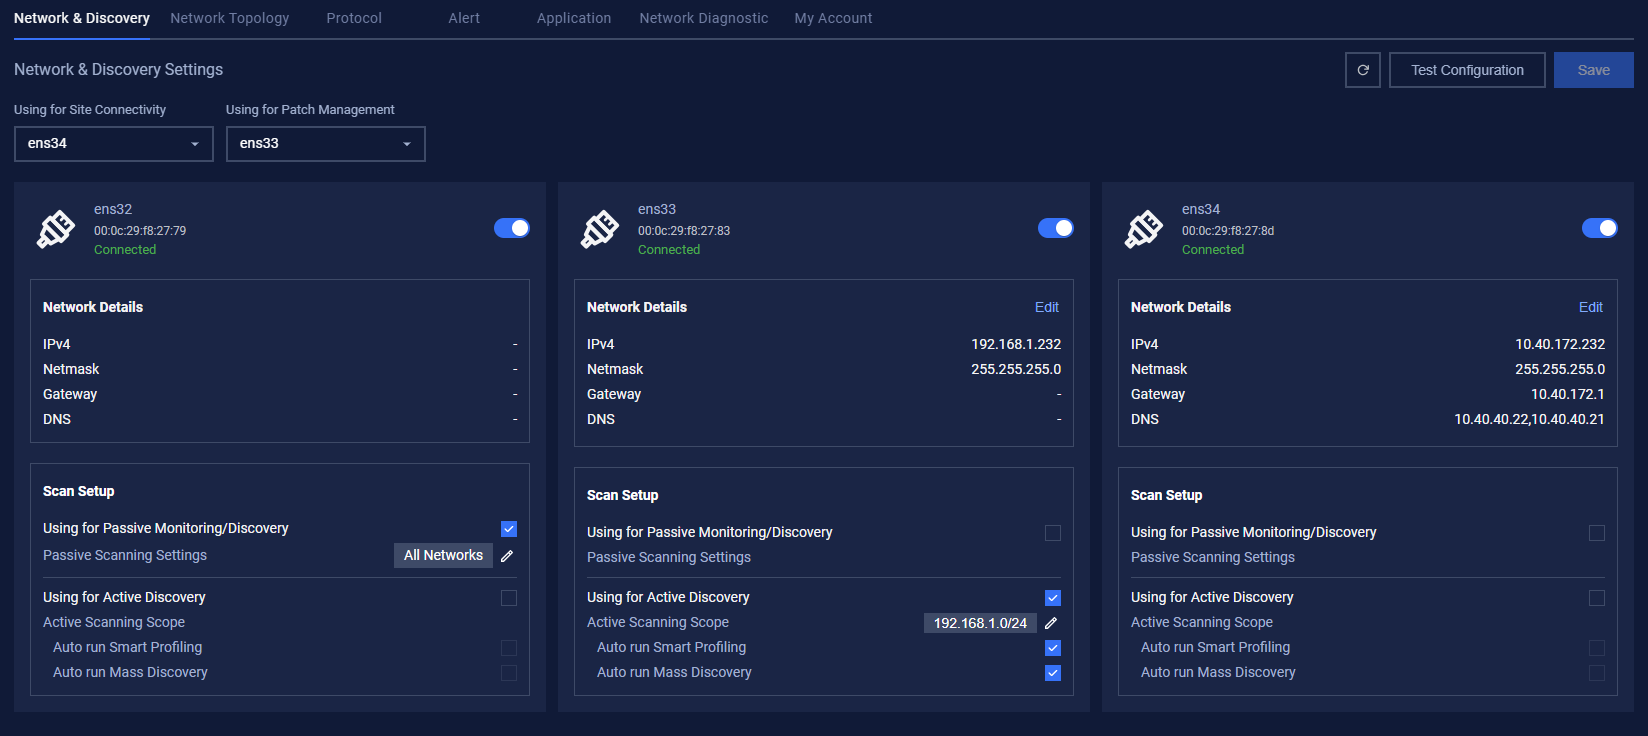
Under this section, you can see all the NICs of MetaDefender OT Security machines, each in a different numbered card.
This information of the NICs matches the NICs settings in the setup wizard that you have completed.
Information of a network interface card includes:
MAC.
IP address.
Netmask.
Default gateway.
Used this interface for internet.
Option for passive scanning.
Option for active scanning.
Range of discovery network.
If you need to adjust the method of Host configuration, set it to automatic (DHCP) or Manual, set Address, Netmask, Gateway, set DNS and other fields, click the Edit icon in the right corner of the card. Your changes will be applied to the system after saving.
It should be noted that:
You can only configure IPs for selected NICs to use as Active Discovery, Online Update, and Manage (Web access).
Particularly for the NICs used as Passive Discovery, you do not need to configure the IP.
With “Filter traffic by passive discovery” option, this filter-down traffic is applied for all interfaces. If this field is empty, MetaDefender OT Security will scan all possible traffics from NICs with passive discovery.
Note: User don’t need to configure route for NICs, MetaDefender OT Security will handle that.
How to configure Discovery settings for best performance by MetaDefender OT Security
MetaDefender OT Security machines should have a network card connected to the mirror port and a network card connected to the normal port on the switch to work most effectively.
The NIC connect to mirror port allows us to capture all traffic in the network.
And the NIC that connect to normal port allows MetaDefender OT Security to collect basic profile information such as device name, IP address and more detailed configuration information such as model, firmware versions, installed software/versions and operating system patch levels.
Set up on Discovery Setting
Ensure the “Connect to SPAN (mirror) port” is selected with a NIC.
Select NIC for Online update.
Select NIC for Management.
Input IP ranges for “Filter traffic by passive discovery”
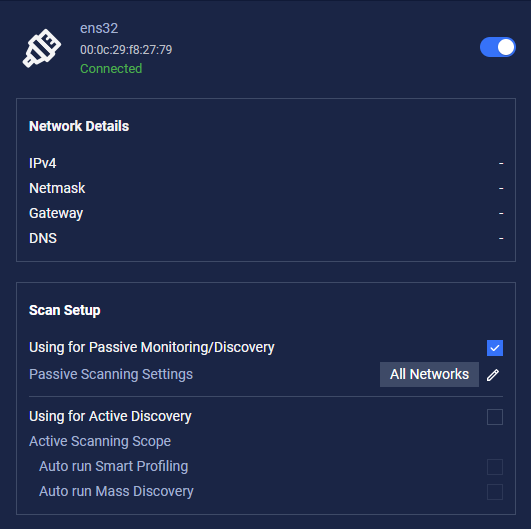
On the NIC(s) that connects to the mirror port, check on “Use this interface for passive discovery”. (Passive Scanning)
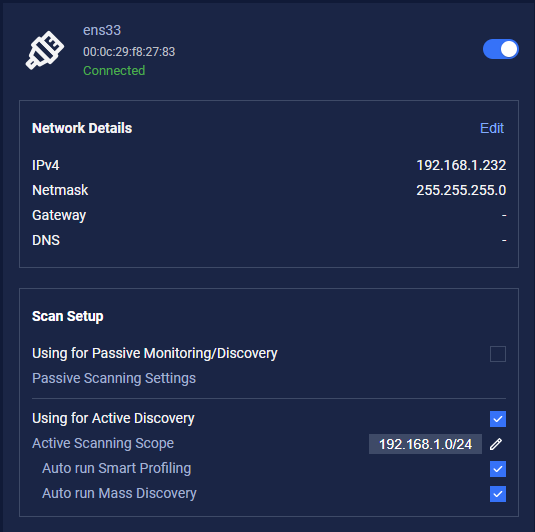
On the NIC(s) that connects to the normal port, check on “Use this interface for smart active discovery”. (Active Scanning)
On the NIC(s) that are not used or not connected to any port, please disable and don’t check any scanning option for those NICs.
Note: In case of any discovery settings changes, you need to click on the Save button so that the changes can be applied. Click on the refresh button can get the latest NIC status.
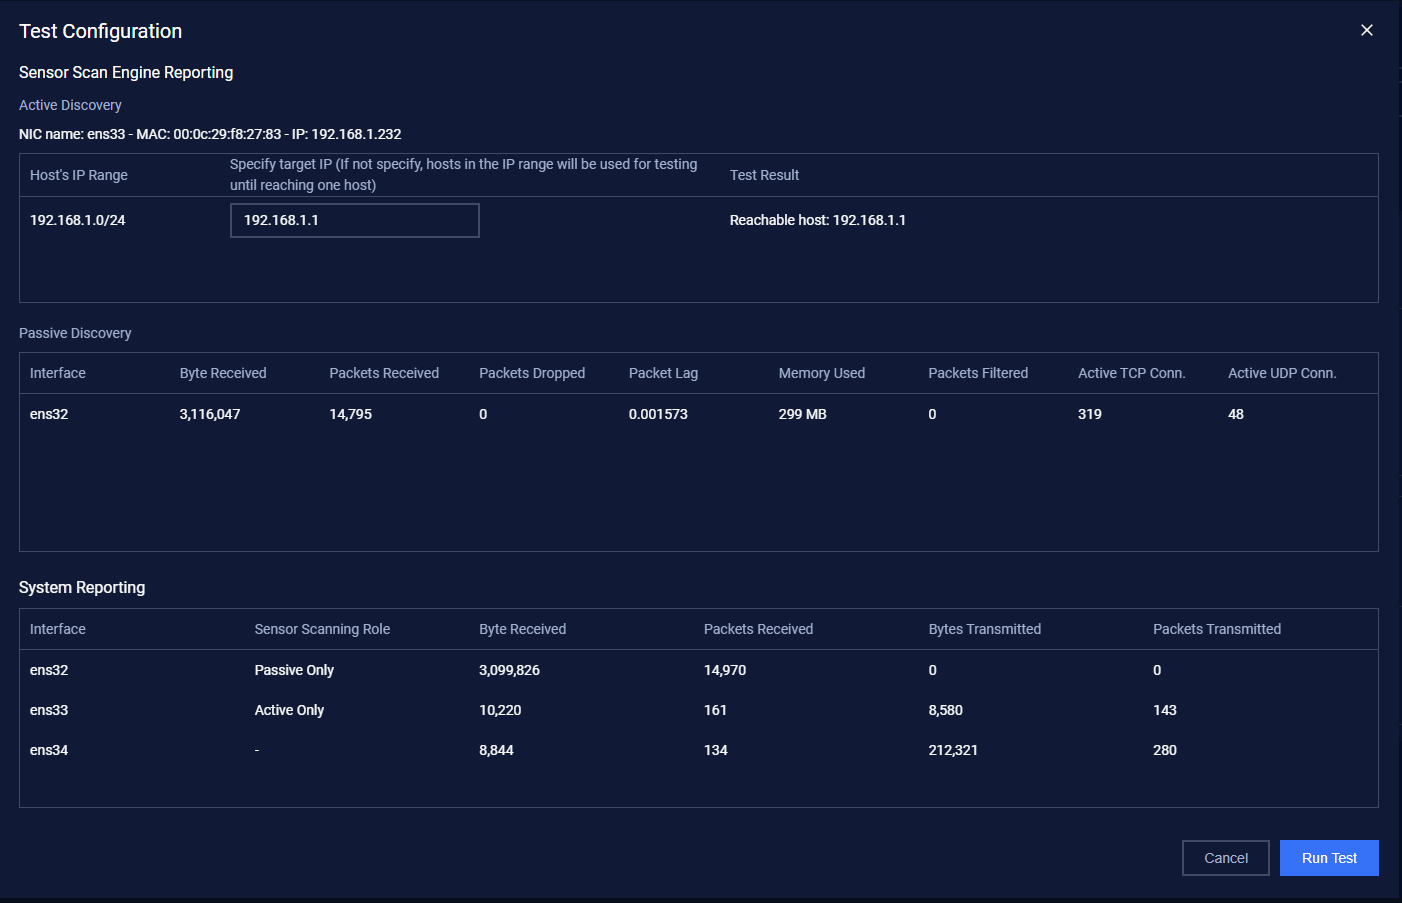
After completing to configuration of the Network, the User can click on Test Configuration button, then click on Run Test to test the user's configuration