Discovery settings is accessible under Settings > Discovery.
On this page, you can change the configuration of the Network Interface Cards (NICs) for network scanning purpose.
Discovery settings
Under this section, you can see all the NICs of Neuralyzer machines, each in a different numbered card.
This information of the NICs matches the NICs settings in the setup wizard that you have completed.
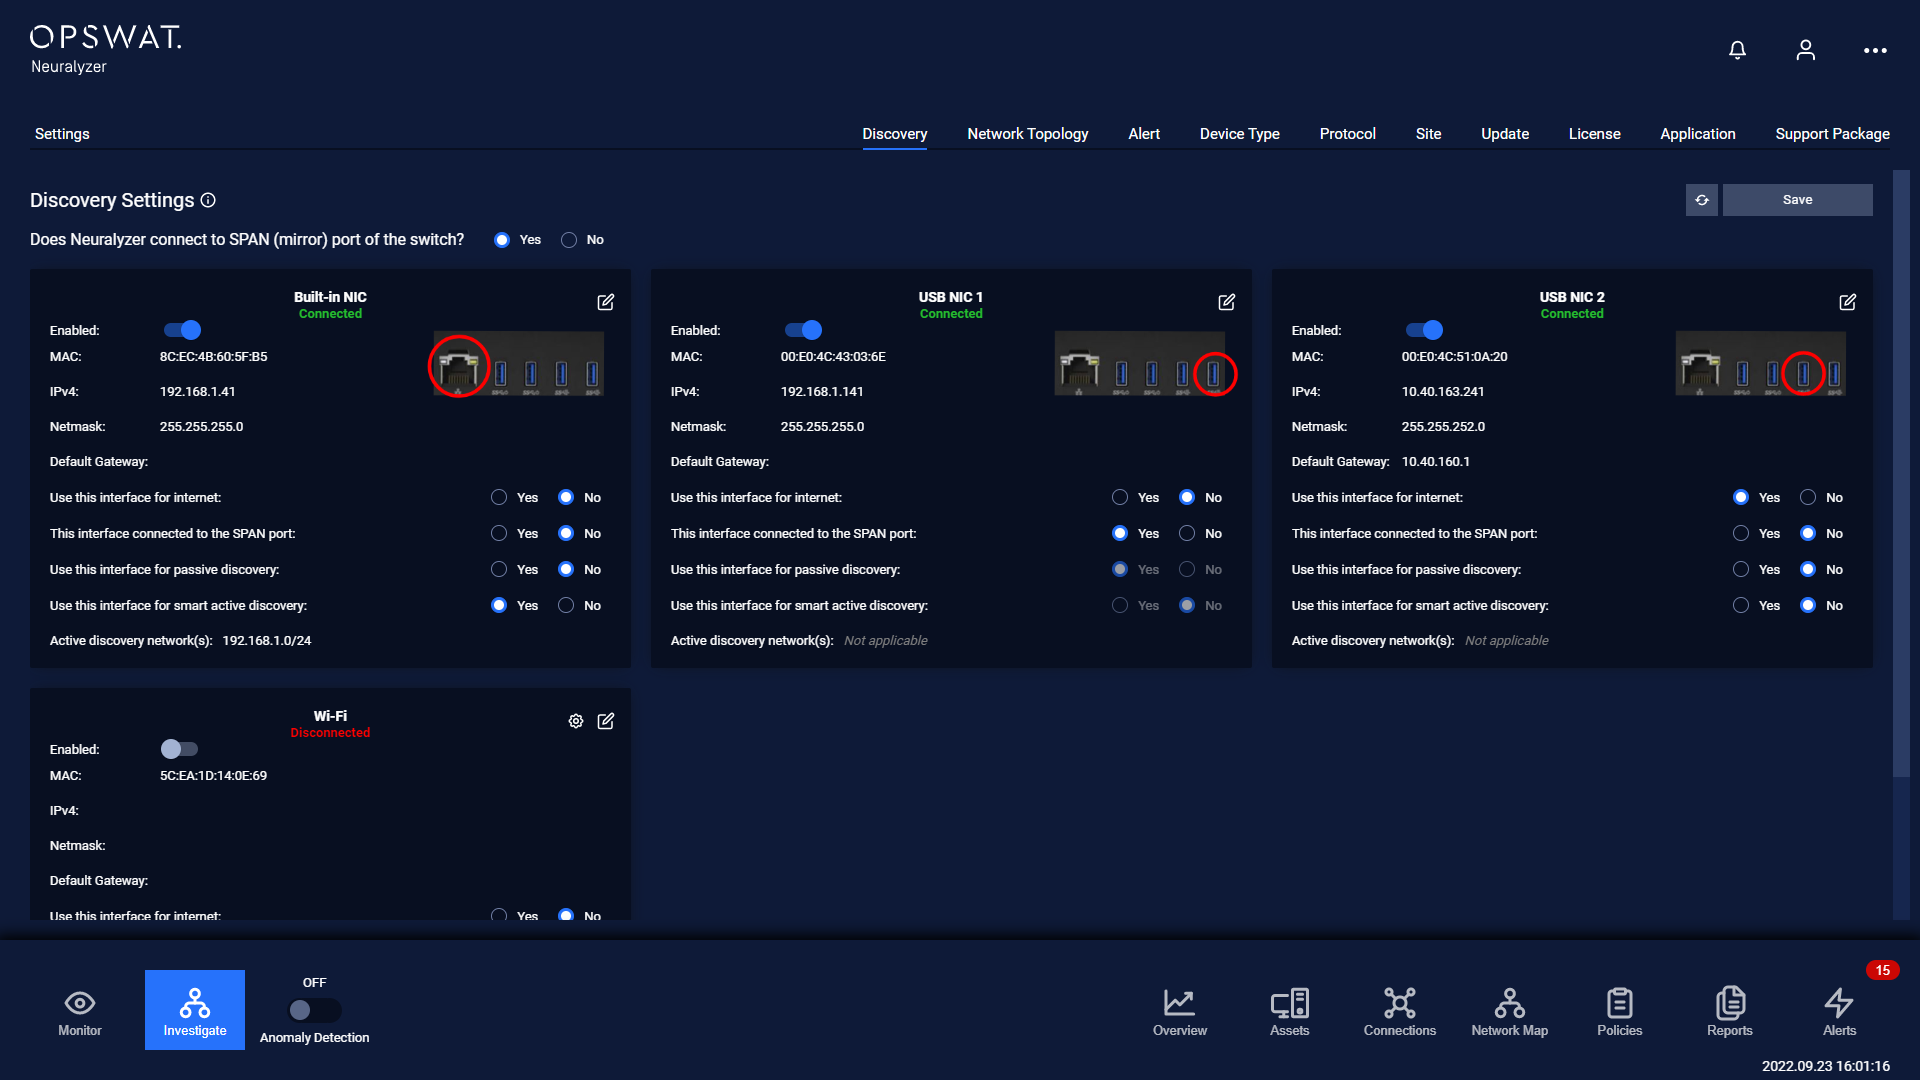
Information of a network interface card includes:
MAC.
IP address.
Netmask.
Default gateway.
Used this interface for internet.
Option for passive scanning.
Option for active scanning.
Range of discovery network.
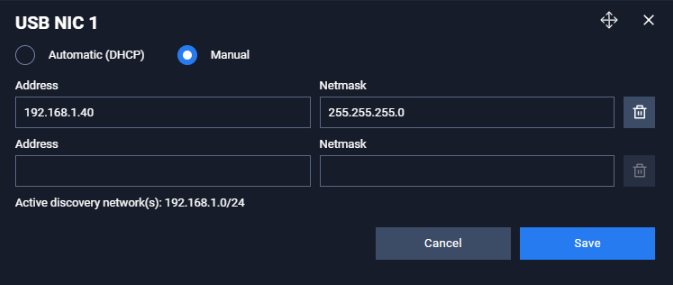
If you need to adjust the method of Host configuration, set it to automatic (DHCP) or Manual, set Address, Netmask, Gateway, set DNS and other fields, click the Edit icon in the right corner of the card. Your changes will be applied to the system after saving.
Note: User don’t need to configure route for NICs, Neuralyzer will handle that.
The “Active discovery network” section is used in case user want to scan another network, so you will have to define that network in this section.
How to configure Discovery settings for best performance by Neuralyzer
Neuralyzer machines should have a network card connected to the mirror port and a network card connected to the normal port on the switch to work most effectively.
The NIC connect to mirror port allows us to capture all traffic in the network.
And the NIC that connect to normal port allows Neuralyzer to collect basic profile information such as device name, IP address and more detailed configuration information such as model, firmware versions, installed software/versions and operating system patch levels.
Preparation
So first, please assign a SPAN port (mirror port) to the system master switch and connect a network card to this port.
Other NICs, depending on the needs and design of the system (multiple network subnets) to connect to the switch, connecting each network card to a normal port for each subnet you want to scan.
Set up on Discovery Setting
Make sure option “Yes” is chosen for “Does the switch has a SPAN (mirror) port to which Neuralyzer is connected to”.
On the NIC that connects to the mirror port, please choose Yes for “This interface connected to the SPAN port”. Option “Use this interface for passive discovery” will automatically change to Yes.
On finished setting up for the NIC connected to the SPAN port, Option “Use this interface for passive discovery” of other NICs will change to “No”.
On the NIC(s) that connects to the normal port, you do not need to change anything.
On the NIC that user for the internet, you need to check on “Use this interface for internet”.
On the NIC(s) that is not used or not connected to any port, please disable those NICs.
Note: In case of any discovery settings changes, you need to click on the Save button so that the changes can be applied. In case you forget, don't worry because Neuralyzer will always remind you when you leave without saving.