This user guide provides step-by-step instructions for setting up RadSec clients and Proxied RADIUS clients in MetaDefender IT Access (MDITA).
"RadSec Clients" enables you to configure secure communication between RADIUS clients (e.g. switches, wireless controllers, or APs) that support RadSec protocol, and the MDITA RADIUS server.
"Proxied RADIUS Clients" allows you to configure communications between RADIUS clients that don't support RadSec protocol, and a "proxy" can relay RADIUS messages to the MDITA RADIUS server securely using RadSec.
This user guide covers two main workflows:
Creating MDITA-side configuration for clients that support the RadSec protocol
Creating MDITA-side configuration for clients that do not support the RadSec protocol
Create RadSec Clients
RadSec Clients are devices or systems that connect to a RadSec Proxy for secure communication with a RADIUS server. There are several options and configurations required for each type of RadSec Clients.
Create RadSec Client that auto detect the RadSec Client vendor
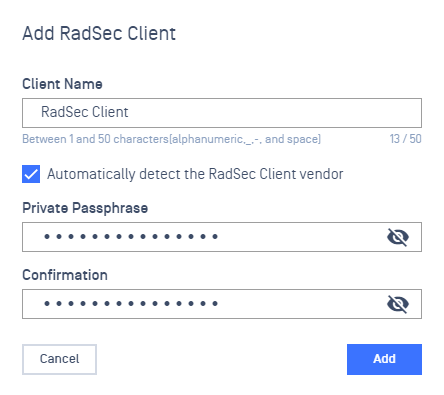
Log into the MetaDefender IT Access console as an administrator
Navigate to Secure Access and then RADIUS NAC
Click on RadSec Clients tab
Click Add RadSec Client button
Provide a name for the RadSec Client
By default, Automatically detect the RadSec Client vendor is checked
Enter a Passphrase used to encrypt the private key associated with the client certificate that will be generated for this RadSec client
Click on Add
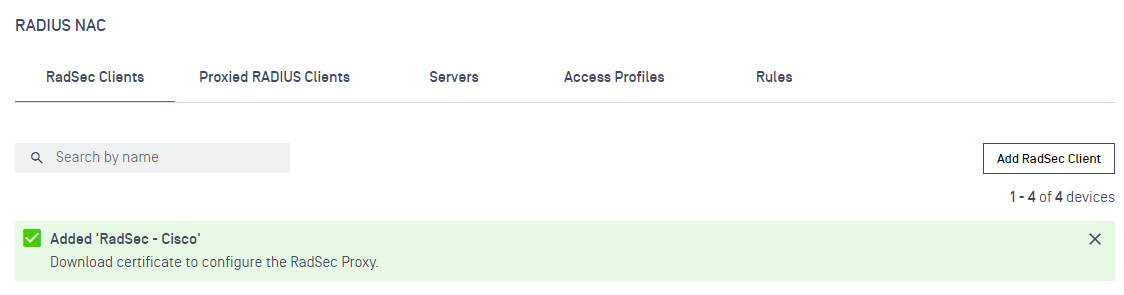
Upon successfully creation, a message popup should appears reminding user to download the associate certificate.

Create RadSec Client with a specific Vendor
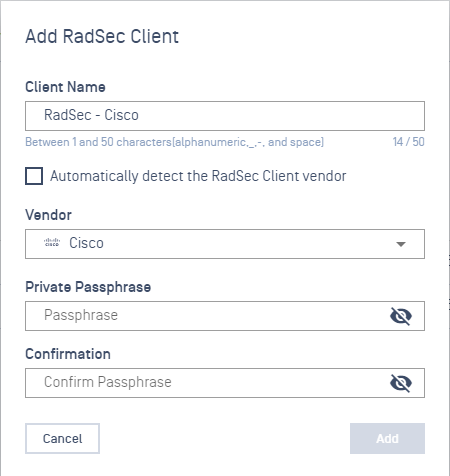
Log into the MetaDefender IT Access console as an administrator
Navigate to Secure Access and then RADIUS NAC
Click on RadSec Clients tab
Click Add RadSec Client button
Provide a name for the RadSec Client
Uncheck Automatically detect the RadSec Client vendor
Select a specific Vendor(*)
Input the Passphrase
Click on Add
Upon successfully creation, a message popup should appears reminding user to download the associate certificate.(**)
(Current supported Vendors: Aruba, Cisco. For any other Vendors that does not exists in the list will be grouped under Other. For OPSWAT Proxy, this configuration is used for clients that do not support the native Radsec protocol but must go through a Radsec Proxy. No IP address is required as MetaDefender IT Access will automatically identify the clients and its vendor attribute.
Create Proxied RADIUS Clients
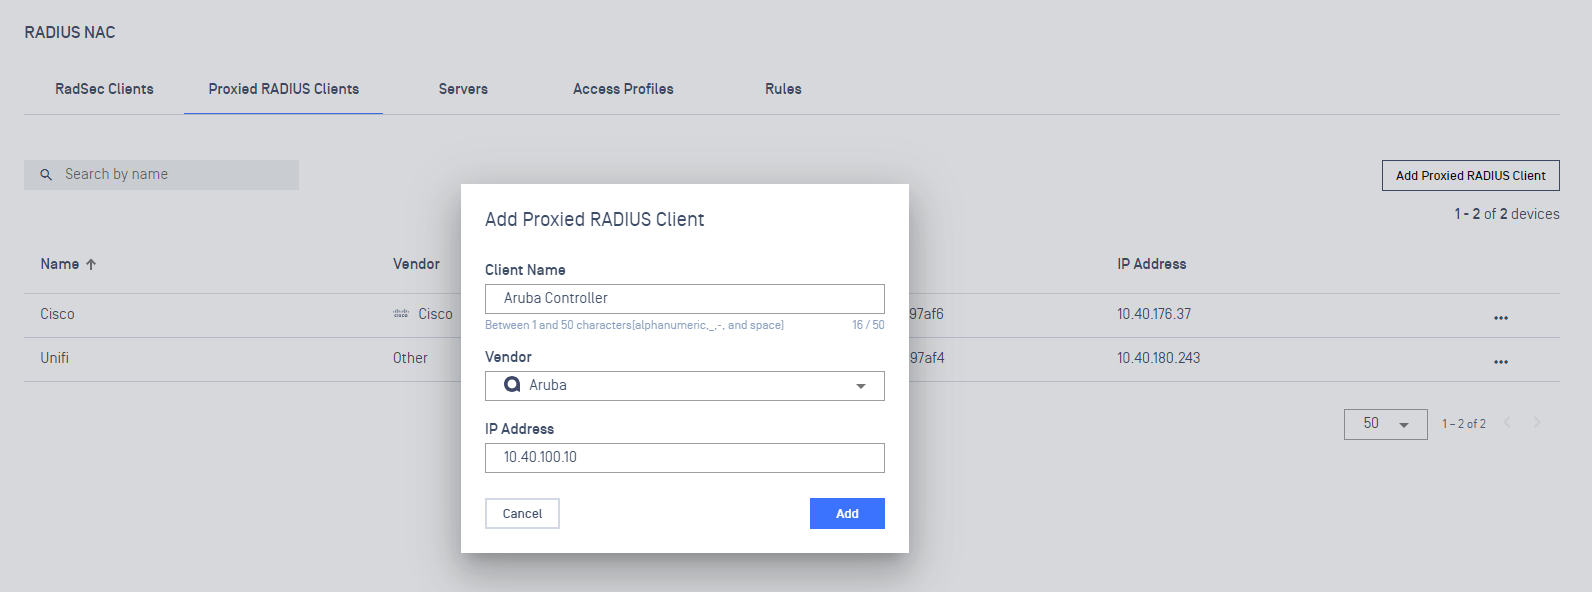
Click "Add Proxied RADIUS Client" on the "Proxied RADIUS Clients" tab.
Fill in a "Client Name". This can be anything you wish.
Select the vendor of your client from the "Vendor" drop down (e.g. Cisco). If the correct vendor isn't present, select "Other".
Fill in the IP address from which the proxy should expect to see RADIUS traffic from your client.
Download RadSec Clients Certificate
In this step, you will download the certificate specific to the mode chosen for the RadSec Client (Non-Behind Proxy). The certificate ensures the authenticity and encryption of the communication between the RadSec Client and the RadSec Proxy.
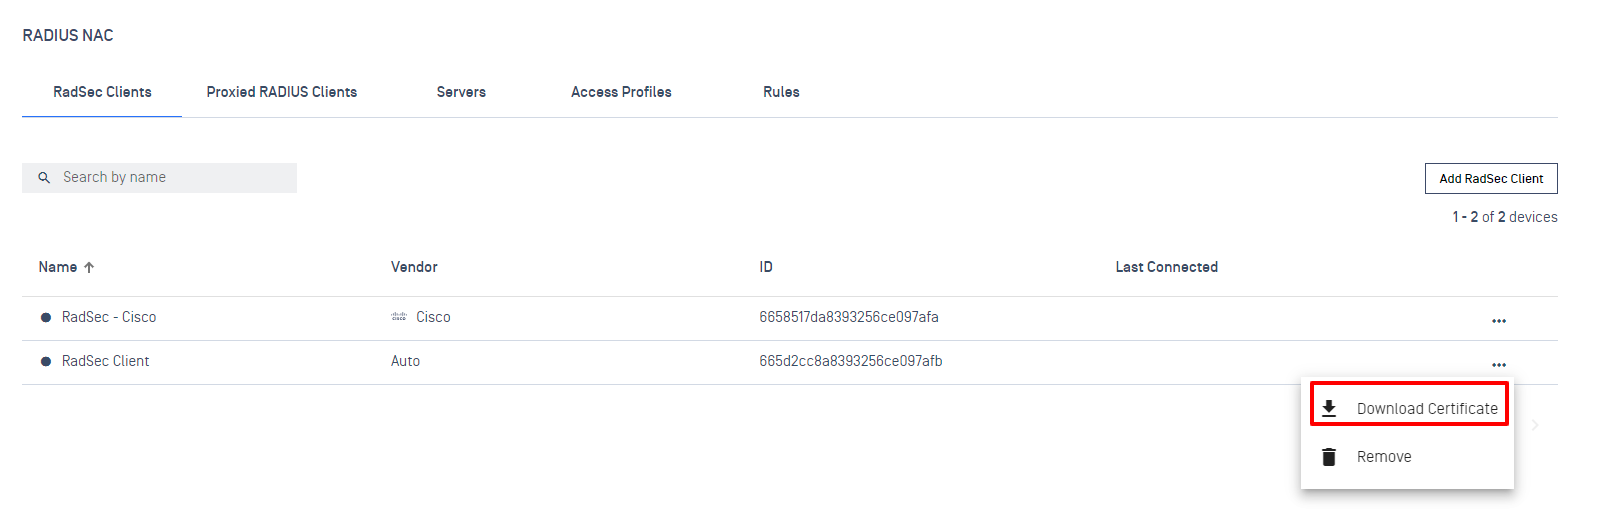
To download the certificate,
Log into the MetaDefender IT Access console as an administrator
Navigate to Secure Access and then RADIUS NAC
Click on RadSec Clients tab
Click on the three dots icon
Select Download Certificate (This option will not available if the selected item is created with Behind Proxy mode)
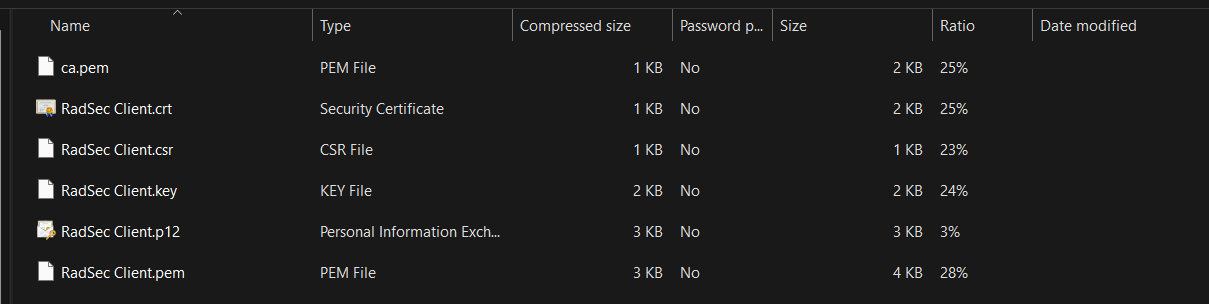
A sample Certificate folder should looks like:
Import RadSec Clients Certificate to RadSec Proxy
To import the Certificate to RadSec Proxy server:
Connect to your Proxy server
Locate your
raddbfolder, by default the path should beradsec-proxy/raddb/Copy the downloaded files to/certsfolder
An example:
Define the RARIUS Client information
Define the RadSec Server configuration
Bring up RadSec-Proxy
Up radsec-proxy with this command:
Managing RadSec Clients
Log into the MetaDefender IT Access console as an administrator
Navigate to Secure Access and then RADIUS NAC
Click on RadSec Clients tab
To edit a Client:
Click on a specific RadSec Client
Change to the new expected value
Click on Save
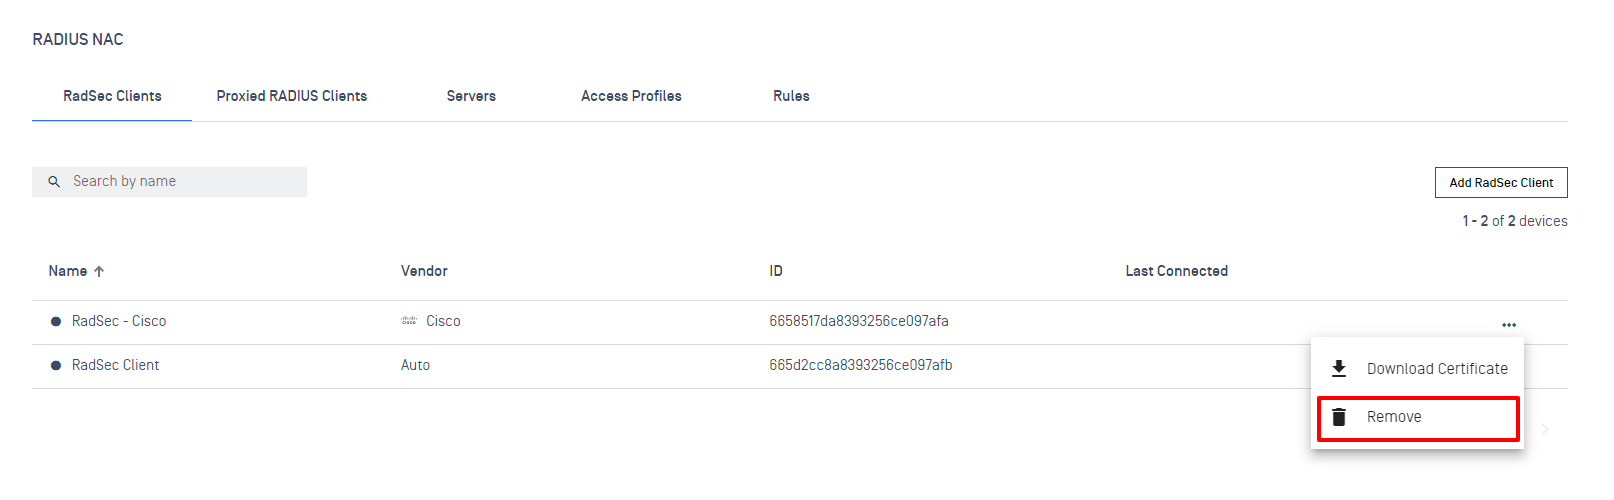
To delete a Client:
Click on three dots icon
Click on Remove button
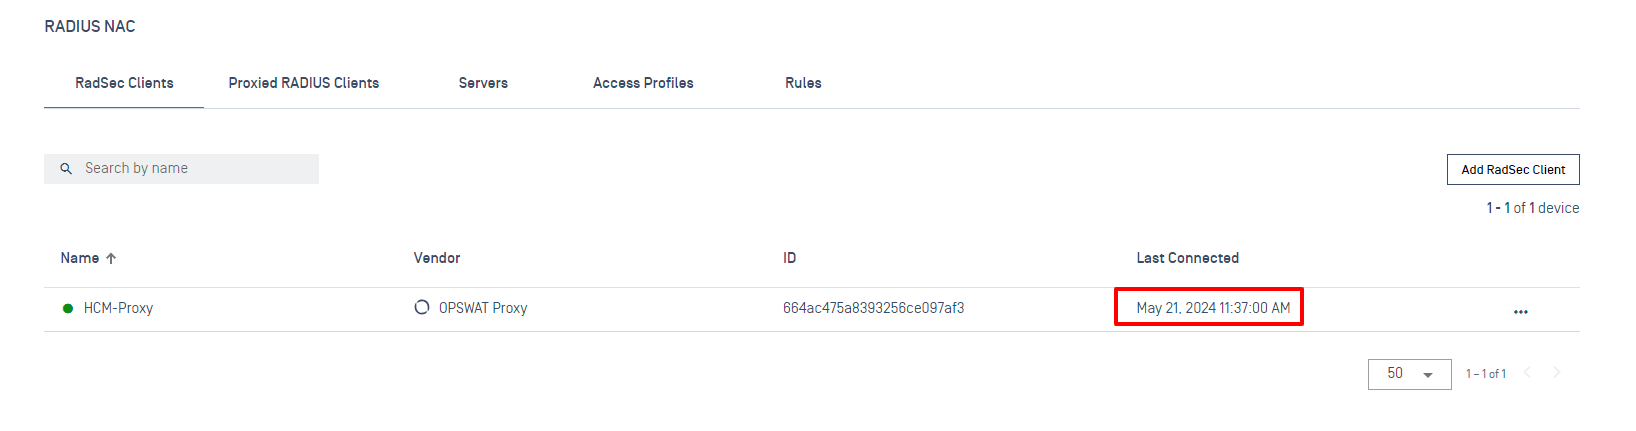
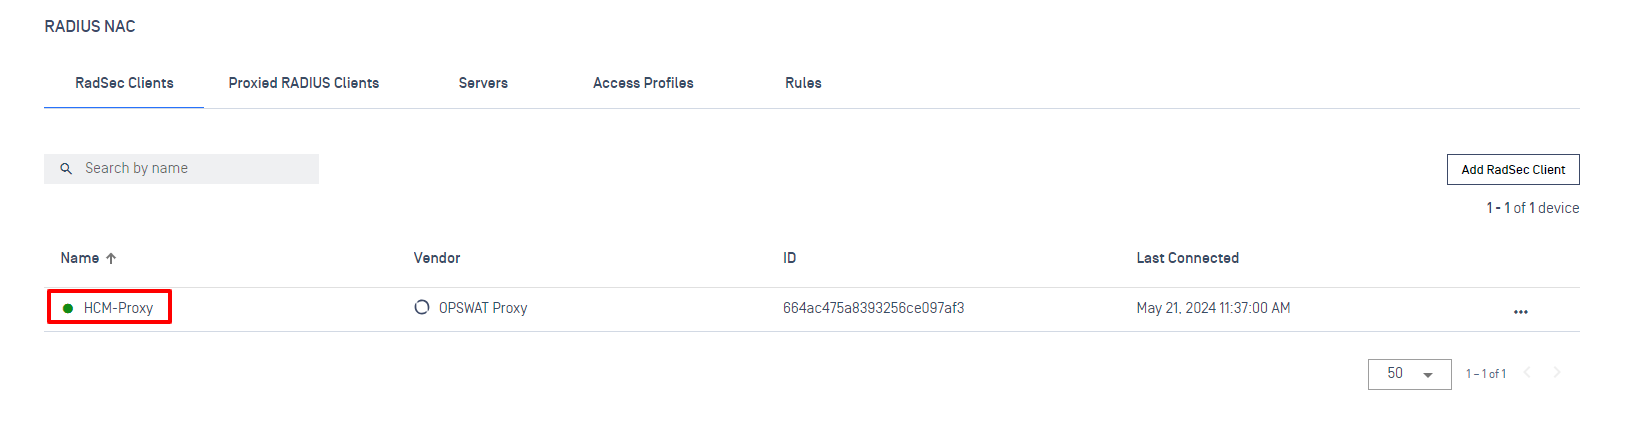
Connection indicator
Provides a status of network connection in real-time. If the icon is displayed in green this mean the connection between RadSec Client & RadSec Server has been established successfully. Otherwise the icon will displayed as grey, indicates that the connection is experiencing issue.
Last Connected
Indicates the last time a connection establish successfully