Step-by-step guide
Click on “NAS” from the left navigation and then click on “New NAS”.
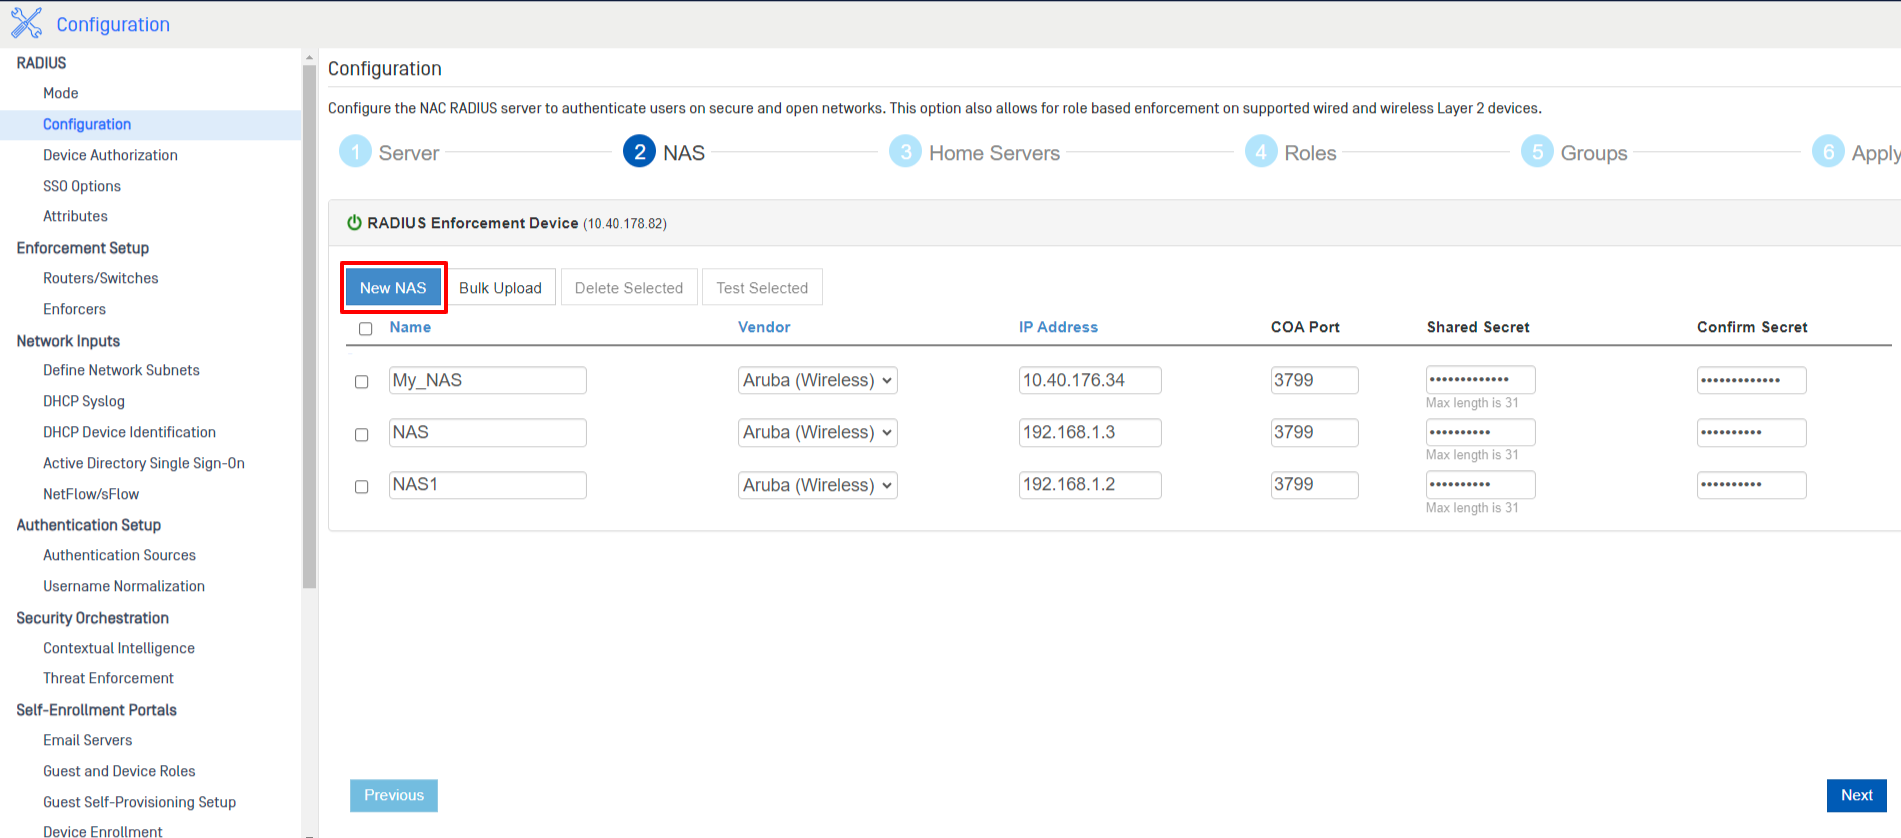
Enter the information about your Wireless Controller, AP or switch.
Name: A label to help identify the NAS at a later time.
Vendor: The vendor of your NAS device.
IP Address: The IP address of your NAS device.
COA Port: In most situations, the default value should be used. Note that some vendors will use an alternate port such as 1700.
Shared Secret: The secret that was set up in step 2.1.
If there are dozens or even thousands of NAS devices, there is a Bulk Upload feature for loading multiple NAS devices simultaneously. If all NAS devices are in the same subnet you may also use a the subnet CIDR.
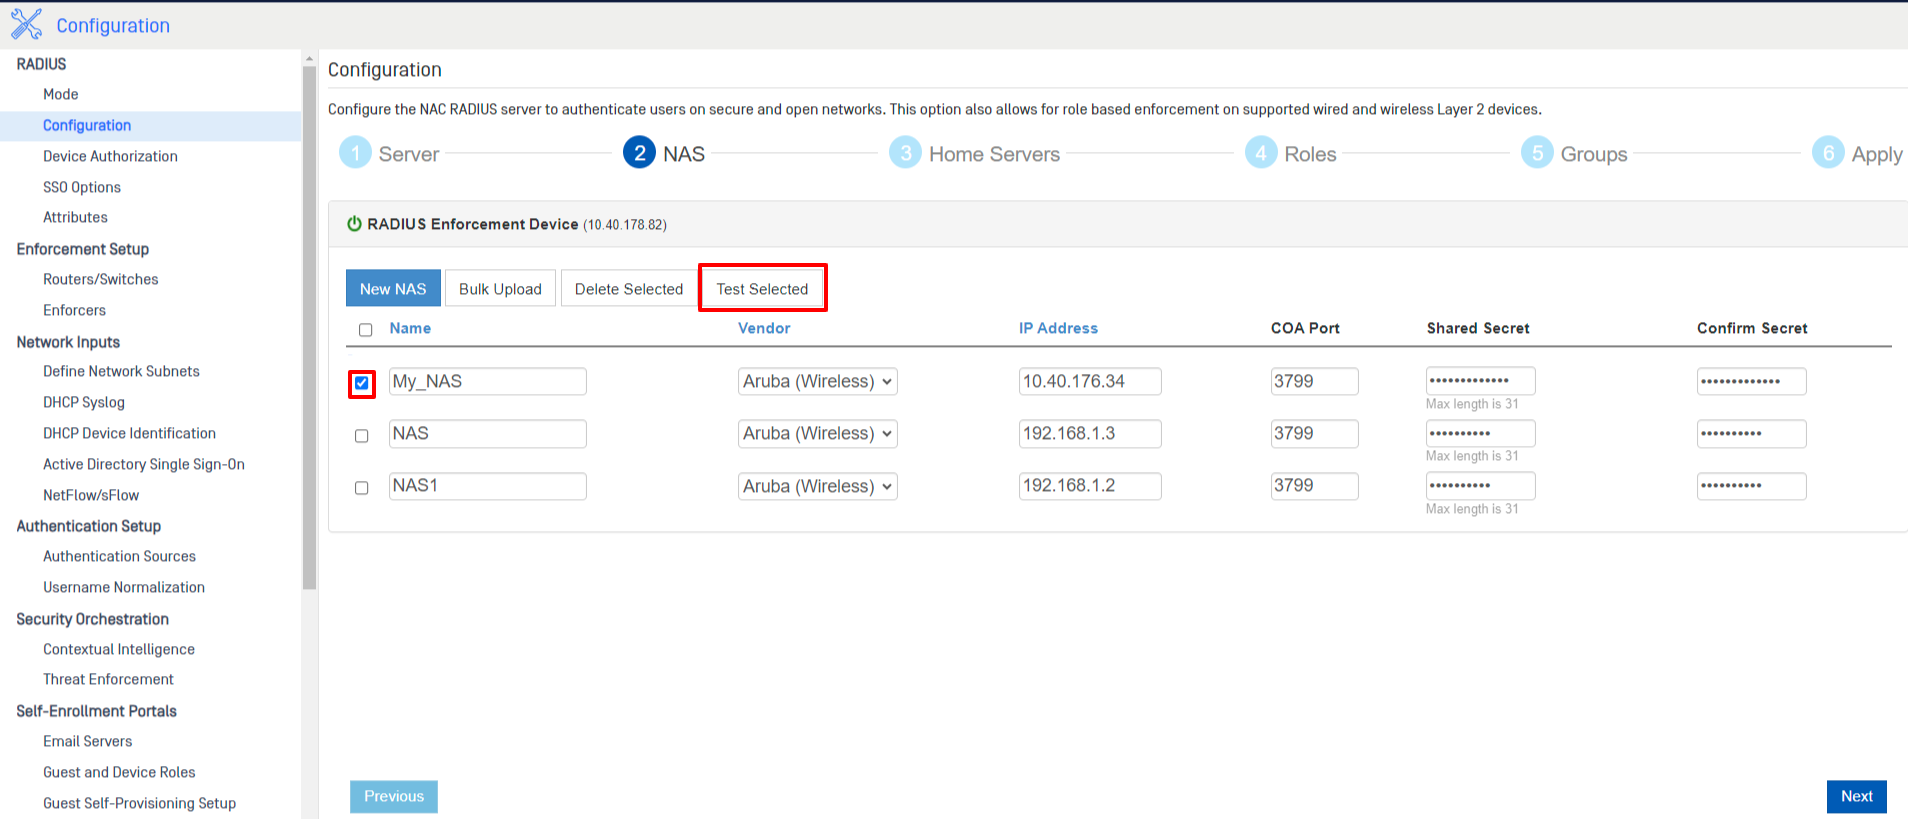
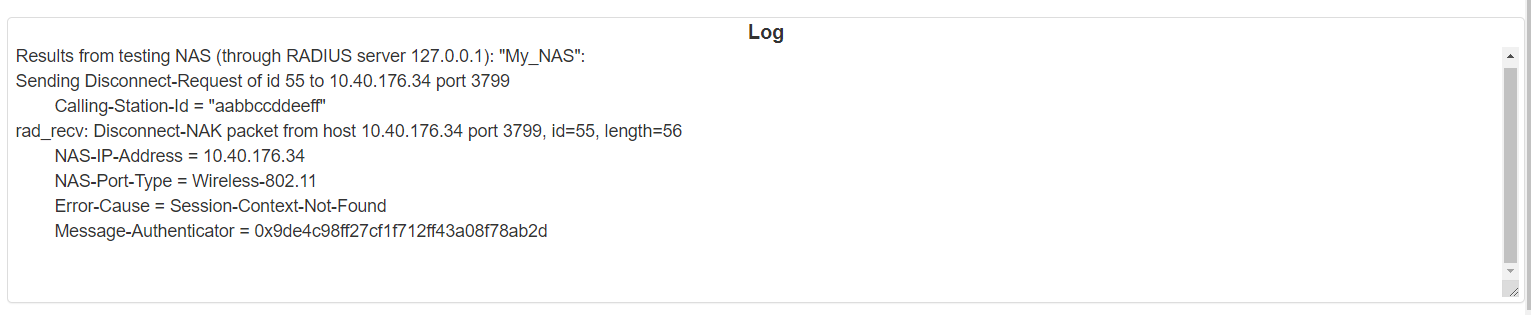
After entering a NAS device, it can be validated by checking the box next to the NAS entry and then choosing the “Test Selected” button. The RADIUS Server will then send a disconnect-request to the NAS. If a rad_recv message is received, this validates the shared secret and verifies the controller is processing Change of Authorization (CoA) messages from the RADIUS Server.