Step-by-step guide
Add a new RADIUS Server
Navigate to 'Configuration > Security > Authentication > Servers'.
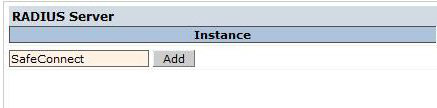
Click 'RADIUS Server' within the 'Servers' tab.

Enter a name for the RADIUS Server and select 'Add'.
Configure the RADIUS Server
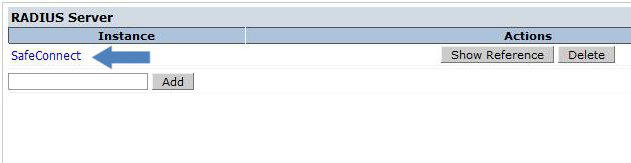
Click on the newly created RADIUS Server to enter into the configuration options.
Once in the configuration options, enter IP address of your MetaAccess NAC Enforcer or Manager in a cluster as the host
Enter the desired value for the key (Shared Secret).
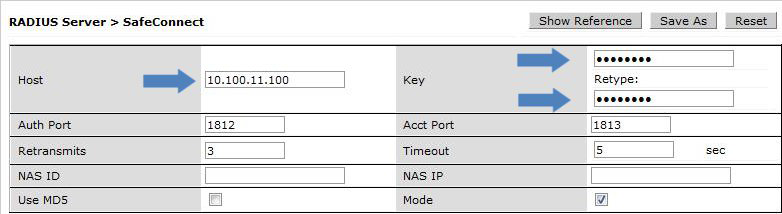
Click the 'Apply' button located in the bottom right corner of the screen.
Associate RADIUS Server to AAA Profile for the appropriate SSID
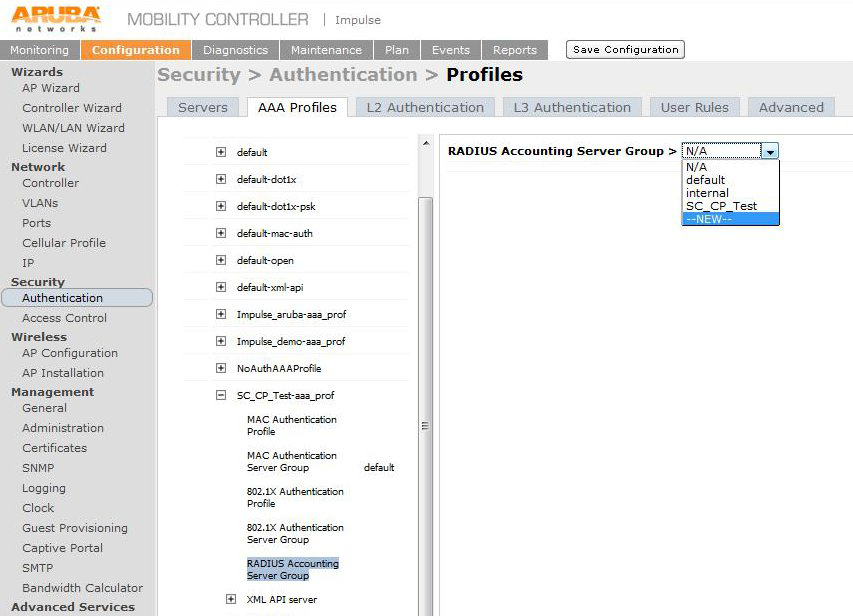
Navigate to the 'AAA Profiles' tab located under: 'Configuration > Security > Authentication > AAA Profiles'.
If you already have a RADIUS Accounting Group Configured for this SSID, please skip to step 5
Add RADIUS Server to a 'new' RADIUS Accounting Server Group
If there is no RADIUS Accounting Group currently configured on this SSID, Select 'NEW' from the menu.
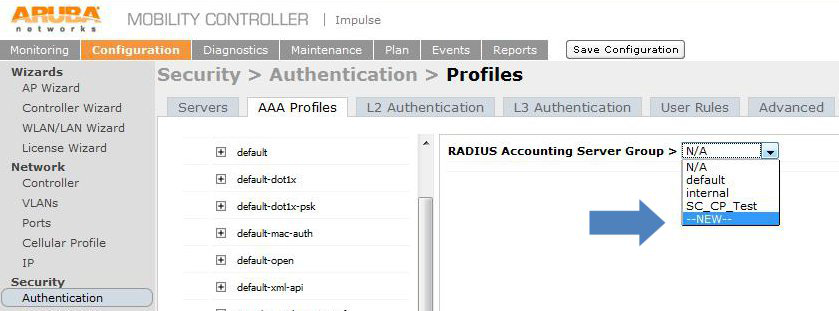
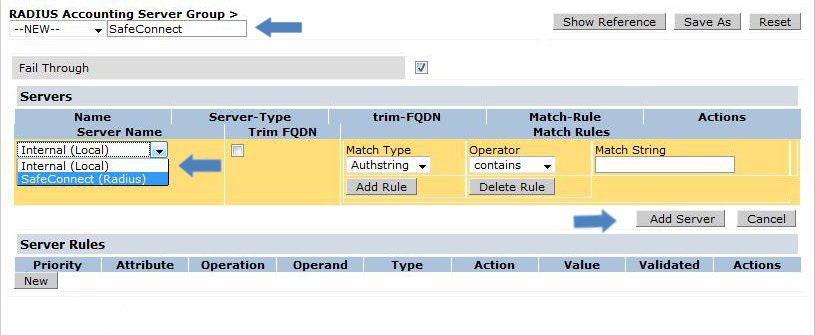
Next to the word 'NEW' enter the desired name for the RADIUS Accounting Server Group.
Under 'Server Name', select the name of the RADIUS server created in the previous step from the drop down menu and then click 'Add Server'.
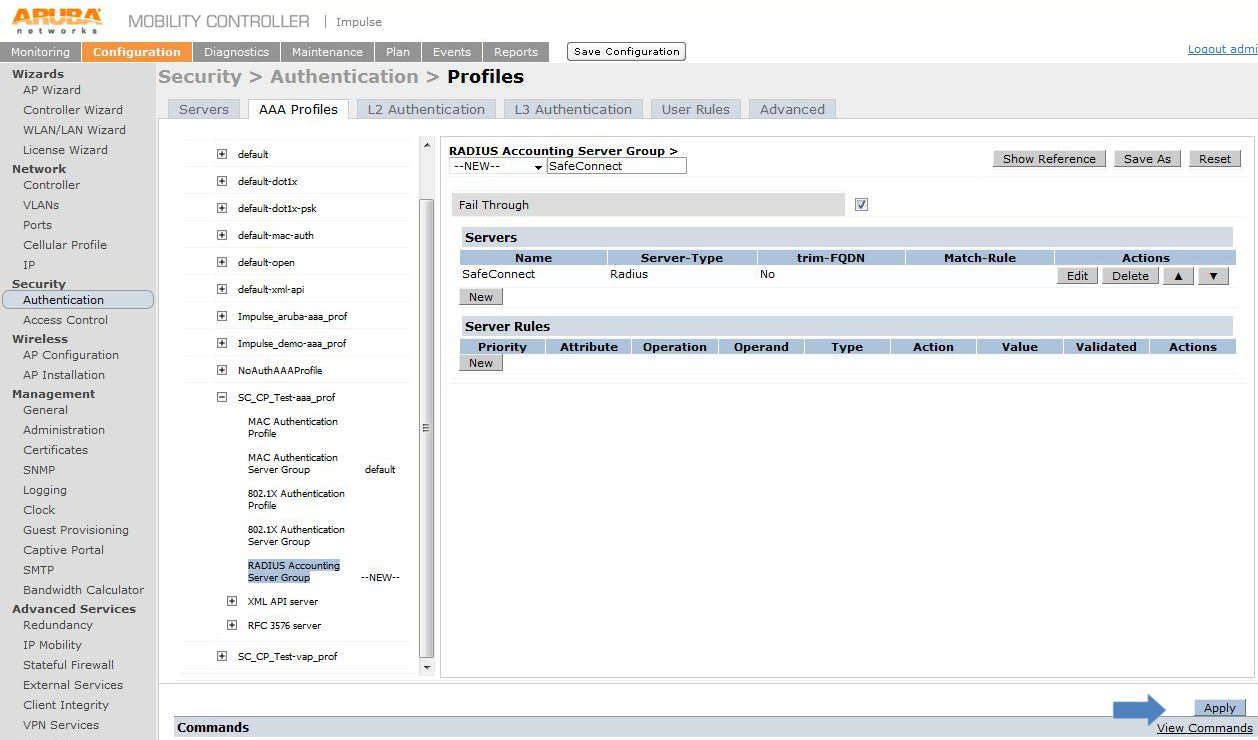
To complete the procedure click the 'Apply' button.
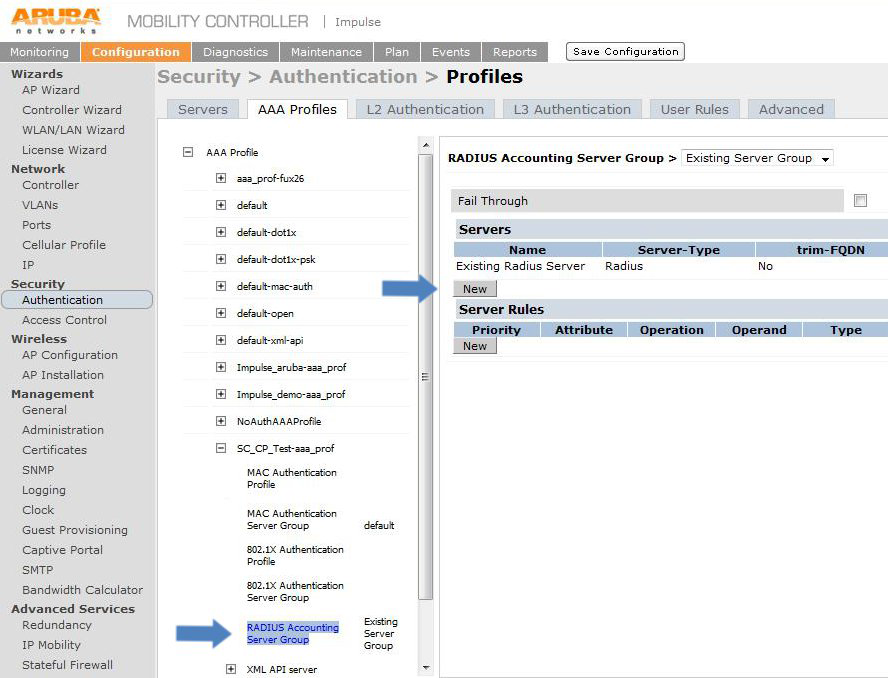
Add RADIUS Server to an 'existing' RADIUS Accounting Server Group
If there is an existing RADIUS Accounting Server Group, follow these steps to add to the existing server group.
If you have an existing RADIUS Accounting Server Group for this SSID, the newly created Accounting server will need to be added to this group.
Click on the RADIUS Accounting Server group for the SSID where you wish to enable Single Sign-On.
Click on the 'New' button under the 'Servers' list.
Under 'Server Name', select the name of the RADIUS server created in the previous steps from the pull down menu and click the 'Add Server' button.
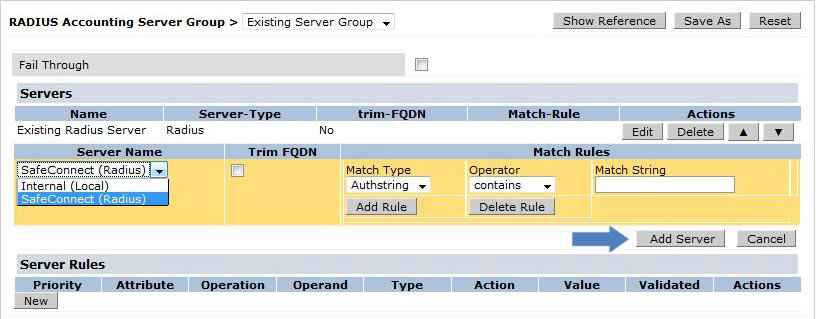
To complete the process click 'Apply'.

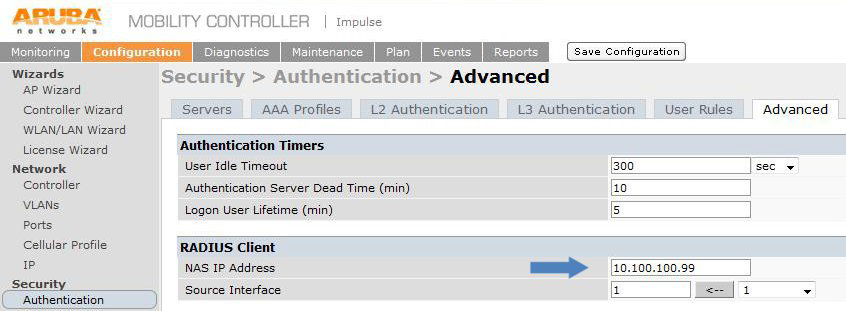
Gather Required Information
The following information will be needed to complete the configuration:
The Key (Shared Secret) gathered in the 'Configure the RADIUS Server' step above.
The IP address of the RADIUS Client of the Aruba Controller.
Navigate to Security -> Authentication -> Advanced.
The IP address will be listed under RADIUS Client -> NAS IP address.