
Should the throughput requirement exceed 25K samples/day, then a typical single-server sandbox deployment is not sufficient anymore. For these cases, a multi-server deployment is necessary. The following diagram gives an idea of how such an architecture may look like:
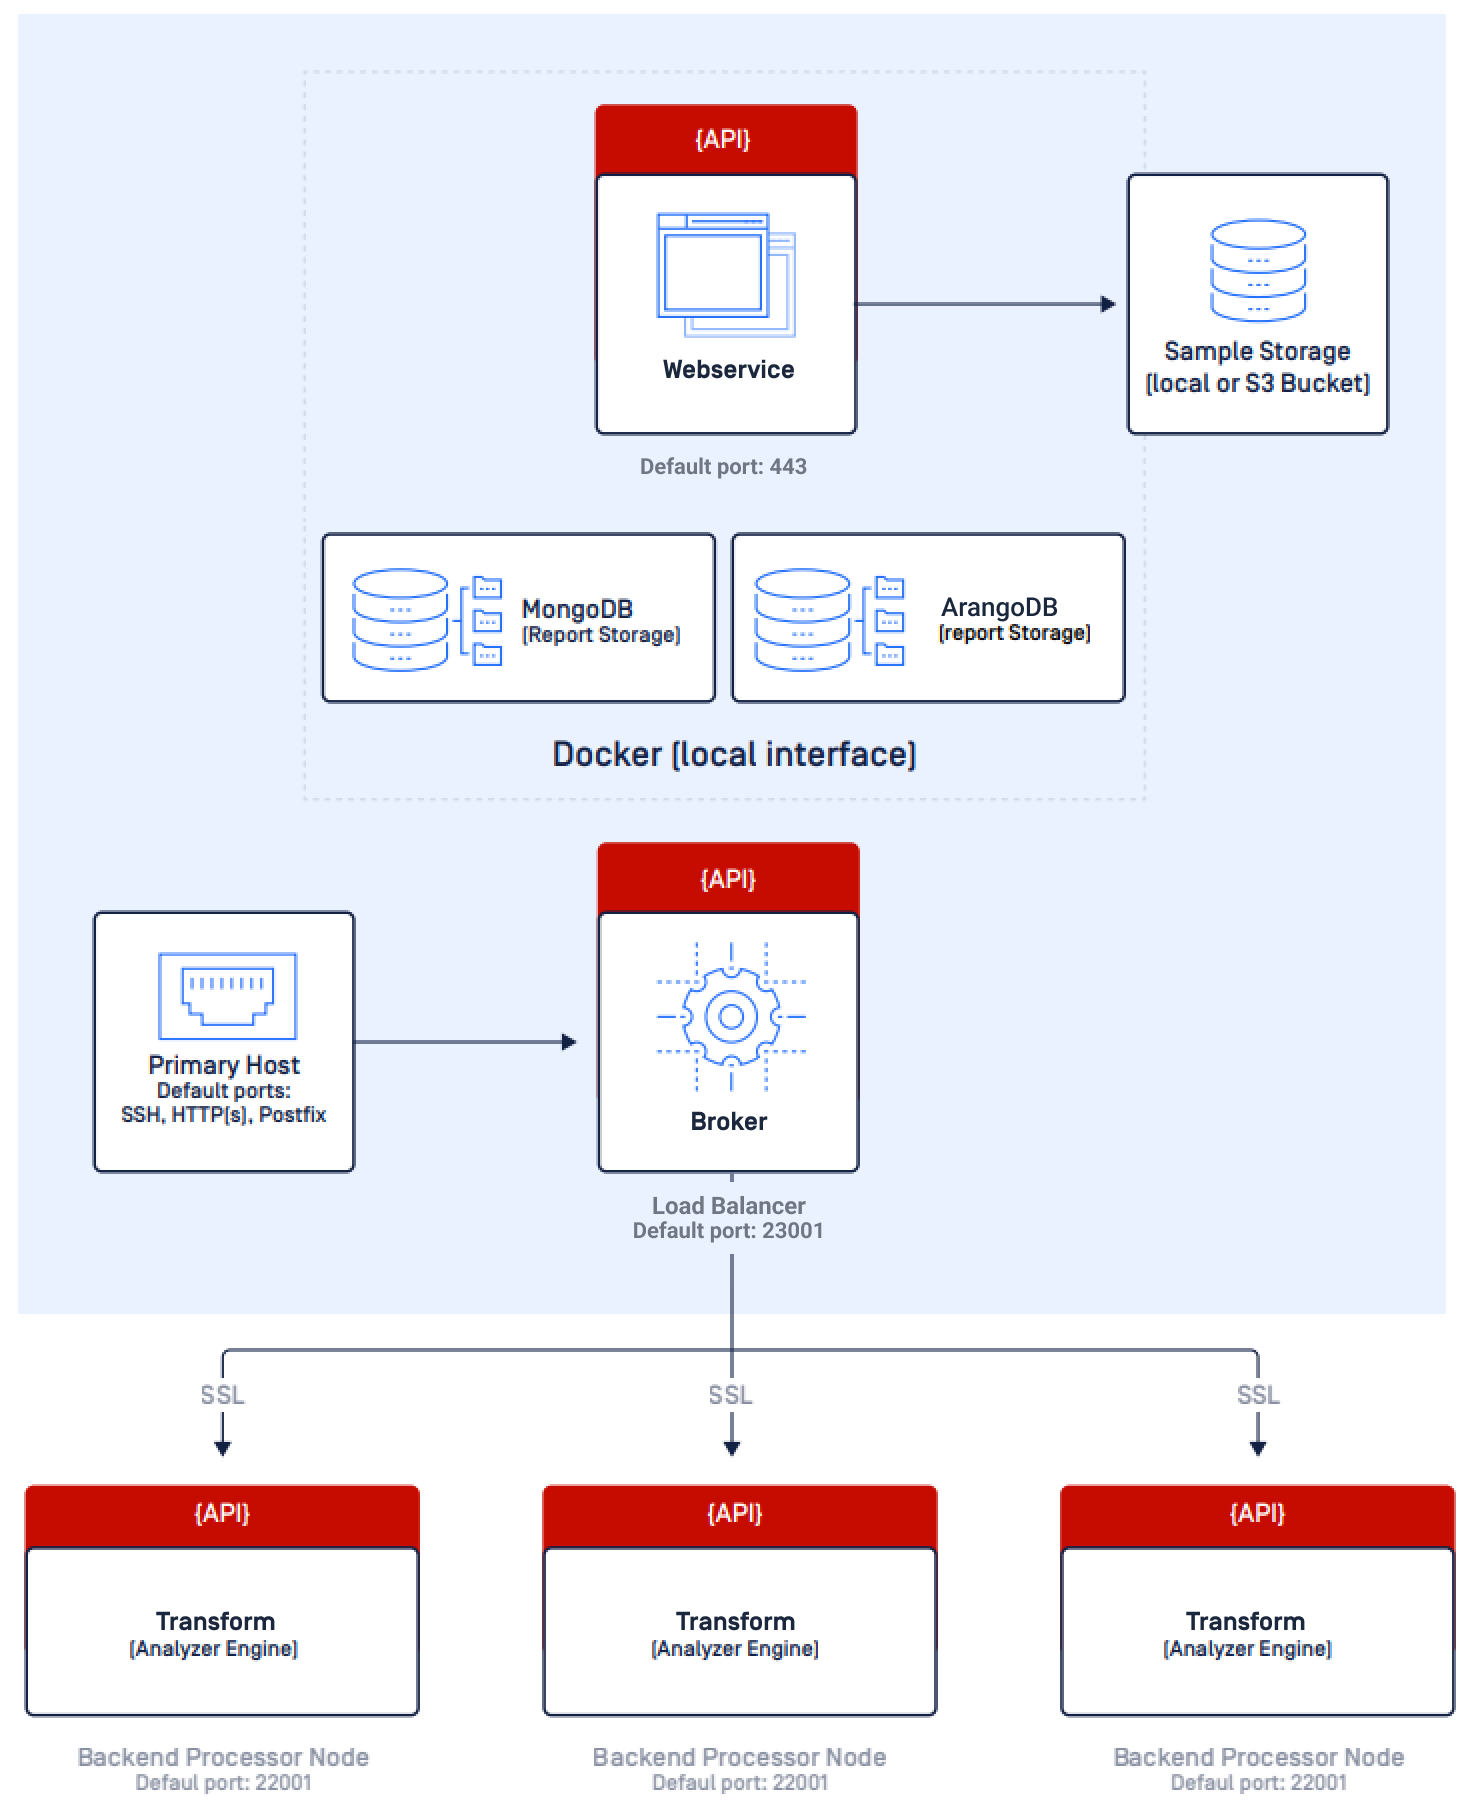
Basically, the idea is that the webservice and broker are installed on a single "frontend" server (main node) and the transform engine is deployed on multiple "analysis nodes" (according to the required throughput). As the broker can be configured to forward incoming files to multiple remote analysis nodes, it is possible to scale throughput as needed.
To achieve the above architecture make sure that the analysis nodes are able to communicate with the main node. Please apply the following additional steps during the install process:
Step #1 - Install analysis nodes
Install 2 or more analysis nodes on different servers. Follow the Quick Install guide and before starting the install.sh script, locate the following lines in install.cfg and change them as follows:
Run the install script, only transform is going to be installed. To make sure that the process was successful, please run:
Repeat this step on each analysis node.
Step #2 - Install main node
Install main node (databases, broker, webservice) on a separate server. Follow the Quick Install guide and before starting the install.sh script, locate the following line in install.cfg and change it as follows:
Run the install script, broker and webservice are going to be installed alongside with the databases. To make sure that the process was successful, please run:
Step #3 - Configure broker
Open /home/sandbox/sandbox/broker.cfg using a text editor and add the following lines (to match the desired architecture and the number of analysis nodes):
applicationServers=app1...appX, where X=<number-of-analysis-nodes>
You can see 3 transform instances in the above example, but you can add more, just make sure that they appear in the applicationServers list.
Please make sure to update the following values for each app: host, secret, callbackHost
After saving your configuration, please restart broker:
Step #4 - Activate the analysis nodes
Follow Step #8 of the Quick Install guide to add license keys and activate each analysis node.
Please make sure that your license covers the required quantity of instances, so you can use the same license key on all nodes!