Introduction
The purpose of this document is to provide configuration guidelines for using PiToPi with Netwall. There are numerous configurations that may work, but this is the one we used for testing.

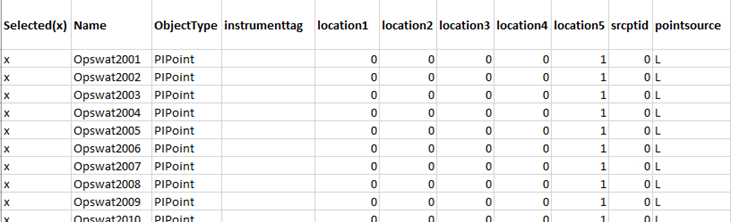
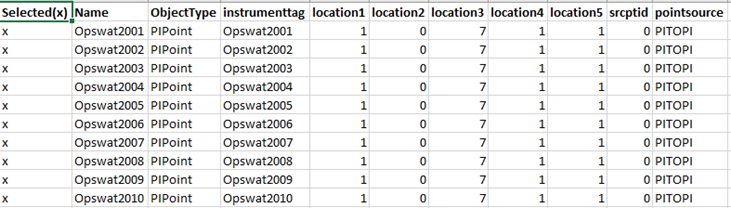
Our test consisted of a Pi Source Machine whose values were passed through Netwall to a Pi Destination Machine using PiToPi configured as a ‘Push’ on the Pi Source machine. The tag configurations for each machine are shown below.
Configuring Netwall
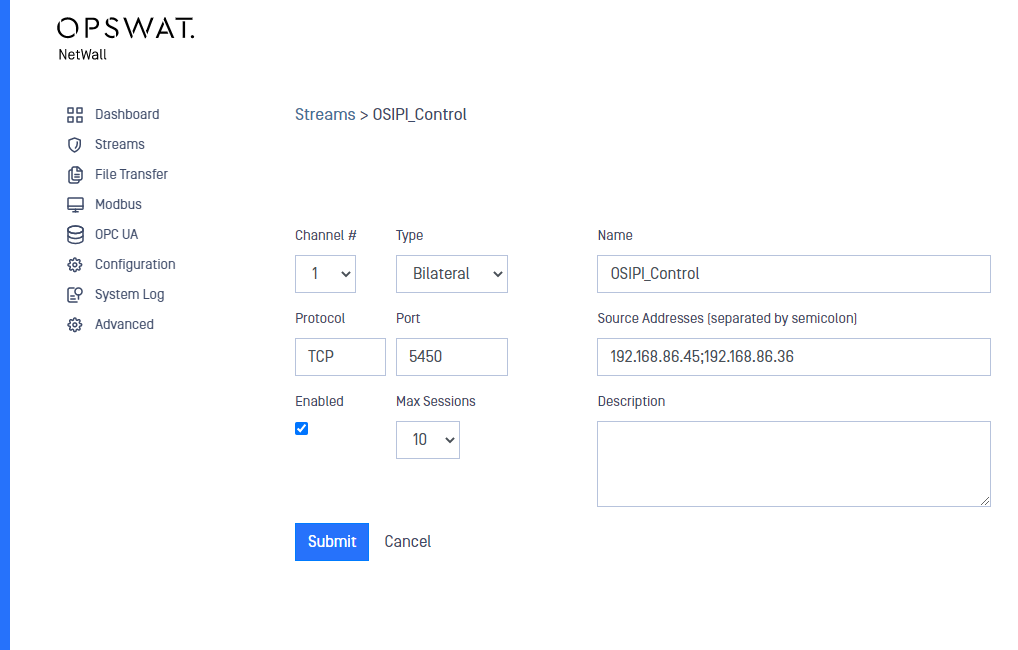
Bilateral NetWall is easily configured to enable port 5450 (the default PI port) between the Pi Source Machine and the Pi Destination machine.
To do so, first, click on Streams to create a stream for the Pi system
Please, remember that you need to create the stream in both sides, BLUE and RED, with the same channel number in both sides. You need a security dongle connected to be able to do so.
Once created you can go back to Streams and check the new PitoPi Stream.
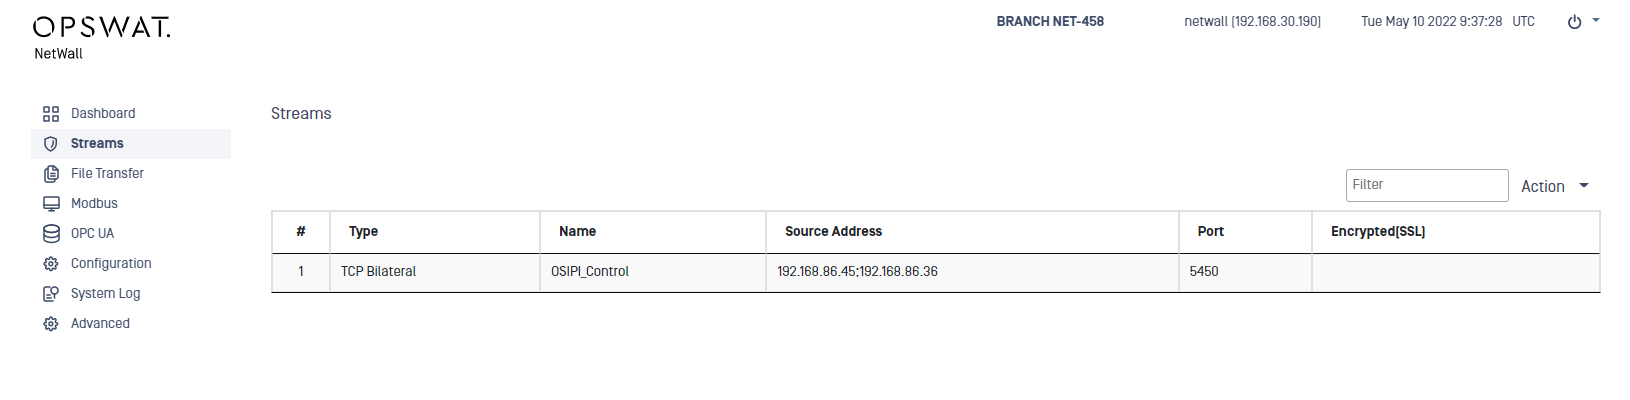
The Source IP is the Pi Source Machine (192.168.86.45). Note there is a 2nd machine defined (192.168.86.36) which is our laptop. The laptop has Excel on it, and we configured the Destination Pi Machine tags using the Excel extensions on the laptop.
The Destination IP is the Pi Destination Machine (192.168.86.49).
Configuring the PI tags
Adding Destination Pi Server Address to the Source Pi Server
The Destination Pi Server IP address is seen as the NetWall Blue IP address (192.168.86.226) to the Source Pi Server. Add this Address to the Source Pi Server using Pi System Management Tools and the File | Add Server option.
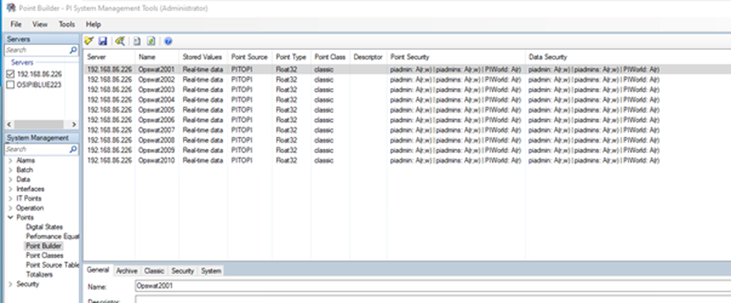
Once you’ve done this, you can use PI SMT on the Source PI Server and select the Destination PI Server using NetWall, as shown below. Note that you cannot select the Source PI Server from the Destination PI Server. NetWall will not allow a connection in that direction.
Creating Trust On Destination Pi Server
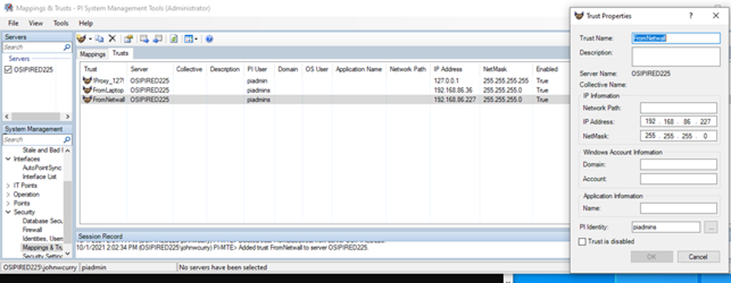
Note that the Pi Destination Machine sees NetWall Red as the Pi Source machine. So, the IP address used in creating the trust on the Pi Destination Machine is the IP address of NetWall Red. Note that we used piadmins as the PI Identity.
Configuring PiToPi on the Pi Source Machine
We installed a new copy of PiToPi on the Pi Source Machine, and then used the Pi ICU (Interface Configuration Utility) to create an instance.
An important step when using the ICU for the first time is the following:
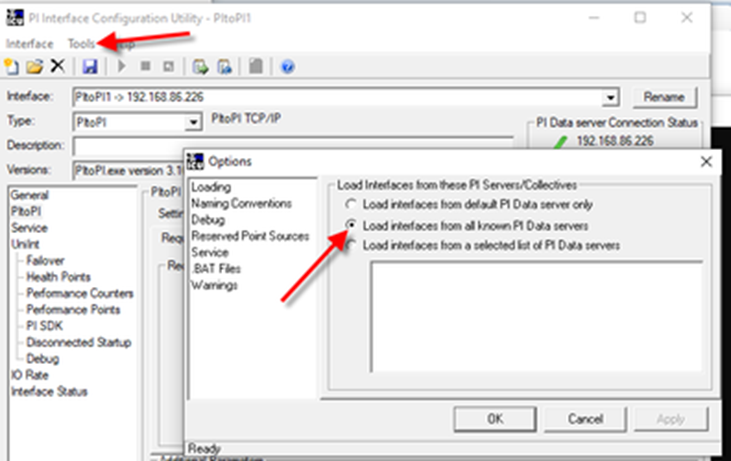
Make sure to select “Load Interfaces from all know PI Data Servers.”
The first step was to create the Interface from a BAT file using the “open folder” Icon on the UCU toolbar and pointing to the PiToPi installation folder:
After configuration, the interface is shown below. Note that we chose to stay with just the .bat file (PItoPI1.bat) which is placed in the PiToPi installation folder.
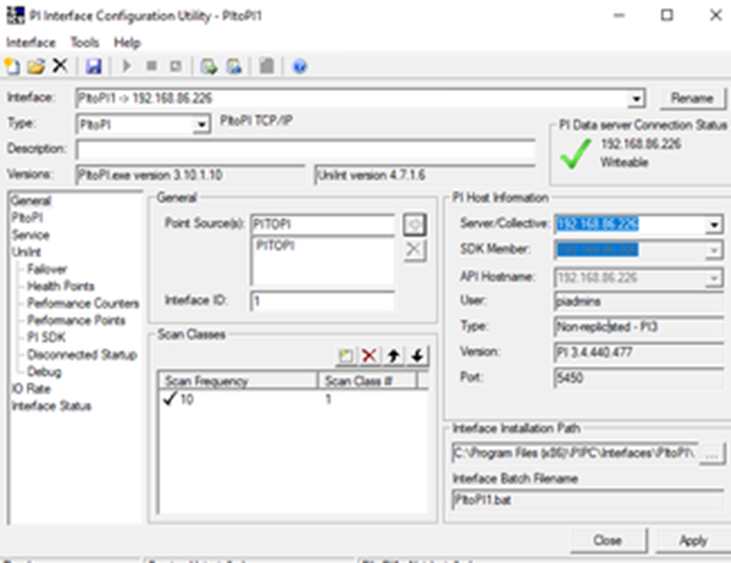
Note that the Hostname contains the address (192.168.86.226) of Netwall Blue. The port number was left at the default (5450).
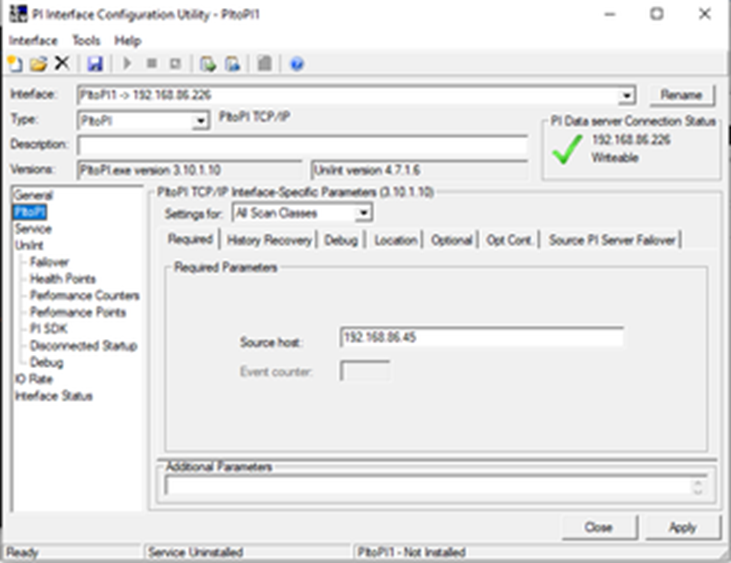
The only additional change we made was to indicate the address of the Source Pi Server, as shown below.
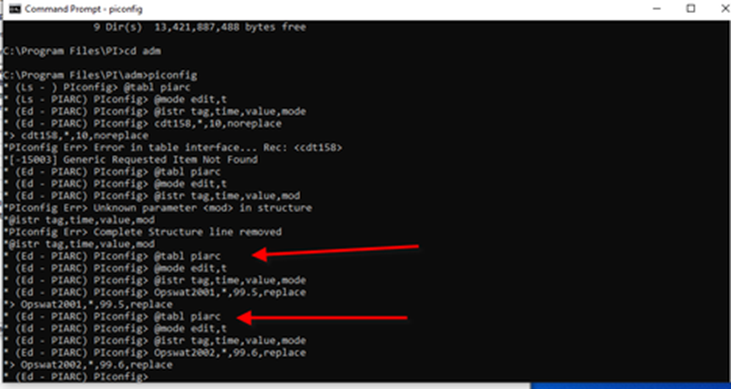
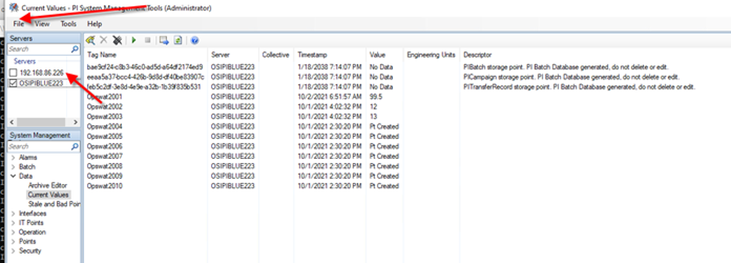
We then started the PItoPI1.bat with administrative privileges. We made changes to current values on the Source Pi Machine using ipconfig. We then verified those values were present on the Destination Pi Machine.