
MetaDefender OT Access can sign users in to the portal through a SAML 2.0 identity provider (IdP). This chapter covers Microsoft Entra ID and Okta. The portal side is the same for both.
Only superadmins can configure SAML App Integration.
MetaDefender OT Access holds one SAML configuration.
1. Before you begin
An Entra ID tenant or Okta organization, and an account that can create applications and assign users to them.
The portal address, as
https://<portal-host>.Use it in the IdP and in the portal.
Users must open the portal at this address.
A value for Application Name, for example
OT-Access, to enter in both the IdP and the portal.
2. How the two sides match
These values link the IdP and the portal:
MetaDefender OT Access portal | Entra ID | Okta |
|---|---|---|
Application Name | Identifier (Entity ID) | Audience URI (SP Entity ID) |
ACS Url: | Reply URL (Assertion Consumer Service URL) | Single sign-on URL |
Import configuration from XML Metadata file (upload) | Federation Metadata XML (download) | Metadata URL (save as XML) |
The portal sends the Application Name to the IdP as its entity ID. The IdP entity ID must be exactly the same text, character for character.
3. Configure the identity provider
Create the enterprise application
Sign in to the Microsoft Entra admin center and open Enterprise apps.
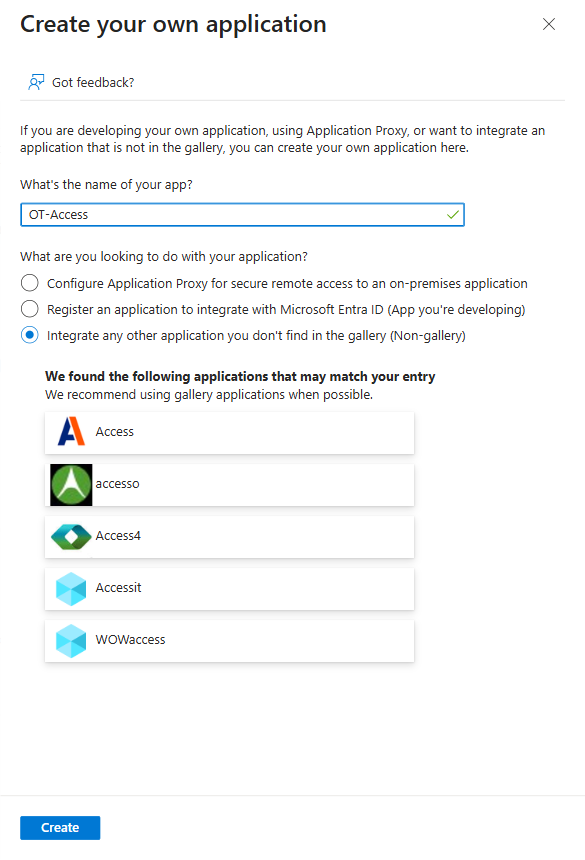
Click New application, then Create your own application.
In What's the name of your app?, enter a display name.
Keep Integrate any other application you don't find in the gallery (Non-gallery) selected.
Click Create.
Set up single sign-on
Open the new application and select Single sign-on, then SAML.
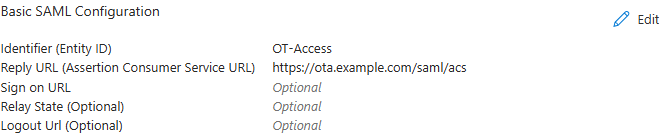
In Basic SAML Configuration, click Edit and set:
Identifier (Entity ID): the Application Name.
Reply URL (Assertion Consumer Service URL):
https://<portal-host>/saml/acs
Leave the fields marked (Optional) empty. Sign-in from the portal does not need them.
Click Save.
Check the user identifier claim
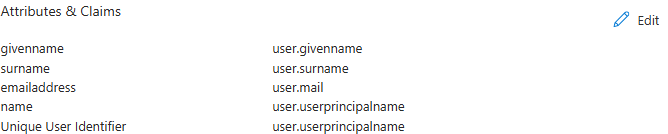
In Attributes & Claims, the Unique User Identifier claim becomes the user name in MetaDefender OT Access. The default value is user.userprincipalname.
Sign the response and download the metadata file
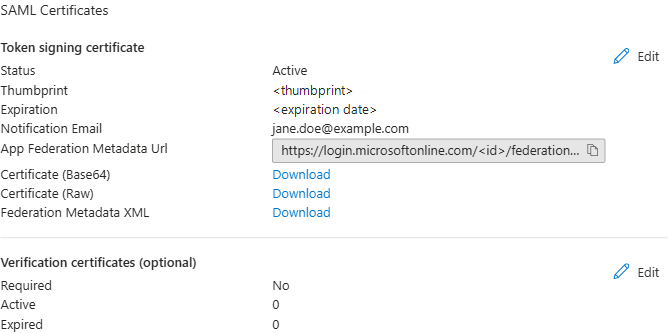
In SAML Certificates, click Edit.
Set Signing Option to Sign SAML response and assertion, keep Signing Algorithm at SHA-256, and click Save.
Next to Federation Metadata XML, click Download and save the file.
Assign users
Open Properties in the application and confirm Assignment required? is Yes. Only assigned users can then sign in.
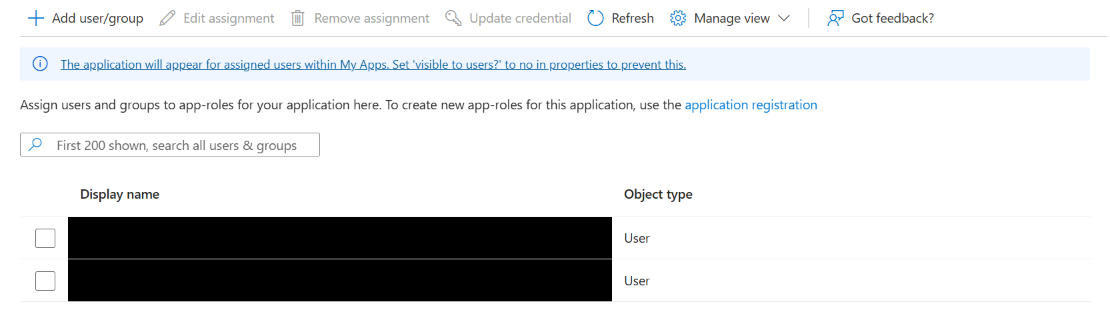
Open Users and groups and click Add user/group.
In Add Assignment, select the users who may sign in, then click Assign.
Assigning groups requires Microsoft Entra ID P1 or P2. With Entra ID Free, assign individual users.
Create the app integration
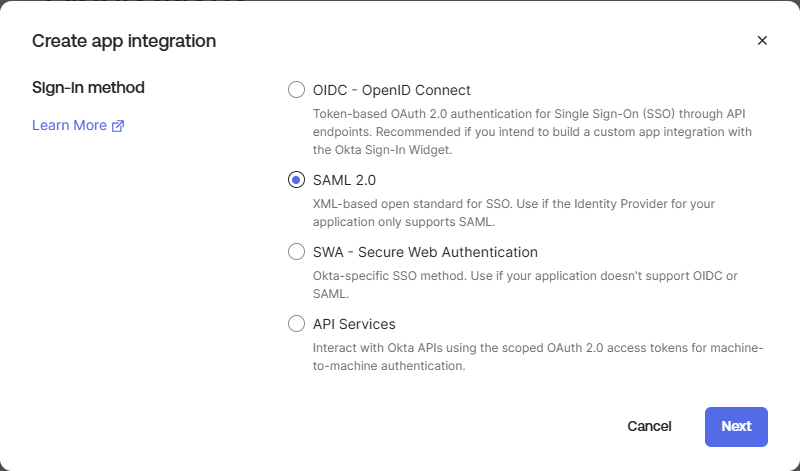
In the Okta Admin Console, open Applications > Applications.
Click Create App Integration, select SAML 2.0, and click Next.
In App name, enter a display name and click Next.
Configure SAML
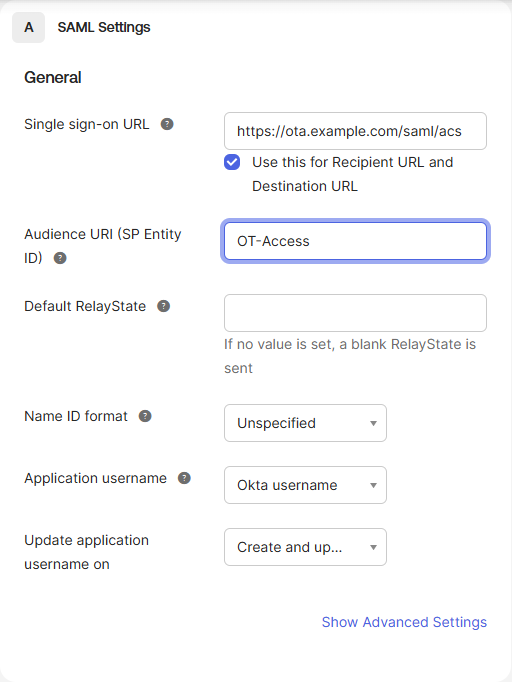
Setting | Value |
|---|---|
Single sign-on URL |
|
Audience URI (SP Entity ID) | The Application Name |
Name ID format | Unspecified |
Application username | Okta username. This value becomes the user name in MetaDefender OT Access. |
Under Show Advanced Settings, keep Response and Assertion Signature set to Signed, with RSA-SHA256.
Click Next, then Finish.
Download the metadata file
Open the Sign On tab of the application.
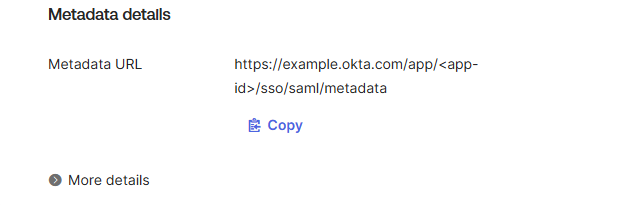
In Metadata details, click Copy next to Metadata URL.
Open the URL in a browser and save the page as an
.xmlfile.
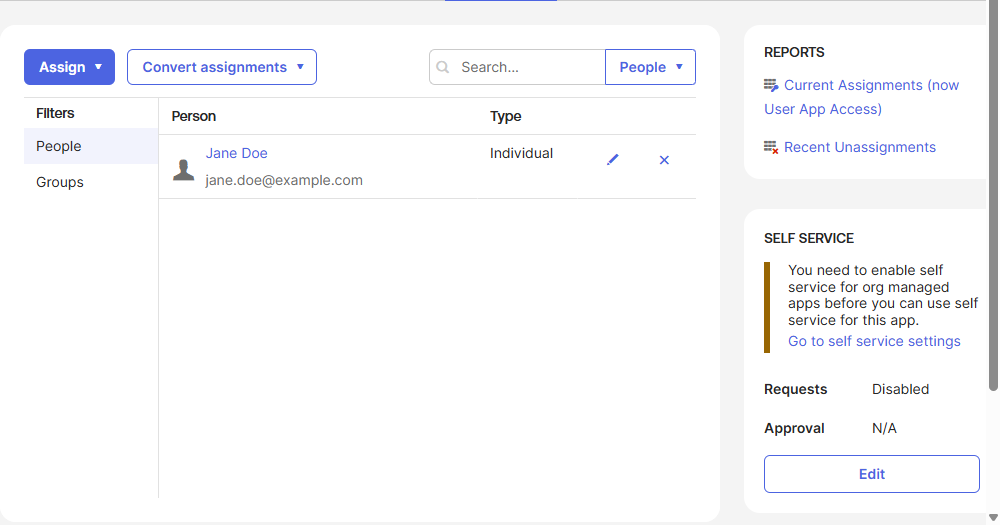
Assign people and groups
Open the Assignments tab.
Click Assign, then Assign to People or Assign to Groups.
Assign the users who may sign in and click Done.
4. Configure MetaDefender OT Access
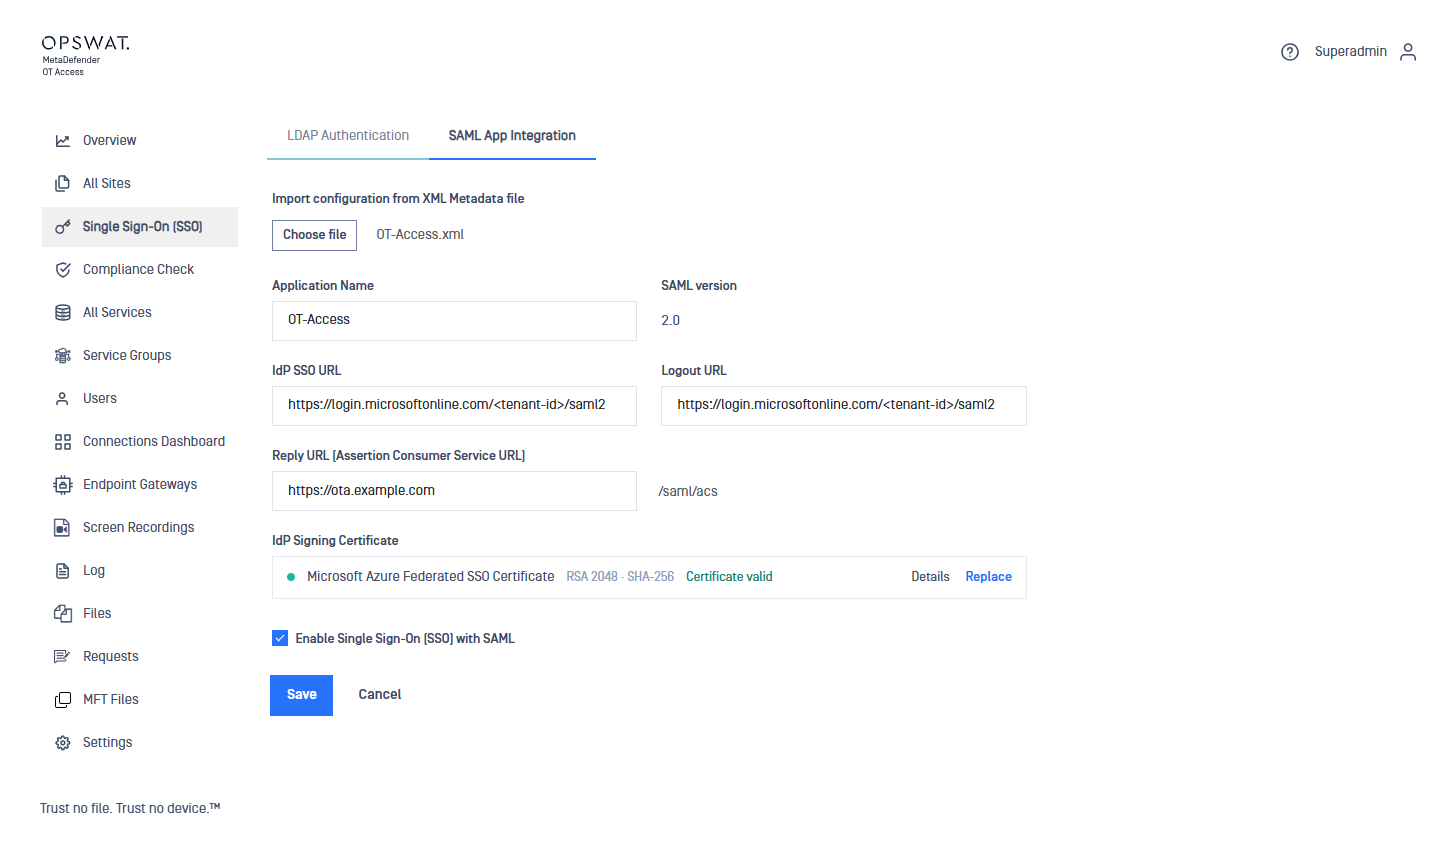
Open the Single Sign-On (SSO) menu and switch to the SAML App Integration tab.
Click Add Config.
Fill in the settings in the table below.
Select Enable Single Sign-On (SSO) with SAML.
Click Save.
Setting | What to enter |
|---|---|
Import configuration from XML Metadata file | The metadata file from the IdP. IdP SSO URL, Logout URL and IdP Signing Certificate fill in from the file. Logout URL stays empty when the IdP does not publish one. |
Application Name | The IdP entity ID: Entra Identifier (Entity ID) or Okta Audience URI (SP Entity ID). |
SAML version | Fixed at 2.0. |
Reply URL (Assertion Consumer Service URL) | The portal address only, |
IdP Signing Certificate | Taken from the metadata file. If your IdP provides the certificate separately, upload it here. |
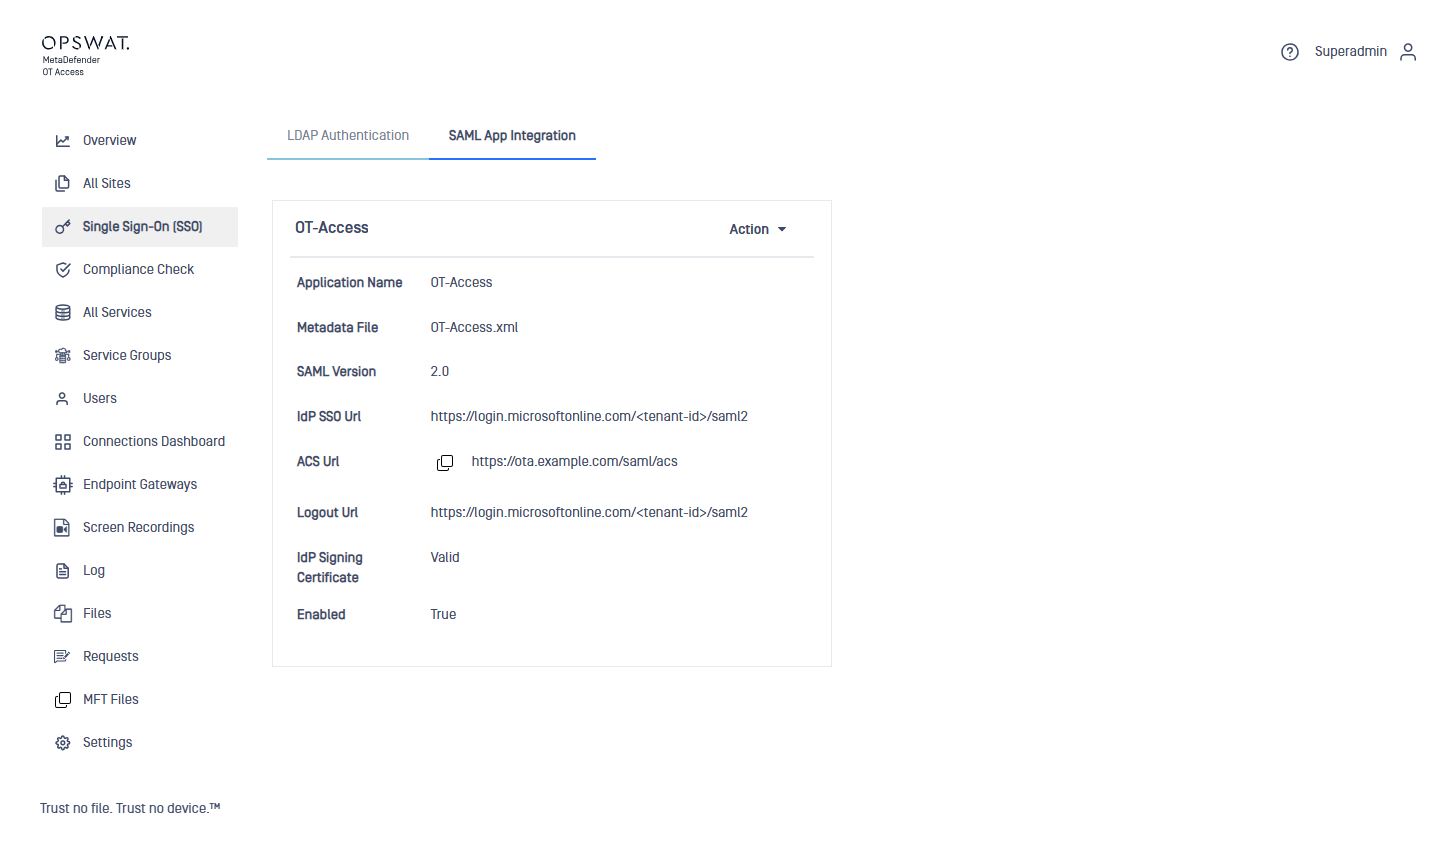
After you save, copy the ACS Url from the view page and compare it with the IdP.
4.1 Edit or delete the configuration
Open the Single Sign-On (SSO) menu and switch to the SAML App Integration tab. Open the configuration.
Open the Action menu and click Edit or Delete.
After you edit the settings, click Save.
5. Users and access
When the Name ID does not match an existing user, the portal creates a normal user with User Type set to 3rd-party IdP.
Grant services or service groups to the new user in All Services or Service Groups, as for any other user.
6. Sign in with SSO
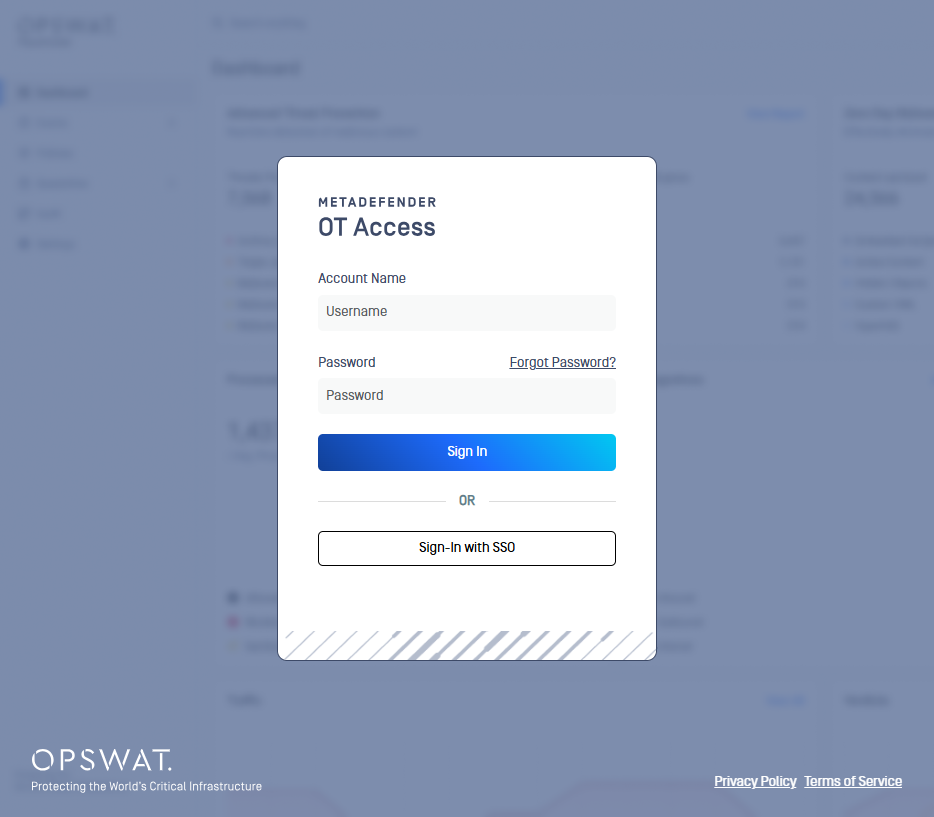
Open
https://<portal-host>in a browser.Click Sign-In with SSO below the user name and password boxes.
The browser redirects to the IdP sign-in page. Sign in with the IdP account. If the user already has an IdP session, this page is skipped.
After a successful sign-in, the browser returns to the portal.
Log Out ends the portal session only. The user stays signed in to the IdP.
7. Verify
In the portal, open Single Sign-On (SSO) > SAML App Integration and confirm Enabled is True and IdP Signing Certificate is valid.
Sign in with SSO as a user who is assigned to the application in the IdP. The browser must return to the portal.
Open Users and confirm the account is listed with User Type set to 3rd-party IdP.
Sign in as a user who is not assigned to the application. The IdP must refuse the sign-in.
8. Troubleshooting
Symptom | Check |
|---|---|
The IdP reports that the application or audience is not found or does not match | The IdP entity ID must equal the portal Application Name, character for character. |
The IdP reports that the reply or ACS address does not match | The IdP ACS URL must equal the ACS Url on the portal view page, including |
The IdP refuses the user before the portal opens | Assign the user or one of the user's groups to the application in the IdP. |
The user signs in but sees no services | Grant services or service groups to the user. A new SAML user has none. |
Sign-In with SSO returns to the sign-in page without opening the IdP | Confirm a SAML configuration exists and Enabled is True. |
After the IdP sign-in, the browser returns to the portal sign-in page without an error | The user opened the portal at a different host name than the one set in the IdP, for example through a reverse proxy. Open the portal at the address set in the IdP and in the portal. |