Settings
[Global Setting > Device Setting > Settings]
Settings are the information and configurations that help other networks or devices communicate with your appliance.
System Tab
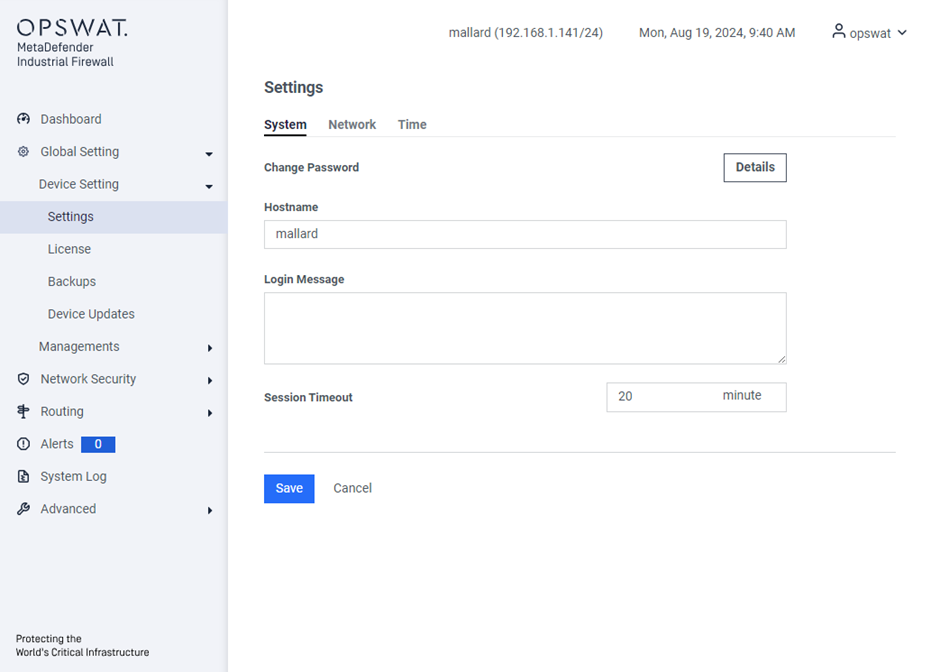
Change password: update the current account password.
Hostname: Label specified for the device. This name is used in events and logs.
Login Message: Text that shows after a user logs on the appliance
Session Timeout: Number of minutes a session can stay open
Network tab
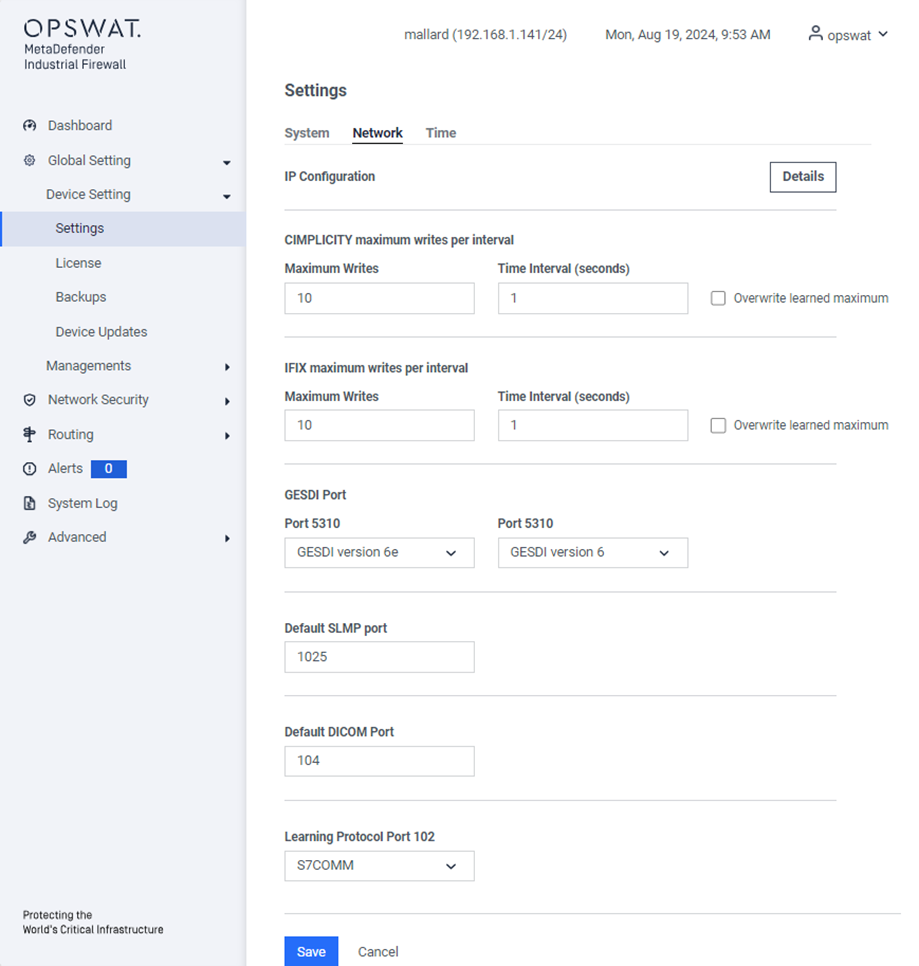
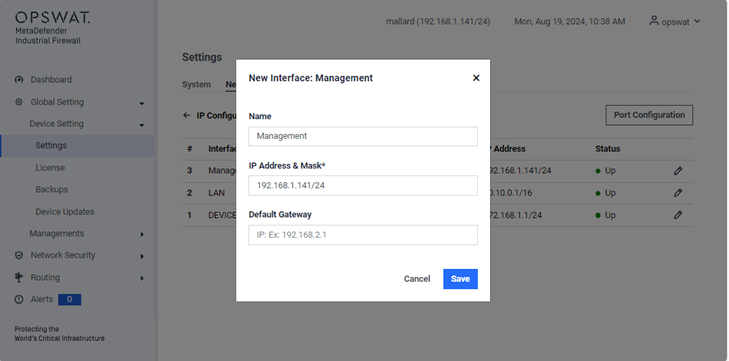
IP Configuration: Configure the mode (Routing or Transparent) for LAN and DEVICE interfaces, and set the interface's IP addresses, including Management, LAN, and Device ports.
CIMPLICITY Maximum Writes: Set a limit on the number of write commands per interval. This option is only available if you have purchased the license that supports GE protocol.
IFIX Maximum Writes: Set a limit on the number of write commands per interval. This option is only available if you have purchased the GE protocol.
GESDI Port: Configure the port settings for GESDI (version 6e and 6).
Default SLMP port: Set the default port for SLMP communication.
Default DICOM port: Set the default port for DICOM communications.
Learning Protocol Port 102: This port can be configured for S7COMM or MMS protocols.
Network > IP Configuration

Port Configuration: Set the mode for each interface. The default mode for both LAN and DEVICE interfaces is routing mode.
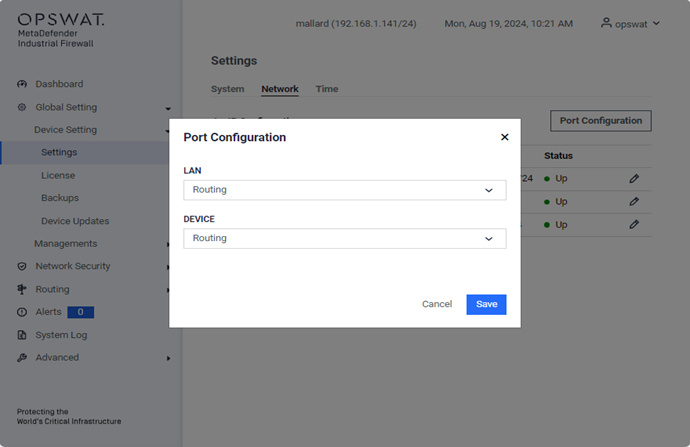
Edit icon: Click this icon to configure the IP address for the interface.
Time tab

Time (NTP) Servers: Configure Network Time Protocol (NTP) servers to synchronize the system clock with accurate time sources.
Date Time: Set the current date and time for the system.
Timezone: Select the appropriate timezone to ensure the system clock reflects the correct local time.
Install license
[Global Setting > Device Setting > License]
OPSWAT will supply license files to you. Contact Support for a new or renewal production license, or an extension on evaluation licenses. Include the serial number of your appliance.
- Save the new license to a location on the MetaDefender Industrial Firewall network.
- Double-click the appliance in the MetaDefender Industrial Firewall Nodes (Configured) box to open the web interface.
Open the Configuration menu and click License. The License pane displays.

Open the Action menu and click Update License. The Upload pane displays.

In the Local License File box, click Browse to navigate to the file. Select the file.
Click the Upload License button to start the upload. The Progress Bar shows when the upload is completed.
Click the End User License Agreement (EULA) link and read it. Then, click the check box to show that you accept the terms. A green banner at the top of the page tells you the procedure succeeded. The License page opens with the new information.
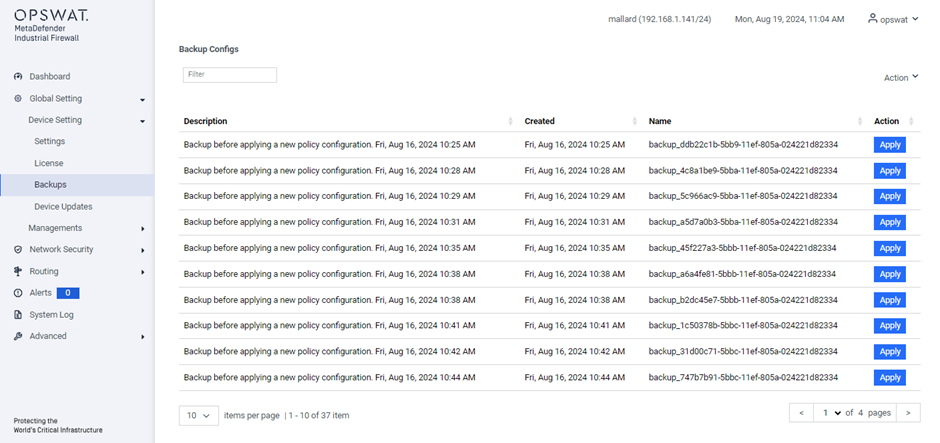
Backups
[Global Setting > Device Setting > Backups]
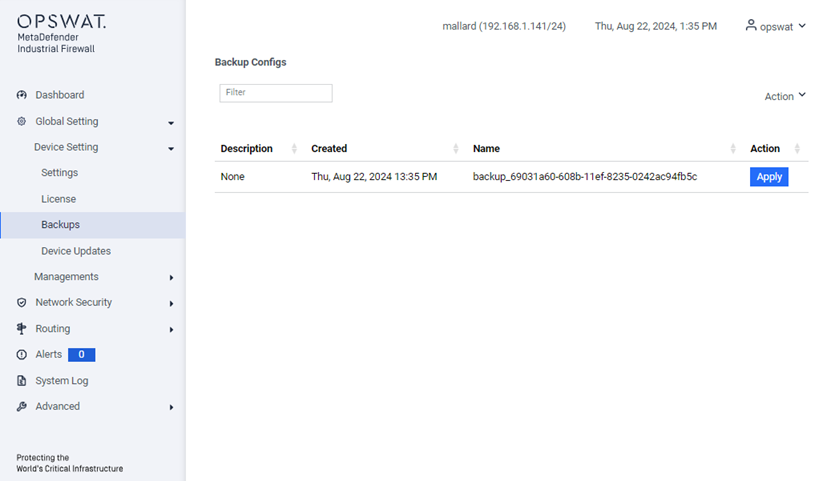
A backup or snapshot is a copy of your computer configurations and data. The appliance creates a backup automatically before all configuration changes are made. You can also make a backup on demand.
You will perform all backup tasks from the Backup Configs pane. Open the Configuration menu and click Backups to access this pane, which displays the following information for the current backups:
- Description: The appliance describes automatic backup that includes the date and time of the backup. For manual backups, the description comes from the Comment box.
- Created: Timestamp in the format of Weekday:MM:DD: HH:MM:SS YYYY
- Name: The system supplies the name. You cannot change it.
Create a backup
Open the Action menu and click Snapshot Running Config. A popup displays, “Snapshot (backup) the current config?”
Enter a comment that includes the cause for the backup. This text becomes the description on the Backup Configs pane.Click the Submit button to save the backup. A green banner at the top of the page tells you the procedure succeeded.
Click the Submit button to save the backup. A green banner at the top of the page tells you the procedure succeeded.
Export a backup
Double-click the backup you want to export. A detail page displays.
Open the Action menu and click Export. The Backup Config Export pane displays.
Enter the Password for this backup. Enter the password again in the Confirm Password box. Record the password in a safe place.
Click the Submit button. A popup page displays. Open the file or Save it. If you save it, the file goes to your local Downloads location. The default location for Windows systems is C:\Users<your user name>\Downloads.
Record the date and time you save it because this will be part of the .bin file name. You cannot edit the file name before it is saved.
Restore a backup
If a new configuration does not operate correctly, you can return an older configuration (rebuild). You can select a backup of this appliance or upload a configuration from a different appliance.
To use a backup from a different appliance, save the backup to a location on this MetaDefender Industrial Firewall network:
- To upload the software to the appliance, open the Action menu and click Upload. The Upload pane displays.
- Click Browse in the Local Filename of config box to navigate to the file. Record the name.
- Enter a Password for this backup.
- Click the Upload Config button to start the upload. The Progress Bar shows when the upload completes.
- This backup shows in the Backup Configs table.
Find the backup name in the Backup Configs table. You can click a column header to filter the table contents.
Delete a backup
Find the backup in the Backup Configs table. You can click a column header to filter the table contents.
Click the backup row to open a detail page.
Open the Action menu and click Delete. Click the Submit button to confirm your action. A green banner at the top of the page tells you that the procedure succeeded.
Device Update
[Global Setting > Device Setting > Device Updates]
The software was installed on the appliance before it was shipped to you. As part of installation, you need to update the software to the latest release. You will also use this procedure to update new personalities (versions) of the appliance software.

Open the Action menu and click Upload Software. The Upload pane displays.

In the Local Filename of update package box, click Browse to navigate to the file for the appliance software.
Click the Upload Package button. The Progress Bar shows when the upload completes.
Click Apply in the Action column of the Software pane to apply the update. The new software version will show in the Version column with the Active column checked
