
Telnet Installation
Windows:
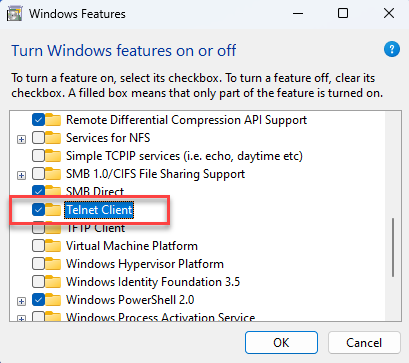
Make sure Telnet is enabled under "Turn Windows features on or off."
Linux:
Make sure Telnet is installed on your system.
Debian/Ubuntu-based distributions:
RHEL/CentOS/Fedora:
For newer versions (CentOS 8+, RHEL 8+, Fedora):
Verify Installation:
After installation, check if Telnet is installed by running:
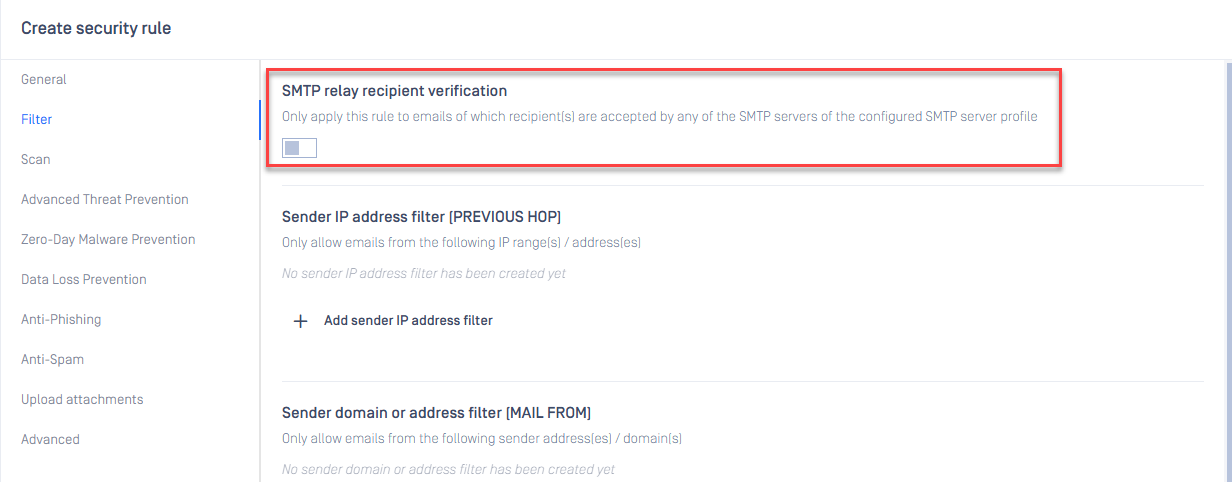
Turn off this option to allow EGS to accept the test email.
Simulate Email using Telnet
1. Connect to the SMTP Server
Open a terminal and use Telnet to connect to the SMTP server on port 10025
Replace smtp.example.com with the actual SMTP server address.
2. Greet the Server (HELO/EHLO)
Once connected, introduce yourself:
If the server supports EHLO, it will respond with additional SMTP options.
3. Specify the Sender's Email
Use the MAIL FROM command to specify the sender:
The server should respond with 250 OK if accepted.
4. Specify the Recipient's Email
Use the RCPT TO command to define the recipient:
Again, you should receive a 250 OK response.
5. Composing the Email
Use the DATA command to start the message:
You should see a prompt like 354 End data with <CRLF>.<CRLF>, indicating that you can now enter the email content.
6. Enter Email Content
Type the email body using the following format. A line must be added between the header and the body of the email.
End the message with a single period (.) on a new line, then press Enter.
7. Confirm and Send
The server should respond with something like:
This confirms that the email has been accepted for delivery.
8. Close the Connection
To exit, type:
You should see a 221 Bye response.
If Further Assistance is required, please proceed to create a support case or chat with our support engineer.