
Create a realm in Keycloak
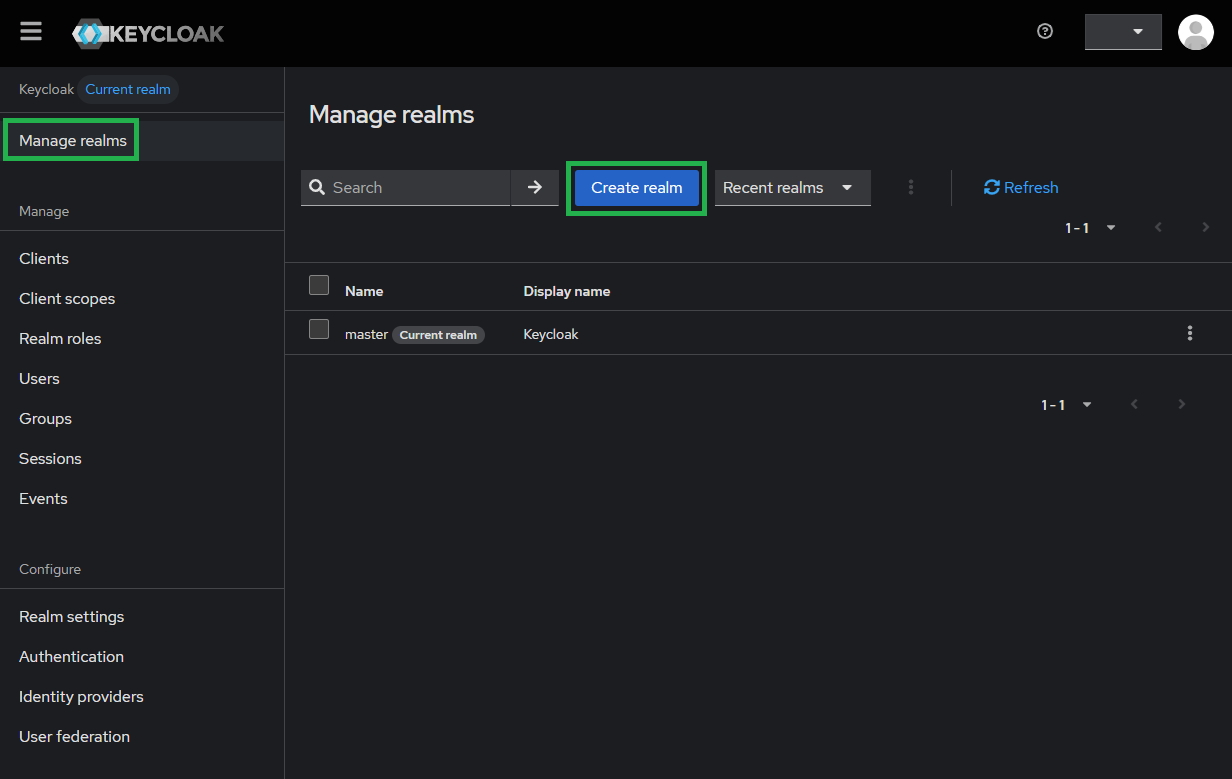
Sign in to Administrator Console, drop the list in the top left corner, and click
Create realm.
Keycloak initially includes a single realm master which is used for managing Keycloak only and not for any applications.
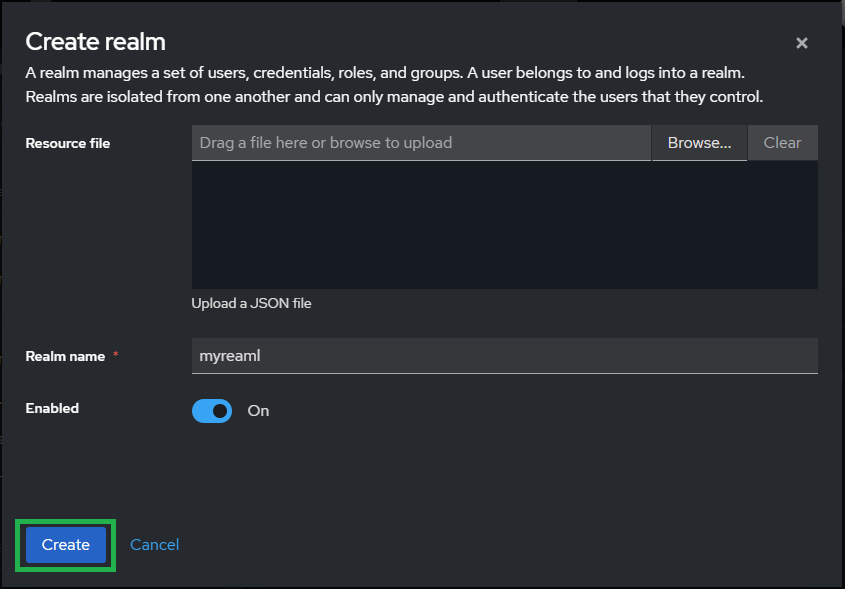
Enter
Realm namee.g. myrealm and clickCreate.
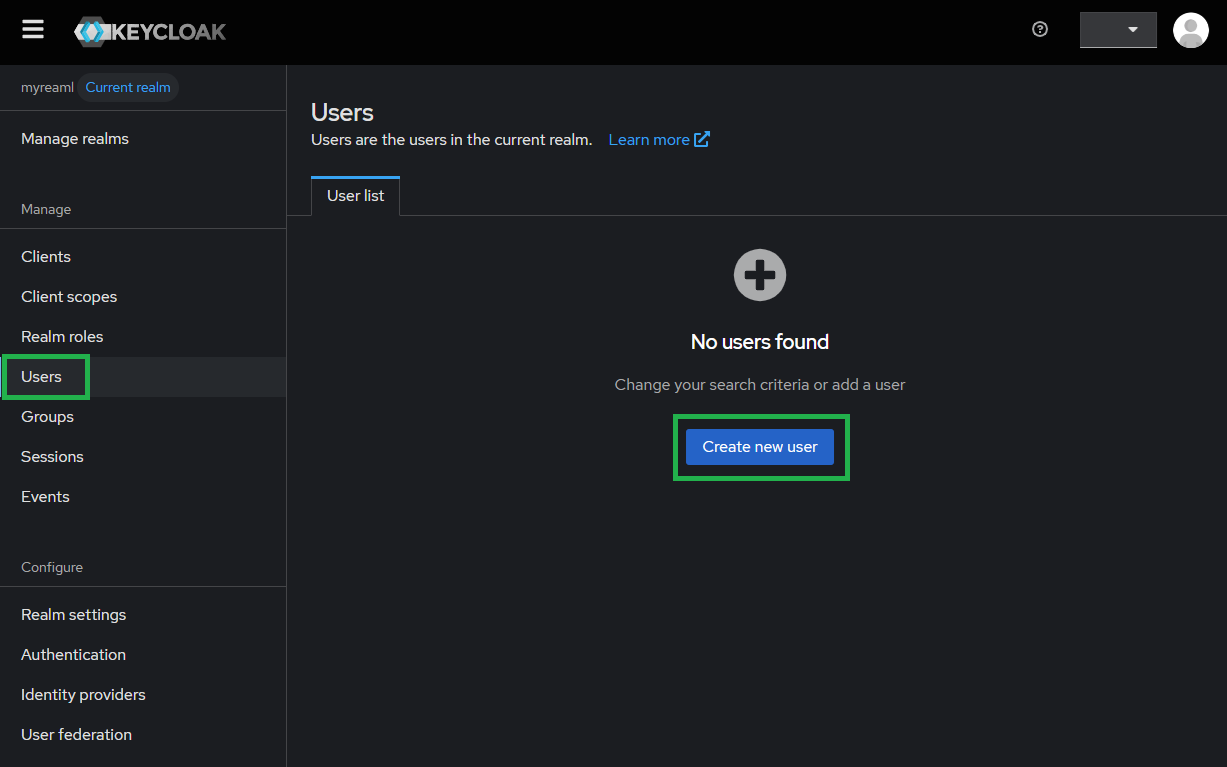
Select
Usersin the left sidebar and clickCreate new user.
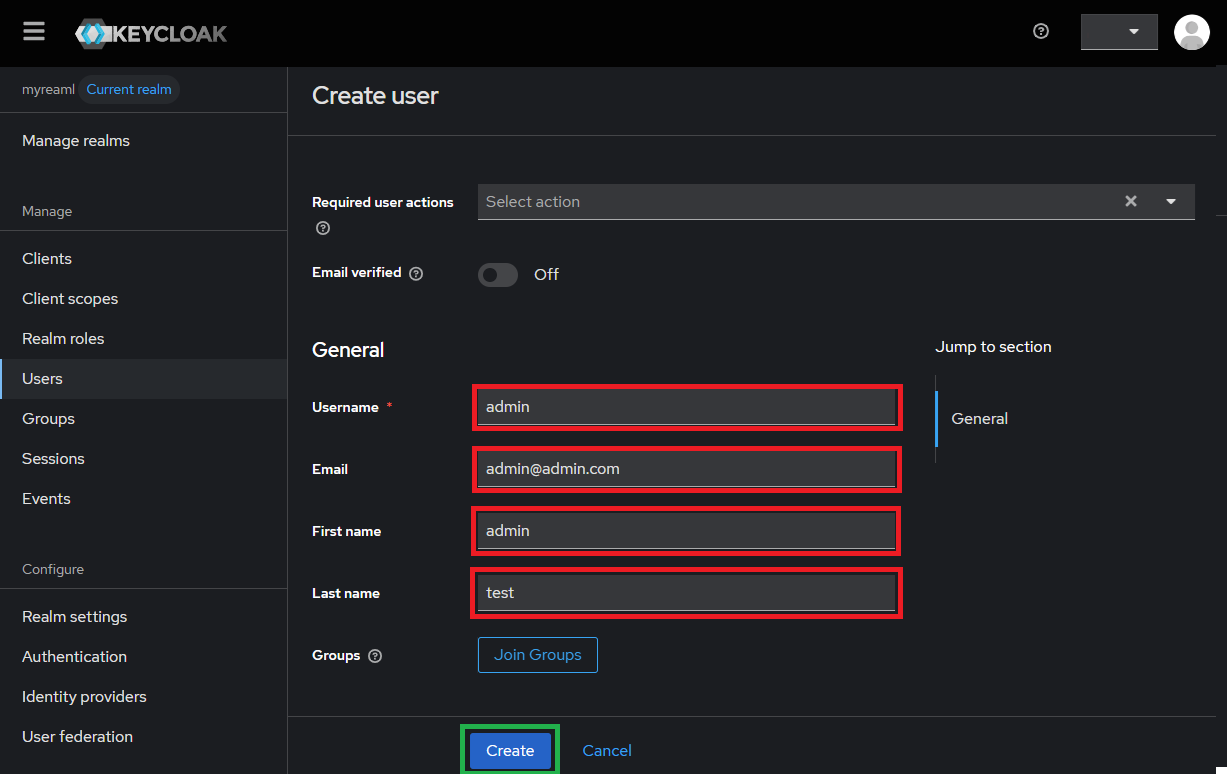
Enter values for
Username,Email,First nameandLast name; then clickCreate.
Under
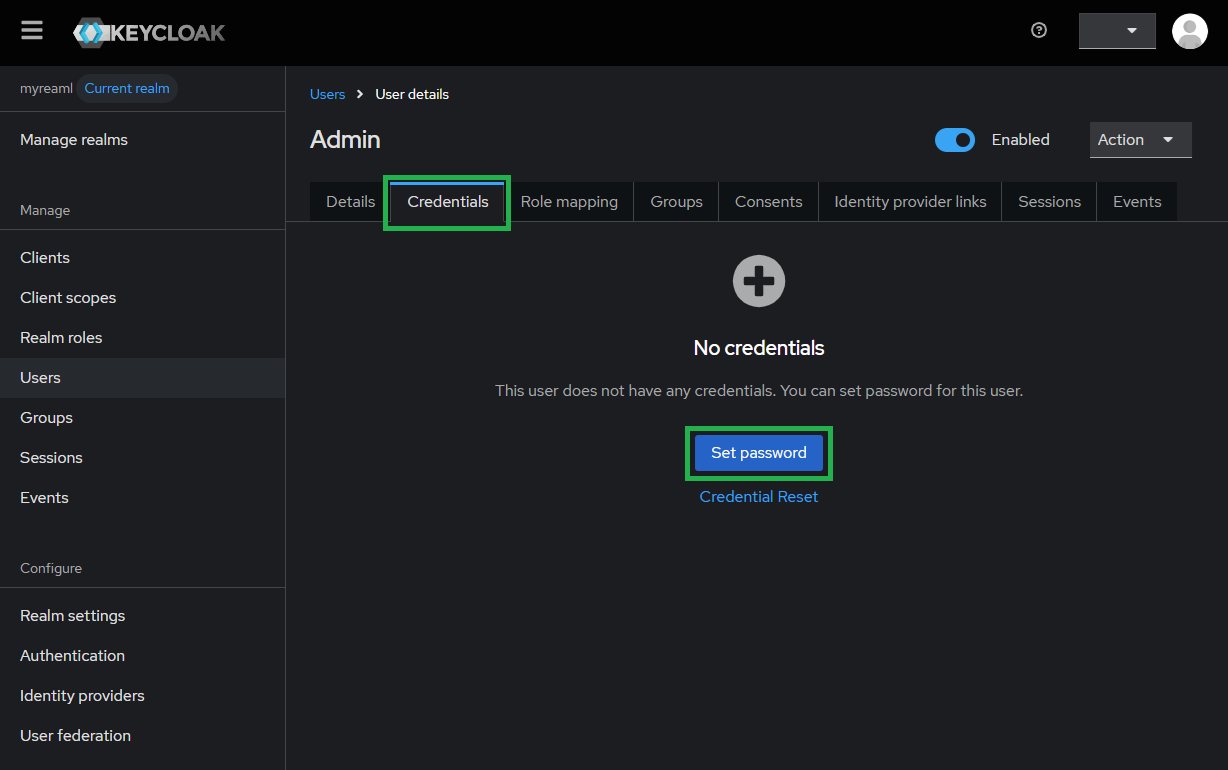
User details, selectCredentialstab and clickSet passwordto create a password for the user created in the previous step.
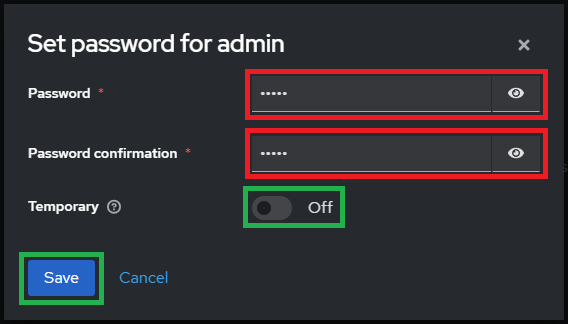
Enter the password and toggle
Temporaryto Off, then clickSave.
Create OIDC directory in MetaDefender Core
Sign in to MetaDefender Core management console.
Under
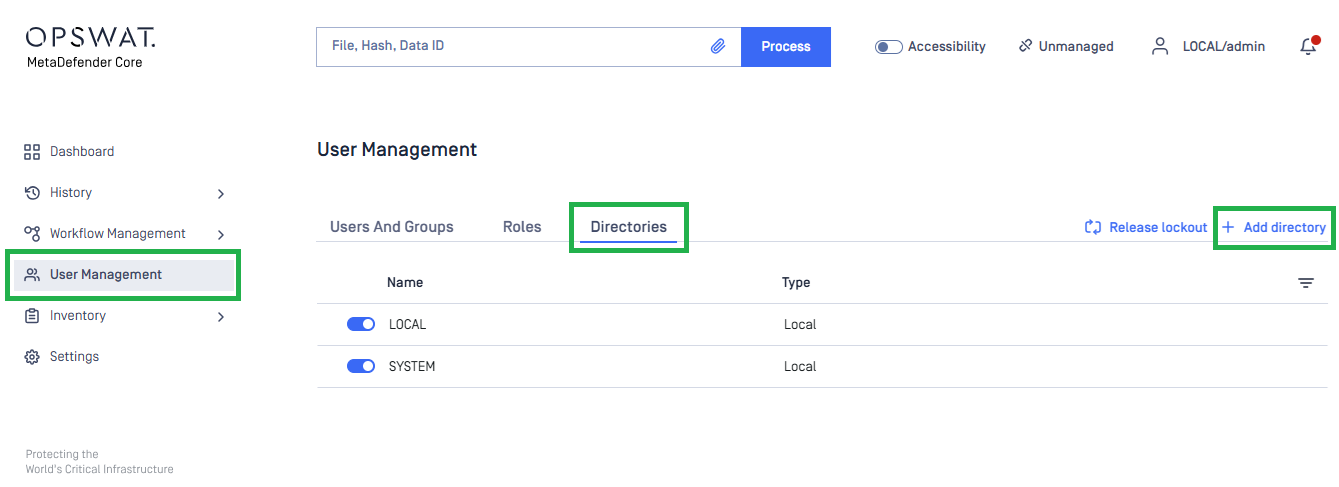
Dashboard, clickUser Managementin the left sidebar.Under
User Management, selectDirectoriestab and hitAdd directoryin the top right.
On
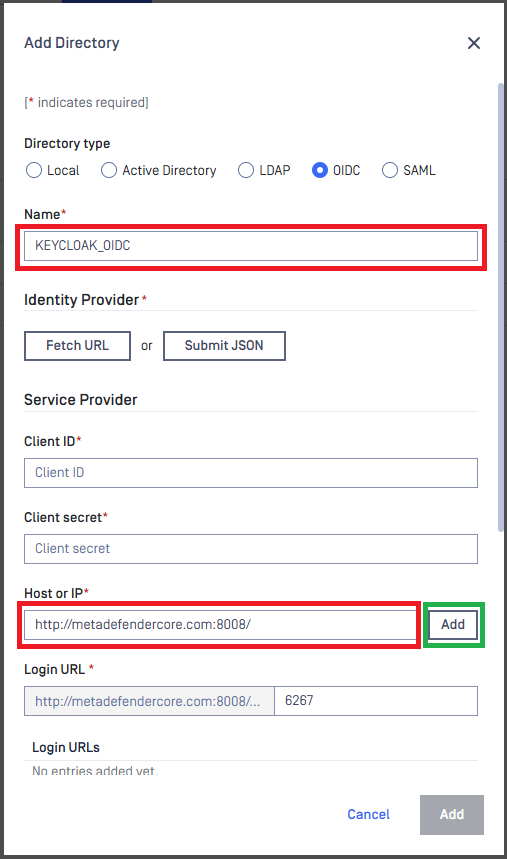
Add Directorypage, select OIDC inDirectory type.Fill
Nameof the new directory, such as KEYCLOAK_OIDC.Under
Service Provider, fill inHost or IPwhere MetaDefender Core is being hosted, using https://localhost:8008 as an example.Click
Add.Copy the value of
Login URLsand store to login_url.
Create Keycloak application
On screen
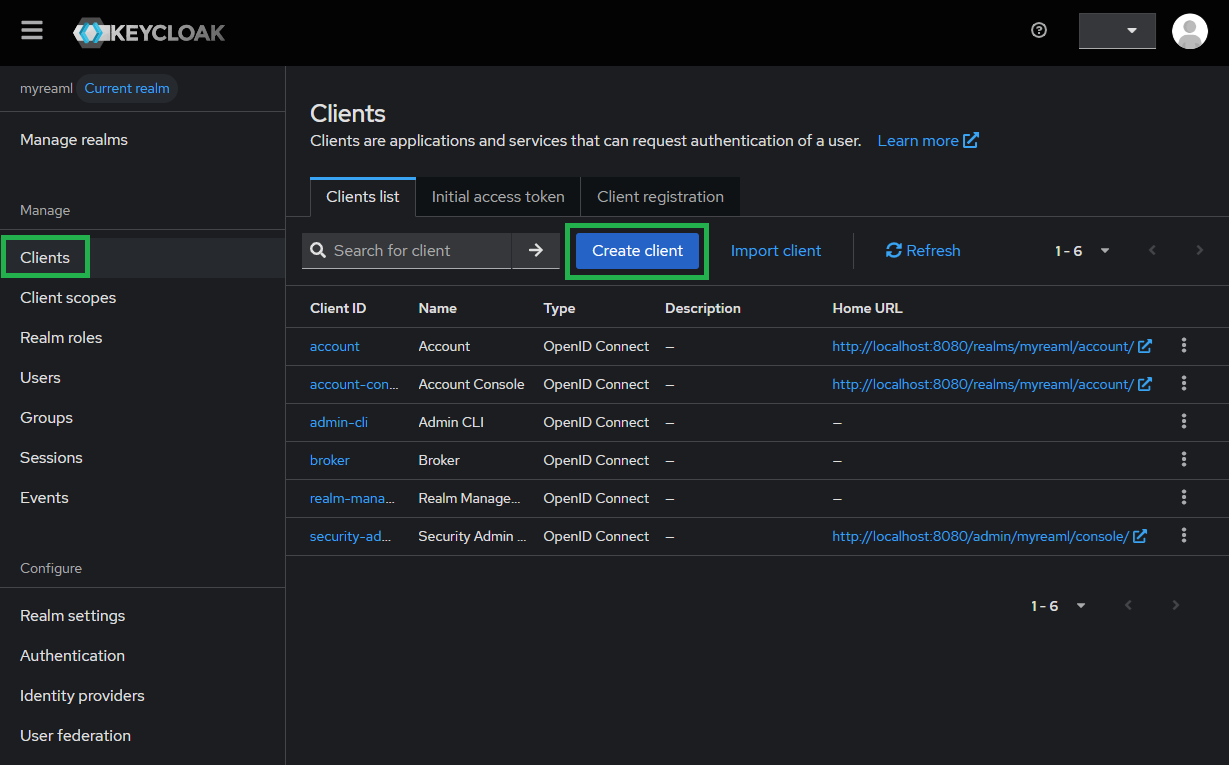
myrealm, selectClientsin the sidebar and clickCreate client.
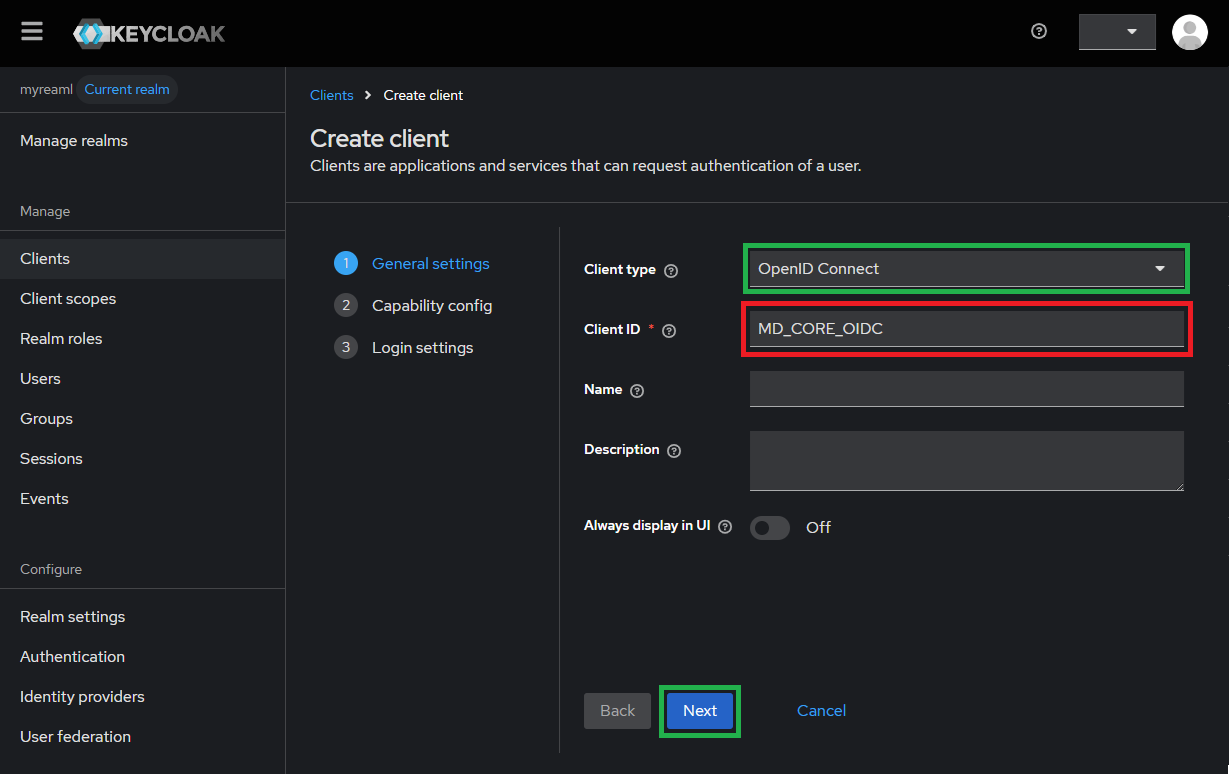
Choose
OpenID ConnectforClient typeand enterClient ID(MD_CORE_OIDC for example) and store to client_id, then hitNext.
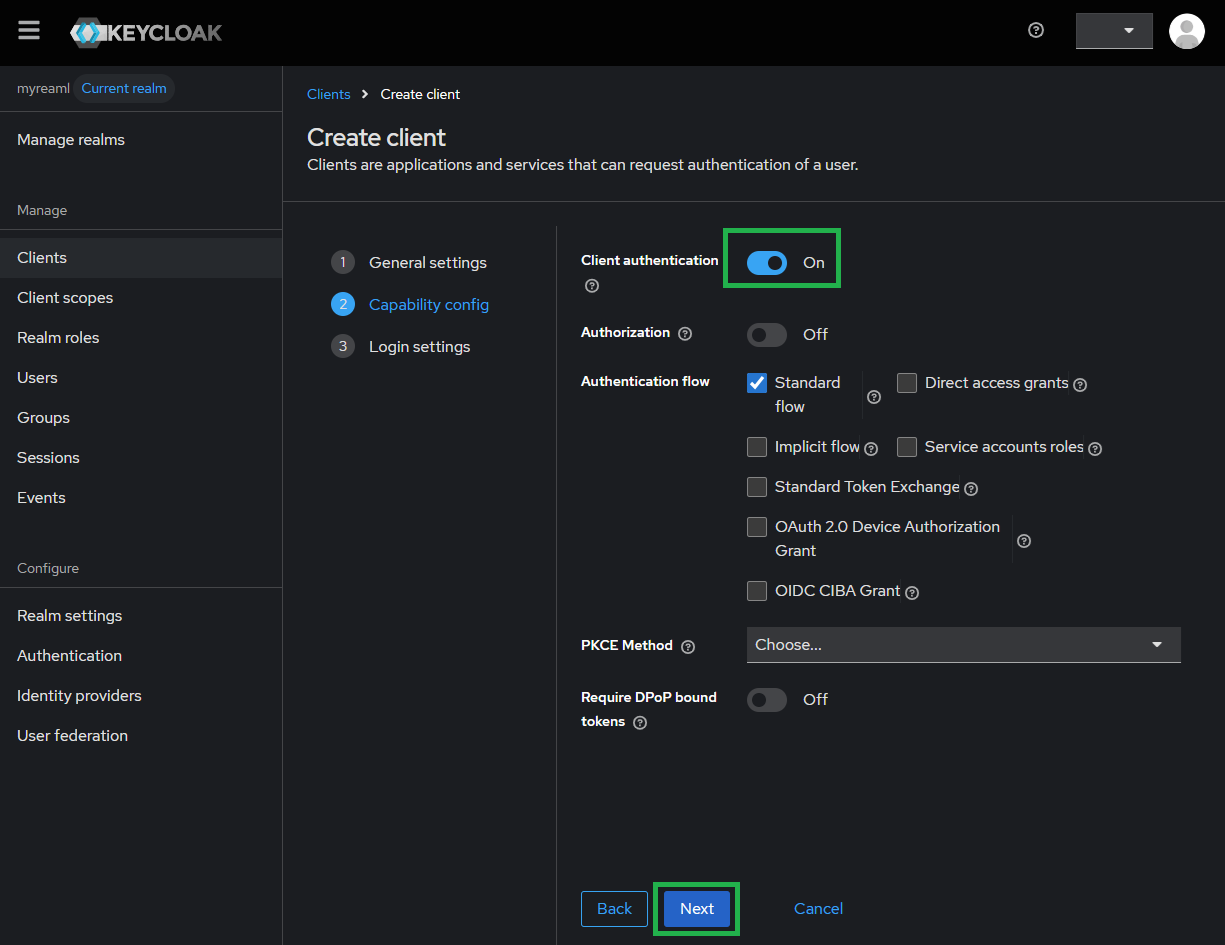
Turn on
Client authenticationthen clickNext.
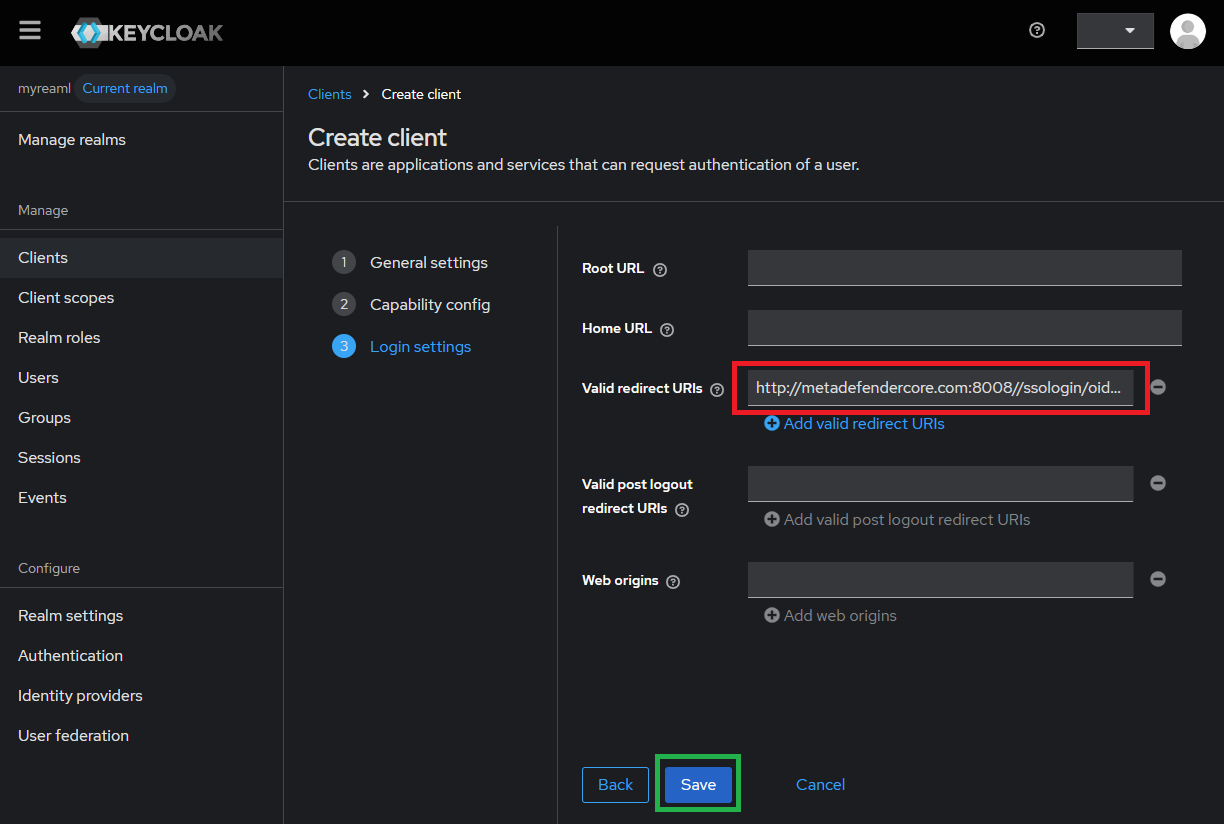
Paste the login_url into
Valid redirect URIsand clickSave.
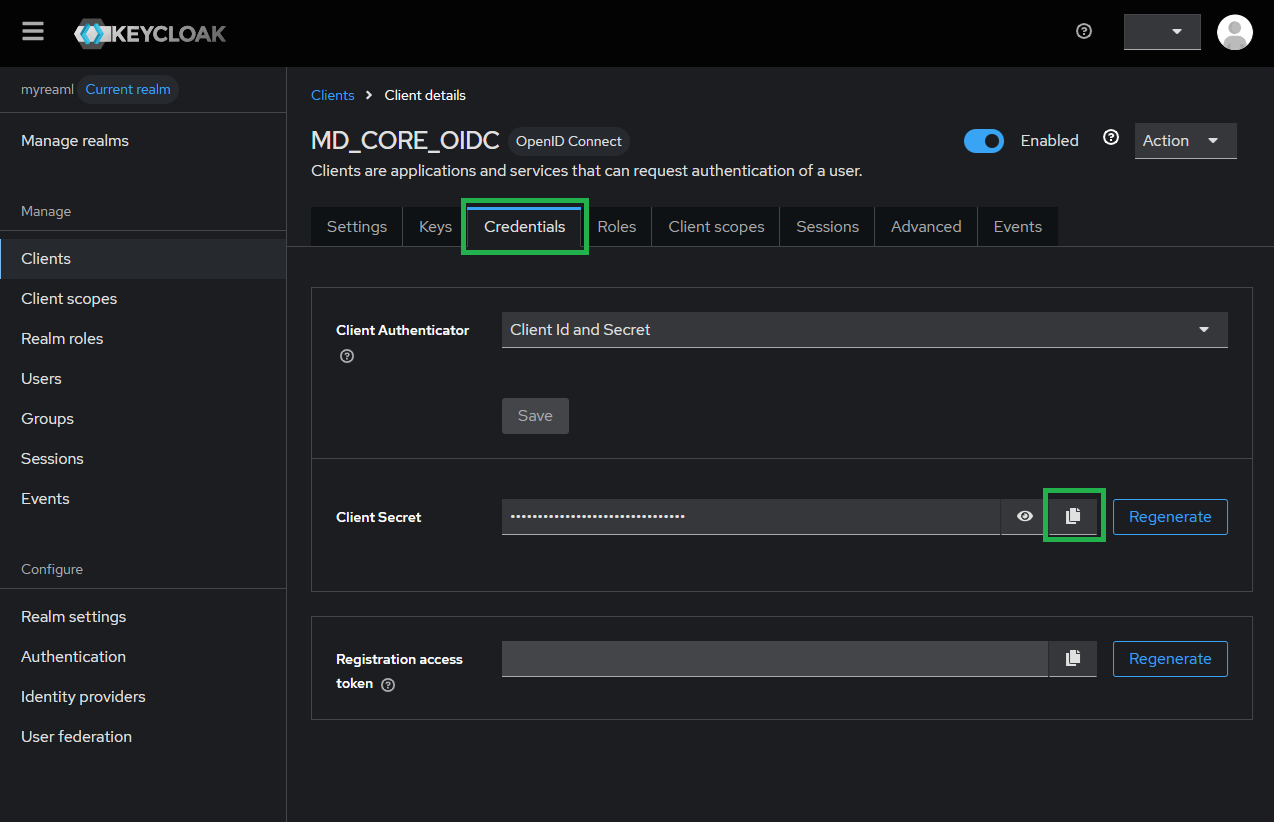
Go to tab
Credentialsand copy theClient Secretand store to client_secret.
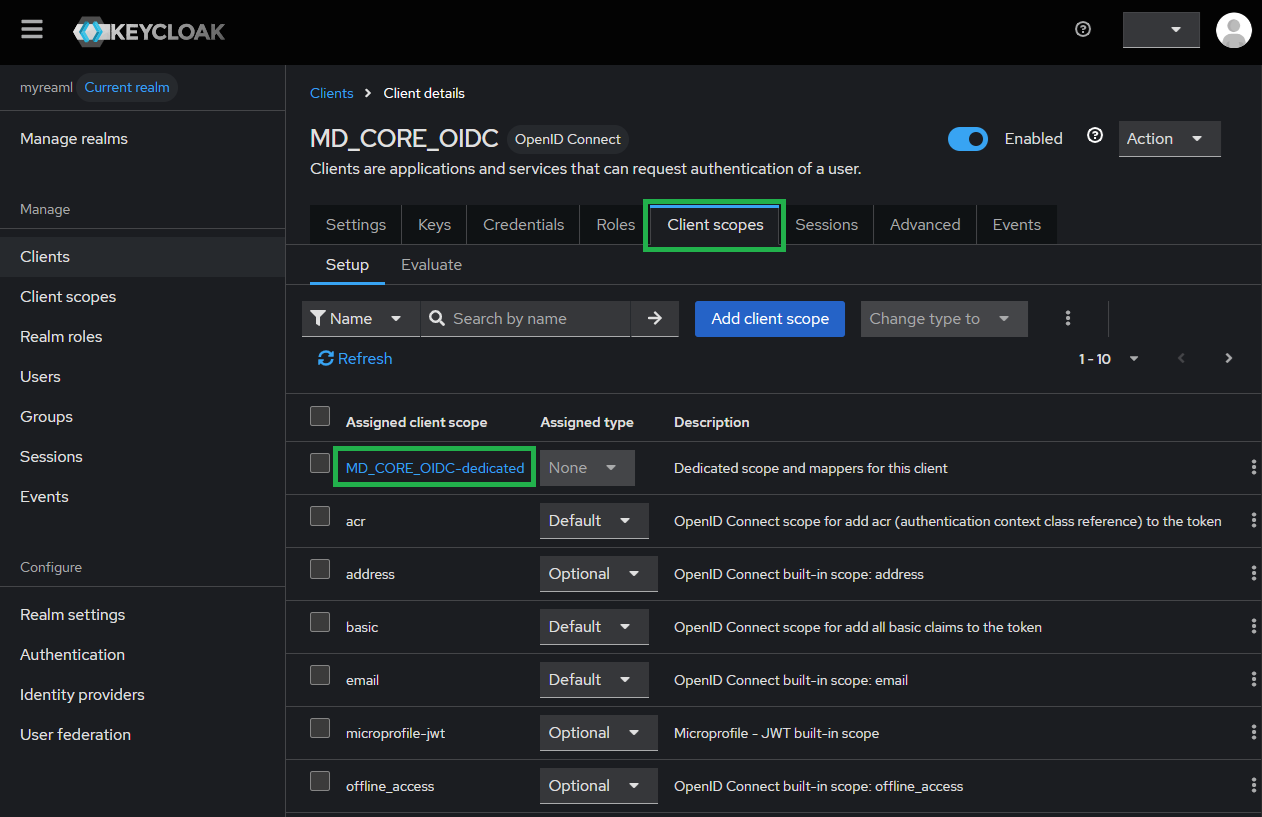
At tab
Client scopes, selectMD_CORE_OIDC-dedicated.
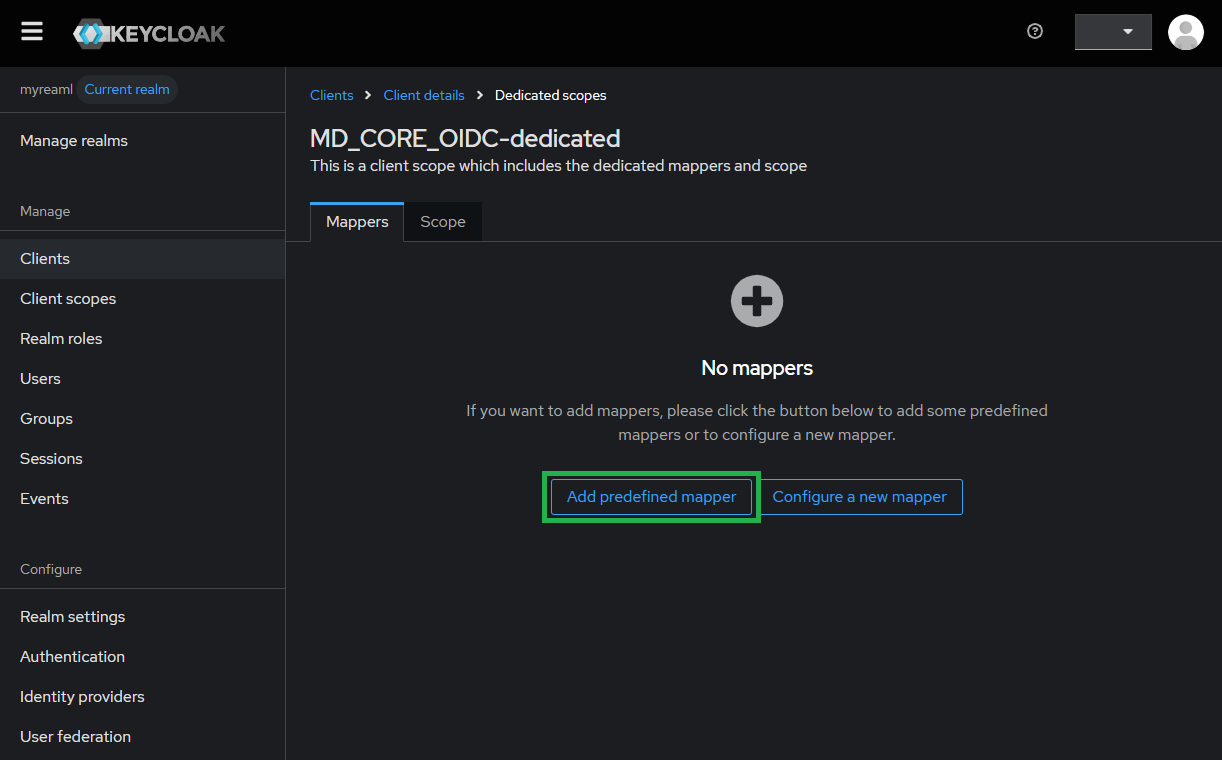
Under
Dedicated scopes, navigate toMapperstab and clickAdd predefines mapper.
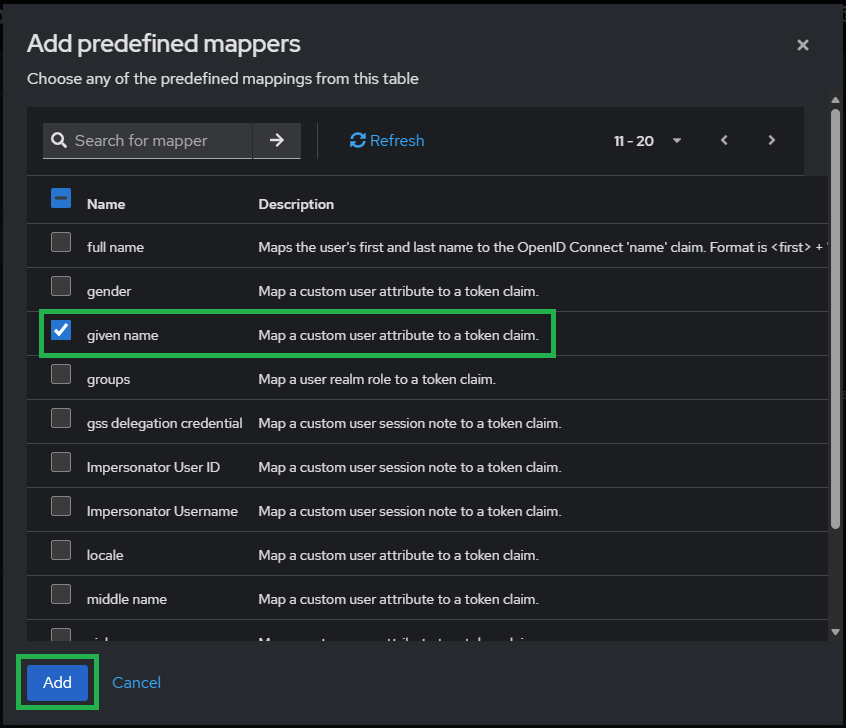
Search for
given name, then pressAdd.
Select
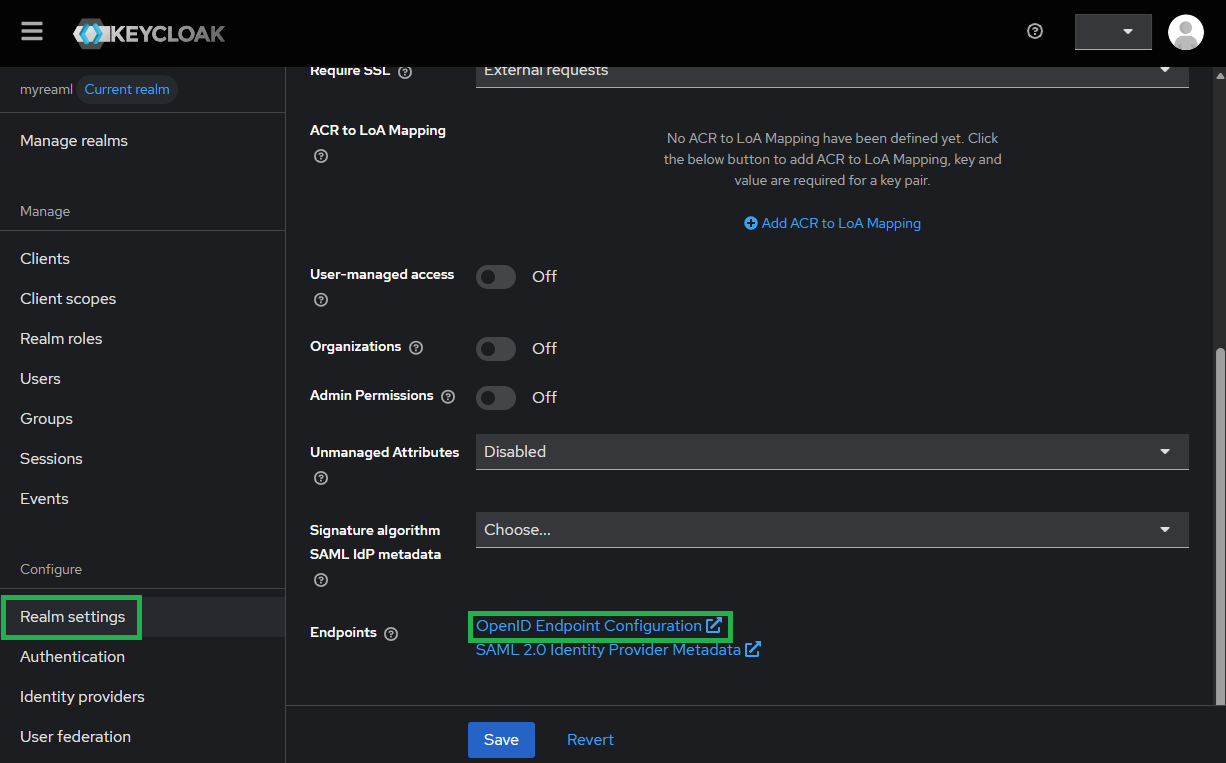
Realm settingsin sidebar, navigate to tabGeneral, clickOpenID Endpoint Configurationand store OIDC metadata link to metadata_url.
Complete configuration in MetaDefender Core
Switch to MetaDefender Core screen, under
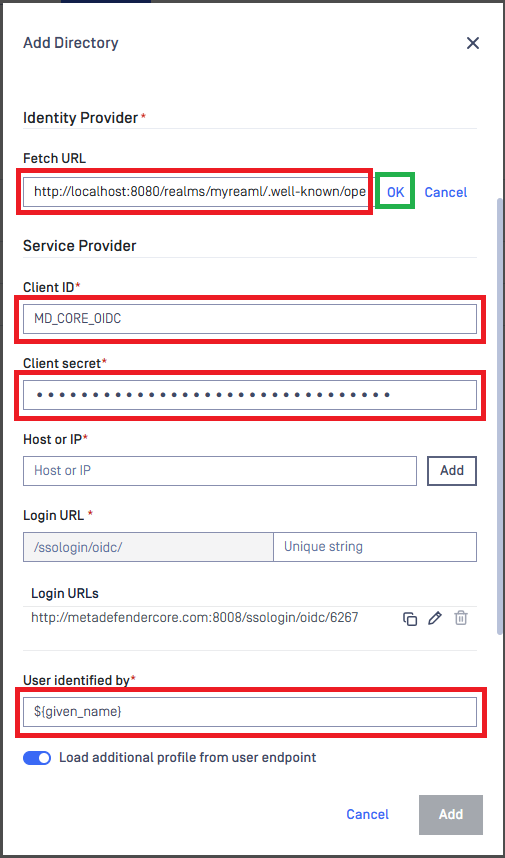
Identity Provider, clickFetch URL.Paste the metadata_url from Keycloak to the box under
Fetch URLand clickOKto ensure MetaDefender Core can set Keycloak as its IdP.Under section
Service Provider, paste the client_id and client_secret to boxes underClient IDandClient Secretrespectively.Fill user identity under
User identifiedby with${given_name}.
Select the appropriate role for the user under
User Role.Click
Addto complete the settings.On
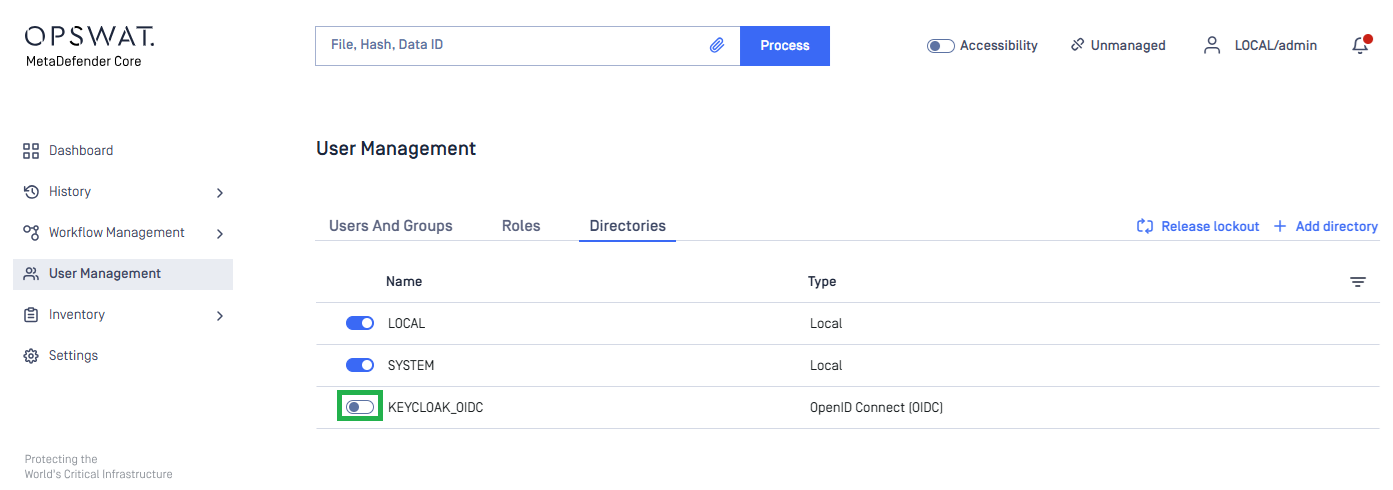
User Managementscreen, toggle the new directory, KEYCLOAK-OIDC in this example. A dialog box will appear to confirm the action. OnceEnableis clicked, all existing sessions will expire immediately.
Test the integration
Click
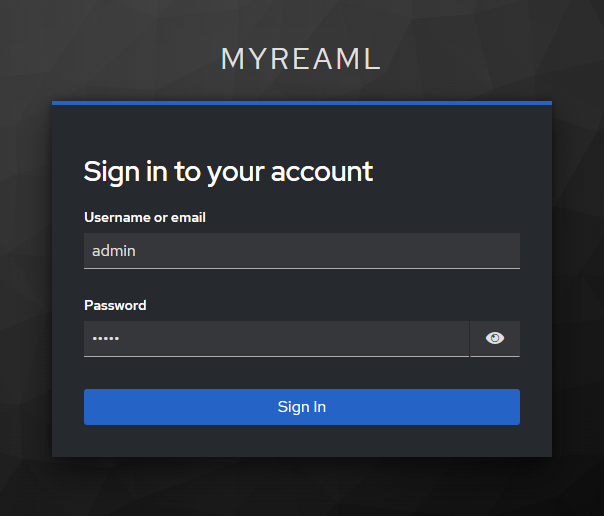
Loginfrom the home screen of MetaDefender Core; the user is redirected to Keycloak page.Sign in with the account registered in Keycloak.
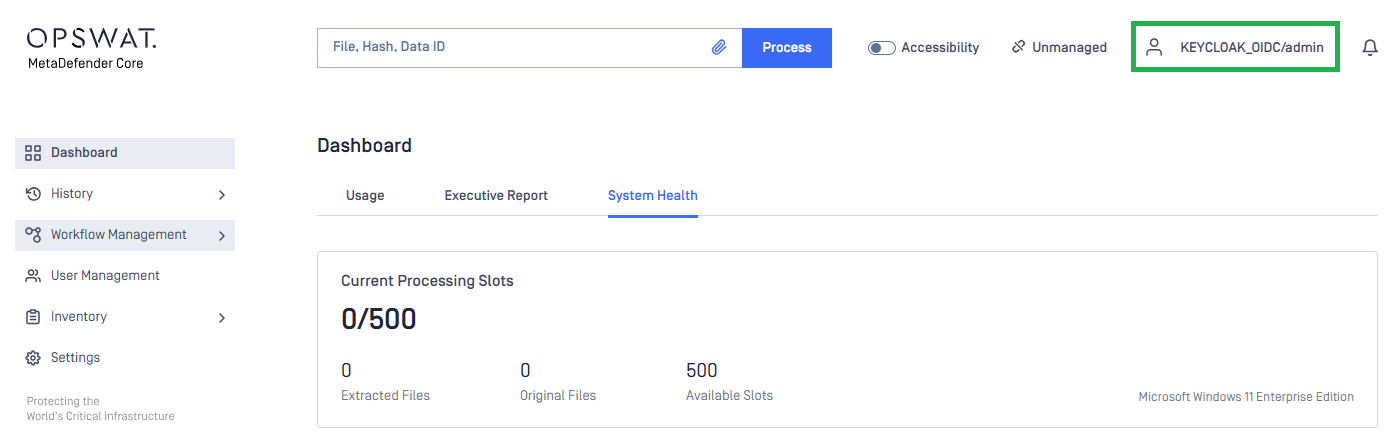
If everything goes well, MetaDefender Core dashboard will be displayed with user identity set in the top right corner.
Otherwise, access backup login page at
<mdcore-host>#/public/backuploginfor trouble shooting.