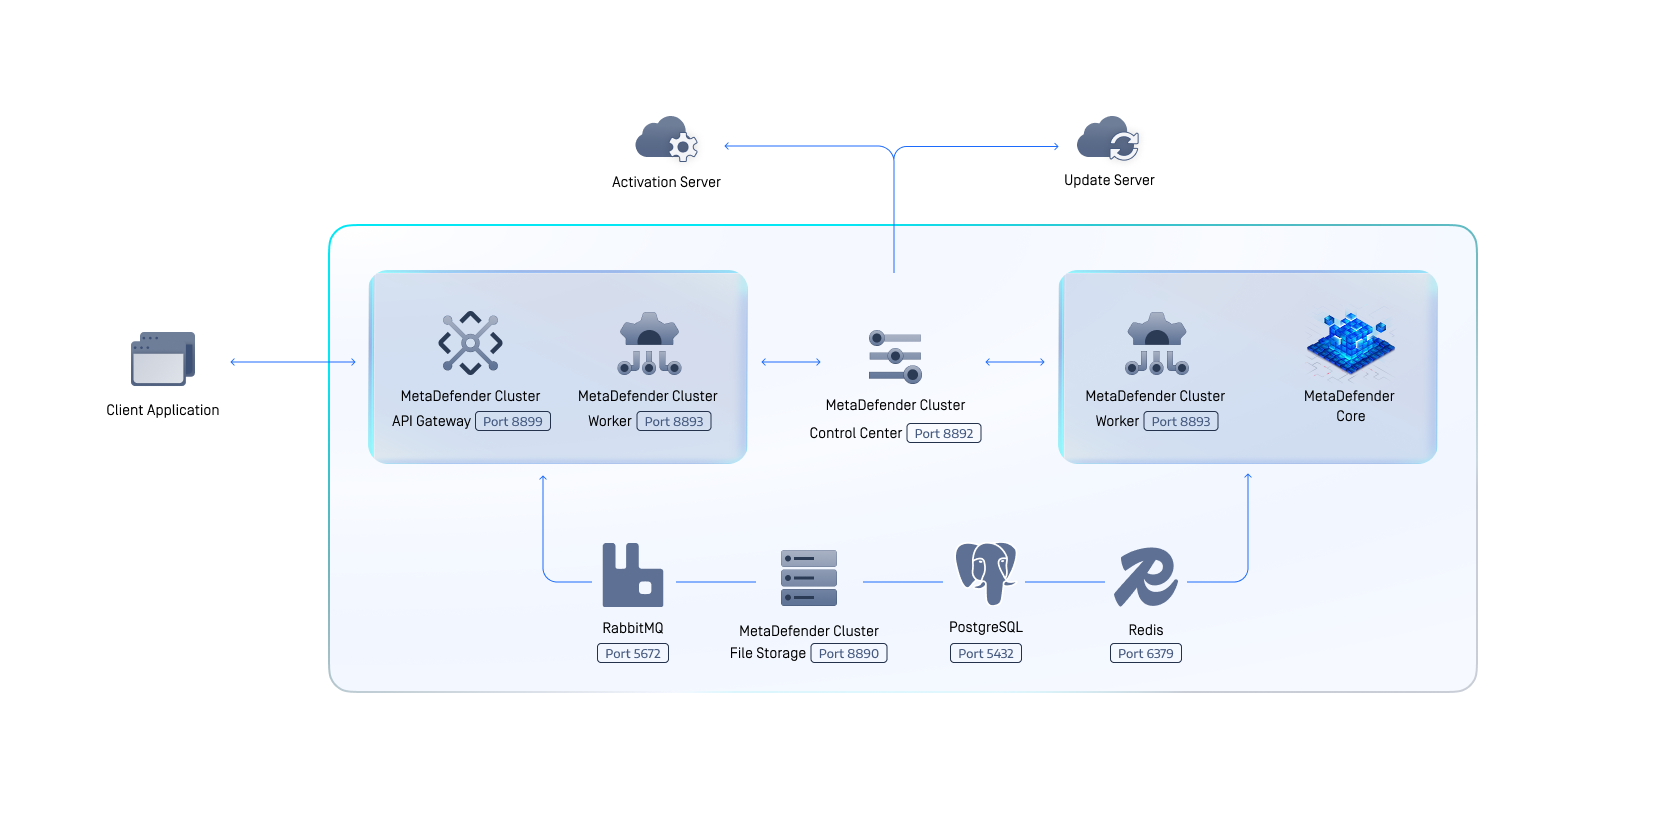
Installing MetaDefender Cluster in Kubernetes

This page walks through a first installation on an existing Kubernetes cluster.

Prerequisites

  • Kubernetes 1.31.x with a kubectl context pointing at the cluster

  • Helm 3.x

  • Access to a container registry holding the MetaDefender Cluster images. Five images are required, each tagged <DOCKER_REPO>:<service>-<MDCLS_VERSION>: control-center, identity-service, file-storage, worker and installers

  • A valid MetaDefender license key

  • A default StorageClass, if you enable persistence for PostgreSQL or MetaDefender Cluster File Storage

Do not use Network File System (NFS) for persistent volumes. NFS can corrupt the MetaDefender Cluster File Storage metadata database and the PostgreSQL data directory. Longhorn is a tested alternative for on-cluster storage. Managed cloud block storage (EBS, Azure Disk, Persistent Disk) is also suitable.

Namespace

Which namespace to deploy into is your choice. The commands in this guide use whichever namespace your kubectl context points at; add -n <namespace> to the helm and kubectl commands if you want a different one, and --create-namespace on the first helm install if it does not exist yet.

Two properties of the charts are worth knowing before you decide, because both follow from the charts naming their objects fixed — control-center, identity-service, file-storage, worker, postgres, redis, rabbitmq, mdcluster-config, mdcluster-secrets — rather than deriving names from the Helm release name:

  • Both releases must go in the same namespace. MetaDefender Cluster Worker pods look up the ConfigMap and Secret by those fixed names, so splitting the two releases across namespaces does not work.

  • A namespace can hold only one MetaDefender Cluster deployment, and a namespace that already contains a postgres, redis or rabbitmq workload will collide with the bundled infrastructure.

The Helm release names (services, instances) affect only Helm's own bookkeeping.

Step 1 — Add the chart repository

The charts are published in the OPSWAT Kubernetes chart repository:

helm repo add mdk8s https://opswat.github.io/metadefender-k8s/ helm repo update

Or the repository can be cloned locally:

git clone https://github.com/OPSWAT/metadefender-k8s.git metadefender cd metadefender/helm_charts/mdcluster

Step 2 — Prepare a values file

Create your own values file — this guide calls it override-values.yaml. It is not shipped with the chart; you create it.

You only set the keys you want to change; everything else falls back to the chart defaults, which you can read with helm show values ./mdcluster-services (and the same for mdcluster-instances). The one values file is passed to both charts.

# override-values.yaml # --- Images ----------------------------------------------------------------- DOCKER_REPO: 'opswat/metadefendercluster-debian' # <DOCKER_REPO>:<service>-<MDCLS_VERSION> MDCLS_VERSION: '2.8.0' imagePullPolicy: IfNotPresent # imagePullSecrets: # - name: regcred secrets: # --- Required: no working default --- CONTROL_CENTER_ENCRYPTION_KEY: '<32-character-key>' # must be EXACTLY 32 characters ADMIN_APIKEY: '<control-center-api-key>' # --- Shared connection keys (must match across services that talk to each other) --- IDENTITY_CONNECTION_KEY: '<key>' FILE_STORAGE_CONNECTION_KEY: '<key>' WORKER_CONNECTION_KEY: '<key>' # --- Bootstrap administrator account --- ADMIN_USER: '<admin-account>' ADMIN_PASSWORD: '<admin-password>' ADMIN_EMAIL: '<admin-email>' # --- Optional --- LICENSE_KEY: '' # when set, deployed MD Core instances are activated automatically # --- Instance --- workers: ometascan: replicas: 1 api-gateway: replicas: 1 callback-service: replicas: 1 # --- Persistence --- postgres: enabled: true persistence: enabled: true size: 100Gi file-storage: replicas: 1 persistence: enabled: true size: 100Gi

Two settings deserve attention before you install:

  • CONTROL_CENTER_ENCRYPTION_KEY must be exactly 32 characters. It is used directly as an AES-256 key, and the length is not validated at startup — so the error you get is nothing like a validation message. An empty value stops the container immediately. A wrong-length value lets the MetaDefender Cluster Control Center launch, but then every service registration fails to encrypt its configuration, so no service registers, the readiness endpoint never returns 200, and the container is killed after GLOBAL_WAIT_TIMEOUT. You see a CrashLoopBackOff with Failed to encrypt configuration in the log. Count the characters before you install.

  • The three connection keys are shared secrets, not per-service passwords. Each key authenticates one side of a service-to-service link, so both sides read the same value from the Secret. Changing one after installation requires restarting both services involved.

To use existing PostgreSQL, Redis, or RabbitMQ instances instead of the bundled single-pod ones, see Configuration reference.

Step 3 — Install

# Install services first helm install services ./md-cluster-services -f ./override-values.yaml # Install instances helm install instances ./md-cluster-instances -f ./override-values.yaml

You can run both commands back to back. Each service waits for its dependencies rather than assuming they are up — but the wait is bounded by GLOBAL_WAIT_TIMEOUT, 150 seconds by default. A service whose dependency is not ready by then exits, and Kubernetes restarts it.

Expect one or more CrashLoopBackOff cycles on a first install. The MetaDefender Cluster Control Center legitimately takes several minutes, which is longer than the MetaDefender Cluster Workers' 150- second budget, so MetaDefender Cluster Worker pods will exit and be restarted until it is ready. This is normal and resolves itself. If the cluster has not settled after ten minutes or so, raise env.GLOBAL_WAIT_TIMEOUT and see Troubleshooting.

Raising GLOBAL_WAIT_TIMEOUT also lengthens the undeploy step of MetaDefender Cluster Worker shutdown, which shares the same bound — raise terminationGracePeriodSeconds to match, or MetaDefender Cluster Workers will be killed mid-shutdown and leave their license activations consumed. See Graceful shutdown.

The version in Helm's post-install message is the chart's own appVersion, not the MDCLS_VERSION you set.

Step 4 — Verify the rollout

kubectl get pods -w

Expect the following order. Only the MetaDefender Cluster Control Center genuinely blocks on its upstreams — the other services start in parallel and simply come up faster:

  1. postgres, redis, rabbitmq become ready

  2. identity-service becomes ready

  3. file-storage pods start and open port 8890

  4. control-center becomes ready — the slowest step. Before its service binary starts it waits for its database port, creates and migrates the four cluster databases, then waits for the MetaDefender Cluster Identity Service and every MetaDefender Cluster File Storage replica.

  5. ometascan, api-gateway and callback-service register, deploy their instances, and become ready

Note that MetaDefender Cluster File Storage comes up before the MetaDefender Cluster Control Center, not after. The MetaDefender Cluster Control Center will not start until every MetaDefender Cluster File Storage address in its endpoint list accepts connections.

MetaDefender Cluster Worker pods stay Running but not Ready until the instance they deployed answers its own readiness check. For ometascan this includes initialising the MetaDefender Core engines and can take several minutes on a first install.

If a pod does not settle, see Troubleshooting.

Confirm the startup work actually succeeded

The MetaDefender Cluster Control Center reports Ready even if uploading the installers or registering the license failed — both are logged as warnings only, and neither blocks startup. A fully green kubectl get pods is therefore consistent with a cluster that has no installers and no license. Check both explicitly:

# Installers — expect one entry per worker instance type kubectl logs deploy/control-center | grep -i installer # License — expect "license added" or "license already exists" kubectl logs deploy/control-center | grep -i license

If no installers were uploaded, workers will register but never deploy an instance, and ometascan will never become ready.

Step 5 — Expose the services

The md-cluster-services chart creates one Service per component. The MetaDefender Cluster worker instances all share a single headless worker Service, and api-gateway additionally gets its own. Two Services are usually reached from outside the cluster.

MetaDefender Cluster Control Center

The web console and administrative API. It is a NodePort Service by default, with the port assigned by Kubernetes from the 30000–32767 range.

kubectl get svc control-center

To pin the node port:

control-center: service: type: NodePort nodePort: 30001

To publish it through a load balancer or ingress instead:

control-center: service: type: LoadBalancer

For a quick check without changing the Service:

kubectl port-forward svc/control-center 8892:8892

Log in at the resulting address with ADMIN_USER and ADMIN_PASSWORD, or authenticate API calls with ADMIN_APIKEY.

MetaDefender Cluster API Gateway

The file-submission entry point (POST /file). It is headless by default, which makes it reachable inside the cluster but not from outside. To publish it, clear the headless setting and choose a Service type:

workers: api-gateway: service: clusterIP: null # remove the headless setting type: LoadBalancer