Step 1. Create SDP app on Microsoft Azure
Log into Azure Portal as Administrator
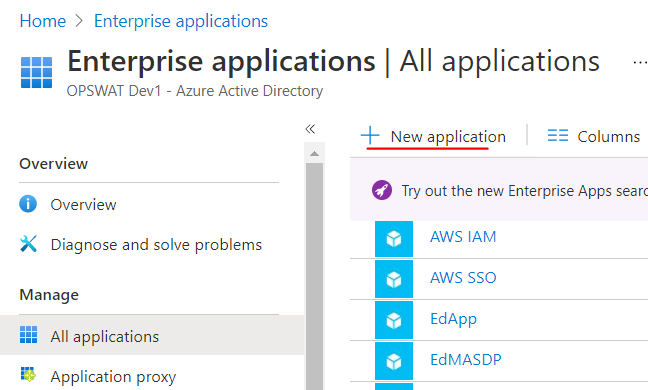
Navigate to Enterprise applications > All applications. Then click on New application
Click on Create your on application and input a name. Then click Create

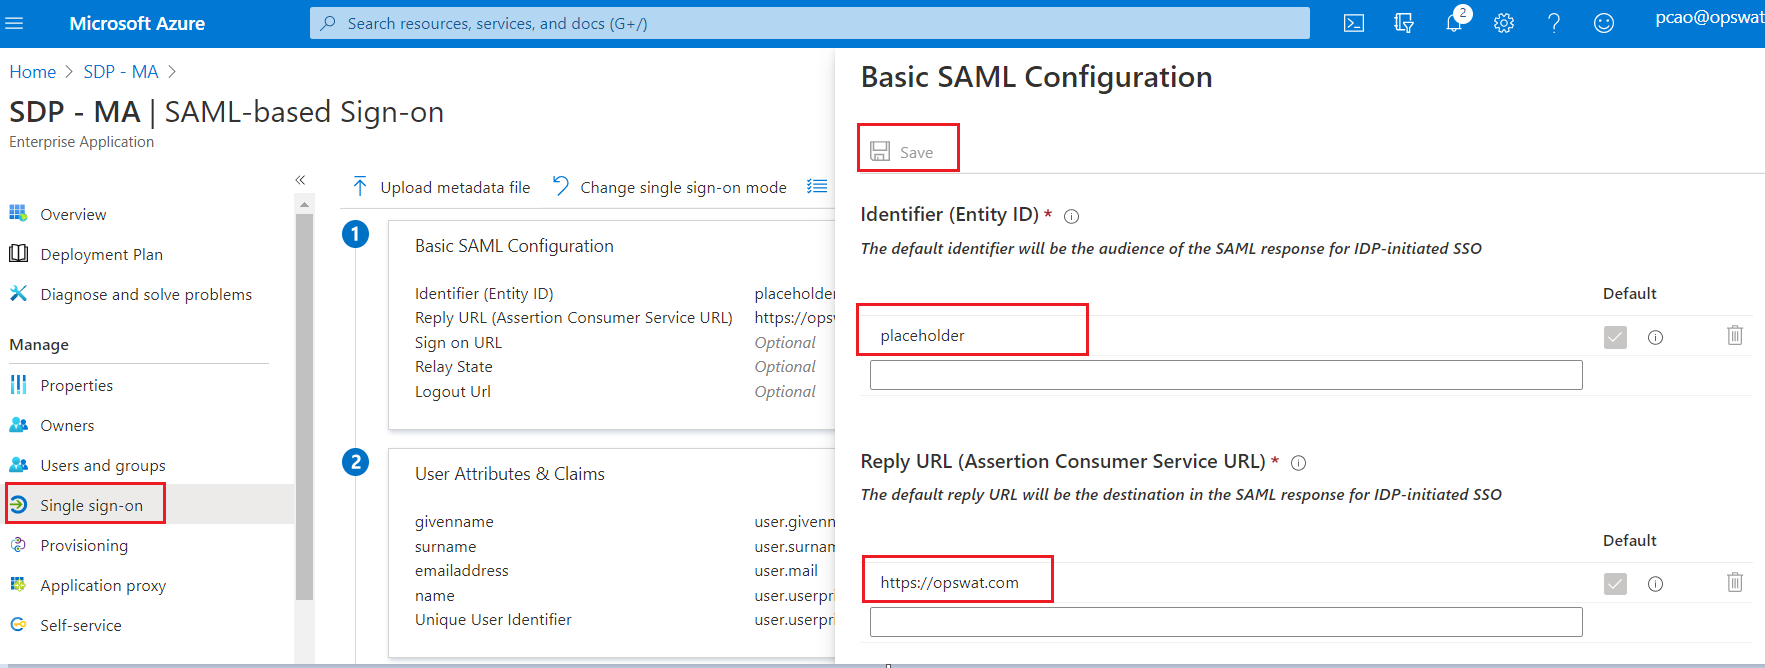
Enter some placeholder value for fields in Basic SAML Configuration, then click save. You will need to to update these fields in later steps.
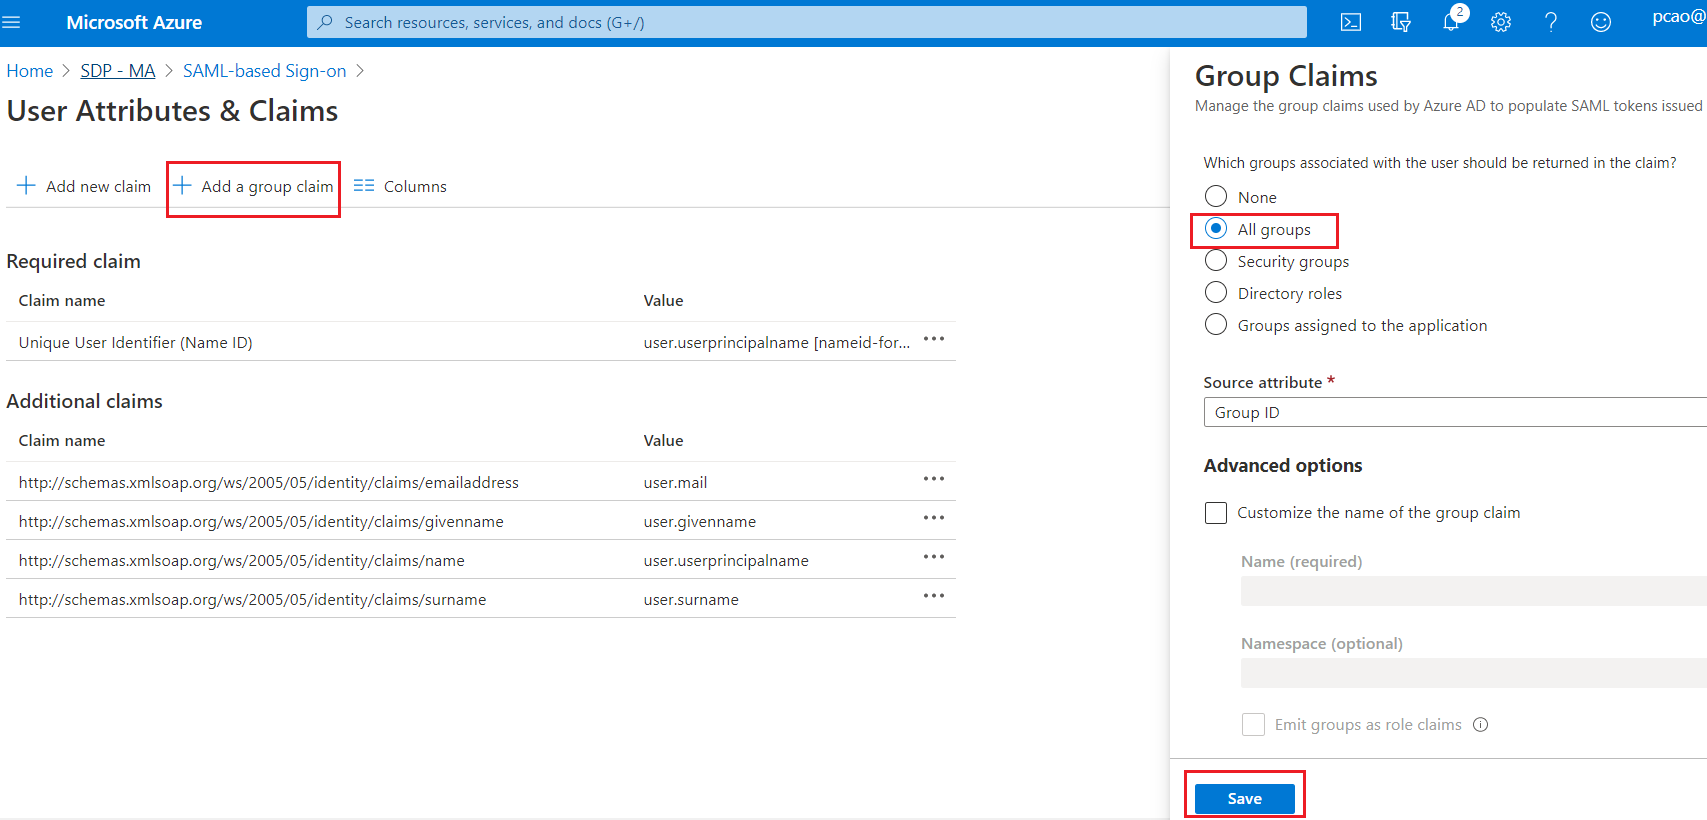
Add group claim for SAML Response
Click Edit on section User Attributes & Claims
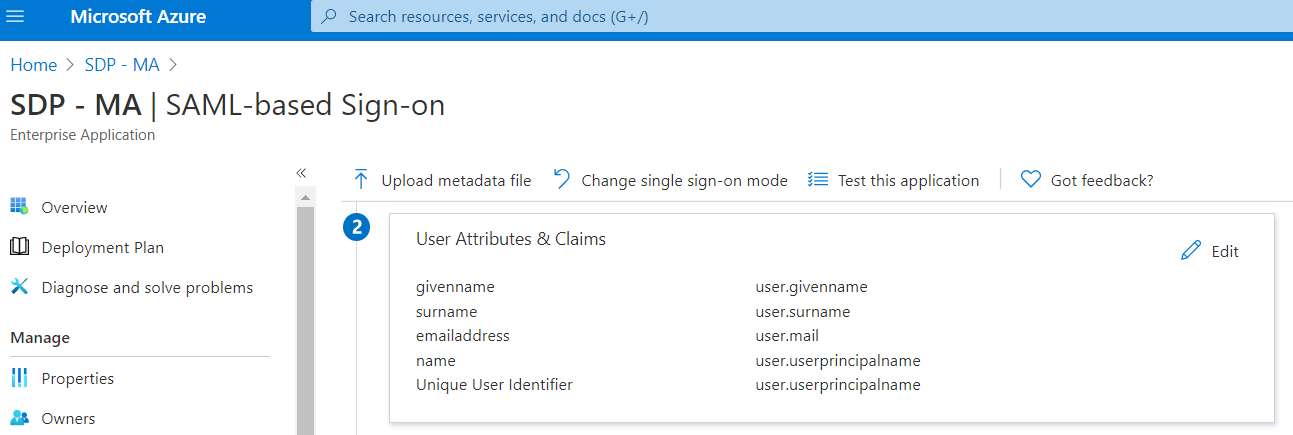
2. Click on "Add a group claim", choose "All groups" options(or you can choose what group you want to include in the SAML response) then click Save
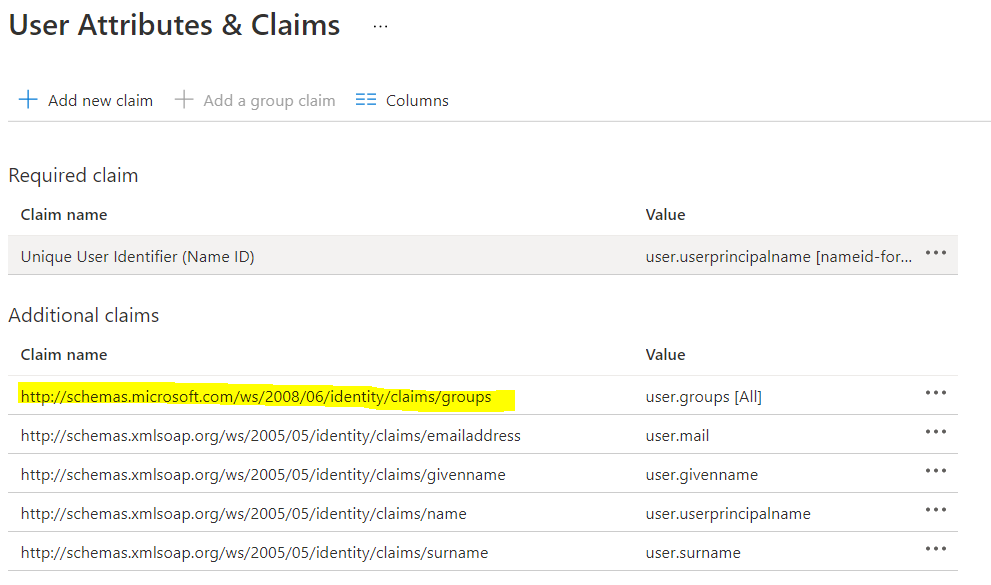
3. Get the Group Claim name
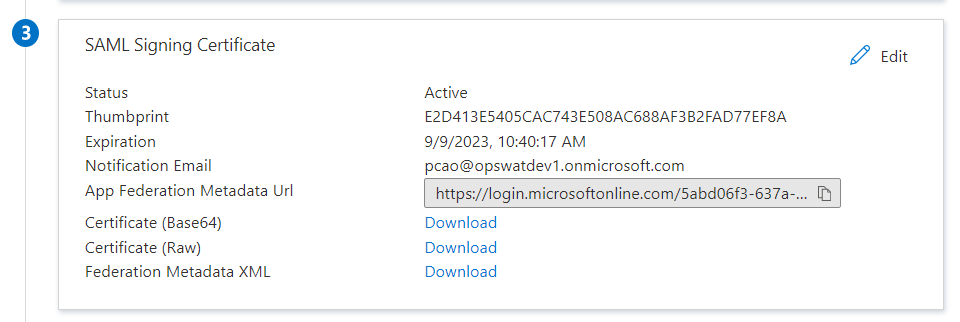
Download Azure metadata for the SDP app. This data will be used to upload to MetaDefender IT-OT Access to enable single sign on for your users. Select Single sign-on on the left navigation, scroll down to SAML Signing Certificate section and and click on "Federation Metadata XML" to download IDP metadata file
(Optional) Get additional information
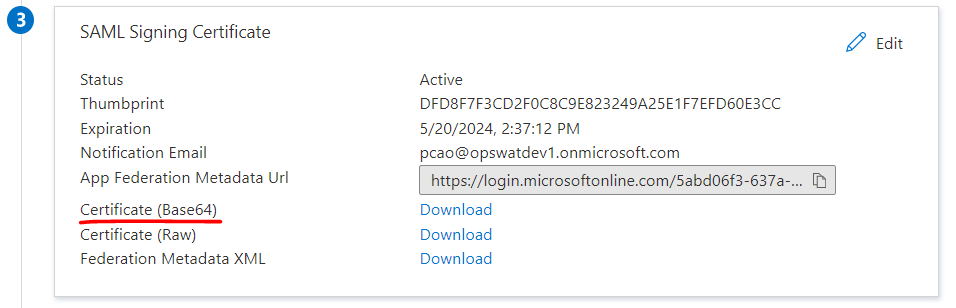
Download Azure’s certificate
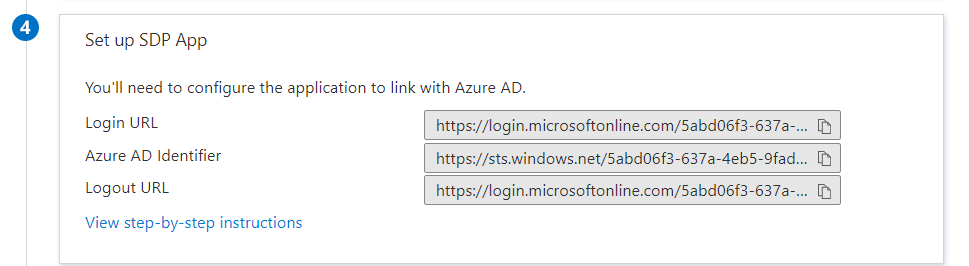
2. Get Azure Login URL
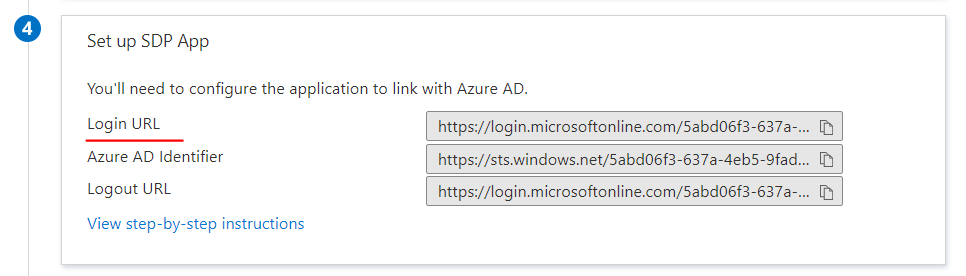
3. Get Azure AD Identifier
Assign your users/groups you want to allow log into SDP on MetaDefender IT-OT Access to this application
Step 2. Configure SSO SDP on MetaDefender IT-OT Access
Log into the MetaDefender IT-OT Access console
Navigate to User Management > SSO > SDP and check “Enable Single Sign On”
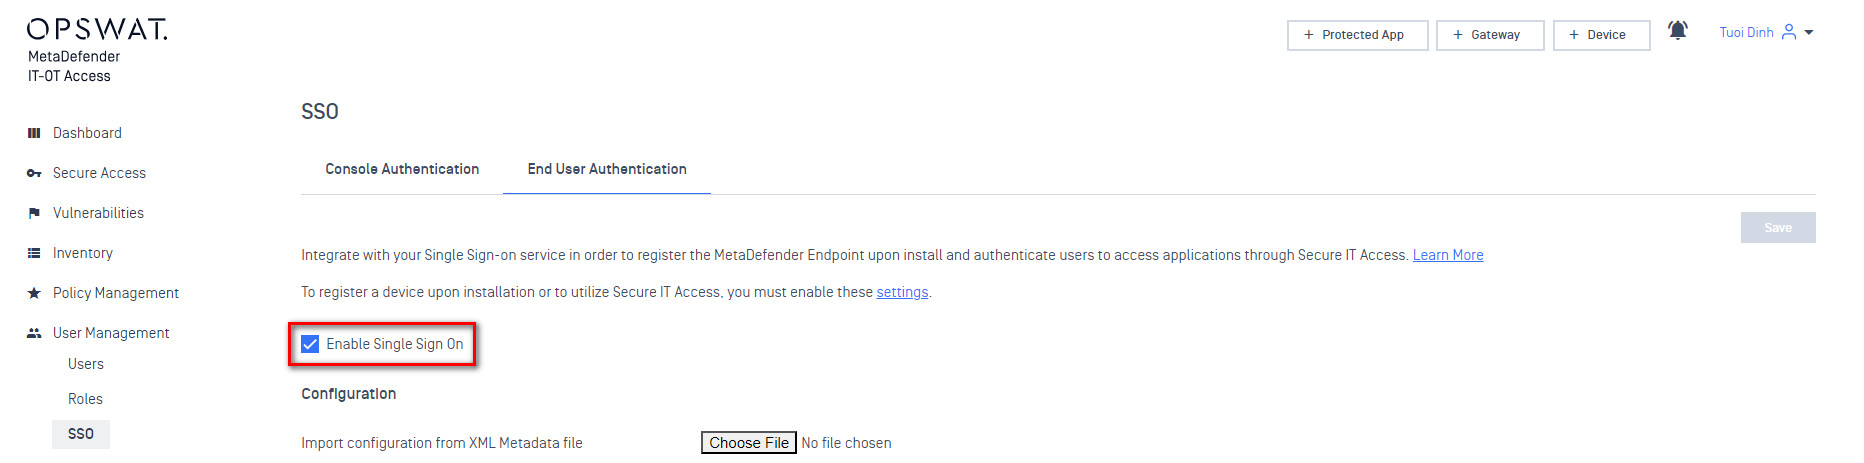
Next to “Import configuration from XML Metadata file”, click “Choose File” and upload the “metadata” file you just downloaded in Step 1.6. This should automatically fill in the “Current Certificate”, “Issuer”, and “IdP SSO URL” fields Leave the Logout URL and Error URL fields blank
(Optional) Use this step if you can not import the metadata file
IdP Certificate: Upload the certificate downloaded in Step 1.7.a
Issuer: Use the value got from Step 1.7.c
IdP SSO URL: Use the value got from Step 1.7.b
At the bottom, click “Add Group Attribute” and enter the value from Step 1.5.c

Scroll to the top of the page, click “Save” and enter your PIN
At the bottom of the page you will see a new value called “MetaDefender IT-OT Access Login URL”

Copy new value called “MetaDefender IT-OT Access Entity ID“

Step 3. Update Applications settings on Identity Provider
Log into Azure Portal as administrator
Click Azure Active Directory.
Navigate to Enterprise applications > All applications.
Select the SDP application
Select Single sign-on.
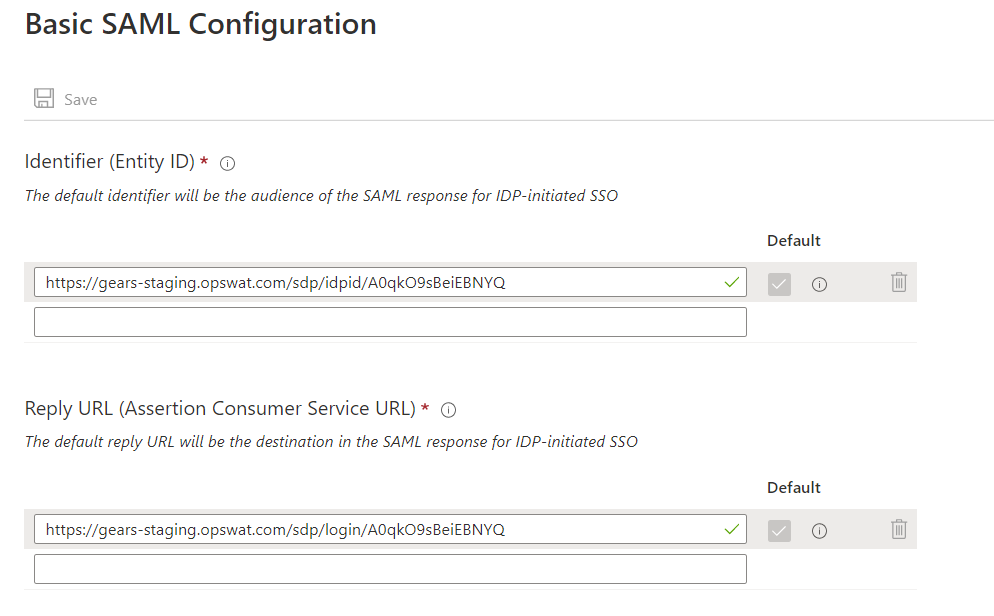
Click the edit icon (pencil icon) on Basic SAML Configuration section
Replace Identifier with value got from step 2.8. Replace Reply URL with the MetaDefender IT-OT Access URL which you got from Step 2.7
Click Save
Step 4. Configure IDP Groups on MetaDefender IT-OT Access
Navigate to the MetaDefender IT-OT Access console at metaaccess.com, then go to User Management > IdP Groups, and click “Add”
Fill in a group name from your Azure, enter your PIN and choose Add. Your new group will show up in the “IdP Groups” section.
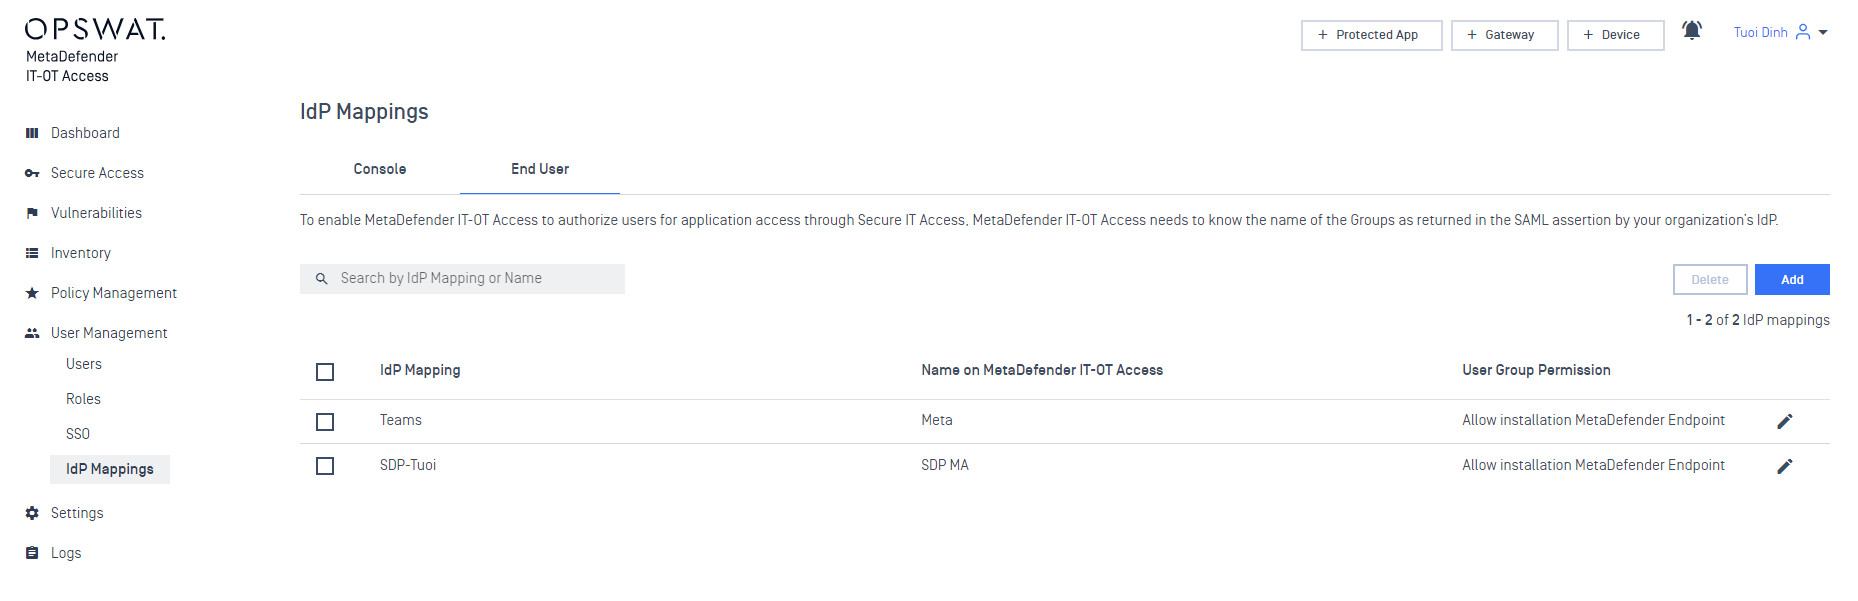
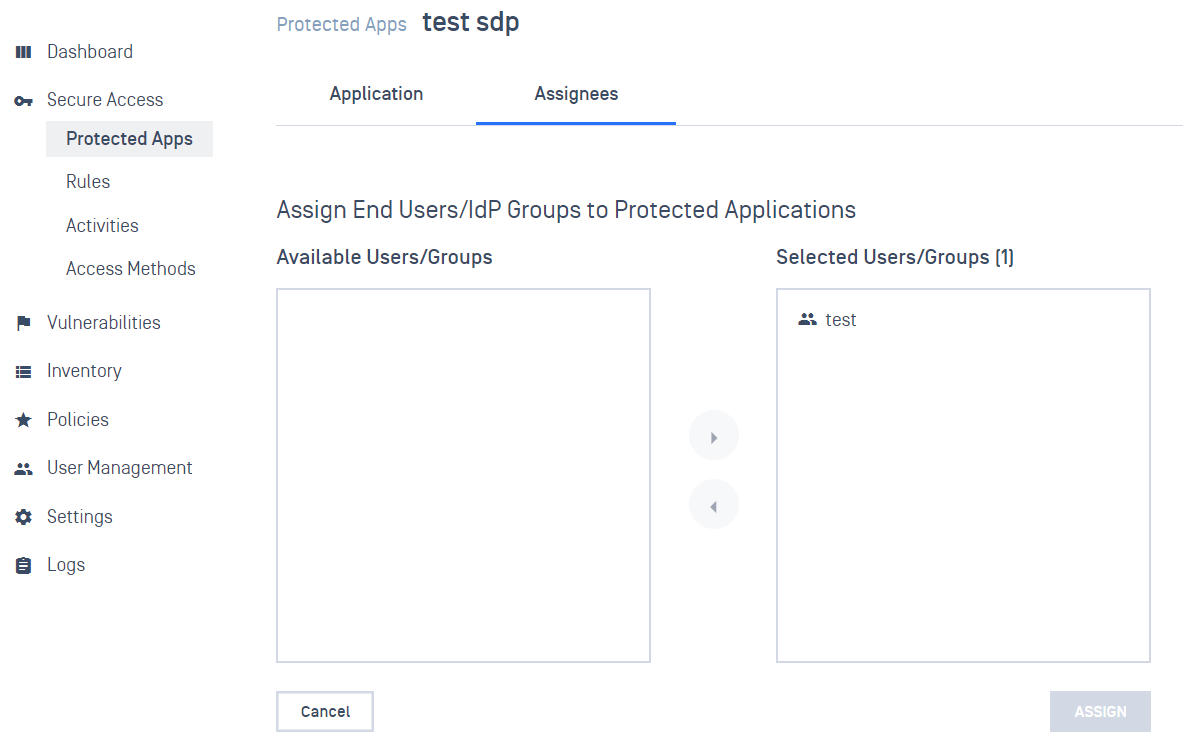
When you are ready to assign your new groups to protected applications, go to Secure Access > Protected Apps, click the “Assign” link next to your desired application(s)
On the “Assign End Users/IdP Groups to Protected Applications” Move groups “Available Users/Groups” to “Selected Users/Groups” to assign access, then enter your PIN again and choose Enter